2014 HONDA PILOT change time
[x] Cancel search: change timePage 120 of 488

119
uu Security System u Security System Alarm *
Controls
■Setting the security system alarm
The security system alarm automatically s
ets when the following conditions have
been met:
• The ign
ition switch is in LOCK (0
, and the key has been removed from the
ignition switch.
• The hoo
d and tailgate are closed.
•All d
oors, the tailgate, and the glass hatc h are locked with the key or the remote
transmitter.
■When the security system alarm sets
The security system alarm indicator in
the instrument panel blinks. When the
blinking interval changes after about 15 se conds, the security system alarm is set.
■To cancel the security system alarm
The security system alarm is canceled when the
vehicle is unlocked using the key or
remote transmitter. The security system al arm indicator goes off at the same time.
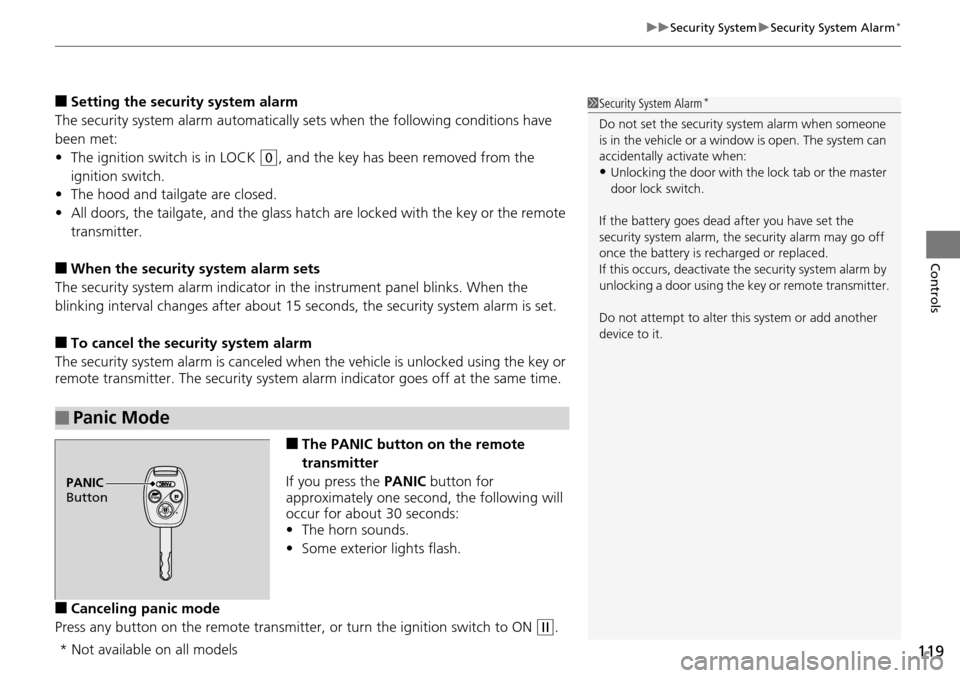
■The PANIC button on the remote
transmitter
If you press the PA
NIC button for
approximately one second, the following will
occur for about 30 seconds:
• The horn so
unds.
• Some
exterior lights flash.
■Canceling panic mode
Press any button on the remote transmitter, or t
urn the ignition switch to ON (w
.
■Panic Mode
1Security System Alarm *
Do not set the security system alarm when someone
is in the vehicle or a window is open. The system can
accidentally activate when:
•Unlocking the door with th e lock tab or the master
door lock switch.
If the battery goes dead after you have set the
security system alarm, the security alarm may go off
once the battery is re charged or replaced.
If this occurs, deactivate the security system alarm by
unlocking a door using the ke y or remote transmitter.
Do not attempt to alter th is system or add another
device to it.
PANIC
Button
* Not available on all models
Page 127 of 488

uu Operating the Switches Around the Steering Wheel u Light Switches
126
Controls
Automatic lighting control can be used when
the ignition switch is in ON
(
w
.
When you turn the light switch to AUTO, the
headli
ghts and other exterior lights will switch
on and off automatically depending on the
ambient brightness. u You can change the au to ligh
t sensitivity
setting.
2 Customized Features P. 90
The headlights, all other exterior lights, and the instrument panel lights turn off
within 15 seconds after you remove the key and close the driver's door.
u You can
change the headlight auto off timer setting.
2 Customized Features P. 90
If you turn the ignition switch to LOCK (0
with the headlight switch on, but do not
open the door, the lights turn off after 10 minutes (three minutes, if the switch is in
the AUTO position).
The lights turn on again when you unlock or
open the driver's door. If you unlock
the door, but do not open it within 15 seconds, the lights go off. If you open the
driver's door, you will hear a lights on reminder chime.
■Automatic Lighting Control1Automatic Lighting Control
We recommend that you turn on the lights manually
when driving at night, in a dense fog, or in dark areas
such as long tunnels or parking facilities.
The light sensor is in the location shown below.
Do not cover this light sensor with anything;
otherwise, the automatic lighting system may not
work properly.
Adjust the auto light sensitivity as follows:
SettingThe exterior lights come on
when the ambient light is at
MAX
HIGH
MID
LOW
MIN
Light Sensor
Bright
Dark
■Automatic Lighting Off Feature
Page 129 of 488

128
uu Operating the Switches Around the Steering Wheel u Wipers and Washers
Controls
Wipers and Washers
The windshield wipers and washers can be
used when the ignition switch is in ON
(w
.
■MIST
The wipers run at high speed until you release
the lever.
■Wiper switch (OFF, INT, LO, HI)
Change the wiper switch setting according to
the amo
unt of rain.
■Adjusting the delay
Turn the adjustment ring
to adjust the wiper
delay.
■Washer
Sprays while you pull t
he lever toward you.
When you release the lever, the wipers make
two
or three more sweeps before stopping.
■Front Wiper/Washer1Wipers and Washers
NOTICE
Do not use the wipers when the windshield is dry.
The windshield will get sc ratched, or the rubber
blades will get damaged.
NOTICE
In cold weather, the blades may freeze to the
windshield, becoming stuck.
Operating the wipers in th is condition may damage
the wipers. Use the defroster to warm the
windshield, then turn the wipers on.
Turn the washers off if no washer fluid comes out.
The pump may get damaged.
If the vehicle speeds up while the wipers are
operating intermittently, the length of the wipe
interval shortens. When the vehicle starts moving, the
wipers make a single sweep.
When the vehicle speeds up, the wiper operation’s
shortest delay setting ( ) and the LO setting become
the same.
Intermittent Time
Adjustment Ring
MIST
INT: Low speed with
intermittent OFF
LO: Low speed wipe
HI: High speed wipe Pull to use
washer.
2
3
4
5
2
3
4
5
Long delay
Short delay
Page 151 of 488

150
Controls
Interior Lights/Interior Convenience Items
Interior Lights
■ON
The interior lights come on regardless of
whet
her the doors are open or closed.
■Door activated
The interior lights come on in the following
situ
ations:
• W
hen any of the doors are opened.
•You un
lock the driver's door.
•You remove the k
ey from the ignition
switch.
Only the cargo area light comes on when the
tailgate is ope
ned.
■OFF
The interior lights remain off regardless of
whet
her the doors are open or closed.
■Interior Light Switches1Interior Light Switches
In the door activated position, the interior lights fade
out and go off about 30 se conds after the doors are
closed.
The lights go off after 30 seconds in the following
situations:
•When you unlock the driver's door but do not open
it.
•When you remove the key from the ignition switch
but do not open a door.
The interior lights go off i mmediately in the following
situations:
•When you lock the driver's door.
•When you close the driver's door with the key in
the ignition switch.
•When you turn the ignition switch to ON (
w
.
If you leave any of the doors open without the key in
the ignition switch, the interior lights go off after
about 15 minutes.
You can change the interi or lights dimming time.
2 Customized Features P. 90
Models with multi-information display
Door Activated
Position
OFF
Front
Door Activated Position
ON
OFF
Cargo Area
ON
Page 163 of 488

uu Interior Lights/Interior Convenience Items u Interior Convenience Items
162
Controls
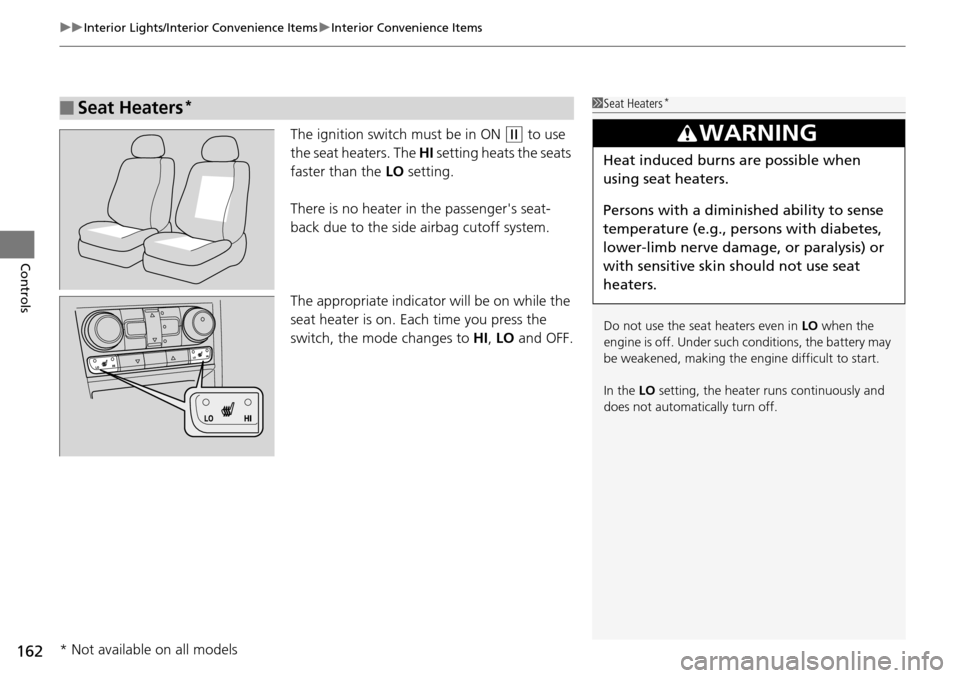
The ignition switch must be in ON (w
to use
the seat heaters. The HI setting heats the seats
faster than the LO setting.
There is no heater in the passenger's seat-
bac
k due to the side airbag cutoff system.
The appropriate indicator will be on while the
seat
heater is on. Each time you press the
switch, the mode changes to HI, LO and OFF.
■Seat Heaters *1Seat Heaters *
Do not use the seat heaters even in LO when the
engine is off. Under such conditions, the battery may
be weakened, making the engine difficult to start.
In the LO setting, the heater runs continuously and
does not automatically turn off.
3 WARNING
Heat induced burns are possible when
using seat heaters.
Persons with a diminished ability to sense
temperature (e.g., persons with diabetes,
lower-limb nerve damage, or paralysis) or
with sensitive skin should not use seat
heaters.
* Not available on all models
Page 176 of 488

175
Features
Audio System Basic Operation
To use the audio system function, the ignition swit ch must be in ACCESSORY (q
or
ON
(w
.
Use the selector knob or SET
UP button to
access some au dio functions.
Press to switch between the normal and
extended display fo r some functions.
Selector knob: Rotate left or right to scroll
throug
h the available choices. Press to set
your selection.
SETUP button: Press to select any mode such
as the Auto Select
, Sound Settings, Play
Mode, Resume/Pause, or compass.
RETURN button: Press to go back to the
previo
us display.
button: Press to change the audio/
information
screen brightness. The brightness
can be set differently for the day time and
night time.
Press once for the daytime mode.
Press twice for the nighttime mode.
Adjust the brightness using .
Models without navigation system1Audio System Basic Operation
These indications are used to show how to operate
the selector knob.
Rotate to select.
Press to enter.
Selector Knob
SETUP
Button
RETURN
Button
Page 180 of 488

Continued179
uu Audio System Basic Operation u Audio/Information Screen *
Features
You can change, store, delete the wallp aper on the audio/information screen.
See the navigation system manual for how to change the wallpaper.
■Importing pictures from USB
You can import up to five images, one at a
time, for wallpaper from USB flash drive.
Select Imp
ort picture from USB from setup menu and properly connect a USB
flash drive to store an image.
1.Connect the
USB flash drive to the adapter
cable.
2 USB Adapter Cable P. 173
2. Press the SETUP button.
3. Ro
tate to select Wall paper Setup,
then press .
4. Ro
tate to select Import pictur e from
USB , then pr
ess .
5. Ro
tate to select a desired picture, then
press .
u Loading Pict
ure will appear on the
display.
■Wallpaper Setup1 Wallpaper Setup
•When importing wallpaper files, the image must be
in the USB flash driv e’s root directory.
Images in a folder cannot be imported.
•The file format of the im age that can be imported
is BMP (bmp) or JPEG (jpg).
•The maximum image size is 1,024 x 768 pixels.
Smaller images are displayed in the middle of the
screen with the extra area appearing in black.
If the USB flash drive doe s not have any pictures, No
Files will appear.
Models with navigation system
Page 194 of 488

193
uu Audio System Basic Operation u Playing a CD
Continued
Features
Playing a CD
Your audio system supports audio CDs, CD-Rs and CD-RWs in either MP3, WMA, or
AAC format. With the CD loaded, press the CD button.
SCAN Button
You will get a 10-second sampling
of each song.
●Press to sample all tracks on the
CD (all files in the current folder
in MP3, WMA, or AAC).
●Press two times to sample the
first file in each of the main
folders (MP3, WMA, or AAC).
●To turn off scan, press and hold
the button. VOL/ (Volume/Power) Knob
Press to turn the audio system on
and off.
Turn to adjust the volume.
CD Button
Press to play a CD
TITLE Button
Press to display the text data on a CD (if it
was recorded with text data).
RETURN Button
Press to go back to the previous display. Selector Knob
Turn to change tracks/files. Turn to
select an item, then press to set your
selection.
SETUP Button
Press to display menu items.
Models without rear entertainment system
CD Slot
Insert a CD about halfway into the
CD slot.
(CD Eject) Button
Press to eject a CD.
SKIP Bar
Press or to change tracks (files in
MP3, WMA or AAC).
Press and hold to mo ve rapidly within a
track/file.
CATEGORY Bar (FOLDER Bar)
Press
(
+
to skip to the next folder,
and (
-
to skip to the beginning of
the previous folder in MP3, WMA or
AAC.