Page 260 of 488

Continued259
uu Rear Entertainment System * u Operating the System
Features
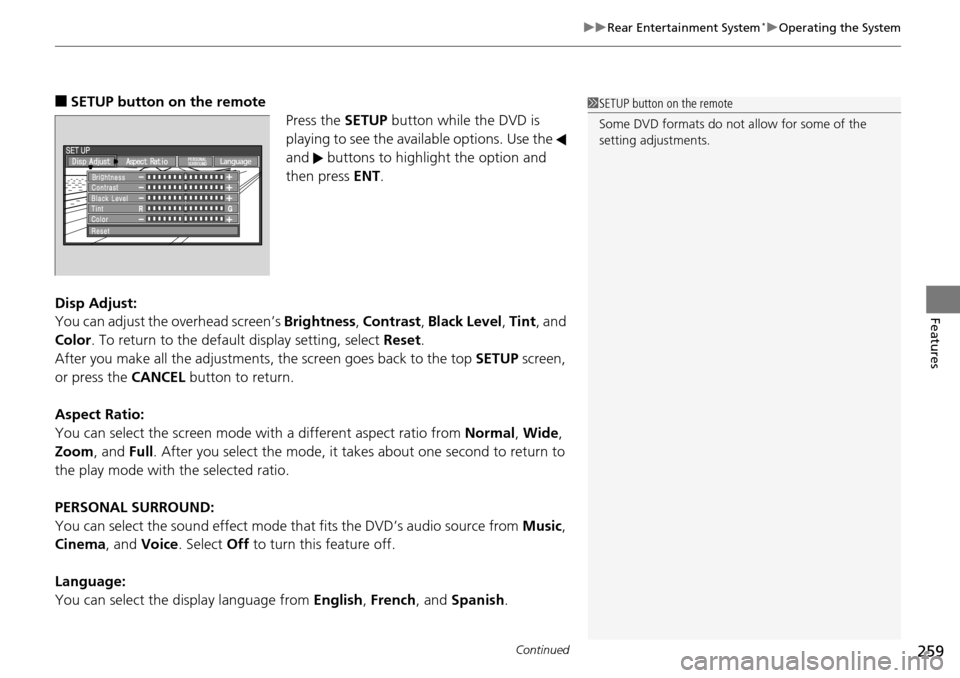
■SETUP button on the remote
Press the SE
TUP button while the DVD is
playing to see the avai lable options. Use the
and buttons to highlight the option and
then press ENT.
Disp Adjust:
You can adjust the overhe
ad screen’s Brightness , Contrast , Black Level , Tint , and
Color . To return to the default display setting, select Reset.
After you make all the adjustments, the screen goes back to the top SET
UP screen,
or press the CANCEL button to return.
Aspect Ratio:
You can select the screen mode wi th
a different aspect ratio from Normal, Wide ,
Zoom , and Full. After you select the mode, it t akes about one second to return to
the play mode with the selected ratio.
PERSONAL SURROUND:
You can select the sound effect mode th at
fits the DVD’s audio source from Music,
Cinema , and Voice . Select Off to turn this feature off.
Language:
You can select the display language from En
glish, French , and Spanish .
1SETUP button on the remote
Some DVD formats do not allow for some of the
setting adjustments.
Page 261 of 488

uu Rear Entertainment System * u Operating the System
260
Features
Initial Settings -
Press the SETUP button to configure the initial Language, Dynamic Range, and
Angle Mark settings before playing a DVD.
Language Settings:
Select the language for the DVD’s displayed menus (M
enu Language), the DVD’s
audio ( Audio Language ), and the DVD’s subtitle ( Subtitle Language).
1. Selec
t the language setting.
2.Select
the language from English, French, Spanish, Arabic, German, Italian,
Dutch, Chinese, Kor ean, Thai, Japanese, and other.
3. I
f you select other, you need to enter the four di git language code to configure
the language that is not listed. Select Yes to go to the number input screen.
u To return to
the Language Settings screen, select No.
4. Press the ENT
button each time you input a digit.
u If y
ou want to delete a number, select DEL.
5. The cursor automatically goes
to ENT after you input four digits. Press the ENT
button to command.
Dynamic Range:
This feature reduces the difference between the loud
and quiet sound levels. Select
ON or OFF .
Angle Mark:
You can select whether to display the angle mark appearing in the upper right
corner of the
screen when you change the view angle while the DVD is playing.
Select ON or OFF .
When the DVD is not playing1SETUP button on the remote
Initial Settings:
The prior language varies by disc. You may not be
able to configure your selected language setting.
Page 262 of 488

261
uu Rear Entertainment System * u Operating the System
Continued
Features
■System Controls and Menus for Audio
(Power) Button
Press to turn on the system.
AUX Button
Press to use a USB, iPod, auxiliary video (rear), or auxiliary audio (front). (Light) Button
Press to illuminate the buttons and bars for a few seconds.
SKIP Buttons
2 Audio System Basic Operation P. 175, 216
(Play/Pause) Button
Press to pause a playing CD.
SCROLL Button
Press to switch search mode on XM radio, and scroll titles on CD.
CANCEL Button
Press to go back to the previous
display or operation.
3
,4 , , and ENT Buttons
Use 3, 4 , , or to highlight a
menu item, and press the ENT Button
to make a selection.
CD/CDL Button *
Press to listen to a CD or CD library.
AM/FM Button
Press to listen to
AM or FM radio.
SETUP Button
2 SETUP button on the remote P. 259
XM Button
Press to listen
to XM radio.
MENU Button
Press to display audio menu for AM/FM radio, XM radio, or CD on the overhead screen.CD/HDD Button
*
Press to listen to a CD or hard disc drive.
Rewind Button
Press and hold to reverse the track.Fast-forward Button
Press and hold to fast-forward the track.
* Not available on all models
Page 263 of 488

uu Rear Entertainment System * u Operating the System
262
Features
■Playing AM/FM radio in the rear
Press the AM/FM b
utton.
When you press the ME
NU button while the radio is playing, the audio menu
appears on the overhead screen. The availa ble functions are the same as those of
the front audio system. The SKIP button on the control panel works the same as the
SKIP bar on the front panel for AM/FM radio operation.
2Playing the AM/FM Radio P. 186
■Playing XM radio in the rear
Press the XM b
utton.
When you press the ME
NU button while the radio is playing, the audio menu
appears on the overhead screen. The availa ble functions are the same as those of
the front audio system. The SKIP button on the control panel works the same as the
SKIP bar on the front panel for XM radio operation.
2Playing the XM ® Radi o * P. 190
To change the mode between category and channel, press and hold the TITLE/
SCROLL button for five seconds.
1 System Controls and Menus for Audio
If you press the button on the front panel, you
can operate the rear entertainment system from the
front display.
2 button on the front panel P. 252
* Not available on all models
Page 273 of 488

272
Features
General Information on the Audio System
XM® Radio Service *
1. You need your radio ID ready befo re registering for subscription.
To see the ID on the display: Turn the selector knob until 0 a
ppears.
2. Hav
e your radio ID and credit card numbe r ready, and either call or visit the XM®
website to subscribe.
Press the (XM®)
button and stay in this mode for about 30 minutes until the
service is activated. Make su re your
vehicle is in an open area with good reception.
LOADING: XM® is
loading the audio or program information.
Ch Off Air: The channel is not currently broadcasting.
Ch Unauthorized: The encryption code is being updated. Channels 0 and 1 still
work norm
ally.
NO SIGNAL: The signal is too weak in the current location.
Ch Unavailable: No such channel exists, the channel is not part of your
subscr
iption, or the artist or title information is unavailable.
CHECK ANTENNA: There is a problem with the XM ® antenna.
Contact a dealer.
■Subscribing to XM® Radio
■Receiving XM® Radio
■XM ® Radio Display Messages
1 Subscribing to XM ® Radio
Contact Information for XM® Radio:US: XM ® Radio at www.siriusxm.com or (800) 852-
9696
Canada: XM ® Canada at www.xmradio.ca , or (877)
209-0079
1 Receiving XM ® Radio
The XM® satellites are in orbit over the equator,
therefore, objects south of the vehicle may cause
satellite reception interruptions. Satellite signals are
more likely to be blocked by tall buildings and
mountains the farther north you travel from the
equator.
You may experience rece ption problems under the
following circumstances:
•In a location with an obstruction to the south of
your vehicle.
•In tunnels
•On the lower level of a multi-tiered road•Large items carried on the roof rack
* Not available on all models
Page 274 of 488
273
uu General Information on the Audio System u Recommended CDs
Continued
Features
Recommended CDs
• Use only high-quality CD-R or CD-RW discs labeled for audio use.
• Use only CD-
R or CD-RW discs on wh ich the recordings are closed.
• Play
only standard round-shaped CDs.
•Some software files may not allo
w for audio play or text data display.
• Some versions of MP3,
WMA or AAC formats may be unsupported.
1Recommended CDs
A Dual-disc cannot play on th is audio unit. If recorded
under certain conditions, a CD-R or CD-RW may not
play either.
■CDs with MP3, WMA or AAC files
The CD packages or jackets should have one of these marks.
Page 276 of 488
275
uu General Information on the Audio System u Compatible iPod ® and USB Flash Drives
Features
Compatible iPod ® and USB Flash Drives
• Use a recommended USB flash drive of 256 MB or higher.
• Some digi
tal audio players may not be compatible.
• Some U
SB flash drives (e.g., a device with security lockout) may not work.
• Some software files may not allo
w for audio play or text data display.
• Some versio
ns of MP3, WMA, or AAC formats may be unsupported.
■iPod® Model Compatibility
Model
iPod classic ® 80GB/160GB
iPod classic ® 120GB
iPod classic ® 160GB (launch in 2009)
iPod ® (5th generation)
iPod nano ®
iPod touch ®
■USB Flash Drives
1iPod ® Model Compatibility
This system may not work with all software versions
of these devices.
1 USB Flash Drives
Files on the USB flash drive are played in their stored
order. This order may be different from the order
displayed on your PC or device.
Page 280 of 488
279
uu Bluetooth ® HandsFreeLink ® u Using HFL
Features
The display shows call status and phone
information.
■HFL Status Display1Bluetooth ® HandsFreeLink ®
Bluetooth ® Wireless Technology
The Bluetooth ® word mark and logos are registered
trademarks owned by Bluetooth SIG, Inc., and any
use of such marks by Honda Motors Co., Ltd., is
under license. Other tradem arks and trade names are
those of their respective owners.
HFL Limitations
An incoming call on HFL will interrupt the audio
system when it is playing. It will resume when the call
is ended.
Signal Strength
HFL Mode
Battery Level
Status
Roam Status
Call Name
Bluetooth IndicatorComes on when your
phone is connected to
HFL.
1HFL Status Display
The information that appe ars on the display varies
between phone models.
You can change the system language to English,
French, or Spanish. 2 Customized Features P. 90