2014 HONDA FIT Transmission
[x] Cancel search: TransmissionPage 193 of 289

192Maintenance
Before Performing MaintenanceInspection and MaintenanceFor your safety, perform all listed inspections and maintenance to keep your vehicle
in good condition. If you become aware of any abnormality (noise, smell, insufficient
brake fluid, oil residue on the ground, etc.), have your vehicle inspected by a dealer.
(Note, however, that service at a dealer is not mandatory to keep your warranties in
effect.) Refer to the separate maintenance booklet for detailed maintenance and
inspection information.■Daily inspections
Perform inspections before long distance trips, when washing the vehicle, or when
refueling.■Periodic inspections
•Check the automatic transmission fluid level monthly.2Automatic Transmission Fluid P. 208
•Check the brake fluid level monthly.
2Brake/Clutch Fluid P. 210
•Check the tire pressure monthly. Examine the tread for wear and foreign objects.
2Checking and Maintaining Tires P. 222
•Check the operation of the exterior lights monthly.
2Replacing Light Bulbs P. 212
•Check the condition of the wiper blades at least every six months.
2Checking and Maintaining Wiper Blades P. 218
■Types of Inspection and Maintenance
1Inspection and Maintenance
Maintenance, replacement, or repair of
emissions control devices and systems may be
done by any automotive repair establishment or
individuals using parts that are “certified” to
EPA standards.
According to state and federal regulations, failure to
perform maintenance on the maintenance main
items marked with # will not void your emissions
warranties. However, all maintenance services should
be performed in accordance with the intervals
indicated by the information display.
2Maintenance Service Items P. 197
If you want to perform complex maintenance tasks
that require more skills and tools, you can purchase a
subscription to the Service Express website at
www.techinfo.honda.com.
2Authorized Manuals P. 277
If you want to perform maintenance yourself, make
sure that you have the necessary tools and skills first.
After performing maintenance, update the records in
the separate maintenance booklet.U.S. models
Page 198 of 289

197
uuMaintenance Minder
TMuTo Use Maintenance Minder
TM
Continued
Maintenance
■Maintenance Service Items
1Maintenance Service Items•Independent of the Maintenance Minder
information, replace the brake fluid every 3 years.•Inspect idle speed every 160,000 miles (256,000
km).•Adjust the valves during services A, B, 1, 2, or 3 if
they are noisy.
Maintenance Minder Message Maintenance
Minder Indicator
Sub Items Main Item
*1: If a message SERVICE does not appear more than 12 months after the display is reset, change the
engine oil every year.
*2: Canadian A/T models only
# : See information on maintenance and emissions warranty.CODE
Maintenance Main Items
A
●Replace engine oil
*1
B
●Replace engine oil and oil filter●Inspect front and rear brakes/service as necessary●Check parking brake adjustment●Inspect tie rod ends, steering gearbox, and boots●Inspect suspension components●Inspect driveshaft boots●Inspect brake hoses and lines (Including ABS/VSA)●Inspect all fluid levels and condition of fluids●Inspect exhaust system
#
●Inspect fuel lines and connections
#
●Check expiration date for TRK bottle
*2
*3: If you drive in dusty conditions, replace the air cleaner element every 15,000 miles (24,000 km).
*4: If you drive primarily in urban areas that have high concentrations of soot in the air from industry and
from diesel-powered vehicles, replace every 15,000 miles (24,000 km).
*5: If you tow a Fit behind a motorhome, the transmission fluid must be changed every 2 years or 30,000
miles (48,000 km), whichever comes first. (For A/T only)CODE
Maintenance Sub Items
1
●Rotate tires
2
●Replace air cleaner element
*3
●Replace dust and pollen filter
*4
●Inspect drive belt
3●Replace transmission fluid
*5
4
●Replace spark plugs●Inspect valve clearance
5●Replace engine coolant
Page 200 of 289

199Maintenance
Maintenance Under the HoodMaintenance Items Under the Hood
Brake Fluid
(Black Cap)
Engine Coolant ReservoirRadiator Cap Washer Fluid
(Blue Cap)
Engine Oil Dipstick
(Orange Loop)Clutch Fluid
(Gray Cap) Engine Oil Fill Cap
Automatic Transmission
Fluid Dipstick
(Yellow Loop) BatteryManual transmission
modelsAutomatic transmission
models
Page 209 of 289

208
uuMaintenance Under the HooduTransmission Fluid
Maintenance
Transmission FluidCheck the fluid level when the engine is at normal operating temperature.
1.Park on level ground, and start the engine.
2.Wait until the radiator fan starts and then
turn off the engine.
uPerform step 3 after waiting for about 60
seconds (less than 90 seconds).
3.Remove the dipstick (yellow loop) from the
transmission and wipe it with a clean cloth.
4.Insert the dipstick all the way back into the
transmission securely, as shown in the
image.
5.Remove the dipstick and check the fluid
level.
uIt should be between the upper and
lower marks in the HOT range.
6.If the level is below the lower mark, add
fluid into the dipstick hole to bring it to the
level between the upper and lower marks,
and have your vehicle checked by a dealer
immediately.■Automatic Transmission FluidSpecified fluid: Honda ATF DW-1 (automatic transmission fluid)
1Automatic Transmission FluidNOTICEDo not mix Honda ATF DW-1 with other
transmission fluids.
Using a transmission fluid other than Honda ATF
DW-1 may adversely affect the operation and
durability of your vehicle’s transmission, and damage
the transmission.
Any damage caused by using a transmission fluid that
is not equivalent to Honda ATF DW-1 is not covered
by Honda’s new vehicle warranty.NOTICEPour the fluid slowly and carefully so you do not spill
any. Clean up any spills immediately; they can
damage components in the engine compartment.
Upper Mark
Lower Mark HOT
Range
Page 210 of 289

209
uuMaintenance Under the HooduTransmission Fluid
Maintenance
Check the fluid level when the engine is at normal operating temperature.
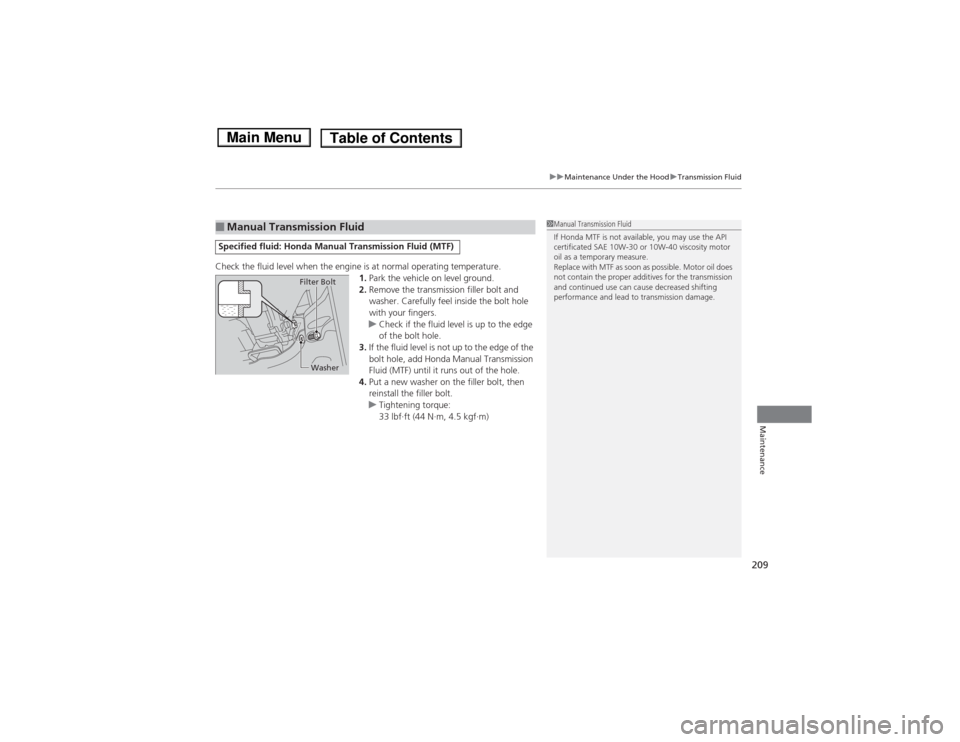
1.Park the vehicle on level ground.
2.Remove the transmission filler bolt and
washer. Carefully feel inside the bolt hole
with your fingers.
uCheck if the fluid level is up to the edge
of the bolt hole.
3.If the fluid level is not up to the edge of the
bolt hole, add Honda Manual Transmission
Fluid (MTF) until it runs out of the hole.
4.Put a new washer on the filler bolt, then
reinstall the filler bolt.
uTightening torque:
33 lbf∙ft (44 N∙m, 4.5 kgf∙m)■Manual Transmission FluidSpecified fluid: Honda Manual Transmission Fluid (MTF)
1Manual Transmission Fluid
If Honda MTF is not available, you may use the API
certificated SAE 10W-30 or 10W-40 viscosity motor
oil as a temporary measure.
Replace with MTF as soon as possible. Motor oil does
not contain the proper additives for the transmission
and continued use can cause decreased shifting
performance and lead to transmission damage.
Filter BoltWasher
Page 211 of 289

210
uuMaintenance Under the HooduBrake/Clutch Fluid
Maintenance
Brake/Clutch FluidUse the same fluid for both the brakes and clutch.
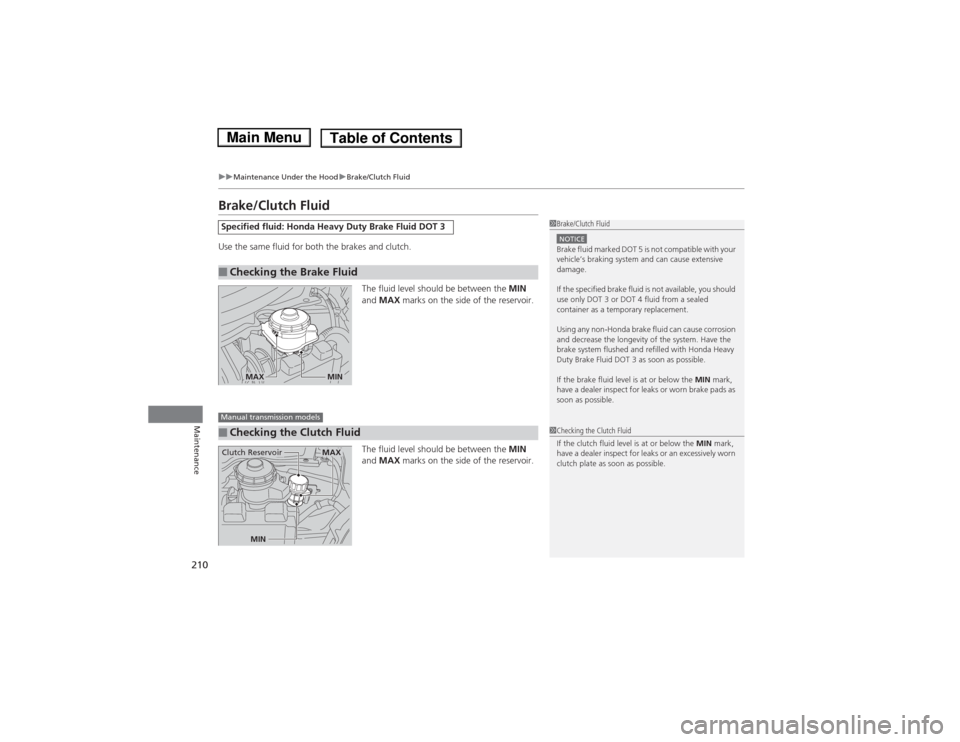
The fluid level should be between the MIN
and MAX marks on the side of the reservoir.
The fluid level should be between the MIN
and MAX marks on the side of the reservoir.Specified fluid: Honda Heavy Duty Brake Fluid DOT 3■Checking the Brake Fluid
1Brake/Clutch FluidNOTICEBrake fluid marked DOT 5 is not compatible with your
vehicle’s braking system and can cause extensive
damage.
If the specified brake fluid is not available, you should
use only DOT 3 or DOT 4 fluid from a sealed
container as a temporary replacement.
Using any non-Honda brake fluid can cause corrosion
and decrease the longevity of the system. Have the
brake system flushed and refilled with Honda Heavy
Duty Brake Fluid DOT 3 as soon as possible.
If the brake fluid level is at or below the MIN mark,
have a dealer inspect for leaks or worn brake pads as
soon as possible.
MIN
MAX
■Checking the Clutch FluidManual transmission models
1Checking the Clutch Fluid
If the clutch fluid level is at or below the MIN mark,
have a dealer inspect for leaks or an excessively worn
clutch plate as soon as possible.
Clutch Reservoir
MIN
MAX
Page 240 of 289

239
Continued
Handling the Unexpected
If a Tire Goes FlatChanging a Flat Tire
*
If a tire goes flat while driving, grasp the steering wheel firmly, and brake gradually
to reduce speed. Then, stop in a safe place. Replace the flat tire with a compact
spare tire. Go to a dealer as soon as possible to have the full size tire repaired or
replaced.
1.Park the vehicle on firm, level, non-slippery surface and apply the parking brake.
2.Move the shift lever to
(P.
2.Move the shift lever to (R.
3.Turn on the hazard warning lights and turn the ignition switch to LOCK
(0.
1Changing a Flat Tire
*
Periodically check the tire pressure of the compact
spare. It should be set to the specified pressure.
Specified Pressure: 60 psi (420 kPa, 4.2 kgf/cm
2)
When driving with the compact spare tire, keep the
vehicle speed under 50 mph (80 km/h). Replace with
a full size tire as soon as possible.
The compact spare tire and wheel in your vehicle are
specifically for this model.
Do not use them with another vehicle.
Do not use another type of compact spare tire or
wheel with your vehicle.
Do not mount tire chains on a compact spare tire.
If a chain-mounted front tire goes flat, remove one of
the full-size rear tires and replace it with the compact
spare tire. Remove the flat front tire and replace it
with the full size tire that was removed from the rear.
Mount the tire chains on the front tire.
Do not use a puncture-repairing agent on a flat tire,
as it can damage the tire pressure sensor.
U.S. models only
Automatic transmission modelsManual transmission modelsAll models* Not available on all models
Page 246 of 289

245
uuIf a Tire Goes FlatuTemporarily Repairing a Flat Tire
Continued
Handling the Unexpected
Temporarily Repairing a Flat TireIf the tire has a large cut or is otherwise severely damaged, you will need to have the
vehicle towed. If the tire only has a small puncture, from a nail for instance, you can
use the tire repair kit so that you can drive to the nearest service station for a more
permanent repair.
If a tire goes flat while driving, grasp the steering wheel firmly, and brake gradually
to reduce speed. Then stop in a safe place.
1.Park the vehicle on firm, level, and non-slippery ground.
2.Put the shift lever in
(P.
3.Set the parking brake.
4.Turn on the hazard warning lights and turn the ignition switch to LOCK
(0.
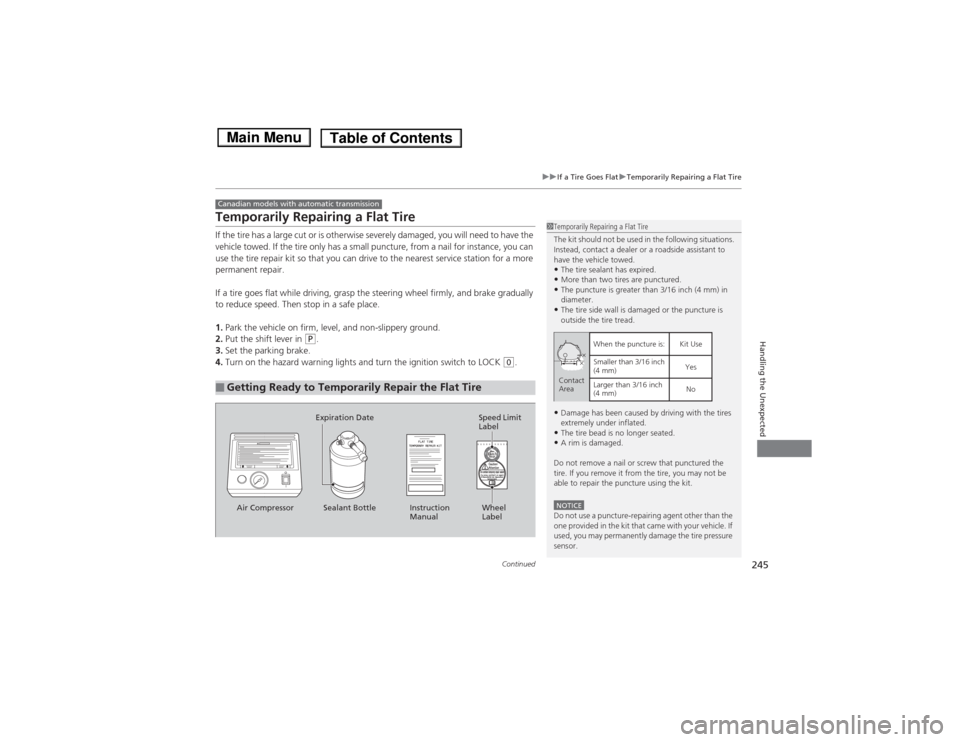
■Getting Ready to Temporarily Repair the Flat TireCanadian models with automatic transmission
1Temporarily Repairing a Flat Tire
The kit should not be used in the following situations.
Instead, contact a dealer or a roadside assistant to
have the vehicle towed.•The tire sealant has expired.•More than two tires are punctured.•The puncture is greater than 3/16 inch (4 mm) in
diameter.•The tire side wall is damaged or the puncture is
outside the tire tread.•Damage has been caused by driving with the tires
extremely under inflated.•The tire bead is no longer seated.•A rim is damaged.
Do not remove a nail or screw that punctured the
tire. If you remove it from the tire, you may not be
able to repair the puncture using the kit.NOTICEDo not use a puncture-repairing agent other than the
one provided in the kit that came with your vehicle. If
used, you may permanently damage the tire pressure
sensor.
When the puncture is:
Smaller than 3/16 inch
(4 mm)
Larger than 3/16 inch
(4 mm) Kit Use
Yes
No Contact
Area
Instruction
Manual Air Compressor Wheel
Label Sealant Bottle Expiration Date
Speed Limit
Label