2014 HONDA FIT fuel indicator
[x] Cancel search: fuel indicatorPage 1 of 289
ContentsThis owner’s manual should be considered a permanent part of the
vehicle and should remain with the vehicle when it is sold.
This owner’s manual covers all models of your vehicle. You may find
descriptions of equipment and features that are not on your
particular model.
Images throughout this owner’s manual (including the front cover)
represent features and equipment that are available on some, but
not all, models. Your particular model may not have some of these
features.
This owner’s manual is for vehicles sold in the United States and
Canada.
The information and specifications included in this publication were
in effect at the time of approval for printing. Honda Motor Co., Ltd.
reserves the right, however, to discontinue or change specifications
or design at any time without notice and without incurring any
obligation.
2Safe Driving P. 21For Safe Driving P. 22 Seat Belts P. 26 Airbags P. 342Instrument Panel P. 63Indicators P. 64 Gauges and Displays P. 722Controls P. 75Setting the Clock P. 76 Locking and Unlocking the Doors P. 77
Opening and Closing the Windows P. 92
Adjusting the Seats P. 1032Features P. 121Audio System P. 122 Audio System Basic Operation P. 125
Bluetooth® HandsFreeLink®
* P. 140
2Driving P. 153Before Driving P. 154 Towing a Trailer P. 159
Refueling P. 186 Fuel Economy P. 1892Maintenance P. 191Before Performing Maintenance P. 192 Maintenance Minder
TM P. 195
Checking and Maintaining Wiper Blades P. 218
Heating and Cooling
* System Maintenance P. 233
2Handling the Unexpected P. 237Tools P. 238 If a Tire Goes Flat P. 239
Overheating P. 254 Indicator, Coming On/Blinking P. 2562Information P. 267Specifications P. 268 Identification Numbers P. 270
Emissions Testing P. 273 Warranty Coverages P. 275
Page 9 of 289

8Quick Reference Guide
Instrument Panel
(P63)
Lights Reminders
Malfunction
Indicator Lamp
Low Oil Pressure
Indicator
Anti-lock Brake
System (ABS)
Indicator Vehicle Stability
Assist (VSA®) System
Indicator
VSA® OFF Indicator
Electric Power
Steering (EPS)
Indicator Lights On Indicator High Beam Indicator
Immobilizer System
Indicator
Seat Belt Reminder
Indicator
System Indicators
CRUISE MAIN
Indicator
*
Supplemental
Restraint System
Indicator Side Airbag Off
Indicator
Door and Tailgate
Open Indicator
TachometerSpeedometerFuel Gauge Security System Alarm Indicator
*
Shift Lever Position Indicator
*
Low Fuel Indicator
Gauges
(P72)
/Information Display
(P73)
/System Indicators
(P64)
Turn Signal and
Hazard Warning
Indicators High Temperature
Indicator
Low Temperature
Indicator
System Indicators System Indicators
Low Tire Pressure
IndicatorU.S. models only
Parking Brake
and Brake System
Indicator
CRUISE CONTROL
Indicator
*
System Indicators
Charging System
Indicator
U.S.U.S.Canada
TPMS IndicatorU.S. models onlyWasher Level
Indicator
*
Daytime Running
Lights Indicator
*
Maintenance
Minder Indicator Fog Light Indicator
*
Canada
Page 67 of 289
66
uuIndicatorsu
Instrument Panel
Indicator
Name
On/Blinking
Explanation
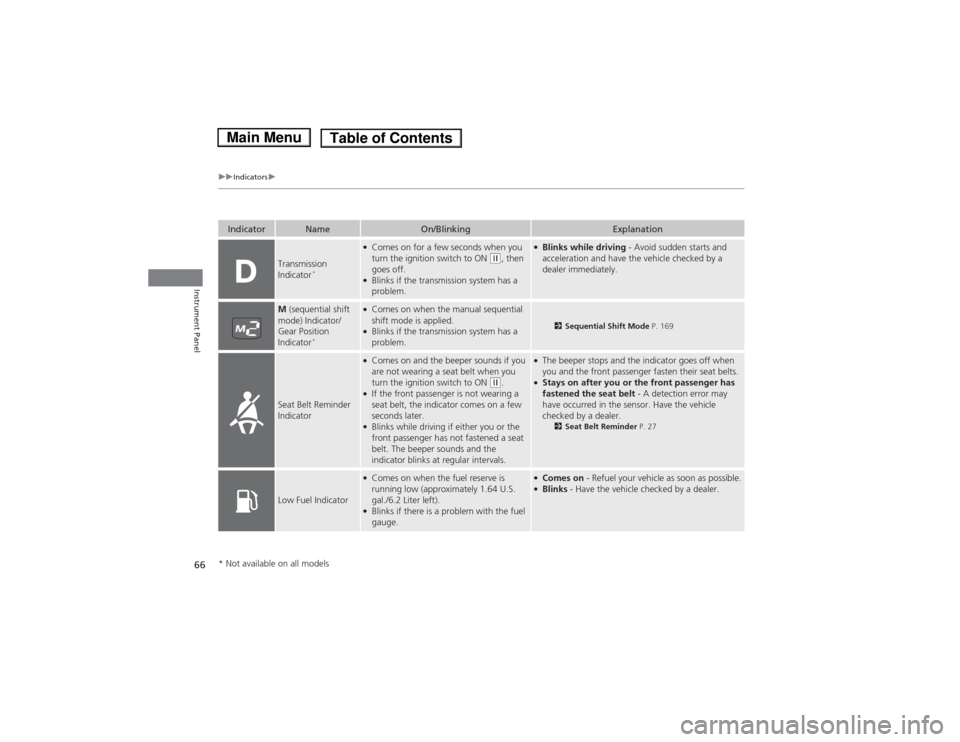
Transmission
Indicator
*
●Comes on for a few seconds when you
turn the ignition switch to ON
(w, then
goes off.
●Blinks if the transmission system has a
problem.
●Blinks while driving - Avoid sudden starts and
acceleration and have the vehicle checked by a
dealer immediately.
M (sequential shift
mode) Indicator/
Gear Position
Indicator
*
●Comes on when the manual sequential
shift mode is applied.●Blinks if the transmission system has a
problem.
2Sequential Shift Mode P. 169
Seat Belt Reminder
Indicator
●Comes on and the beeper sounds if you
are not wearing a seat belt when you
turn the ignition switch to ON
(w.
●If the front passenger is not wearing a
seat belt, the indicator comes on a few
seconds later.●Blinks while driving if either you or the
front passenger has not fastened a seat
belt. The beeper sounds and the
indicator blinks at regular intervals.
●The beeper stops and the indicator goes off when
you and the front passenger fasten their seat belts.●Stays on after you or the front passenger has
fastened the seat belt - A detection error may
have occurred in the sensor. Have the vehicle
checked by a dealer.
2Seat Belt Reminder P. 27
Low Fuel Indicator
●Comes on when the fuel reserve is
running low (approximately 1.64 U.S.
gal./6.2 Liter left).●Blinks if there is a problem with the fuel
gauge.
●Comes on - Refuel your vehicle as soon as possible.●Blinks - Have the vehicle checked by a dealer.
* Not available on all models
Page 73 of 289
72Instrument Panel
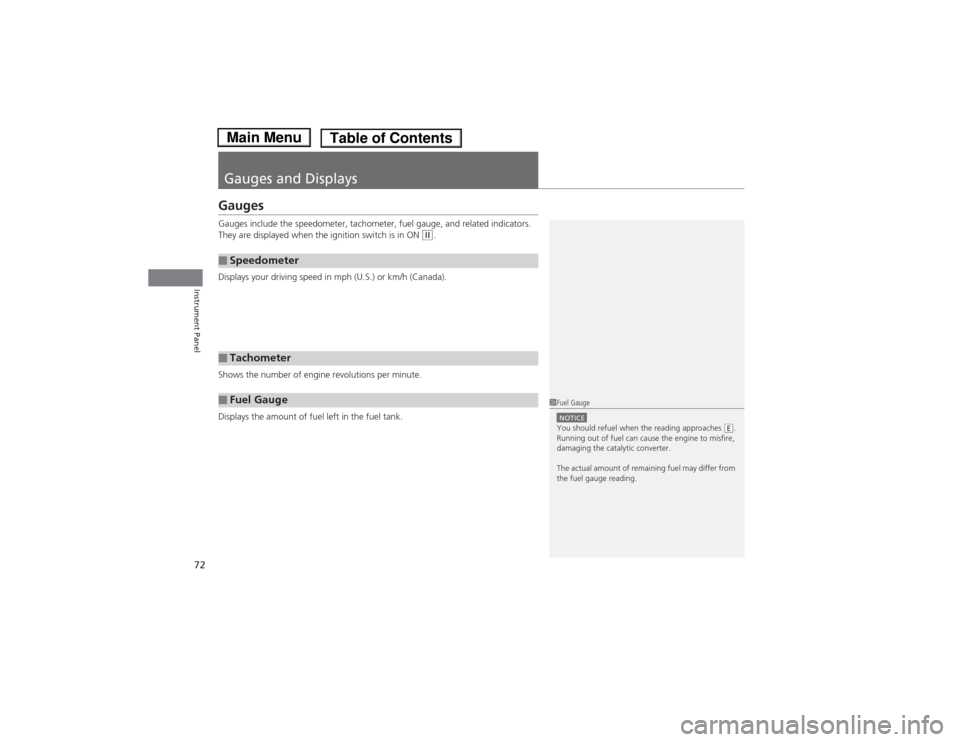
Gauges and DisplaysGaugesGauges include the speedometer, tachometer, fuel gauge, and related indicators.
They are displayed when the ignition switch is in ON
(w.
Displays your driving speed in mph (U.S.) or km/h (Canada).
Shows the number of engine revolutions per minute.
Displays the amount of fuel left in the fuel tank.
■Speedometer■Tachometer■Fuel Gauge
1Fuel GaugeNOTICEYou should refuel when the reading approaches .
Running out of fuel can cause the engine to misfire,
damaging the catalytic converter.
The actual amount of remaining fuel may differ from
the fuel gauge reading.
E
Page 163 of 289
uuWhen DrivinguStarting the Engine
162Driving
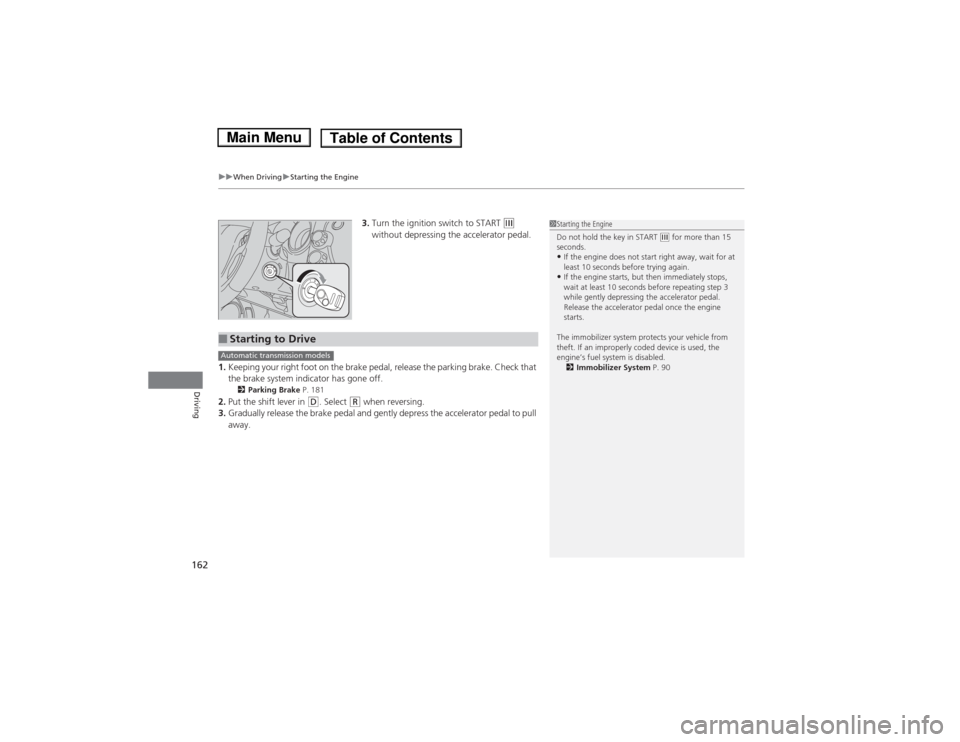
3.Turn the ignition switch to START
(e
without depressing the accelerator pedal.
1.Keeping your right foot on the brake pedal, release the parking brake. Check that
the brake system indicator has gone off.
2Parking Brake P. 181
2.Put the shift lever in
(D. Select
(R when reversing.
3.Gradually release the brake pedal and gently depress the accelerator pedal to pull
away.
1Starting the Engine
Do not hold the key in START
(e for more than 15
seconds.
•If the engine does not start right away, wait for at
least 10 seconds before trying again.•If the engine starts, but then immediately stops,
wait at least 10 seconds before repeating step 3
while gently depressing the accelerator pedal.
Release the accelerator pedal once the engine
starts.
The immobilizer system protects your vehicle from
theft. If an improperly coded device is used, the
engine’s fuel system is disabled.
2Immobilizer System P. 90
■Starting to DriveAutomatic transmission models
Page 167 of 289

uuWhen DrivinguShifting
166Driving
■Shift Lever Operation
1Shift Lever OperationNOTICEWhen you change the shift lever from
(D to (R and
vice versa, come to a complete stop and keep the
brake pedal depressed.
Operating the shift lever before the vehicle has come
to a complete standstill can damage the transmission.
Use the shift lever position indicator to check the
lever position before pulling away.
Whichever position the shift lever is in when driving,
a blinking
(D indicator indicates a transmission
problem.
Avoid sudden acceleration and have the transmission
checked by a dealer as soon as possible.
The fuel supply may be cut off if you drive at engine
speeds in or over the tachometer red zone (engine
speed limit). If this happens, you may experience a
slight jolt.
It may not be possible to operate the shift lever if the
brake pedal is applied while the shift lever release
button is held down.
Depress the brake pedal first.
Shift Lever Position Indicator Tachometer’s red zone
Depress the brake pedal and press
the shift lever release button to shift.
Shift without pressing the shift lever
release button.
Press the shift lever release button
and shift.
Page 169 of 289
uuWhen DrivinguShifting
168Driving
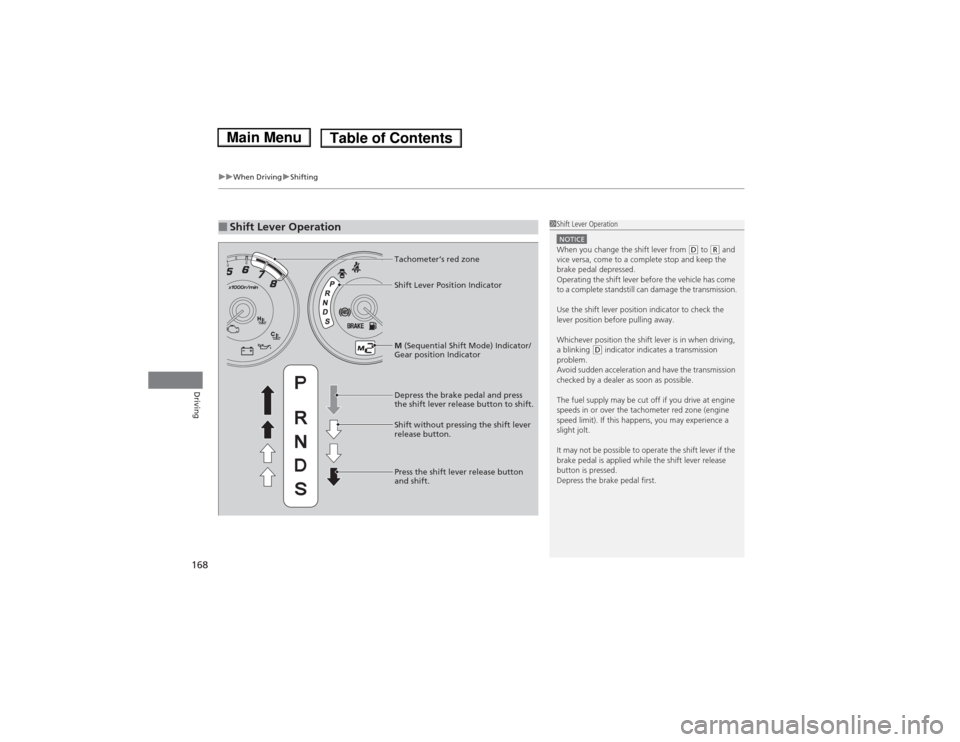
■Shift Lever Operation
1Shift Lever OperationNOTICEWhen you change the shift lever from
(D to (R and
vice versa, come to a complete stop and keep the
brake pedal depressed.
Operating the shift lever before the vehicle has come
to a complete standstill can damage the transmission.
Use the shift lever position indicator to check the
lever position before pulling away.
Whichever position the shift lever is in when driving,
a blinking
(D indicator indicates a transmission
problem.
Avoid sudden acceleration and have the transmission
checked by a dealer as soon as possible.
The fuel supply may be cut off if you drive at engine
speeds in or over the tachometer red zone (engine
speed limit). If this happens, you may experience a
slight jolt.
It may not be possible to operate the shift lever if the
brake pedal is applied while the shift lever release
button is pressed.
Depress the brake pedal first.
M (Sequential Shift Mode) Indicator/
Gear position Indicator Tachometer’s red zone
Depress the brake pedal and press
the shift lever release button to shift.
Shift without pressing the shift lever
release button.
Press the shift lever release button
and shift. Shift Lever Position Indicator
Page 171 of 289
uuWhen DrivinguShifting
170Driving
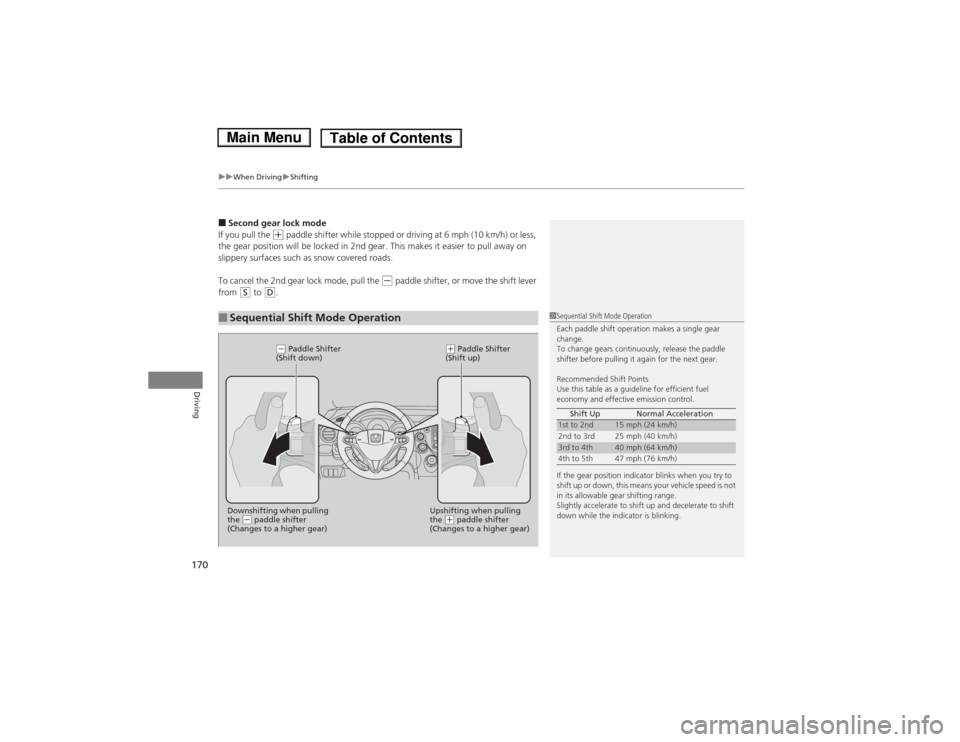
■Second gear lock mode
If you pull the
(+ paddle shifter while stopped or driving at 6 mph (10 km/h) or less,
the gear position will be locked in 2nd gear. This makes it easier to pull away on
slippery surfaces such as snow covered roads.
To cancel the 2nd gear lock mode, pull the
(- paddle shifter, or move the shift lever
from
(S to
(D.
■Sequential Shift Mode Operation
1Sequential Shift Mode Operation
Each paddle shift operation makes a single gear
change.
To change gears continuously, release the paddle
shifter before pulling it again for the next gear.
Recommended Shift Points
Use this table as a guideline for efficient fuel
economy and effective emission control.
If the gear position indicator blinks when you try to
shift up or down, this means your vehicle speed is not
in its allowable gear shifting range.
Slightly accelerate to shift up and decelerate to shift
down while the indicator is blinking.Shift Up Normal Acceleration1st to 2nd
15 mph (24 km/h)
2nd to 3rd 25 mph (40 km/h)
3rd to 4th
40 mph (64 km/h)
4th to 5th 47 mph (76 km/h)
Upshifting when pulling
the
(+ paddle shifter
(Changes to a higher gear) Downshifting when pulling
the
(- paddle shifter
(Changes to a higher gear)
(- Paddle Shifter
(Shift down)
(+ Paddle Shifter
(Shift up)