Page 120 of 573

119
uuOperating the Switches Around the Steering WheeluTurn SignalsContinued
Controls
Turn Signals
The turn signals can be used when the ignition
switch is in ON
(w*1.
■One-touch turn signal
When you lightly push up or down and release
the turn signal lever, the exterior turn signals
and turn signal indicator blink three times.
This feature can be used when signaling for a
lane change.
Light Switches
Rotating the light switch turns the lights on
and off, regardless of the position of the
ignition switch
*1.
■High beams
Push the lever forward until you hear a click.■Low beams
When in high beams, pull the lever back to
return to low beams.■Flashing the high beams
Pull the lever back, and release it.
*1: Models with the smart entry system have an ENGINE START/STOP button instead of an
ignition switch.
Right Turn
Left Turn
■Manual Operation
1Light Switches
If you remove the key from the ignition switch or
leave the power mode in VEHICLE OFF (LOCK) while
the lights are on, a chime sounds when the driver’s
door is opened.
When the lights are on, the lights on indicator in the
instrument panel will be on.
2Lights On Indicator P. 79
Do not leave the lights on when the engine is off
because it will cause the battery to discharge.
If you sense that the level of the headlights is
abnormal, have the vehicle inspected by a dealer.
High Beams
Flashing the high beams
Low Beams
Turns on parking, side marker,
tail, and rear license plate lights
Turns on headlights, parking,
side marker, tail, and rear
license plate lights
Page 122 of 573

121
uuOperating the Switches Around the Steering WheeluLight Switches
Controls
The headlights, all other exterior lights, and the instrument panel lights turn off 15
seconds after you remove the key or set the power mode to VEHICLE OFF (LOCK),
take the remote with you, and close the driver’s door.
If you turn the ignition switch to LOCK
(0*1 with the headlight switch on, but do
not open the door, the lights turn off after 10 minutes (three minutes, if the switch
is in the AUTO position).
The lights turn on again when you unlock or open the driver’s door. If you unlock
the door, but do not open it within 15 seconds, the lights go off. If you open the
driver’s door, you will hear a lights on reminder chime.
*1: Models with the smart entry system have an ENGINE START/STOP button instead of an
ignition switch.■Automatic Lighting Off Feature
1Automatic Lighting Off Feature
You can change the headlight auto off timer setting.
2Customized Features
* P. 281
Models with smart entry system
* Not available on all models
Page 123 of 573

122
uuOperating the Switches Around the Steering WheeluFog Lights
Controls
Fog Lights
When the low beam headlights are on, turn
the fog light switch on to use the fog lights.
Daytime Running LightsThe high beam headlights come on slightly dimmer than normal when the following
conditions have been met:
•The ignition switch is in ON
(w*1.
•The headlight switch is off, or in .
•The parking brake is released.
The lights remain on even if you set the parking brake. Turning off the ignition
switch or setting the power mode to VEHICLE OFF will turn off the daytime running
lights.
The high beam headlights return to the original brightness once the headlight
switch is turned on.
*1: Models with the smart entry system have an ENGINE START/STOP button instead of an
ignition switch.
1Fog Lights
When the fog lights are on, the indicator in the
instrument panel will be on.
They go off when the headlights turn off, or when
the daytime running lights are on.
2Fog Light Indicator P. 79
Fog Light Switch
Page 126 of 573

125
uuOperating the Switches Around the Steering WheeluBrightness Control
Controls
Brightness Control
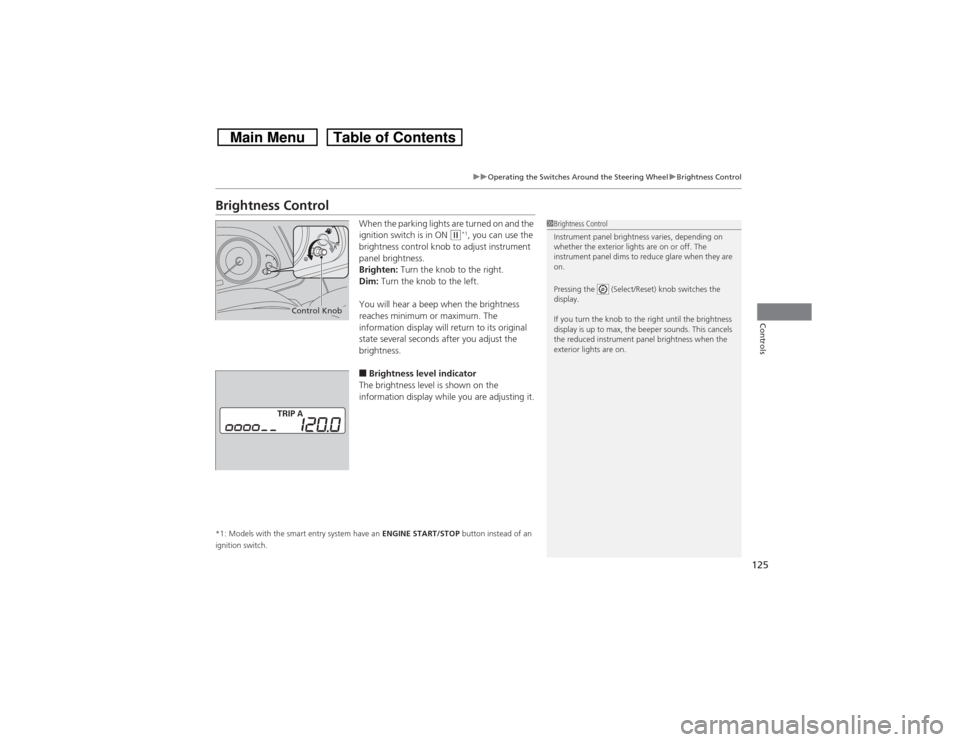
When the parking lights are turned on and the
ignition switch is in ON
(w*1, you can use the
brightness control knob to adjust instrument
panel brightness.
Brighten: Turn the knob to the right.
Dim: Turn the knob to the left.
You will hear a beep when the brightness
reaches minimum or maximum. The
information display will return to its original
state several seconds after you adjust the
brightness.
■Brightness level indicator
The brightness level is shown on the
information display while you are adjusting it.
*1: Models with the smart entry system have an ENGINE START/STOP button instead of an
ignition switch.
1Brightness Control
Instrument panel brightness varies, depending on
whether the exterior lights are on or off. The
instrument panel dims to reduce glare when they are
on.
Pressing the (Select/Reset) knob switches the
display.
If you turn the knob to the right until the brightness
display is up to max, the beeper sounds. This cancels
the reduced instrument panel brightness when the
exterior lights are on.
Control Knob
Page 130 of 573

129
uuOperating the Switches Around the Steering WheeluAdjusting the Steering Wheel
Controls
Adjusting the Steering WheelThe steering wheel height and distance from your body can be adjusted so that you
can comfortably grip the steering wheel in an appropriate driving posture.
1.Push the steering wheel adjustment lever
down.
uThe steering wheel adjustment lever is
under the steering column.
2.Move the steering wheel up or down, and
in or out.
uMake sure you can see the instrument
panel gauges and indicators.
3.Pull the steering wheel adjustment lever up
to lock the steering wheel in position.
uAfter adjusting the position, make sure
you have securely locked the steering
wheel in place by trying to move it up,
down, in, and out.
1Adjusting the Steering Wheel
Make any steering wheel adjustments before you
start driving.
3
WARNING
Adjusting the steering wheel position while
driving may cause you to lose control of the
vehicle and be seriously injured in a crash.
Adjust the steering wheel only when the
vehicle is stopped.
To adjustTo lock
Lever
Page 413 of 573
412
uuBefore DrivinguDriving Preparation
Driving
•Be sure items placed on the floor behind the front seats cannot roll under the
seats.
uThey can interfere with the driver’s ability to operate the pedals, the operation
of the seats, or the operation of the sensors under the seats.
•Everyone in the vehicle must fasten their seat belt.
2Fastening a Seat Belt P. 35
•Make sure that the indicators in the instrument panel come on when you start the
vehicle, and go off soon after.
uAlways have a dealer check the vehicle if a problem is indicated.
2Indicators P. 70
Page 433 of 573

432
uuWhen DrivinguCruise Control
Driving
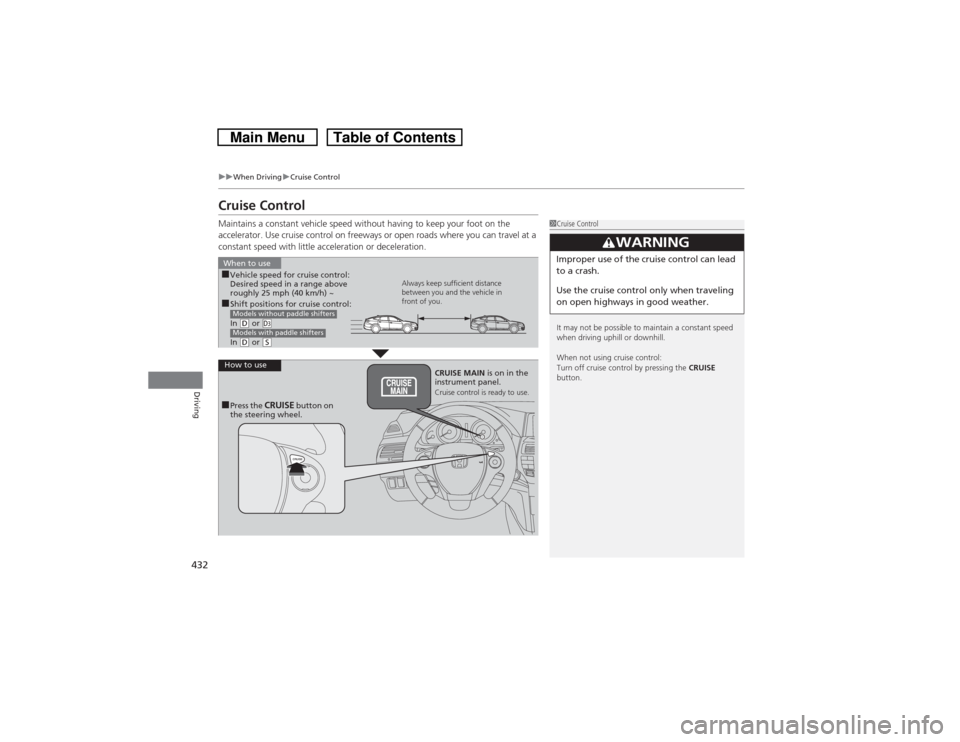
Cruise ControlMaintains a constant vehicle speed without having to keep your foot on the
accelerator. Use cruise control on freeways or open roads where you can travel at a
constant speed with little acceleration or deceleration.
1Cruise Control
It may not be possible to maintain a constant speed
when driving uphill or downhill.
When not using cruise control:
Turn off cruise control by pressing the CRUISE
button.
3
WARNING
Improper use of the cruise control can lead
to a crash.
Use the cruise control only when traveling
on open highways in good weather.
■Shift positions for cruise control:
In (D or
(d
In (D or
(S
Models without paddle shiftersModels with paddle shiftersWhen to use
Always keep sufficient distance
between you and the vehicle in
front of you.
■Vehicle speed for cruise control:
Desired speed in a range above
roughly 25 mph (40 km/h) ~
How to use
CRUISE MAIN is on in the
instrument panel.
Cruise control is ready to use.
■Press the
CRUISE
button on
the steering wheel.
Page 441 of 573

uuWhen DrivinguLane Departure Warning (LDW)
*
440Driving
The system begins to search for lane markings when all the following conditions are met:
•The vehicle is traveling between 40 and 90 mph (64 and 145 km/h).
•The vehicle is on a straight or slightly curved road.
•The turn signals are off.
•The brake pedal is not depressed.
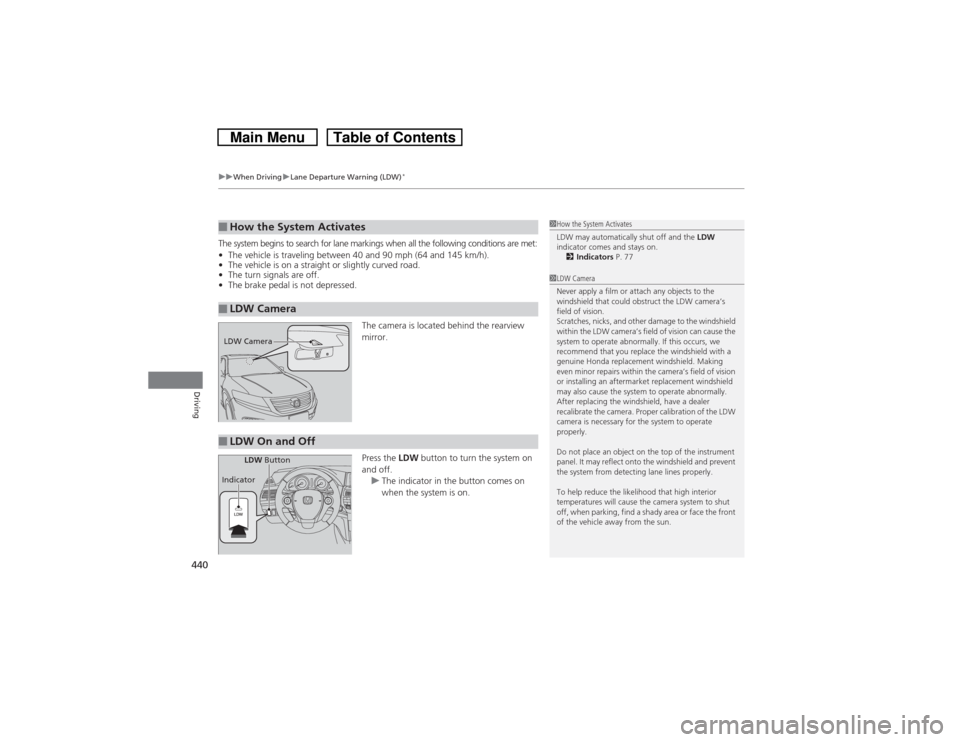
The camera is located behind the rearview
mirror.
Press the LDW button to turn the system on
and off.
uThe indicator in the button comes on
when the system is on.■How the System Activates■LDW Camera
1How the System Activates
LDW may automatically shut off and the LDW
indicator comes and stays on.
2Indicators P. 771LDW Camera
Never apply a film or attach any objects to the
windshield that could obstruct the LDW camera’s
field of vision.
Scratches, nicks, and other damage to the windshield
within the LDW camera’s field of vision can cause the
system to operate abnormally. If this occurs, we
recommend that you replace the windshield with a
genuine Honda replacement windshield. Making
even minor repairs within the camera’s field of vision
or installing an aftermarket replacement windshield
may also cause the system to operate abnormally.
After replacing the windshield, have a dealer
recalibrate the camera. Proper calibration of the LDW
camera is necessary for the system to operate
properly.
Do not place an object on the top of the instrument
panel. It may reflect onto the windshield and prevent
the system from detecting lane lines properly.
To help reduce the likelihood that high interior
temperatures will cause the camera system to shut
off, when parking, find a shady area or face the front
of the vehicle away from the sun.
LDW Camera■LDW On and Off
LDW Button
Indicator