Page 113 of 573
112
uuOpening and Closing the WindowsuOpening/Closing the Power Windows
Controls
To open: Unlock the driver’s door with the
key. Within 10 seconds of returning the key to
the central position, turn the key in the unlock
direction and hold it there.
To close: Lock the driver’s door with the key.
Within 10 seconds of returning the key to the
central position, turn the key in the lock
direction and hold it there.
Release the key to stop the windows/
moonroof at the desired position. If you want
further adjustment, repeat the same
operation.
■Opening/Closing the Windows and Moonroof with the KeyClose
Open
Page 114 of 573

113Controls
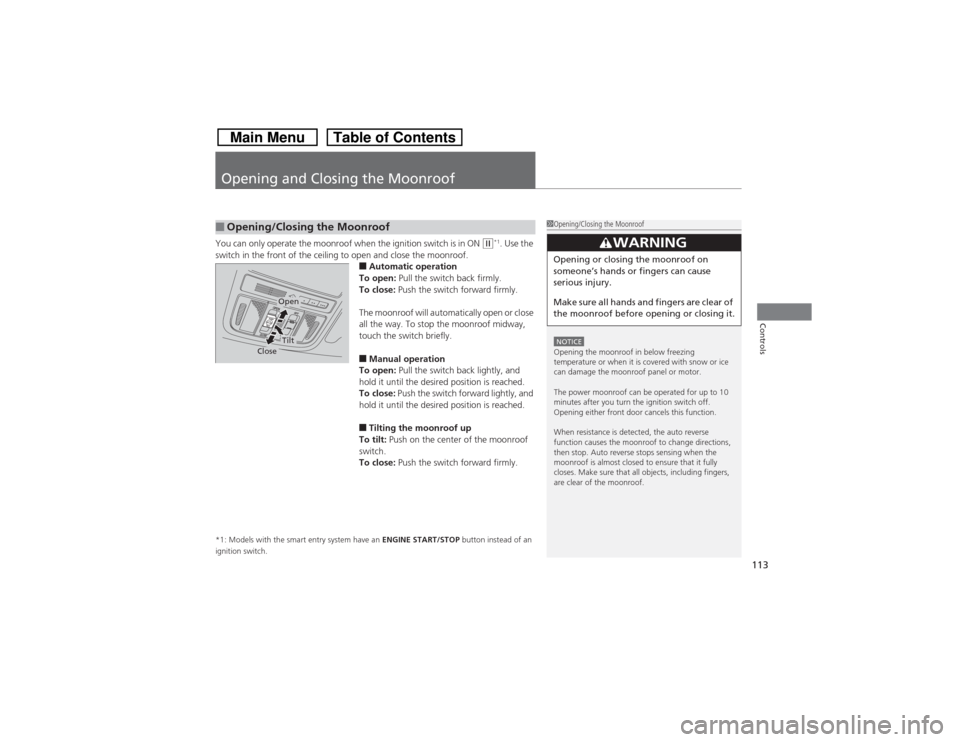
Opening and Closing the MoonroofYou can only operate the moonroof when the ignition switch is in ON
(w*1. Use the
switch in the front of the ceiling to open and close the moonroof.
■Automatic operation
To open: Pull the switch back firmly.
To close: Push the switch forward firmly.
The moonroof will automatically open or close
all the way. To stop the moonroof midway,
touch the switch briefly.■Manual operation
To open: Pull the switch back lightly, and
hold it until the desired position is reached.
To close: Push the switch forward lightly, and
hold it until the desired position is reached.■Tilting the moonroof up
To tilt: Push on the center of the moonroof
switch.
To close: Push the switch forward firmly.
*1: Models with the smart entry system have an ENGINE START/STOP button instead of an
ignition switch.■Opening/Closing the Moonroof
1Opening/Closing the MoonroofNOTICEOpening the moonroof in below freezing
temperature or when it is covered with snow or ice
can damage the moonroof panel or motor.
The power moonroof can be operated for up to 10
minutes after you turn the ignition switch off.
Opening either front door cancels this function.
When resistance is detected, the auto reverse
function causes the moonroof to change directions,
then stop. Auto reverse stops sensing when the
moonroof is almost closed to ensure that it fully
closes. Make sure that all objects, including fingers,
are clear of the moonroof.
3
WARNING
Opening or closing the moonroof on
someone’s hands or fingers can cause
serious injury.
Make sure all hands and fingers are clear of
the moonroof before opening or closing it.
Open
Close
Tilt
Page 151 of 573
uuInterior Lights/Interior Convenience ItemsuInterior Convenience Items
150Controls
Pull the handle to open the cargo floor lid.
The reverse side of the cargo floor lid is water-
proofed. Flip the lid to use the water-proofed
side.■To keep the lid open:
1.Remove the hook from the back of the
cargo floor lid.
2.Pull the hook to the hole on the side panel.■Removable box
The removable box is under the cargo floor.
To remove the box, lift it up with the straps on
both sides.
■Under-floor Storage Area
1Under-floor Storage AreaNOTICEDo not put objects that weigh more than 22.1 lbs (10
kg) in the removable box. Exceeding the maximum
load may damage the box.
Do not leave water, soil, sand, or perishable foods in
the removable box. Rotting food and dirt on the floor
may cause the breakdown of electrical equipment.
Strap
Page 152 of 573
151
uuInterior Lights/Interior Convenience ItemsuInterior Convenience Items
Continued
Controls
Pull the strap to raise the lid.
The reverse side of each lid is water-proofed.
Flip the lids, then replace each other side.
■Side Storage Compartments
Strap
Page 225 of 573

224
uuAudio System Basic OperationuVoice Control Operation
Features
Voice Control OperationYour vehicle has a voice control system that allows hands-free operation of most of
the navigation system functions.
The voice control system uses the (Talk) and (hang-up/back) buttons on the
steering wheel and a microphone near the map lights on the ceiling.
To achieve optimum voice recognition when using the navigation voice control
system:
•Make sure the correct screen is displayed for the voice command that you are
using.
•Close the windows and moonroof.
•Adjust the dashboard and side vents so air does not blow onto the microphone
on the ceiling.
•Speak clearly in a clear, natural speaking voice without pausing between words.
•Reduce any background noise if possible. The system may misinterpret your
command if more than one person is speaking at the same time.
•Refer to the Voice Help feature.
2Refer to the Navigation System Manual
■Voice Recognition
1Voice Control Operation
When you press the button, a helpful prompt asks
what you would like to do. Press and release the
button again to bypass this prompt and give a
command.1Voice Recognition
The voice control system can only be used from the
driver’s seat because the microphone unit removes
noises from the front passenger’s side.
Page 277 of 573

276Features
General Information on the Audio SystemXM® Radio Service
*
1.You need your radio ID ready before registering for subscription. To see the ID in
the display: Turn the MENU/SEL (Selector) knob or the interface dial until 0
appears.
2.Have your radio ID and credit card number ready, and either call or visit the XM®
website to subscribe.
Switch to the XM® mode by using the SOURCE button, or through the audio with
touch screen, and stay in this mode for about 30 minutes until the service is
activated. Make sure your vehicle is in an open area with good reception.
Loading:
XM® is loading the audio or program information.
Ch off air:
The channel is not currently broadcasting.
Ch unauthorized:
XM® radio is receiving information update from the network.
No signal:
The signal is too weak in the current location.
Ch unavailable:
No such channel exists, the channel is not part of your subscription, or the artist or
title information is unavailable.
Check antenna:
There is a problem with the XM® antenna. Contact a dealer.■Subscribing to XM® Radio■Receiving XM® Radio■XM® Radio Display Messages
1Subscribing to XM® Radio
Contact Information for XM® Radio:
US: XM® Radio at www.siriusxm.com or 1-800-852-
9696
Canada: XM® Canada at www.xmradio.ca, or 1-877-
209-00791Receiving XM® Radio
The XM® satellites are in orbit over the equator;
therefore, objects south of the vehicle may cause
satellite reception interruptions. Satellite signals are
more likely to be blocked by tall buildings and
mountains the farther north you travel from the
equator.
You may experience reception problems under the
following circumstances:•In a location with an obstruction to the south of
your vehicle.•In tunnels•On the lower level of a multi-tiered road•Large items carried on the roof rack
* Not available on all models
Page 406 of 573

405Features
Compass
*
When you turn the ignition switch to ON
(w, the compass self-calibrates, and the
compass display appears.
Compass CalibrationIf the compass indicates the wrong direction, or the CAL indicator blinks, you need
to manually calibrate the system.
1.Turn the ignition switch to ON
(w.
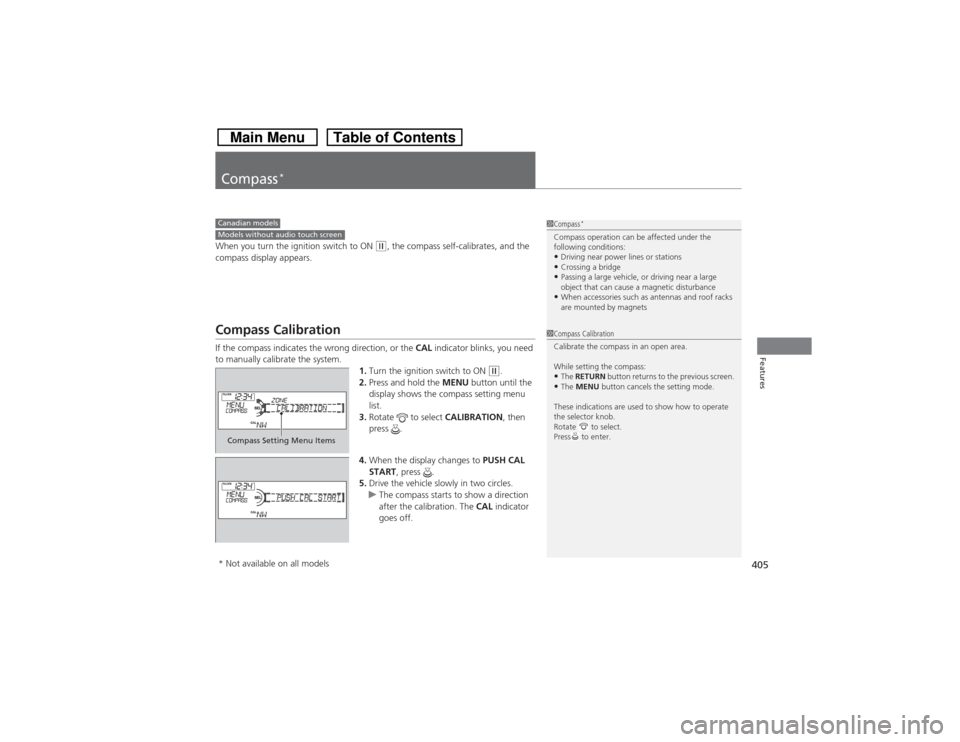
2.Press and hold the MENU button until the
display shows the compass setting menu
list.
3.Rotate to select CALIBRATION, then
press .
4.When the display changes to PUSH CAL
START, press .
5.Drive the vehicle slowly in two circles.
uThe compass starts to show a direction
after the calibration. The CAL indicator
goes off.
1Compass
*
Compass operation can be affected under the
following conditions:•Driving near power lines or stations•Crossing a bridge•Passing a large vehicle, or driving near a large
object that can cause a magnetic disturbance•When accessories such as antennas and roof racks
are mounted by magnets
Canadian modelsModels without audio touch screen
1Compass Calibration
Calibrate the compass in an open area.
While setting the compass:•The RETURN button returns to the previous screen.•The MENU button cancels the setting mode.
These indications are used to show how to operate
the selector knob.
Rotate to select.
Press to enter.
Compass Setting Menu Items* Not available on all models
Page 408 of 573

407Features
Compass
*
When you turn the ignition switch to ON
(w*1, the compass self-calibrates, and the
compass display appears.
Compass CalibrationIf the compass indicates the wrong direction, or the CAL indicator blinks, you need
to manually calibrate the system.
1.Turn the ignition switch to ON
(w*1.
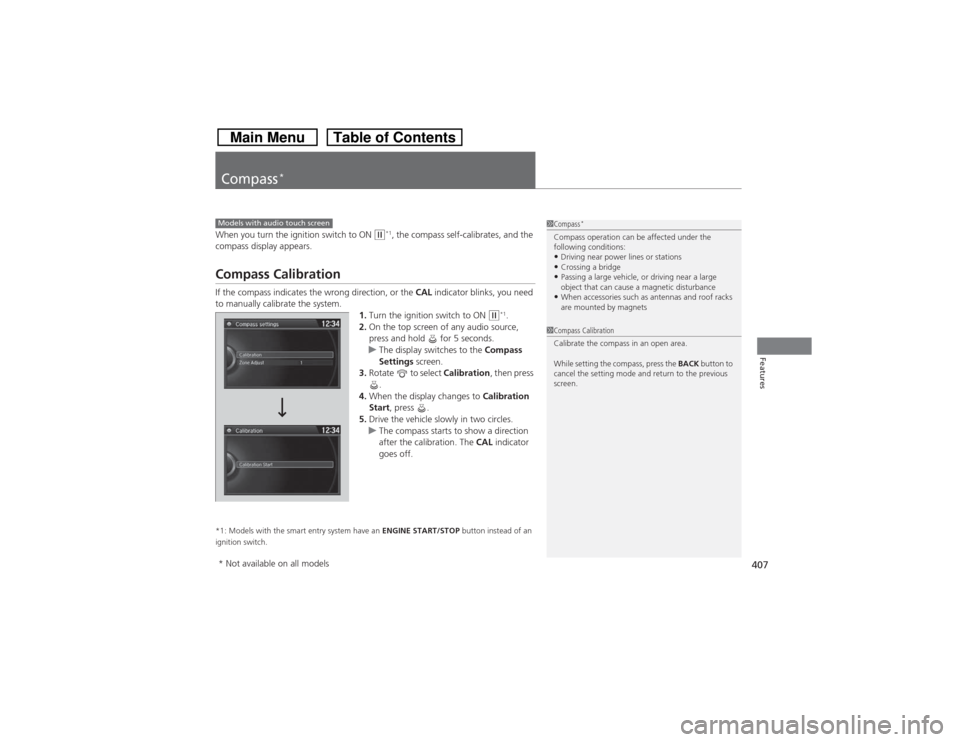
2.On the top screen of any audio source,
press and hold for 5 seconds.
uThe display switches to the Compass
Settings screen.
3.Rotate to select Calibration, then press
.
4.When the display changes to Calibration
Start, press .
5.Drive the vehicle slowly in two circles.
uThe compass starts to show a direction
after the calibration. The CAL indicator
goes off.
*1: Models with the smart entry system have an ENGINE START/STOP button instead of an
ignition switch.Models with audio touch screen
1Compass
*
Compass operation can be affected under the
following conditions:•Driving near power lines or stations•Crossing a bridge•Passing a large vehicle, or driving near a large
object that can cause a magnetic disturbance•When accessories such as antennas and roof racks
are mounted by magnets
1Compass Calibration
Calibrate the compass in an open area.
While setting the compass, press the BACK button to
cancel the setting mode and return to the previous
screen.
* Not available on all models