Page 425 of 573
424
uuWhen DrivinguPrecautions While Driving
Driving
Precautions While DrivingAvoid driving in deep water and on flooded roads. This can damage the engine or
driveline, or cause electrical component failure.
If there is a strong impact with something under the vehicle, stop in a safe location.
Check the underside of the vehicle for damage or any fluid leaks.*1: Models with the smart entry system have an ENGINE START/STOP button instead of an
ignition switch.■In Rain■Other Precautions
1Precautions While DrivingNOTICEDo not operate the shift lever while pressing the
accelerator pedal. You could damage the
transmission.NOTICEIf you repeatedly turn the steering wheel at an
extremely low speed, or hold the steering wheel on
the full left or right position for a while, the electric
power steering (EPS) system heats up. The system
goes into a protective mode, and limits its
performance. The steering wheel becomes harder
and harder to operate. Once the system cools down,
the EPS system is restored.
Repeated operation under these conditions can
eventually damage the system.
If the ignition switch is turned to ACCESSORY
(q or
LOCK
(0*1 while driving, the engine will shut down
and all steering and brake power assist functions will
stop, making it difficult to control the vehicle.
Do not put the shift lever in
(N, as you will lose
engine braking (and acceleration) performance.
Page 427 of 573
426
uuWhen DrivinguShifting
Driving
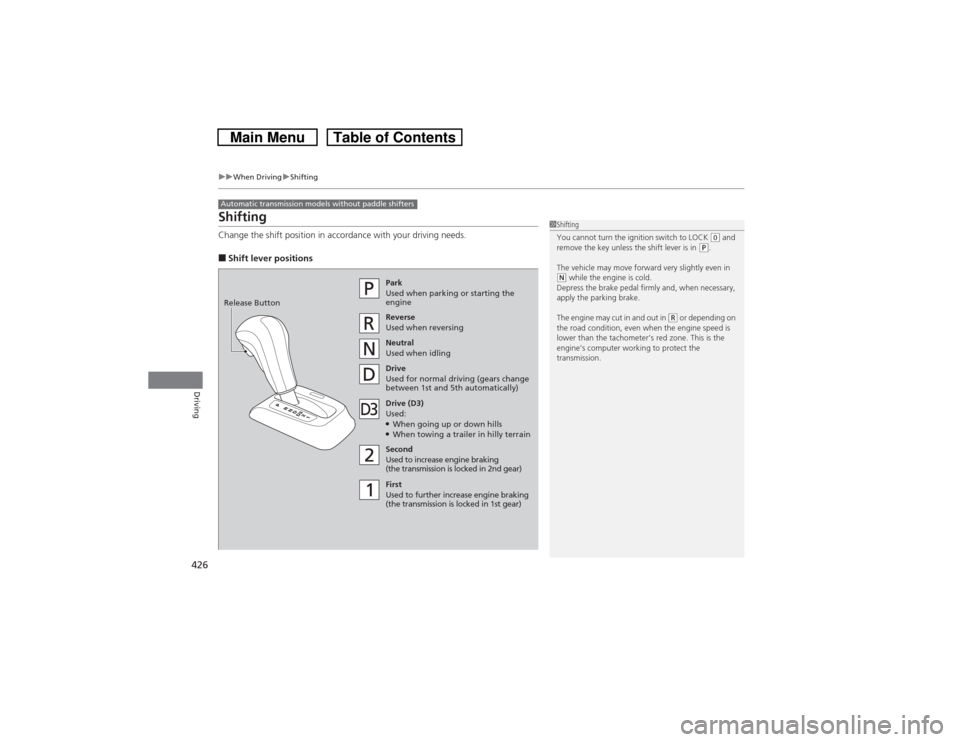
ShiftingChange the shift position in accordance with your driving needs.■Shift lever positionsAutomatic transmission models without paddle shifters
1Shifting
You cannot turn the ignition switch to LOCK
(0 and
remove the key unless the shift lever is in
(P.
The vehicle may move forward very slightly even in
(N while the engine is cold.
Depress the brake pedal firmly and, when necessary,
apply the parking brake.
The engine may cut in and out in
(R or depending on
the road condition, even when the engine speed is
lower than the tachometer’s red zone. This is the
engine’s computer working to protect the
transmission.
Park
Used when parking or starting the
engine
Reverse
Used when reversing
Neutral
Used when idling
Drive
Used for normal driving (gears change
between 1st and 5th automatically)
Drive (D3)
Used:●When going up or down hills●When towing a trailer in hilly terrain
Second
Used to increase engine braking
(the transmission is locked in 2nd gear)
First
Used to further increase engine braking
(the transmission is locked in 1st gear) Release Button
Page 431 of 573
430
uuWhen DrivinguShifting
Driving
Use the paddle shifters to change between 1st and 6th gears without removing your
hands from the steering wheel. The transmission will switch to the sequential shift
mode.■When the shift lever is in
(D:
The vehicle will go into the sequential shift mode momentarily, and the gear position
indicator will come on.
Once you start traveling at a constant speed, the sequential shift mode will
automatically switch off, and the gear position indicator will go off.
Hold the
(+ paddle shifter for two seconds to return to normal drive.
■When the shift lever is in
(S:
The vehicle will go into the sequential shift mode, and the M (sequential shift mode)
indicator and gear position indicator will come on. At speeds of 6 mph (10 km/h) or
less, the vehicle automatically shifts down into 1st gear. It will not automatically shift
up, even if vehicle speed increases.
You can only pull away in 1st or 2nd gear.
When switching out of the sequential shift mode, move the shift lever from
(S to
(D. When the sequential shift mode is canceled, the M indicator and gear position
indicator go off.■Sequential Shift Mode
Page 432 of 573
431
uuWhen DrivinguShifting
Driving
■Second gear lock mode
If you pull the
(+ paddle shifter while stopped or driving at 6 mph (10 km/h) or less,
the gear position will be locked in 2nd gear. This makes it easier to pull away on
slippery surfaces such as snow covered roads.
To cancel the 2nd gear lock mode, pull the
(- paddle shifter, or move the shift lever
from
(S to
(D.
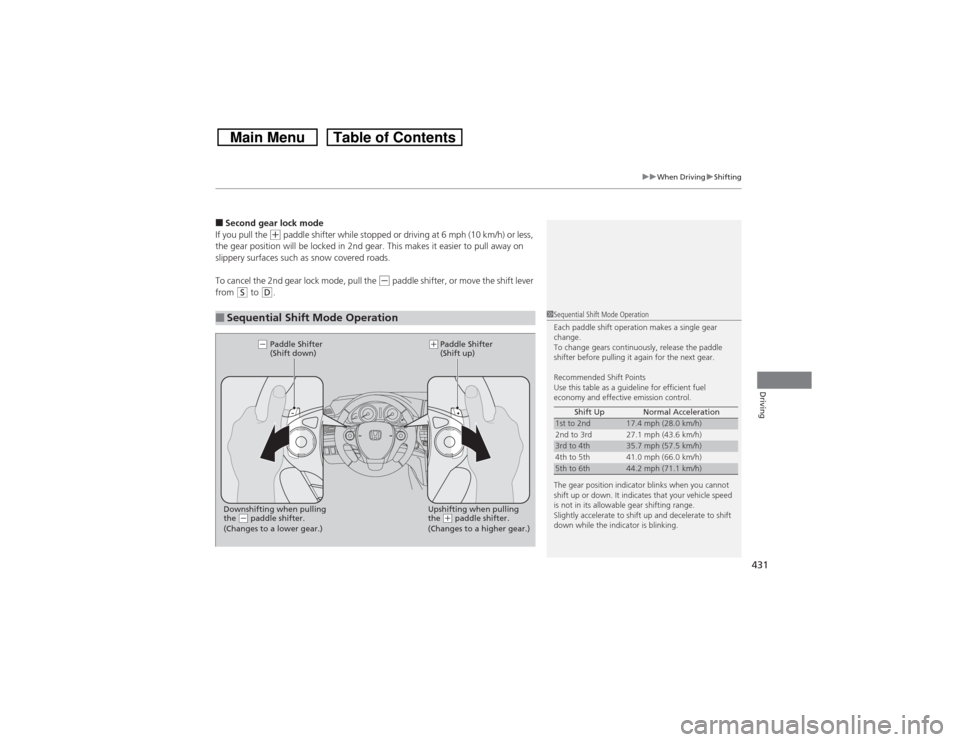
■Sequential Shift Mode Operation
1Sequential Shift Mode Operation
Each paddle shift operation makes a single gear
change.
To change gears continuously, release the paddle
shifter before pulling it again for the next gear.
Recommended Shift Points
Use this table as a guideline for efficient fuel
economy and effective emission control.
The gear position indicator blinks when you cannot
shift up or down. It indicates that your vehicle speed
is not in its allowable gear shifting range.
Slightly accelerate to shift up and decelerate to shift
down while the indicator is blinking.Shift Up Normal Acceleration1st to 2nd
17.4 mph (28.0 km/h)
2nd to 3rd 27.1 mph (43.6 km/h)
3rd to 4th
35.7 mph (57.5 km/h)
4th to 5th 41.0 mph (66.0 km/h)
5th to 6th
44.2 mph (71.1 km/h)
Paddle Shifter
(Shift down)Paddle Shifter
(Shift up)
Downshifting when pulling
the
(- paddle shifter.Upshifting when pulling
the
(+ paddle shifter.
(-(+
(Changes to a lower gear.) (Changes to a higher gear.)
Page 437 of 573
uuWhen DrivinguForward Collision Warning (FCW)
*
436Driving
1Forward Collision Warning (FCW)
*
Never apply a film or attach any objects to the
windshield that could obstruct the FCW camera’s
field of vision.
Scratches, nicks, and other damage to the windshield
within the FCW camera’s field of vision can cause the
system to operate abnormally. If this occurs, we
recommend that you replace the windshield with a
genuine Honda replacement windshield. Making
even minor repairs within the camera’s field of vision
or installing an aftermarket replacement windshield
may also cause the system to operate abnormally.
After replacing the windshield, have a dealer
recalibrate the camera. Proper calibration of the FCW
camera is necessary for the system to operate
properly.
Beep Camera-based system
The camera is located
behind the rearview mirror.
The beeper sounds and
the FCW indicator blinks
until a possible collision
is avoided.
* Not available on all models
Page 442 of 573
441
uuWhen DrivinguLane Departure Warning (LDW)
*
Driving
LDW may not activate or may not recognize lanes, and may activate even when
keeping in the middle of a lane under the following conditions.■LDW Limitations
Condition
●When you drive in bad weather (rain, fog, etc.).●A heavy load in the rear or modifications to the suspension tilts your vehicle.●An abnormal tire condition is detected (wrong tire size, flat tire, etc.).●When the windshield is blocked by dirt, mud, leaves, wet snow, etc.●When the temperature inside the system is high.●A sudden change between light and dark such as an entrance or exit of a tunnel.●You drive into the sunlight (e.g. at dawn or dusk).●When the windshield is dirty or cloudy.●When you drive in the shadows of trees, buildings, etc.●When your vehicle is towing a trailer.●When you drive on a wet road surface following another vehicle.uThe camera may perceive the tire tracks in the water as lane lines.
●When there is snow or wheel tracks on the side of the road.●When the road has many repaired area or an erased lane line.●When the vehicle is running over painted signs or crosswalk markings.●When you drive in a lane with worn-out lane markings.
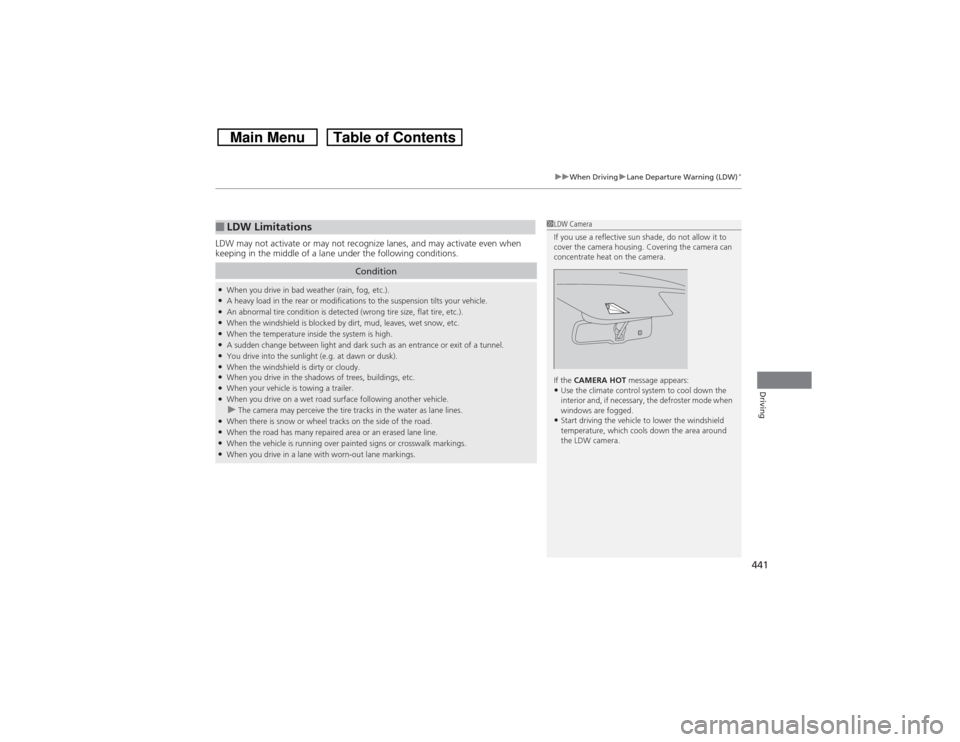
1LDW Camera
If you use a reflective sun shade, do not allow it to
cover the camera housing. Covering the camera can
concentrate heat on the camera.
If the CAMERA HOT message appears:•Use the climate control system to cool down the
interior and, if necessary, the defroster mode when
windows are fogged.•Start driving the vehicle to lower the windshield
temperature, which cools down the area around
the LDW camera.
Page 448 of 573
447
uuWhen DrivinguTire Pressure Monitoring System (TPMS) - Required Federal Explanation
Continued
Driving
Tire Pressure Monitoring System (TPMS) - Required Federal ExplanationEach tire, including the spare (if provided), should be checked
monthly when cold and inflated to the inflation pressure
recommended by the vehicle manufacturer on the vehicle placard
or tire inflation pressure label.
(If your vehicle has tires of a different size than the size indicated
on the vehicle placard or tire inflation pressure label, you should
determine the proper tire inflation pressure for those tires.)
As an added safety feature, your vehicle has been equipped with
a tire pressure monitoring system (TPMS) that illuminates a low
tire pressure telltale
when one or more of your tires is significantly under-inflated.
Accordingly, when the low tire pressure telltale illuminates, you
should stop and check your tires as soon as possible, and inflate
them to the proper pressure.
Driving on a significantly under-inflated tire causes the tire to
overheat and can lead to tire failure. Under-inflation also reduces
fuel efficiency and tire tread life, and may affect the vehicle’s
handling and stopping ability.U.S. models
Page 455 of 573
454Driving
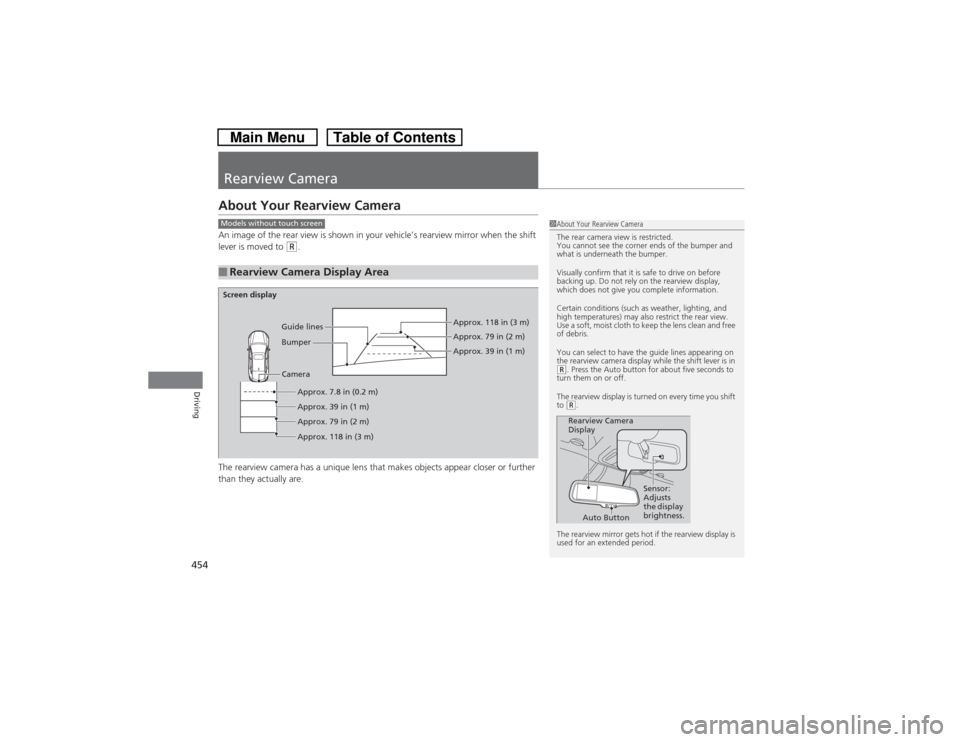
Rearview CameraAbout Your Rearview CameraAn image of the rear view is shown in your vehicle’s rearview mirror when the shift
lever is moved to
(R.
The rearview camera has a unique lens that makes objects appear closer or further
than they actually are.
■Rearview Camera Display Area
1About Your Rearview Camera
The rear camera view is restricted.
You cannot see the corner ends of the bumper and
what is underneath the bumper.
Visually confirm that it is safe to drive on before
backing up. Do not rely on the rearview display,
which does not give you complete information.
Certain conditions (such as weather, lighting, and
high temperatures) may also restrict the rear view.
Use a soft, moist cloth to keep the lens clean and free
of debris.
You can select to have the guide lines appearing on
the rearview camera display while the shift lever is in (R. Press the Auto button for about five seconds to
turn them on or off.
The rearview display is turned on every time you shift
to (R.
The rearview mirror gets hot if the rearview display is
used for an extended period.Rearview Camera
Display
Sensor:
Adjusts
the display
brightness.
Auto Button
Models without touch screenScreen display
Camera
Approx. 7.8 in (0.2 m)
Approx. 39 in (1 m)
Approx. 79 in (2 m)
Approx. 118 in (3 m)Approx. 118 in (3 m)
Approx. 79 in (2 m)
Approx. 39 in (1 m) Bumper Guide lines