Page 194 of 561
Continued193
uuAudio System Basic OperationuPlaying a USB Flash Drive
Features
1.Press the MENU button.
2. Rotate to select Music Search, then
press .
3. Rotate to select a folder.
4. Press to change the display to a list of
files in that folder.
5. Rotate to select a file, then press .
■How to Select a File from the Music Search List1Playing a USB Flash Drive
Use the recommended USB flash drives.
2 General Information on the Audio System
P. 289
Files in WMA format protected by digital rights
management (DRM) cannot be played.
The audio system displays Unplayable File, and then
skips to the next file.
If there is a problem, you may see an error message
on the audio/information screen.
2 iPod/USB Flash Drive P. 285
File Selection
Folder Selection
Main MenuTable of Contents
Page 196 of 561

195
uuAudio System Basic OperationuPlaying Bluetooth ® Audio
Continued
Features
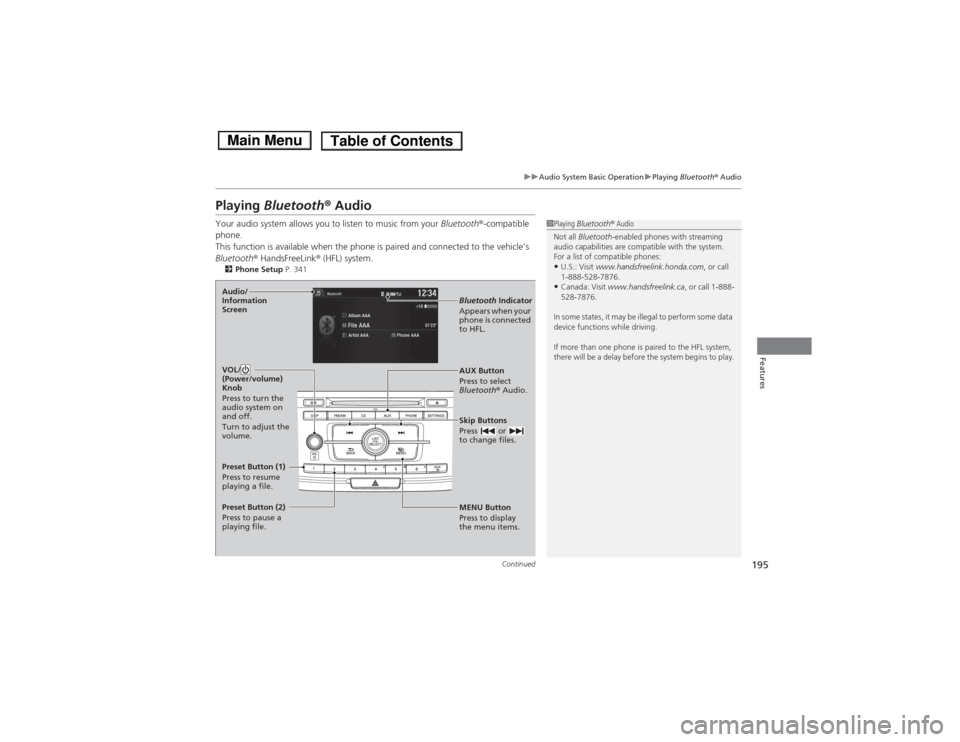
Playing Bluetooth ® Audio
Your audio system allows you to listen to music from your Bluetooth®-compatible
phone.
This function is available when the phone is paired and connected to the vehicle's
Bluetooth ® HandsFreeLink ® (HFL) system.
2 Phone Setup P. 341
1Playing Bluetooth ® Audio
Not all Bluetooth -enabled phones with streaming
audio capabilities are compatible with the system.
For a list of compatible phones:• U.S.: Visit www.handsfreelink.honda.com , or call
1-888-528-7876.
• Canada: Visit www.handsfreelink.ca , or call 1-888-
528-7876.
In some states, it may be illegal to perform some data
device functions while driving.
If more than one phone is paired to the HFL system,
there will be a delay before the system begins to play.
MENU Button
Press to display
the menu items.
AUX Button
Press to select
Bluetooth
® Audio.
Skip Buttons
Press or
to change files.
Bluetooth Indicator
Appears when your
phone is connected
to HFL.
VOL/
(Power/volume) Knob
Press to turn the
audio system on and off.
Turn to adjust the
volume.Audio/
Information Screen
Preset Button (1)
Press to resume
playing a file.
Preset Button (2)
Press to pause a
playing file.
Main MenuTable of Contents
Page 198 of 561

197
Features
Audio System Basic Operation
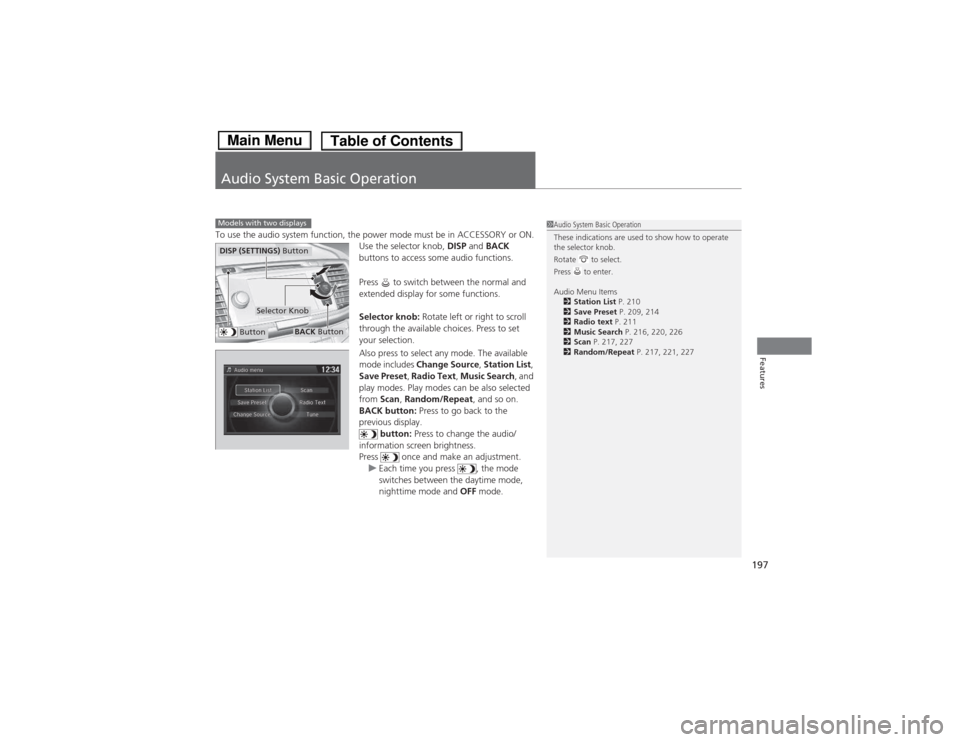
To use the audio system function, the power mode must be in ACCESSORY or ON.Use the selector knob, DISP and BACK
buttons to access some audio functions.
Press to switch between the normal and
extended display for some functions.
Selector knob: Rotate left or right to scroll
through the available choices. Press to set
your selection.
Also press to select any mode. The available
mode includes Change Source , Station List ,
Save Preset , Radio Text , Music Search , and
play modes. Play modes can be also selected from Scan, Random/Repeat , and so on.
BACK button: Press to go back to the
previous display. button: Press to change the audio/
information screen brightness.
Press once and make an adjustment.
uEach time you press , the mode
switches between the daytime mode,
nighttime mode and OFF mode.
Models with two displays1Audio System Basic Operation
These indications are used to show how to operate
the selector knob.
Rotate to select.
Press to enter.
Audio Menu Items
2 Station List P. 210
2 Save Preset P. 209, 214
2 Radio text P. 211
2 Music Search P. 216, 220, 226
2 Scan P. 217, 227
2 Random/Repeat P. 217, 221, 227
Button
Selector Knob
DISP (SETTINGS) Button
BACK Button
Main MenuTable of Contents
Page 199 of 561
198
uuAudio System Basic OperationuAudio with Touch Screen
Features
Audio with Touch Screen
Use the touch screen to operate the audio system. Select Source , then select an icon on the source list to switch the audio source.
Select More to display the menu items.
■Selecting an Audio Source
1Audio with Touch Screen
Icons that appear on the screen vary by the source
selected.
Select to go back to the previous screen.
Use the / / / icons to turn the page.
X
■Displaying the Menu Items
Select Source .
Source List Icons
Select More.
Menu Items
Main MenuTable of Contents
Page 200 of 561
Continued199
uuAudio System Basic OperationuAudio with Touch Screen
FeaturesSelect to adjust the clock and screen settings. ■Changing the Clock settings
2 Clock P. 110
■ Changing the Screen settings
1.Select Screen Settings .
2. Use
(+ , (- or others to adjust the setting.
■Changing the Clock/Screen Settings1Changing the Clock/Screen Settings
The followings are adjustable screen settings: •Brightness
• Contrast
• Black Level
• Display
Changes between the daytime or nighttime
modes.
• Beep
Mutes a beep that sounds every time you touch the
screen.
• Keyboard
Changes the on-screen keyboard from the
alphabetical order to the qwerty type.
• Fade Timer
Sets the screen black out timing.
Select .
Main MenuTable of Contents
Page 201 of 561
uuAudio System Basic OperationuAudio with Touch Screen
200
Features
1. Select More, then Sound Settings .
2. Use (+ , (- or others to adjust the setting.
Select to switch to the phone operation screen. 2 Bluetooth ® HandsFreeLink ® P. 333
■Adjusting the Sound1Adjusting the Sound
Select Off, Low , Mid or High for the SVC setting.
2 Adjusting the Sound P. 206
■Displaying the Phone Operation Screen1Displaying the Phone Operation Screen
The phone operation screen is available when a
phone is paired to HFL.
Select .
Main MenuTable of Contents
Page 202 of 561
201
uuAudio System Basic OperationuAudio/Information Screen
Continued
Features
Audio/Information Screen
Displays the audio status and wallpaper. From this screen, you can go to various
setup options.
Press the (display) button to change the display.
■Switching the Display
Using the button
(Display) ButtonAudioTrip Computer
(Current Drive)
Clock/Wallpaper Trip Computer
(History of Trip A)
Audio/Information Screen
Main MenuTable of Contents
Page 204 of 561

203
uuAudio System Basic OperationuAudio/Information Screen
Continued
Features
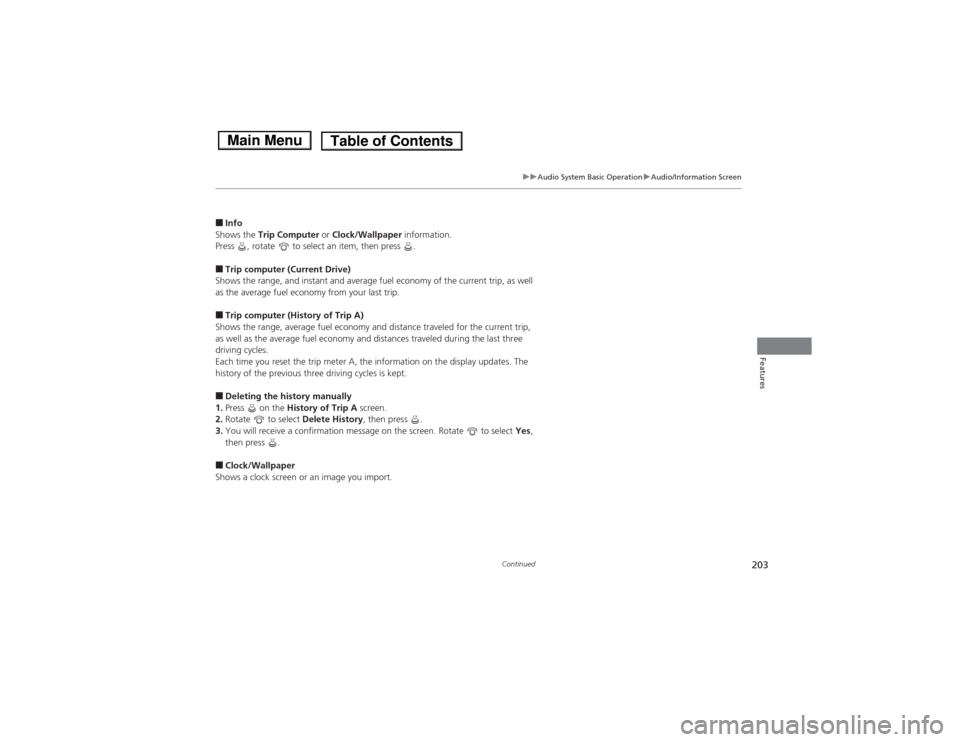
■Info
Shows the Trip Computer or Clock/Wallpaper information.
Press , rotate to select an item, then press .
■ Trip computer (Current Drive)
Shows the range, and instant and average fuel economy of the current trip, as well
as the average fuel economy from your last trip. ■ Trip computer (History of Trip A)
Shows the range, average fuel economy and distance traveled for the current trip,
as well as the average fuel economy and distances traveled during the last three
driving cycles.
Each time you reset the trip meter A, the information on the display updates. The
history of the previous three driving cycles is kept. ■ Deleting the history manually
1. Press on the History of Trip A screen.
2. Rotate to select Delete History, then press .
3. You will receive a confirmation message on the screen. Rotate to select Yes,
then press .
■ Clock/Wallpaper
Shows a clock screen or an image you import.
Main MenuTable of Contents