2014 GMC SIERRA change wheel
[x] Cancel search: change wheelPage 170 of 544
Black plate (32,1)GMC Sierra Owner Manual (GMNA-Localizing-U.S./Canada/Mexico-
5853626) - 2014 - 3rd crc - 6/6/14
5-32 Instruments and Controls
Hourmeter
This display shows the total number
of hours the engine has run.
Unit
This will change the displays on the
instrument cluster and DIC to either
metric or English (US)
measurements. To change the units,
press the trip odometer reset stem
when UNITS is displayed to enter
the Unit menu. Turn the trip
odometer reset stem to switch
between English and metric. Press
the trip odometer reset stem when
the desired setting is displayed.
Compass
The vehicle may have a compass in
the Driver Information Center (DIC).
SeeCompass on page 5-5.
Driver Information Center
(DIC) (Uplevel)
The DIC displays are shown in the
center of the instrument cluster in
the Info app. See Instrument Cluster
on page 5-10. The displays show
the status of many vehicle systems.
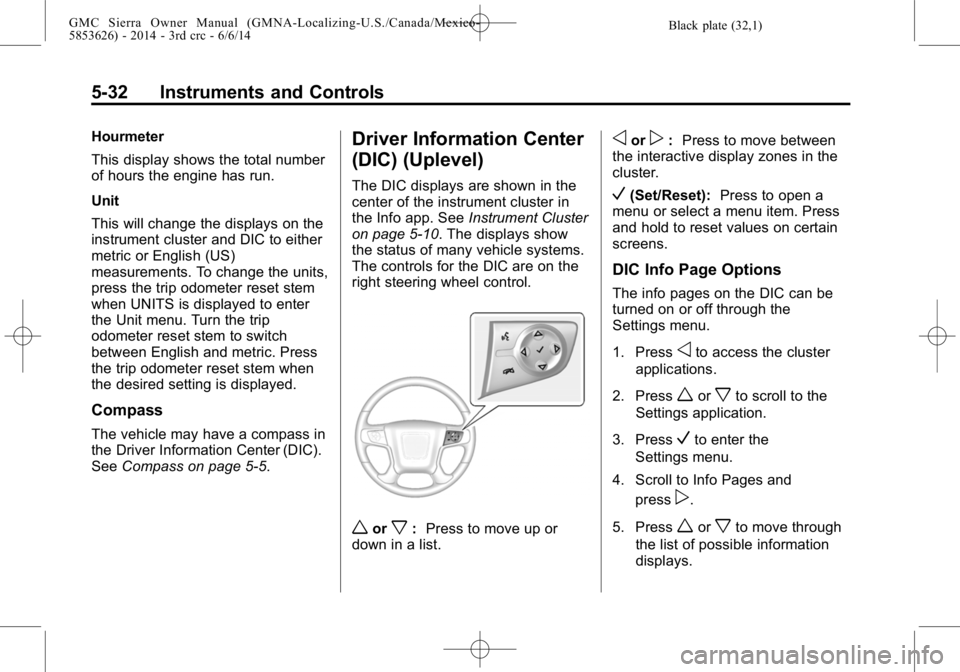
The controls for the DIC are on the
right steering wheel control.
worx: Press to move up or
down in a list.
oorp: Press to move between
the interactive display zones in the
cluster.
V(Set/Reset): Press to open a
menu or select a menu item. Press
and hold to reset values on certain
screens.
DIC Info Page Options
The info pages on the DIC can be
turned on or off through the
Settings menu.
1. Press
oto access the cluster
applications.
2. Press
worxto scroll to the
Settings application.
3. Press
Vto enter the
Settings menu.
4. Scroll to Info Pages and press
p.
5. Press
worxto move through
the list of possible information
displays.
Page 195 of 544
Black plate (1,1)GMC Sierra Owner Manual (GMNA-Localizing-U.S./Canada/Mexico-
5853626) - 2014 - 3rd crc - 6/6/14
Lighting 6-1
Lighting
Exterior Lighting
Exterior Lamp Controls . . . . . . . . 6-1
Exterior Lamps OffReminder . . . . . . . . . . . . . . . . . . . . 6-2
Headlamp High/Low-Beam Changer . . . . . . . . . . . . . . . . . . . . . 6-2
Flash-to-Pass . . . . . . . . . . . . . . . . . 6-3
Daytime Running Lamps (DRL) . . . . . . . . . . . . . . . . 6-3
Automatic Headlamp System . . . . . . . . . . . . . . . . . . . . . . 6-3
Hazard Warning Flashers . . . . . 6-4
Turn and Lane-Change Signals . . . . . . . . . . . . . . . . . . . . . . 6-5
Fog Lamps . . . . . . . . . . . . . . . . . . . . 6-5
Auxiliary Roof-Mounted Lamp . . . . . . . . . 6-6
Interior Lighting
Instrument Panel IlluminationControl . . . . . . . . . . . . . . . . . . . . . . 6-6
Cargo Lamp . . . . . . . . . . . . . . . . . . 6-7
Dome Lamps . . . . . . . . . . . . . . . . . 6-7
Reading Lamps . . . . . . . . . . . . . . . 6-7
Lighting Features
Entry Lighting . . . . . . . . . . . . . . . . . 6-8
Exit Lighting . . . . . . . . . . . . . . . . . . . 6-8
Battery Load Management . . . . 6-8
Battery Power Protection . . . . . . 6-9
Exterior Lighting
Exterior Lamp Controls
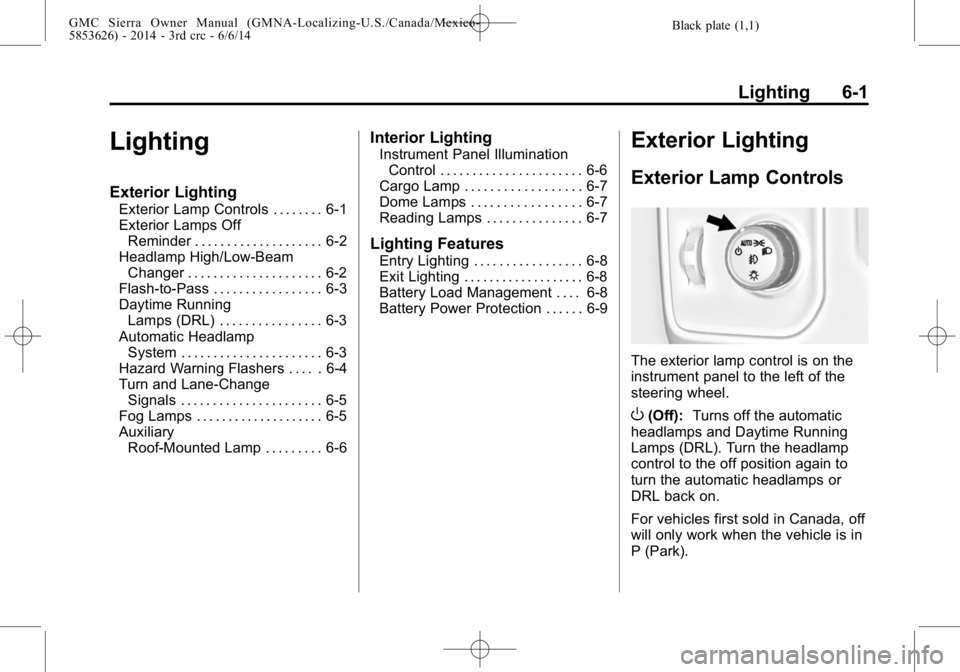
The exterior lamp control is on the
instrument panel to the left of the
steering wheel.
O(Off): Turns off the automatic
headlamps and Daytime Running
Lamps (DRL). Turn the headlamp
control to the off position again to
turn the automatic headlamps or
DRL back on.
For vehicles first sold in Canada, off
will only work when the vehicle is in
P (Park).
Page 200 of 544
Black plate (6,1)GMC Sierra Owner Manual (GMNA-Localizing-U.S./Canada/Mexico-
5853626) - 2014 - 3rd crc - 6/6/14
6-6 Lighting
When the headlamps are changed
to high beam, the fog lamps go off.
When the high-beam headlamps are
turned off, the fog lamps will come
on again.
Some localities have laws that
require the headlamps to be on with
the fog lamps.
Auxiliary
Roof-Mounted Lamp
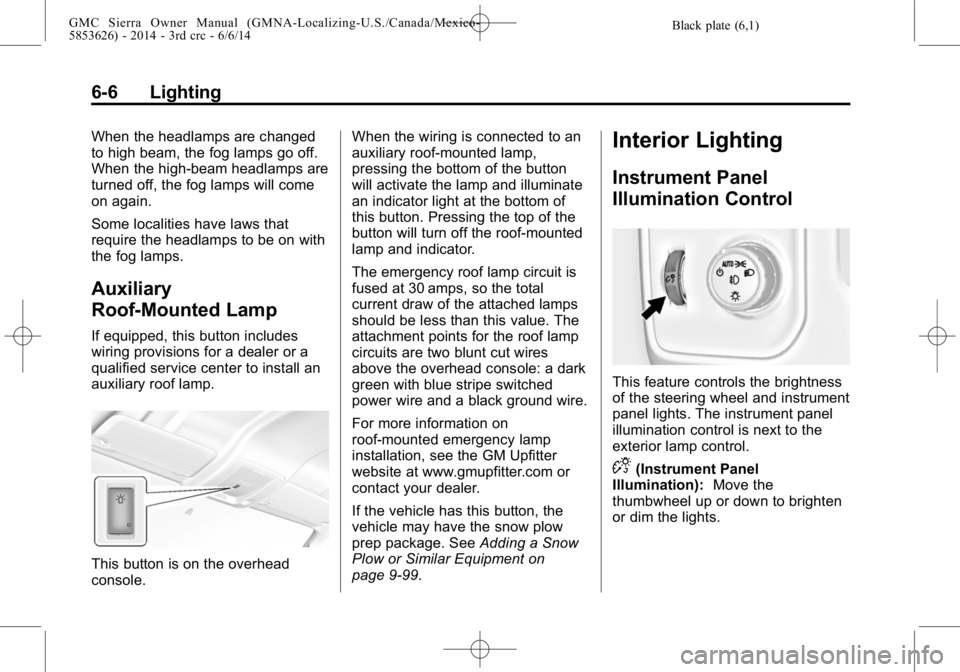
If equipped, this button includes
wiring provisions for a dealer or a
qualified service center to install an
auxiliary roof lamp.
This button is on the overhead
console.When the wiring is connected to an
auxiliary roof-mounted lamp,
pressing the bottom of the button
will activate the lamp and illuminate
an indicator light at the bottom of
this button. Pressing the top of the
button will turn off the roof-mounted
lamp and indicator.
The emergency roof lamp circuit is
fused at 30 amps, so the total
current draw of the attached lamps
should be less than this value. The
attachment points for the roof lamp
circuits are two blunt cut wires
above the overhead console: a dark
green with blue stripe switched
power wire and a black ground wire.
For more information on
roof-mounted emergency lamp
installation, see the GM Upfitter
website at www.gmupfitter.com or
contact your dealer.
If the vehicle has this button, the
vehicle may have the snow plow
prep package. See
Adding a Snow
Plow or Similar Equipment on
page 9-99.
Interior Lighting
Instrument Panel
Illumination Control
This feature controls the brightness
of the steering wheel and instrument
panel lights. The instrument panel
illumination control is next to the
exterior lamp control.
D(Instrument Panel
Illumination): Move the
thumbwheel up or down to brighten
or dim the lights.
Page 213 of 544
Black plate (9,1)GMC Sierra Owner Manual (GMNA-Localizing-U.S./Canada/Mexico-
5853626) - 2014 - 3rd crc - 6/6/14
Infotainment System 7-9
Radio
AM-FM Radio
Playing the Radio
While on the audio main page,
press the RADIO button repeatedly
to cycle through the available
sources AM, FM, and SiriusXM
®
(if equipped) or press the MEDIA
button repeatedly to cycle through
the available sources Bluetooth
®
Audio (if equipped), CD, USB, SD,
and AUX.
The steering wheel controls can
also be used to adjust the volume.
SeeSteering Wheel Controls on
page 5-3.
AM, FM, or SiriusXM (If Equipped)
To select AM, FM, or SiriusXM (if
equipped), press the RADIO button
to toggle to the desired broadcast
source. Press the RADIO faceplate button
to change the active radio source or
change to the radio from another
source. Press the MENU knob and
the following radio settings may
display:
Tone Settings:
.Bass, Midrange, and Treble:
Turn the MENU knob and
highlight. Press the MENU knob
to select. Turn the MENU knob
to adjust.
.Balance:
Turn the MENU knob
to highlight. Press the MENU
knob to select. Turn the MENU
knob left for more sound from
the left speakers or right for
more sound from the right
speakers. The middle position
balances the sound between the
left and right speakers.
.Fade: Turn the MENU knob to
highlight. Press the MENU knob
to select. Turn the MENU knob
to the left for more sound from
the front speakers and to the
right for more sound from the rear speakers. The middle
position balances the sound
between the front and rear
speakers.
.DSP: If equipped with a Bose
Surround®sound system, it will
have three DSP modes
including:
‐ Normal: Adjusts the audio to
provide the best sound for all
seating positions.
‐ Driver: Adjusts the audio to
provide the best sound for the
driver.
‐ Centerpoint: Creates a
surround sound from nearly
any audio source.
.EQ (Equalizer): If equipped with
a Bose Sound System, turn the
MENU knob to highlight. Turn
the MENU knob to scroll through
the options. Press the MENU
knob to select. Press the
o
BACK button to go to the
previous menu.
Page 276 of 544

Black plate (6,1)GMC Sierra Owner Manual (GMNA-Localizing-U.S./Canada/Mexico-
5853626) - 2014 - CRC - 6/6/14
9-6 Driving and Operating
If the vehicle starts to slide, follow
these suggestions:
.Ease your foot off the
accelerator pedal and steer the
way you want the vehicle to go.
The vehicle may straighten out.
Be ready for a second skid if it
occurs.
.Slow down and adjust your
driving according to weather
conditions. Stopping distance
can be longer and vehicle
control can be affected when
traction is reduced by water,
snow, ice, gravel, or other
material on the road. Learn to
recognize warning clues—such
as enough water, ice, or packed
snow on the road to make a
mirrored surface —and slow
down when you have any doubt.
.Try to avoid sudden steering,
acceleration, or braking,
including reducing vehicle speed
by shifting to a lower gear. Any
sudden changes could cause
the tires to slide. Remember: Antilock brakes help
avoid only the braking skid.
Off-Road Driving
Four-wheel-drive vehicles can be
used for off-road driving. Vehicles
without four-wheel drive and
vehicles not equipped with All
Terrain (AT) or On-Off Road (OOR)
tires must not be driven off-road
except on a level, solid surface. For
more contact information about the
original equipment tires, see the
Limited Warranty and Owner
Assistance Information manual.
One of the best ways for successful
off-road driving is to control the
speed.
{Warning
When driving off-road, bouncing
and quick changes in direction
can easily throw you out of
position. This could cause you to
(Continued)
Warning (Continued)
lose control and crash. You and
your passengers should always
wear safety belts.
Before Driving Off-Road
.Have all necessary maintenance
and service work completed.
.Fuel the vehicle, fill fluid levels,
and check inflation pressure in
all tires, including the spare,
if equipped.
.Read all the information about
four-wheel-drive vehicles in this
manual.
.Remove any underbody air
deflector, if equipped. Re-attach
the air deflector after off-road
driving.
.Know the local laws that apply to
off-road driving.
Page 280 of 544
Black plate (10,1)GMC Sierra Owner Manual (GMNA-Localizing-U.S./Canada/Mexico-
5853626) - 2014 - CRC - 6/6/14
9-10 Driving and Operating
Driving in Mud, Sand, Snow,
or Ice
Use a low gear when driving in
mud—the deeper the mud, the
lower the gear. Keep the vehicle
moving to avoid getting stuck.
Traction changes when driving on
sand. On loose sand, such as on
beaches or sand dunes, the tires
tend to sink into the sand. This
affects steering, accelerating, and
braking. Drive at a reduced speed
and avoid sharp turns or abrupt
maneuvers.
Traction is reduced on hard packed
snow and ice and it is easy to lose
control. Reduce vehicle speed when
driving on hard packed snow
and ice.
{Warning
Driving on frozen lakes, ponds,
or rivers can be dangerous. Ice
conditions vary greatly and the
(Continued)
Warning (Continued)
vehicle could fall through the ice;
you and your passengers could
drown. Drive your vehicle on safe
surfaces only.
Driving in Water
{Warning
Driving through rushing water can
be dangerous. Deep water can
sweep your vehicle downstream
and you and your passengers
could drown. If it is only shallow
water, it can still wash away the
ground from under your tires.
Traction could be lost, and the
vehicle could roll over. Do not
drive through rushing water.
{Caution
Do not drive through standing
water if it is deep enough to cover
the wheel hubs, axles, or exhaust
pipe. Deep water can damage the
axle and other vehicle parts.
If the standing water is not too deep,
drive slowly through it. At faster
speeds, water splashes and the
vehicle can stall. When going
through water, the brakes get wet
and it may take longer to stop. See
“Driving on Wet Roads” later in this
section.
After Off-Road Driving
Remove any brush or debris that
has collected on the underbody or
chassis, or under the hood. These
accumulations can be a fire hazard.
After operation in mud or sand,
have the brake linings cleaned and
checked. These substances can
cause glazing and uneven braking.
Check the body structure, steering,
Page 285 of 544
Black plate (15,1)GMC Sierra Owner Manual (GMNA-Localizing-U.S./Canada/Mexico-
5853626) - 2014 - CRC - 6/6/14
Driving and Operating 9-15
If that does not get the vehicle out
after a few tries, it might need to be
towed out. SeeTowing the Vehicle
on page 10-93. Recovery hooks can
be used, if the vehicle has them.
Recovery Hooks
{Warning
Never pull on recovery hooks
from the side. The hooks could
break and you and others could
be injured. When using recovery
hooks, always pull the vehicle
from the front.
{Caution
Do not drive through standing
water if it is deep enough to cover
the wheel hubs, axles, or exhaust
pipe. Deep water can damage the
axle and other vehicle parts.
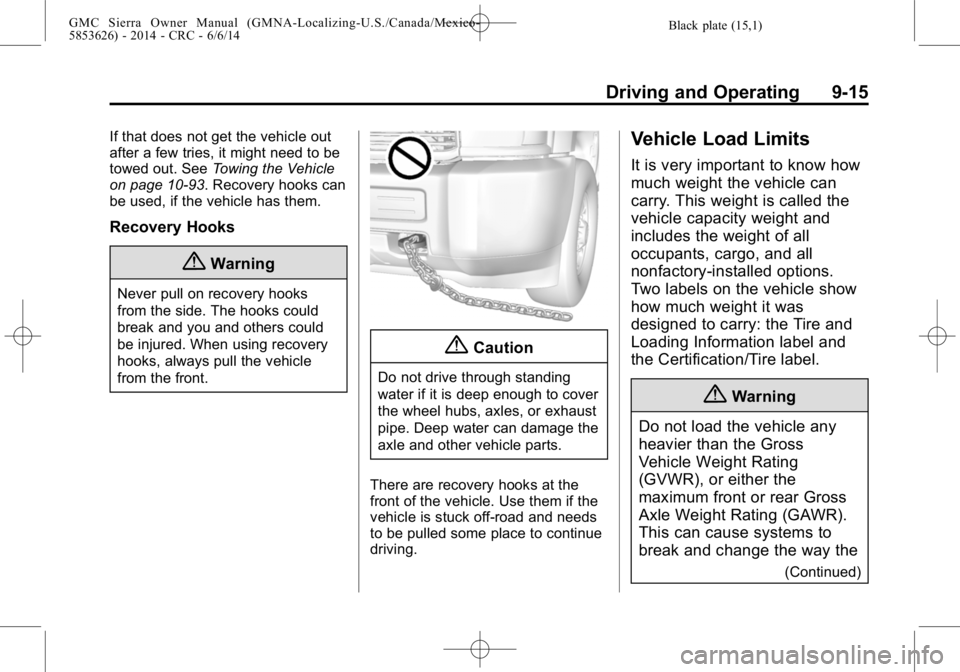
There are recovery hooks at the
front of the vehicle. Use them if the
vehicle is stuck off-road and needs
to be pulled some place to continue
driving.
Vehicle Load Limits
It is very important to know how
much weight the vehicle can
carry. This weight is called the
vehicle capacity weight and
includes the weight of all
occupants, cargo, and all
nonfactory-installed options.
Two labels on the vehicle show
how much weight it was
designed to carry: the Tire and
Loading Information label and
the Certification/Tire label.
{Warning
Do not load the vehicle any
heavier than the Gross
Vehicle Weight Rating
(GVWR), or either the
maximum front or rear Gross
Axle Weight Rating (GAWR).
This can cause systems to
break and change the way the
(Continued)
Page 296 of 544

Black plate (26,1)GMC Sierra Owner Manual (GMNA-Localizing-U.S./Canada/Mexico-
5853626) - 2014 - CRC - 6/6/14
9-26 Driving and Operating
2 (ACC/ACCESSORY):This
position lets things like the radio
and the windshield wipers operate
while the engine is off. It also
unlocks the steering wheel. Use this
position if the vehicle must be
pushed or towed.
3 (ON/RUN): This position can be
used to operate the electrical
accessories and to display some
instrument cluster warning and
indicator lights. This position can
also be used for service and
diagnostics, and to verify the proper
operation of the malfunction
indicator lamp as may be required
for emission inspection purposes.
The switch stays in this position
when the engine is running. The
transmission is also unlocked in this
position on automatic transmission
vehicles.
If the key is left in the ACC/
ACCESSORY or ON/RUN position
with the engine off, the battery could
be drained. The vehicle may not
start if the battery is allowed to drain
for an extended period of time. 4 (START):
This is the position that
starts the engine. When the engine
starts, release the key. The ignition
switch returns to ON/RUN for
driving.
A warning tone will sound when the
driver door is opened and the
ignition is in ACC/ACCESSORY or
LOCK/OFF, and the key is in the
ignition.
Starting the Engine
If the vehicle has a diesel engine,
see the Duramax diesel
supplement.
{Caution
Do not try to shift to P (Park) if the
vehicle is moving. If you do, you
could damage the transmission.
Shift to P (Park) only when the
vehicle is stopped. Move the shift lever to P (Park) or
N (Neutral). The engine will not start
in any other position. To restart the
engine when the vehicle is already
moving, use N (Neutral) only.
{Caution
If you add electrical parts or
accessories, you could change
the way the engine operates. Any
resulting damage would not be
covered by the vehicle warranty.
See
Add-On Electrical Equipment
on page 9-99.