Page 2 of 20
2
Integrated Trailer Brake ControlFCustomizable Driver Display
Telescoping Steering Wheel Control
Turn Signal/Windshield Wipers Lever4WD Control♦
Cruise Control Buttons/Heated Steering
Wheel Button
Audio Next/Previous Favorite Station Controls (behind steering
wheel)
Power Mirror Control/Door Lock Switch/ Window
Buttons
Instrument Panel
Tilt Steering Wheel Lever
Voice Recognition Buttons/Customizable
Driver Display Controls
Audio Volume Controls (behind
steering wheel)
Memory Seat Controls
Instrument Panel Illumination Control/Exterior Lamp Control
StabiliTrak Off
Antilock Brake System
StabiliTrak Active
Check Engine
Tow/Haul Mode
Hill Descent Control
Low Fuel
Traction Control Off
Oil Pressure
Engine Coolant Temperature
Charging System
Door Ajar
Lane Departure Warning
Cruise Control Set
Forward Collision Alert
Security
Symbols
Tow/Haul Button
Page 3 of 20
3
Refer to your Owner Manual to learn about the information being relayed by the lights, gauges and indicators on the instrument cluster.
See In Brief in your Owner Manual.
Driver’s Heated/Ventilated Seat ButtonsF
Infotainment System Touch Screen
Passenger’s Heated/Ventilated Seat ButtonsFClimate Controls
Airbag Readiness
Low Tire Pressure
Brake System
Safety Belt Reminder
F Optional equipment
Accessory Power Outlets
Adjustable Pedals Switch/Traction Control and StabiliTrak Button/Cargo Box Lamp Button
Front and Rear Parking Assist Button/Lane Departure Warning ButtonF/Hill Descent Control ButtonF
110V OutletUSB Ports
Page 10 of 20
10F Optional equipment *screen measured diagonally
BACK: Move back one level in the menus
Home page
Eject disc
Interaction Selector: Touch to display the favorites list
TUNE/MENU: Tune radio stations/Open and select menus
Applications: Touch the screen icon to access the application
Additional Pages: Touch to view additional pages of applications (if available)
Power/ Volume
MEDIA: Select the media source
RADIO: Select AM, FM, XM♦
SEEK: Previous/Next radio station, track or file
Refer to your Owner Manual for important safety information about using \
the infotainment system while driving.
The GMC IntelliLink System is controlled by using the audio system buttons, touch screen, voice recognition and audio steering wheel controls.
See your Infotainment System Owner Manual.
GMC IntelliLink Radio with 8-Inch* Color Screen
Page 11 of 20

11
GMC IntelliLink Radio with 8-Inch* Color Screen
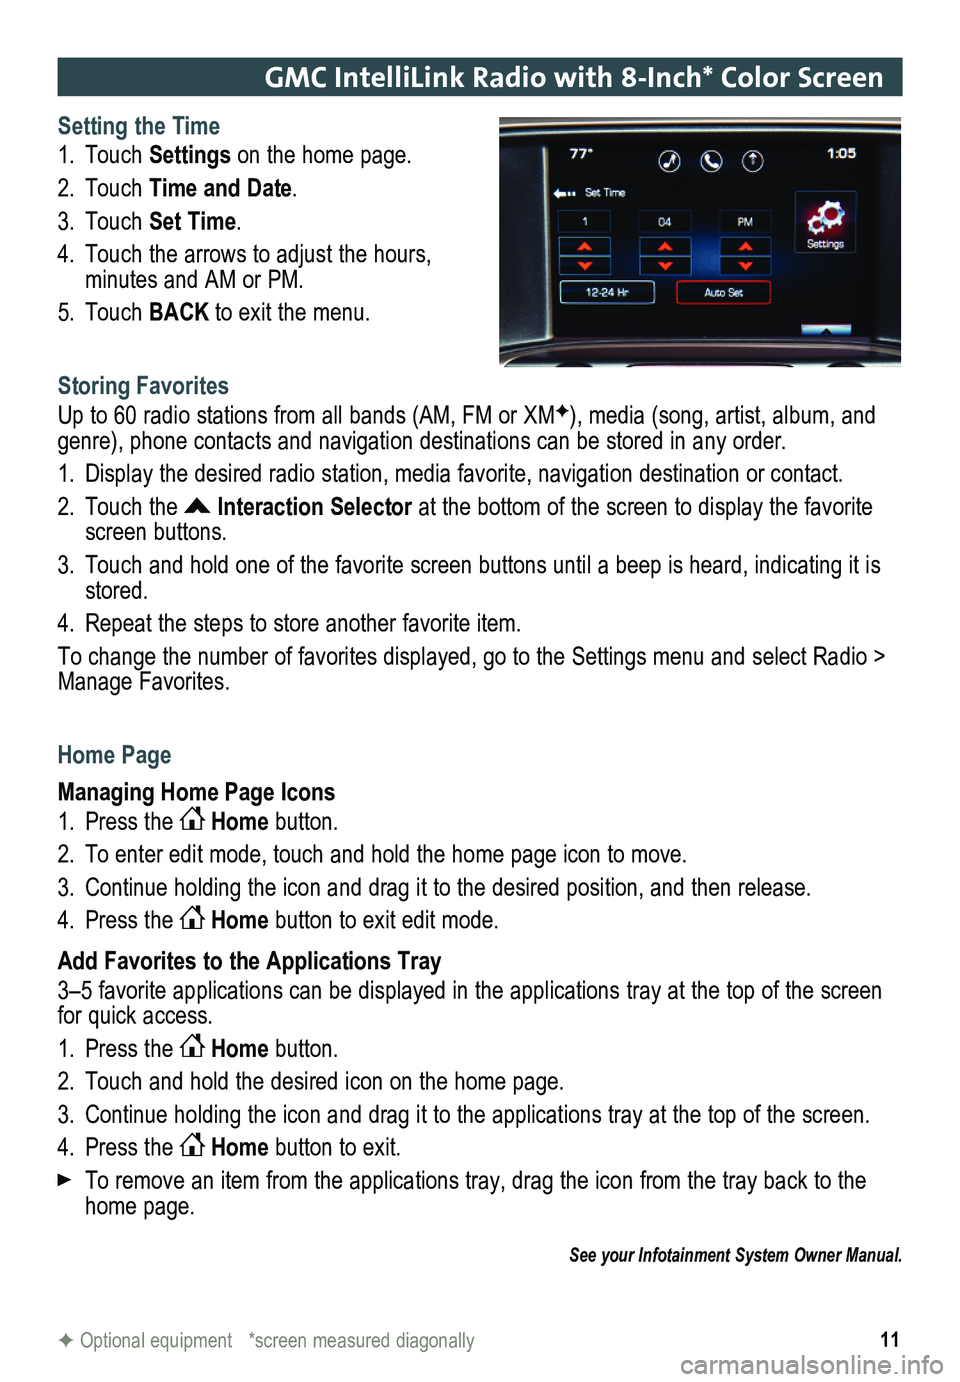
Setting the Time
1. Touch Settings on the home page.
2. Touch Time and Date.
3. Touch Set Time.
4. Touch the arrows to adjust the hours,
minutes and AM or PM.
5. Touch BACK to exit the menu.
Storing Favorites
Up to 60 radio stations from all bands (AM, FM or XMF), media (song, artist, album, and genre), phone contacts and navigation destinations can be stored in any order.
1. Display the desired radio station, media favorite, navigation destination or contact.
2. Touch the Interaction Selector at the bottom of the screen to display the favorite screen buttons.
3. Touch and hold one of the favorite screen buttons until a beep is heard,\
indicating it is stored.
4. Repeat the steps to store another favorite item.
To change the number of favorites displayed, go to the Settings menu and select Radio > Manage Favorites.
Home Page
Managing Home Page Icons
1. Press the Home button.
2. To enter edit mode, touch and hold the home page icon to move.
3. Continue holding the icon and drag it to the desired position, and then release.
4. Press the Home button to exit edit mode.
Add Favorites to the Applications Tray
3–5 favorite applications can be displayed in the applications tray at the top of the screen for quick access.
1. Press the Home button.
2. Touch and hold the desired icon on the home page.
3. Continue holding the icon and drag it to the applications tray at the top of the screen.
4. Press the Home button to exit.
To remove an item from the applications tray, drag the icon from the tray back to the home page.
See your Infotainment System Owner Manual.
F Optional equipment *screen measured diagonally
Page 15 of 20

15F Optional equipment
Vehicle Personalization
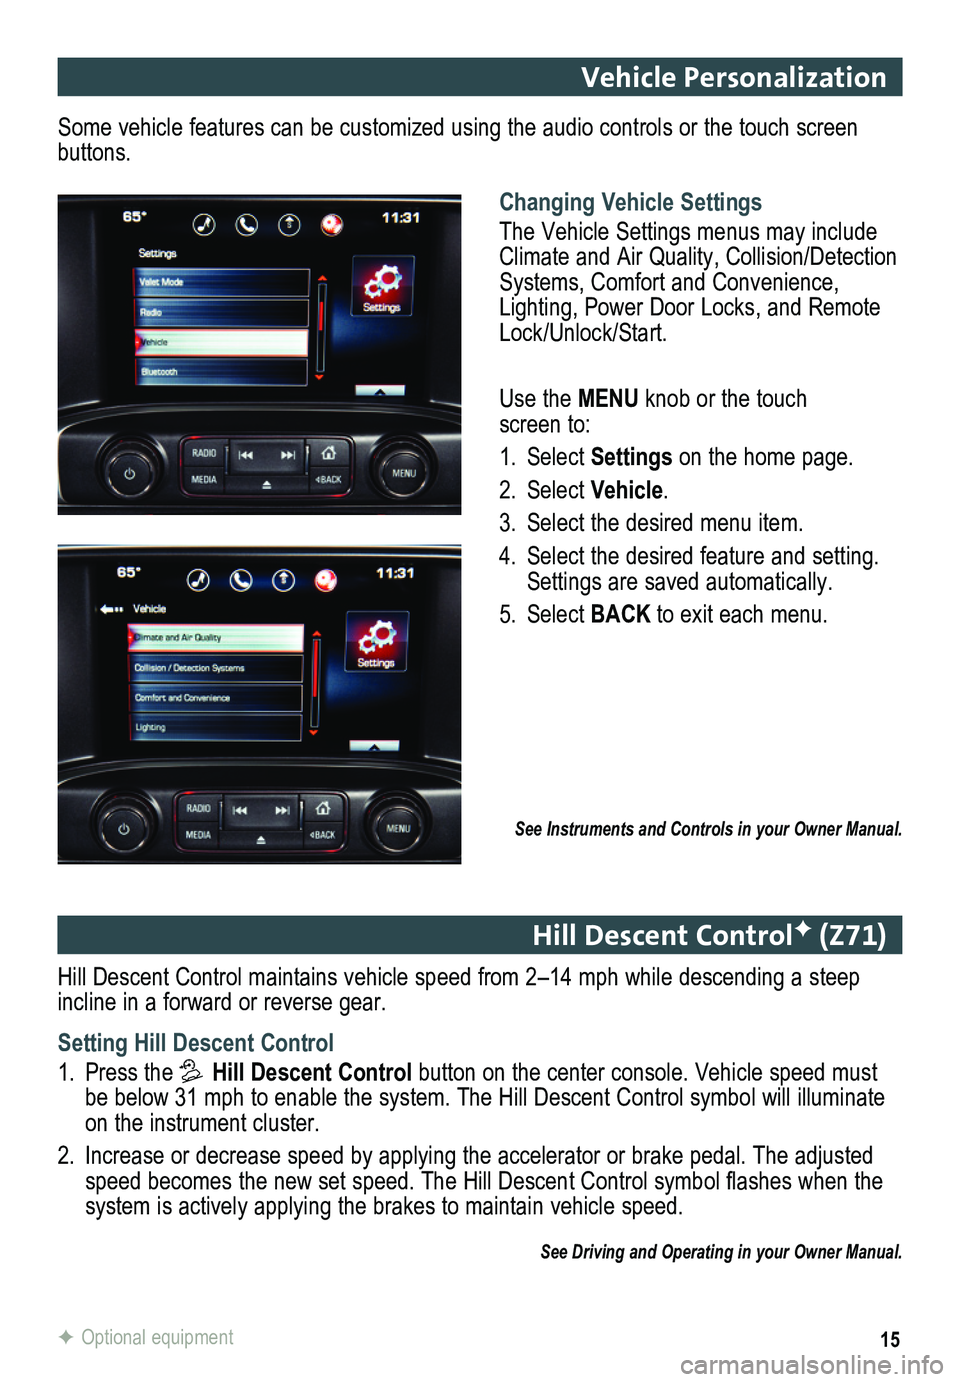
Changing Vehicle Settings
The Vehicle Settings menus may include Climate and Air Quality, Collision/Detection Systems, Comfort and Convenience, Lighting, Power Door Locks, and Remote Lock/Unlock/Start.
Use the MENU knob or the touch screen to:
1. Select Settings on the home page.
2. Select Vehicle.
3. Select the desired menu item.
4. Select the desired feature and setting. Settings are saved automatically.
5. Select BACK to exit each menu.
See Instruments and Controls in your Owner Manual.
Some vehicle features can be customized using the audio controls or the touch screen buttons.
Hill Descent Control maintains vehicle speed from 2–14 mph while descending a steep incline in a forward or reverse gear.
Setting Hill Descent Control
1. Press the Hill Descent Control button on the center console. Vehicle speed must be below 31 mph to enable the system. The Hill Descent Control symbol wi\
ll illuminate on the instrument cluster.
2. Increase or decrease speed by applying the accelerator or brake pedal. T\
he adjusted speed becomes the new set speed. The Hill Descent Control symbol flashes when the system is actively applying the brakes to maintain vehicle speed.
See Driving and Operating in your Owner Manual.
Hill Descent ControlF (Z71)