2014 GMC ACADIA lock
[x] Cancel search: lockPage 306 of 414

Black plate (36,1)GMC Acadia/Acadia Denali Owner Manual (GMNA-Localizing-U.S./Canada/
Mexico-6014315) - 2014 - crc - 8/15/13
10-36 Vehicle Care
FusesUsage
Collision Alert/
Universal Remote
System
PDM Power Mirrors, Liftgate Release
PWR MODE Power Mode PWR MIR Power Mirrors RDO Radio
REAR WPR Rear Wiper
RT TRN SIG Passenger Side Turn Signal
STR WHL ILLUM Steering Wheel
Illumination
USB CHRG USB Charging
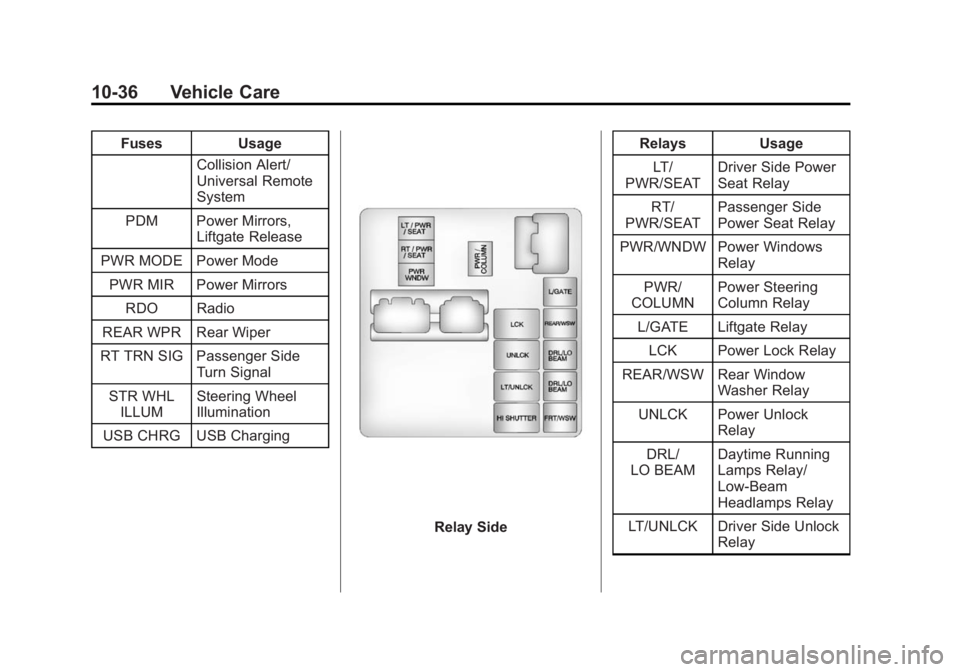
Relay Side Relays Usage
LT/
PWR/SEAT Driver Side Power
Seat Relay
RT/
PWR/SEAT Passenger Side
Power Seat Relay
PWR/WNDW Power Windows Relay
PWR/
COLUMN Power Steering
Column Relay
L/GATE Liftgate Relay
LCK Power Lock Relay
REAR/WSW Rear Window Washer Relay
UNLCK Power Unlock Relay
DRL/
LO BEAM Daytime Running
Lamps Relay/
Low-Beam
Headlamps Relay
LT/UNLCK Driver Side Unlock Relay
Page 319 of 414

Black plate (49,1)GMC Acadia/Acadia Denali Owner Manual (GMNA-Localizing-U.S./Canada/
Mexico-6014315) - 2014 - crc - 8/15/13
Vehicle Care 10-49
TPMS Sensor Matching
Process
Each TPMS sensor has a unique
identification code. The identification
code needs to be matched to a new
tire/wheel position after rotating the
tires or replacing one or more of the
TPMS sensors. The TPMS sensor
matching process should also be
performed after replacing a spare
tire with a road tire containing the
TPMS sensor. The malfunction light
and the DIC message should go off
at the next ignition cycle. The
sensors are matched to the tire/
wheel positions, using a TPMS
relearn tool, in the following order:
driver side front tire, passenger side
front tire, passenger side rear tire,
and driver side rear. See your
dealer for service or to purchase a
relearn tool.
There are two minutes to match the
first tire/wheel position, and
five minutes overall to match all four
tire/wheel positions. If it takes
longer, the matching process stops
and must be restarted.The TPMS sensor matching process
is outlined below:
1. Set the parking brake.
2. Turn the ignition to ON/RUN with
the engine off.
3. Press the Remote Keyless Entry (RKE) transmitter's
QandK
buttons at the same time for
approximately five seconds. The
horn sounds twice to signal the
receiver is in relearn mode and
TIRE LEARNING ACTIVE
message displays on the DIC
screen.
4. Start with the driver side front tire.
5. Place the relearn tool against the tire sidewall, near the valve
stem. Then press the button to
activate the TPMS sensor.
A horn chirp confirms that the
sensor identification code has
been matched to this tire and
wheel position. 6. Proceed to the passenger side
front tire, and repeat the
procedure in Step 5.
7. Proceed to the passenger side rear tire, and repeat the
procedure in Step 5.
8. Proceed to the driver side rear tire, and repeat the procedure in
Step 5. The horn sounds two
times to indicate the sensor
identification code has been
matched to the driver side rear
tire, and the TPMS sensor
matching process is no longer
active. The TIRE LEARNING
ACTIVE message on the DIC
display screen goes off.
9. Turn the ignition to LOCK/OFF.
10. Set all four tires to the recommended air pressure
level as indicated on the Tire
and Loading Information label.
11. Put the valve caps back on the valve stems.
Page 324 of 414

Black plate (54,1)GMC Acadia/Acadia Denali Owner Manual (GMNA-Localizing-U.S./Canada/
Mexico-6014315) - 2014 - crc - 8/15/13
10-54 Vehicle Care
The Tire and Loading
Information label indicates the
original equipment tires on the
vehicle. SeeVehicle Load Limits
on page 9-10.
Different Size Tires and
Wheels
If wheels or tires are installed that
are a different size than the original
equipment wheels and tires, vehicle
performance, including its braking,
ride and handling characteristics,
stability, and resistance to rollover
may be affected. If the vehicle has
electronic systems such as antilock
brakes, rollover airbags, traction
control, electronic stability control,
or All-Wheel Drive, the performance
of these systems can also be
affected.
{Warning
If different sized wheels are used,
there may not be an acceptable
level of performance and safety if
tires not recommended for those
wheels are selected. This
increases the chance of a crash
and serious injury. Only use GM
specific wheel and tire systems
developed for the vehicle, and
have them properly installed by a
GM certified technician.
See Buying New Tires on
page 10-52 andAccessories and
Modifications on page 10-2.
Uniform Tire Quality
Grading
Quality grades can be found
where applicable on the tire
sidewall between tread shoulder
and maximum section width. For
example:
Treadwear 200 Traction AA
Temperature A
The following information relates
to the system developed by the
United States National Highway
Traffic Safety Administration
(NHTSA), which grades tires by
treadwear, traction, and
temperature performance. This
applies only to vehicles sold in
the United States. The grades
are molded on the sidewalls of
most passenger car tires. The
Uniform Tire Quality Grading
(UTQG) system does not apply
to deep tread, winter tires,
compact spare tires, tires with
Page 328 of 414

Black plate (58,1)GMC Acadia/Acadia Denali Owner Manual (GMNA-Localizing-U.S./Canada/
Mexico-6014315) - 2014 - crc - 8/15/13
10-58 Vehicle Care
{Warning
Driving on a flat tire will cause
permanent damage to the tire.
Re-inflating a tire after it has been
driven on while severely
underinflated or flat may cause a
blowout and a serious crash.
Never attempt to re-inflate a tire
that has been driven on while
severely underinflated or flat.
Have your dealer or an authorized
tire service center repair or
replace the flat tire as soon as
possible.
{Warning
Lifting a vehicle and getting under
it to do maintenance or repairs is
dangerous without the
appropriate safety equipment and
training. If a jack is provided with
the vehicle, it is designed only for(Continued)
Warning (Continued)
changing a flat tire. If it is used for
anything else, you or others could
be badly injured or killed if the
vehicle slips off the jack. If a jack
is provided with the vehicle, only
use it for changing a flat tire.
If a tire goes flat, avoid further tire
and wheel damage by driving slowly
to a level place, well off the road,
if possible. Turn on the hazard
warning flashers. See Hazard
Warning Flashers on page 6-3.
{Warning
Changing a tire can be
dangerous. The vehicle can slip
off the jack and roll over or fall
causing injury or death. Find a
level place to change the tire. To
help prevent the vehicle from
moving:
(Continued)
Warning (Continued)
1. Set the parking brake firmly.
2. Put an automatictransmission in P (Park) or a
manual transmission in
1 (First) or R (Reverse).
3. Turn off the engine and do not restart while the vehicle
is raised.
4. Do not allow passengers to remain in the vehicle.
5. Place wheel blocks on both sides of the tire at the
opposite corner of the tire
being changed.
When the vehicle has a flat tire (2),
use the following example as a
guide to assist in the placement of
the wheel blocks (1).
Page 329 of 414

Black plate (59,1)GMC Acadia/Acadia Denali Owner Manual (GMNA-Localizing-U.S./Canada/
Mexico-6014315) - 2014 - crc - 8/15/13
Vehicle Care 10-59
1. Wheel Block
2. Flat Tire
The following information explains
how to repair or change a tire.
Tire Changing
Removing Tools
The tools needed to remove the
spare tire are located in the storage
compartment on the driver side, at
the rear of the vehicle.
1. Tool Bag
2. Wing Bolt
3. Jack
1. Open the jack storagecompartment by pulling on the
latch tab, located toward the rear
of the vehicle, and pulling the
cover off.
2. Remove the wing bolt (2) by turning it counterclockwise.
3. Push the jack (3) up out of the holding bracket and remove the
tool bag (1). 4. Turn the jack on its side, with the
bottom facing toward you.
5. Pull the jack straight out, bottom first.
1. Jack
2. Wrench (Three-Piece Shown,One-Piece Similar)
The tools you will be using include
the jack (1) and wrench (2).
Page 330 of 414

Black plate (60,1)GMC Acadia/Acadia Denali Owner Manual (GMNA-Localizing-U.S./Canada/
Mexico-6014315) - 2014 - crc - 8/15/13
10-60 Vehicle Care
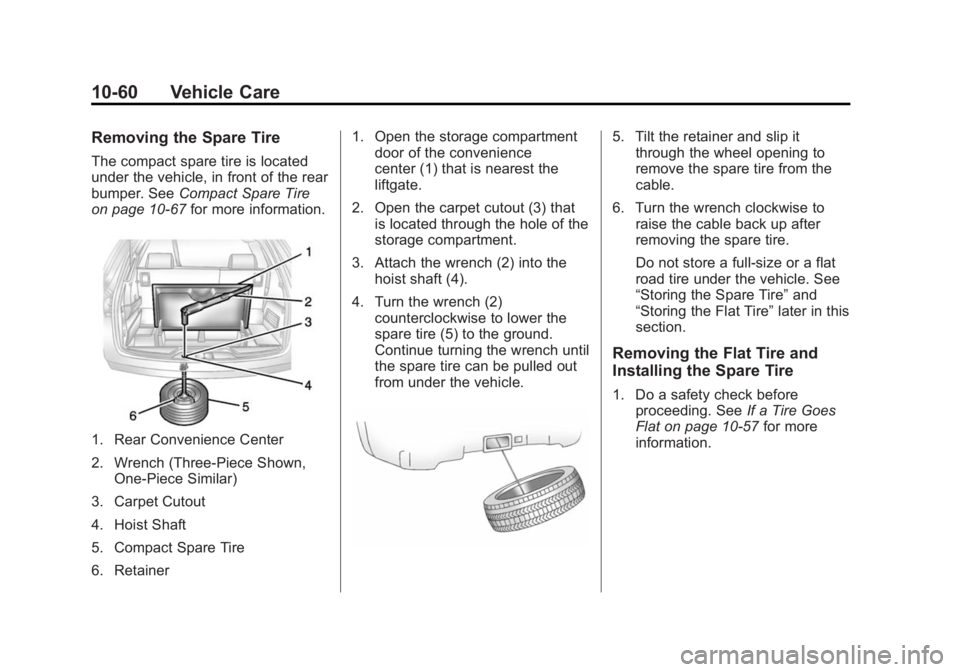
Removing the Spare Tire
The compact spare tire is located
under the vehicle, in front of the rear
bumper. SeeCompact Spare Tire
on page 10-67 for more information.
1. Rear Convenience Center
2. Wrench (Three-Piece Shown,
One-Piece Similar)
3. Carpet Cutout
4. Hoist Shaft
5. Compact Spare Tire
6. Retainer 1. Open the storage compartment
door of the convenience
center (1) that is nearest the
liftgate.
2. Open the carpet cutout (3) that is located through the hole of the
storage compartment.
3. Attach the wrench (2) into the hoist shaft (4).
4. Turn the wrench (2) counterclockwise to lower the
spare tire (5) to the ground.
Continue turning the wrench until
the spare tire can be pulled out
from under the vehicle.
5. Tilt the retainer and slip itthrough the wheel opening to
remove the spare tire from the
cable.
6. Turn the wrench clockwise to raise the cable back up after
removing the spare tire.
Do not store a full-size or a flat
road tire under the vehicle. See
“Storing the Spare Tire” and
“Storing the Flat Tire” later in this
section.
Removing the Flat Tire and
Installing the Spare Tire
1. Do a safety check before proceeding. See If a Tire Goes
Flat on page 10-57 for more
information.
Page 331 of 414

Black plate (61,1)GMC Acadia/Acadia Denali Owner Manual (GMNA-Localizing-U.S./Canada/
Mexico-6014315) - 2014 - crc - 8/15/13
Vehicle Care 10-61
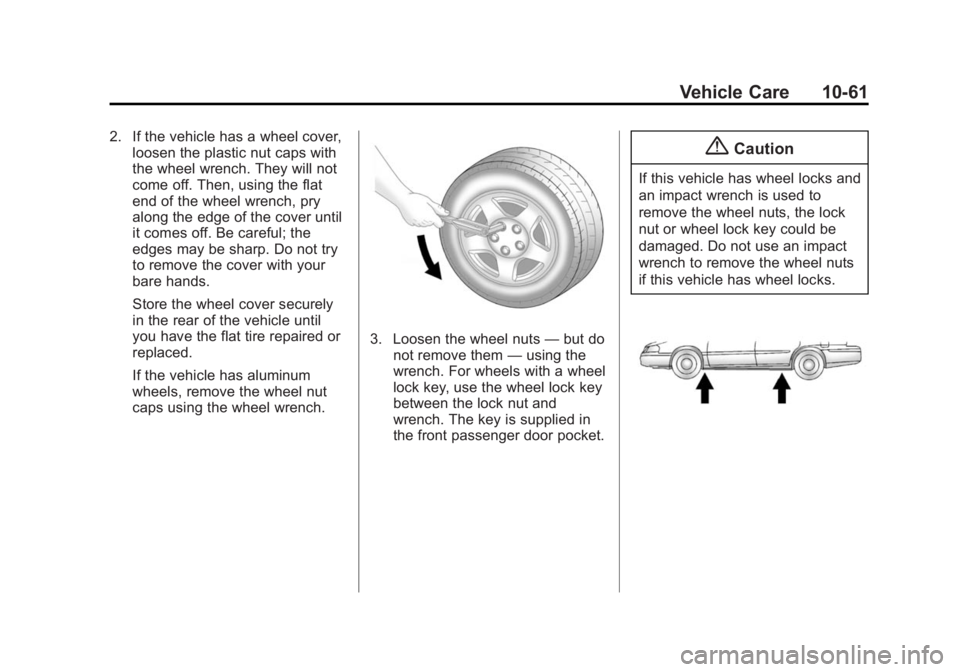
2. If the vehicle has a wheel cover,loosen the plastic nut caps with
the wheel wrench. They will not
come off. Then, using the flat
end of the wheel wrench, pry
along the edge of the cover until
it comes off. Be careful; the
edges may be sharp. Do not try
to remove the cover with your
bare hands.
Store the wheel cover securely
in the rear of the vehicle until
you have the flat tire repaired or
replaced.
If the vehicle has aluminum
wheels, remove the wheel nut
caps using the wheel wrench.
3. Loosen the wheel nuts —but do
not remove them —using the
wrench. For wheels with a wheel
lock key, use the wheel lock key
between the lock nut and
wrench. The key is supplied in
the front passenger door pocket.
{Caution
If this vehicle has wheel locks and
an impact wrench is used to
remove the wheel nuts, the lock
nut or wheel lock key could be
damaged. Do not use an impact
wrench to remove the wheel nuts
if this vehicle has wheel locks.
Page 332 of 414

Black plate (62,1)GMC Acadia/Acadia Denali Owner Manual (GMNA-Localizing-U.S./Canada/
Mexico-6014315) - 2014 - crc - 8/15/13
10-62 Vehicle Care
4. To identify the appropriatejacking location, find the triangle
or rectangular notch about
30.5 cm (12 in) from the front tire
or about 27 cm (10.5 in) from the
rear tire.
Triangle Shown, Without Similar
The triangle may be located
near each wheel on the vehicle's
exterior.
{Caution
If a jack is used to raise the
vehicle without positioning it
correctly, the vehicle could be
damaged. When raising the
vehicle on a jack, avoid contact
with the rear axle control arms.
5. Attach the wrench to the jack, and turn the wrench clockwise to
raise the jack head 7.6 cm (3 in).
6. Do not raise the vehicle yet. Put the compact spare tire near you.
{Warning
Getting under a vehicle when it is
lifted on a jack is dangerous.
If the vehicle slips off the jack,
you could be badly injured or
killed. Never get under a vehicle
when it is supported only by
a jack.
{Warning
Raising the vehicle with the jack
improperly positioned can
damage the vehicle and even
make the vehicle fall. To help
avoid personal injury and vehicle
damage, be sure to fit the jack lift
head into the proper location
before raising the vehicle.
7. Raise the vehicle by turning the wrench clockwise in the jack.
Raise the vehicle far enough off
the ground so that there is
enough room for the spare tire to
fit under the wheel well.
8. Remove all the wheel nuts and the flat tire.