2014 FORD SUPER DUTY wipers
[x] Cancel search: wipersPage 4 of 458

Introduction
About This Manual...........................................7
Symbols Glossary
.............................................7
Data Recording
..................................................9
California Proposition 65..............................11
Perchlorate.........................................................11
Ford Credit
..........................................................11
Replacement Parts Recommendation
........................................11
Special Notices................................................12
Mobile Communications Equipment.....................................................13
Export Unique Options..................................13
Child Safety
General Information
.......................................14
Installing Child Seats.....................................15
Booster Seats
..................................................23
Child Seat Positioning..................................25
Child Safety Locks.........................................26
Safety Belts
Principle of Operation...................................27
Fastening the Safety Belts
.........................28
Safety Belt Height Adjustment..................31
Safety Belt Warning Lamp and Indicator Chime..............................................................31
Safety Belt Minder.........................................32
Child Restraint and Safety Belt Maintenance................................................34
Supplementary Restraints System
Principle of Operation..................................35
Driver and Passenger Airbags...................36
Side Airbags
......................................................41
Safety Canopy ™
.............................................42
Crash Sensors and Airbag Indicator........43
Airbag Disposal...............................................44 Keys and Remote Controls
General Information on Radio
Frequencies..................................................45
Remote Control..............................................45
Replacing a Lost Key or Remote Control...........................................................48
MyKey ™
Principle of Operation..................................49
Creating a MyKey...........................................49
Clearing All MyKeys
........................................51
Checking MyKey System Status................51
Using MyKey With Remote Start Systems..........................................................51
MyKey Troubleshooting
...............................52
Locks
Locking and Unlocking
.................................53
Keyless Entry....................................................54
Security
Passive Anti-Theft System.........................57
Anti-Theft Alarm
............................................58
Steering Wheel
Adjusting the Steering Wheel
...................59
Audio Control..................................................59
Voice Control
...................................................60
Cruise Control.................................................60
Information Display Control......................60
Heated Steering Wheel
................................61
Pedals
Adjusting the Pedals
.....................................62
Wipers and Washers
Windshield Wipers.........................................63
Windshield Washers
.....................................63
1
Super Duty (TFA) Table of Contents
Page 66 of 458
WINDSHIELD WIPERS
Note:
Fully defrost the windshield before
switching on the windshield wipers.
Note: Make sure the windshield wipers are
switched off before entering a car wash.
Note: Clean the windshield and wiper
blades if they begin to leave streaks or
smears. If that does not resolve the issue,
install new wiper blades.
Note: Do not operate the wipers on a dry
windshield. This may scratch the glass,
damage the wiper blades or cause the wiper
motor to burn out. Always use the
windshield washers before wiping a dry
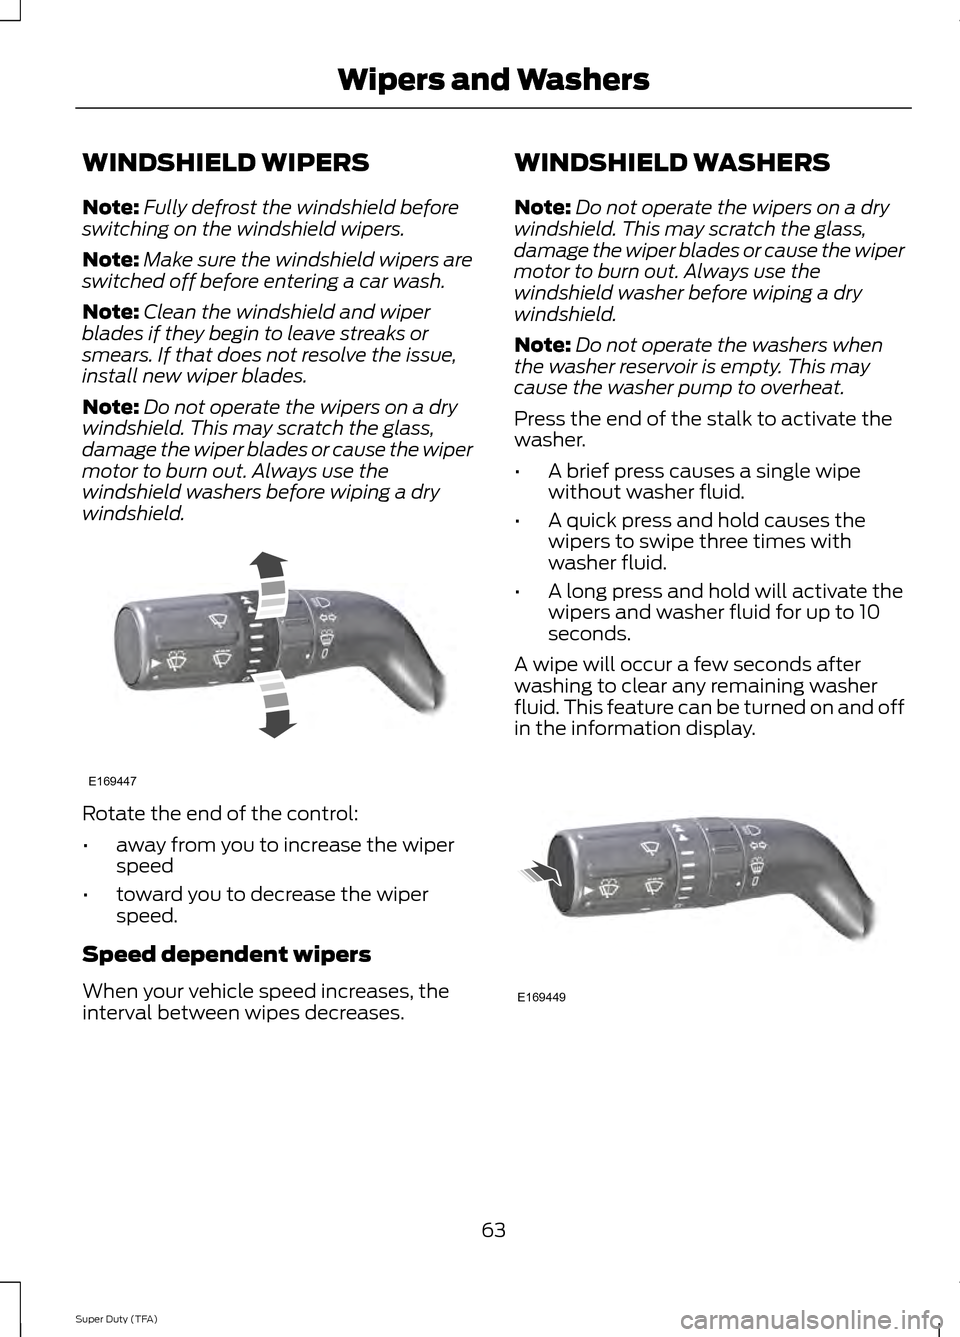
windshield. Rotate the end of the control:
•
away from you to increase the wiper
speed
• toward you to decrease the wiper
speed.
Speed dependent wipers
When your vehicle speed increases, the
interval between wipes decreases. WINDSHIELD WASHERS
Note:
Do not operate the wipers on a dry
windshield. This may scratch the glass,
damage the wiper blades or cause the wiper
motor to burn out. Always use the
windshield washer before wiping a dry
windshield.
Note: Do not operate the washers when
the washer reservoir is empty. This may
cause the washer pump to overheat.
Press the end of the stalk to activate the
washer.
• A brief press causes a single wipe
without washer fluid.
• A quick press and hold causes the
wipers to swipe three times with
washer fluid.
• A long press and hold will activate the
wipers and washer fluid for up to 10
seconds.
A wipe will occur a few seconds after
washing to clear any remaining washer
fluid. This feature can be turned on and off
in the information display. 63
Super Duty (TFA) Wipers and WashersE169447 E169449
Page 68 of 458
Note:
If the vehicle is equipped with
autolamps, it will have the headlamps on
with windshield wipers feature. If the
windshield wipers are turned on, the exterior
lamps will turn on with the headlamp
control in the autolamp position.
The autolamp system also keeps the lights
on for a predetermined amount of time after
the ignition switch is turned to off. You can
change the amount of time the lamps stay
on by using the programming procedure that
follows:
Autolamps - Programmable Exit
Delay
Programmable exit delay allows the length
of the autolamp exit delay to be changed.
To program the auto lamp exit time delay:
1. Start with the ignition in the off position
and the headlamp control in the
autolamp position.
2. Turn the headlamp control to off.
3. Turn the ignition switch to on and then
back to off.
4. Turn the headlamp control to the autolamp position. The headlamps will
turn on.
5. Wait the desired amount of time for the exit delay you want (up to three
minutes), then turn the headlamps off. INSTRUMENT LIGHTING
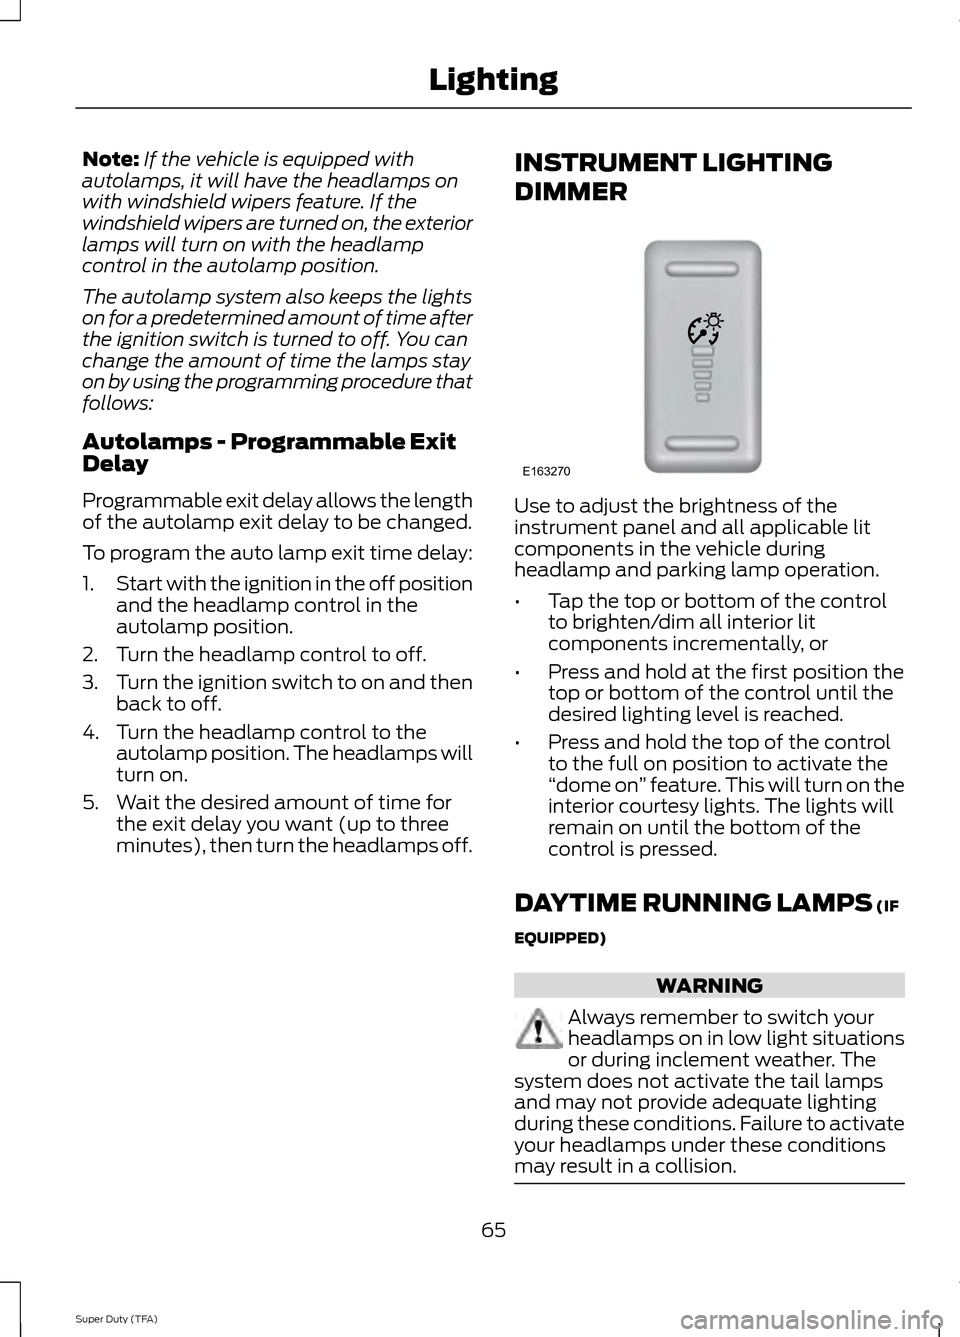
DIMMER Use to adjust the brightness of the
instrument panel and all applicable lit
components in the vehicle during
headlamp and parking lamp operation.
•
Tap the top or bottom of the control
to brighten/dim all interior lit
components incrementally, or
• Press and hold at the first position the
top or bottom of the control until the
desired lighting level is reached.
• Press and hold the top of the control
to the full on position to activate the
“dome on ” feature. This will turn on the
interior courtesy lights. The lights will
remain on until the bottom of the
control is pressed.
DAYTIME RUNNING LAMPS (IF
EQUIPPED) WARNING
Always remember to switch your
headlamps on in low light situations
or during inclement weather. The
system does not activate the tail lamps
and may not provide adequate lighting
during these conditions. Failure to activate
your headlamps under these conditions
may result in a collision. 65
Super Duty (TFA) LightingE163270
Page 87 of 458
AUTOUNLOCK
This feature automatically unlocks all
vehicle doors when the driver
’s door is
opened within 10 minutes of the ignition
being turned off.
COURTESY WIPE
This feature allows for an extra swipe of
the wipers after a wipe/wash cycle.
CREATE MYKEY / MYKEY SETUP /
CLEAR MYKEY
For more information, See Creating a
MyKey (page 49).
RESET FOR REMOTE START (if
equipped)
REAR PARK AID
This feature sounds a warning tone to warn
the driver of obstacles near the rear
bumper, and functions only when R
(Reverse) gear is selected.
TBC MODE (if equipped)
Allows you to choose the trailer brake
mode.
TRAILER SWAY (if equipped)
This feature uses the electronic stability
control to mitigate trailer sway.
LANGUAGE = ENGLISH / SPANISH /
FRENCH
Allows you to choose which language the
message center will display in.
Waiting four seconds or pressing the
RESET button cycles the message center
through each of the language choices.
Press the RESET button to set the
language choice. Information Display Controls
(Type 2)
(If Equipped)
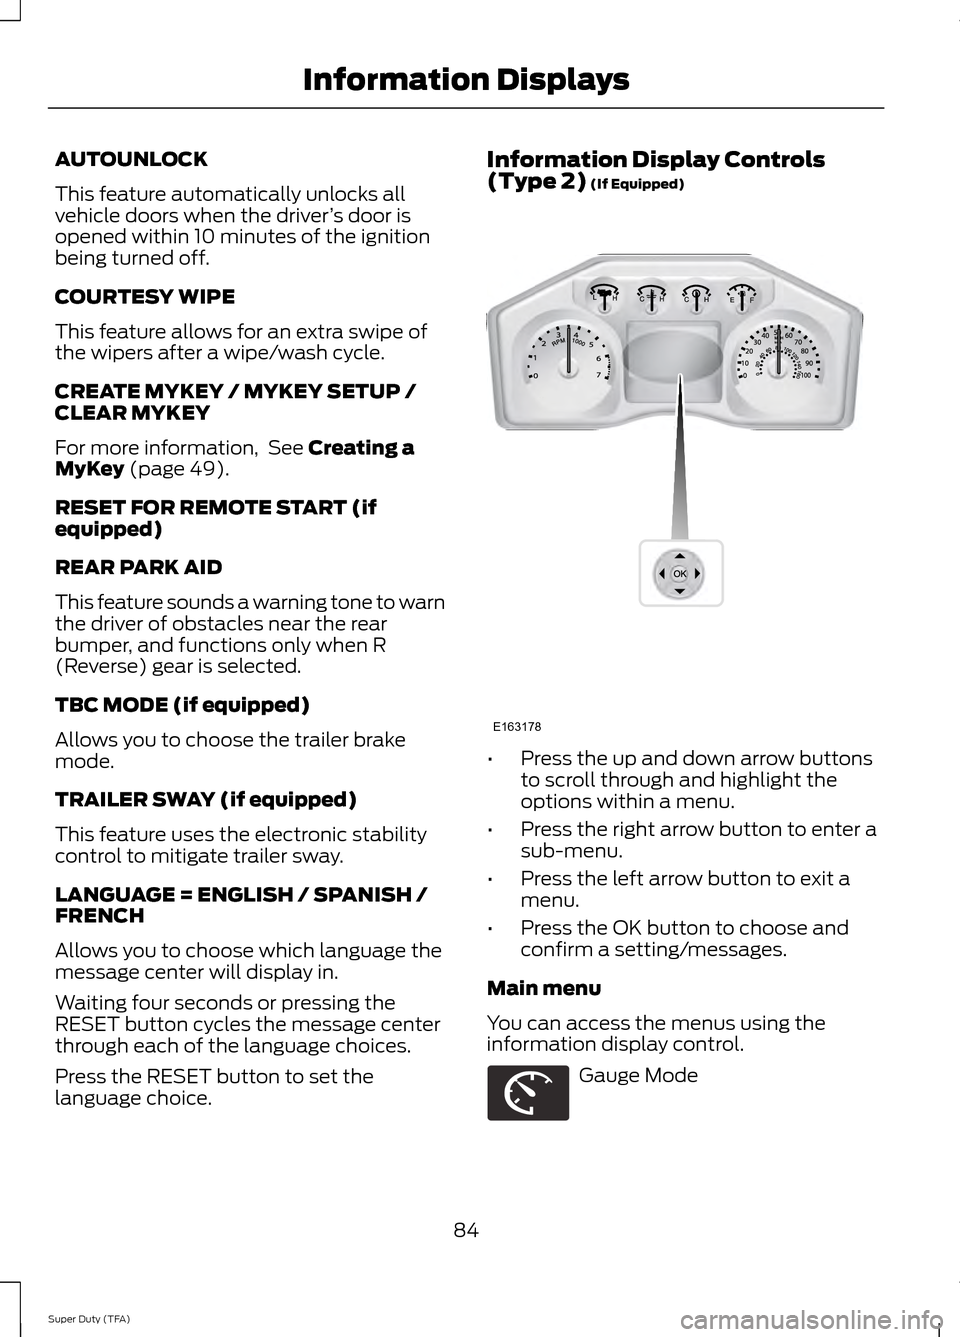
•
Press the up and down arrow buttons
to scroll through and highlight the
options within a menu.
• Press the right arrow button to enter a
sub-menu.
• Press the left arrow button to exit a
menu.
• Press the OK button to choose and
confirm a setting/messages.
Main menu
You can access the menus using the
information display control. Gauge Mode
84
Super Duty (TFA) Information DisplaysE163178 E163179
Page 218 of 458
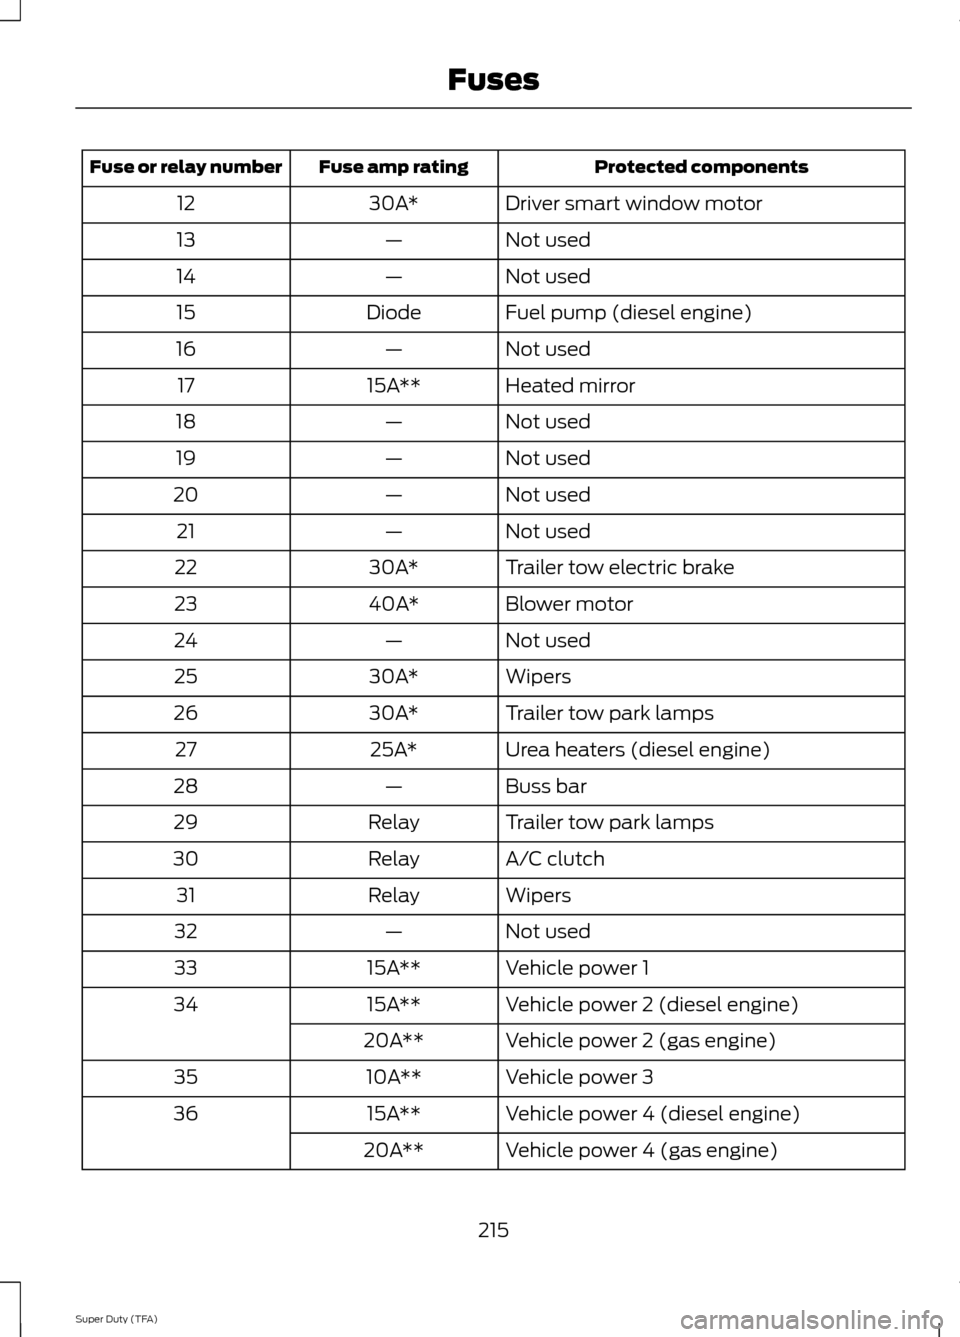
Protected components
Fuse amp rating
Fuse or relay number
Driver smart window motor
30A*
12
Not used
—
13
Not used
—
14
Fuel pump (diesel engine)
Diode
15
Not used
—
16
Heated mirror
15A**
17
Not used
—
18
Not used
—
19
Not used
—
20
Not used
—
21
Trailer tow electric brake
30A*
22
Blower motor
40A*
23
Not used
—
24
Wipers
30A*
25
Trailer tow park lamps
30A*
26
Urea heaters (diesel engine)
25A*
27
Buss bar
—
28
Trailer tow park lamps
Relay
29
A/C clutch
Relay
30
Wipers
Relay
31
Not used
—
32
Vehicle power 1
15A**
33
Vehicle power 2 (diesel engine)
15A**
34
Vehicle power 2 (gas engine)
20A**
Vehicle power 3
10A**
35
Vehicle power 4 (diesel engine)
15A**
36
Vehicle power 4 (gas engine)
20A**
215
Super Duty (TFA) Fuses
Page 251 of 458
•
Never wash or rinse any ignition coil,
spark plug wire or spark plug well, or
the area in and around these locations.
• Cover the battery, power distribution
box, and air filter assembly to prevent
water damage when cleaning the
engine.
CLEANING THE EXHAUST WARNINGS
Failure to maintain the functional
holes, in the tailpipe section of the
exhaust, clean and free of debris or
foreign material may result in the holes
becoming blocked or plugged. Do not
modify or remove the tail-pipe section.
Blocked or plugged holes or
removal/modification of the system could
result in elevated exhaust gas
temperatures which may result in
vehicle/property damage or personal
injury. The normal operating temperature
of the exhaust system is very high.
Never work around or attempt to
repair any part of the exhaust system until
it has cooled. Use special care when
working around the diesel oxidation
catalytic converter and/or the diesel
particulate filter (DPF). The diesel
oxidation catalytic converter and/or the
DPF heats up to a high temperature after
only a short period of engine operation and
can stay hot even after the engine is turned
off. Failure to follow these instructions may
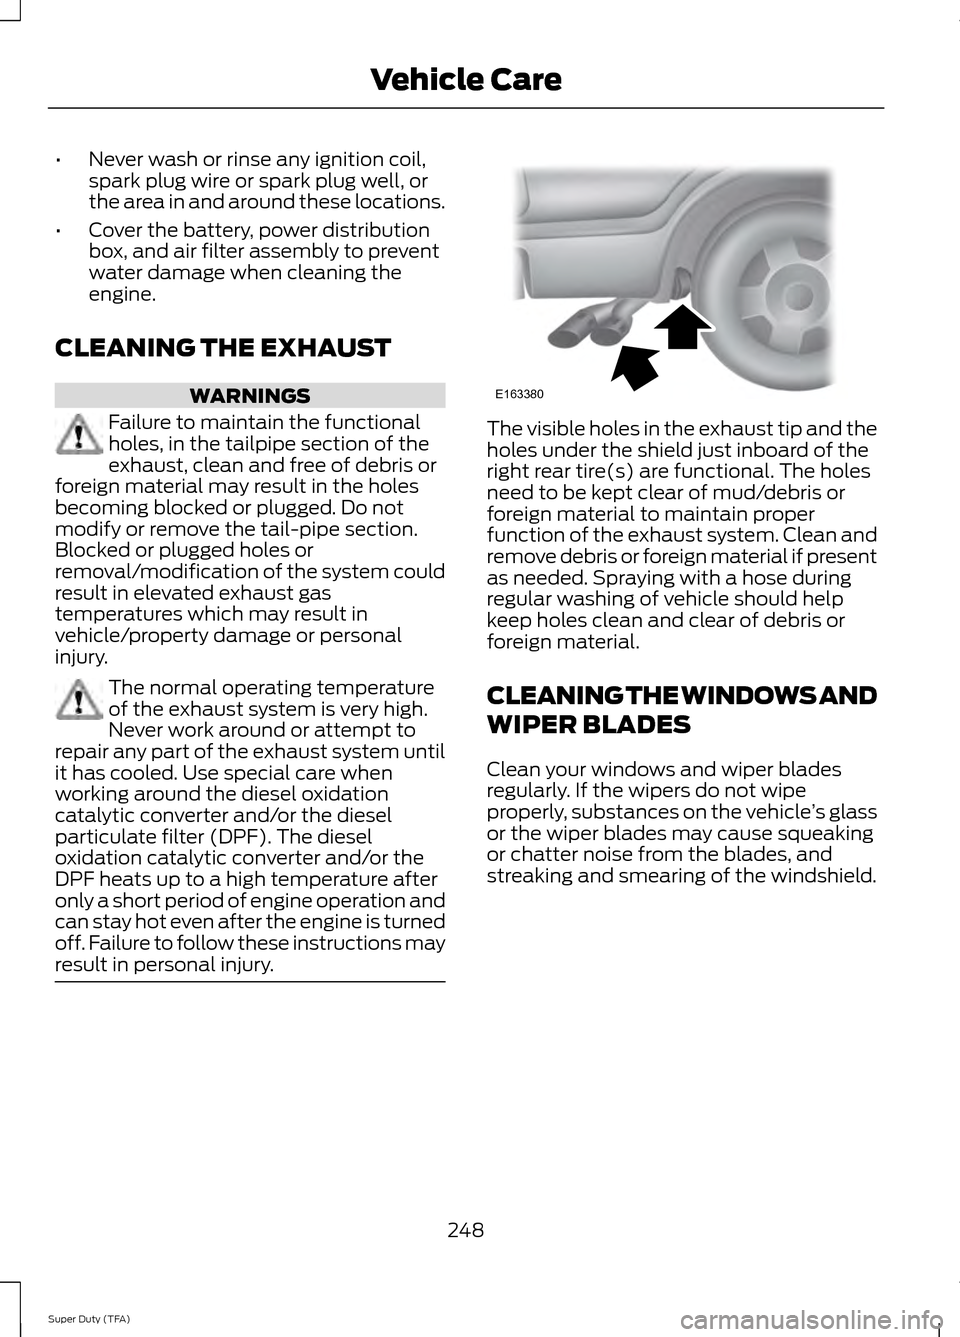
result in personal injury. The visible holes in the exhaust tip and the
holes under the shield just inboard of the
right rear tire(s) are functional. The holes
need to be kept clear of mud/debris or
foreign material to maintain proper
function of the exhaust system. Clean and
remove debris or foreign material if present
as needed. Spraying with a hose during
regular washing of vehicle should help
keep holes clean and clear of debris or
foreign material.
CLEANING THE WINDOWS AND
WIPER BLADES
Clean your windows and wiper blades
regularly. If the wipers do not wipe
properly, substances on the vehicle
’s glass
or the wiper blades may cause squeaking
or chatter noise from the blades, and
streaking and smearing of the windshield.
248
Super Duty (TFA) Vehicle CareE163380
Page 252 of 458
To clean these items, follow these tips:
•
You can clean the windows with a
non-abrasive cleaner such as
Motorcraft Ultra-Clear Spray Glass
Cleaner.
• You can clean the wiper blades with
isopropyl rubbing-alcohol or Motorcraft
Premium Windshield Wash
Concentrate with Bitterant in the U.S.,
or Premium Quality Windshield Washer
Fluid in Canada. Be sure to replace
wiper blades when they appear worn
or do not function properly.
• Do not use abrasives, as they may
cause scratches.
• Do not use fuel, kerosene, or paint
thinner to clean any parts.
If you cannot remove those streaks after
cleaning with the glass cleaner or if the
wipers chatter and move in a jerky motion,
clean the outer surface of the windshield
and the wiper blades using a sponge or
soft cloth with a neutral detergent or
mild-abrasive cleaning solution. After
cleaning, rinse the windshield and wiper
blades with clean water. The windshield
is clean if beads do not form when you
rinse the windshield with water.
Note: Do not use sharp objects, such as a
razorblade, to clean the inside of the rear
window or to remove decals, as this may
cause damage to the rear window
defroster ’s heated grid lines.
CLEANING THE INTERIOR WARNINGS
Do not use cleaning solvents, bleach
or dye on the vehicle
’s safety belts,
as these actions may weaken the
belt webbing. WARNINGS
On vehicles equipped with
seat-mounted airbags, do not use
chemical solvents or strong
detergents. Such products could
contaminate the side airbag system and
affect performance of the side airbag in a
collision. For fabric, carpets, cloth seats, safety belts
and seats equipped with side airbags:
•
Remove dust and loose dirt with a
vacuum cleaner.
• Remove light stains and soil with
Motorcraft Professional Strength
Carpet & Upholstery Cleaner.
• If grease or tar is present on the
material, spot-clean the area first with
Motorcraft Spot and Stain Remover. In
Canada, use Motorcraft Multi-Purpose
Cleaner.
• If a ring forms on the fabric after spot
cleaning, clean the entire area
immediately (but do not oversaturate)
or the ring will set.
• Do not use household cleaning
products or glass cleaners, which can
stain and discolor the fabric and affect
the flame retardant abilities of the seat
materials.
CLEANING THE INSTRUMENT
PANEL AND INSTRUMENT
CLUSTER LENS WARNING
Do not use chemical solvents or
strong detergents when cleaning the
steering wheel or instrument panel
to avoid contamination of the airbag
system. 249
Super Duty (TFA) Vehicle Care
Page 255 of 458
•
Touch-up exposed or primed metal to
prevent rust.
• Cover chrome and stainless steel parts
with a thick coat of auto wax to prevent
discoloration. Re-wax as necessary
when your vehicle is washed.
• Lubricate all hood, door and trunk lid
hinges, and latches with a light grade
oil.
• Cover interior trim to prevent fading.
• Keep all rubber parts free from oil and
solvents.
Engine
• The engine oil and filter should be
changed prior to storage, as used
engine oil contain contaminates that
may cause engine damage.
• Start the engine every 15 days. Run at
fast idle until it reaches normal
operating temperature
• With your foot on the brake, shift
through all the gears while the engine
is running.
Fuel system
• Fill the fuel tank with high-quality fuel
until the first automatic shutoff of the
fuel pump nozzle.
Note: During extended periods of vehicle
storage (30 days or more), fuel may
deteriorate due to oxidation. Add a quality
gas stabilizer product to your vehicle's fuel
system whenever actual or expected
storage periods exceed 30 days. Follow the
instructions on the additive label. your
vehicle should then be operated at idle
speed to circulate the additive throughout
the fuel system. Cooling system
•
Protect against freezing temperatures.
• When removing your vehicle from
storage, check coolant fluid level.
Confirm there are no cooling system
leaks, and fluid is at the recommended
level.
Battery
• Check and recharge as necessary. Keep
connections clean.
• If storing your vehicle for more than 30
days without recharging the battery, it
may be advisable to disconnect the
battery cables to ensure battery charge
is maintained for quick starting.
Note: If battery cables are disconnected, it
will be necessary to reset memory features.
Brakes
• Make sure brakes and parking brake
are fully released.
Tires
• Maintain recommended air pressure.
Miscellaneous
• Make sure all linkages, cables, levers
and pins under your vehicle are covered
with grease to prevent rust.
• Move vehicles at least 25 feet (8
meters) every 15 days to lubricate
working parts and prevent corrosion.
Removing Vehicle From Storage
When your vehicle is ready to come out of
storage, do the following:
• Wash your vehicle to remove any dirt
or grease film build-up on window
surfaces.
• Check windshield wipers for any
deterioration.
252
Super Duty (TFA) Vehicle Care