2014 FORD SUPER DUTY automatic transmission
[x] Cancel search: automatic transmissionPage 167 of 458
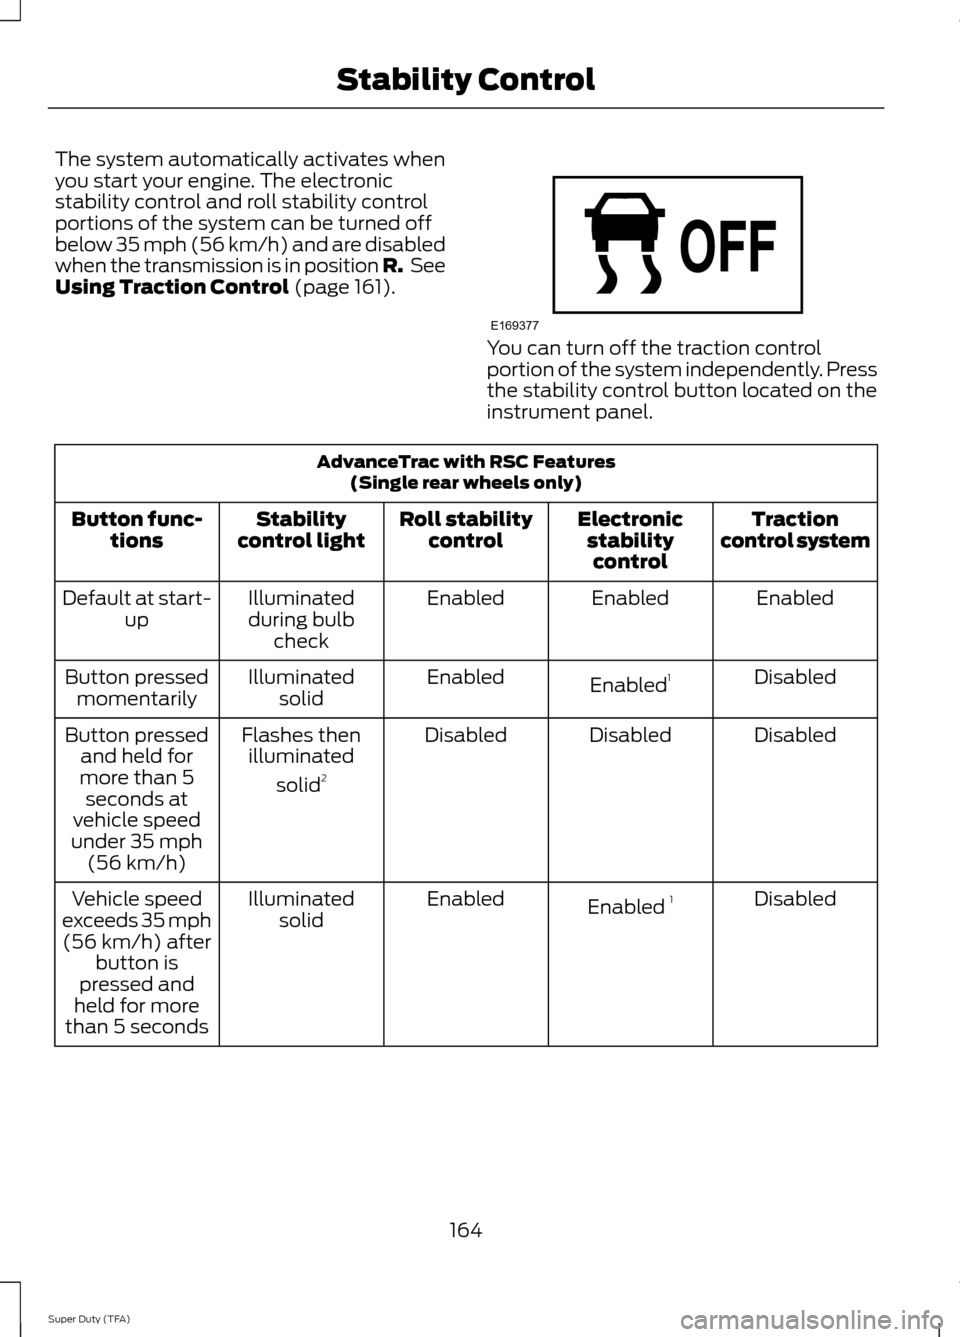
The system automatically activates when
you start your engine. The electronic
stability control and roll stability control
portions of the system can be turned off
below 35 mph (56 km/h) and are disabled
when the transmission is in position R.
See
Using Traction Control (page 161). You can turn off the traction control
portion of the system independently. Press
the stability control button located on the
instrument panel.
AdvanceTrac with RSC Features
(Single rear wheels only)
Traction
control system
Electronic
stabilitycontrol
Roll stability
control
Stability
control light
Button func-
tions
Enabled
Enabled
Enabled
Illuminated
during bulb check
Default at start-
up
Disabled
Enabled 1
Enabled
Illuminated
solid
Button pressed
momentarily
Disabled
Disabled
Disabled
Flashes then
illuminated
solid 2
Button pressed
and held for
more than 5 seconds at
vehicle speed
under 35 mph (56 km/h)
Disabled
Enabled 1
Enabled
Illuminated
solid
Vehicle speed
exceeds 35 mph (56 km/h) after button is
pressed and
held for more
than 5 seconds
164
Super Duty (TFA) Stability ControlE169377
Page 171 of 458

PARKING AID (IF EQUIPPED)
WARNINGS
To help avoid personal injury, please
read and understand the limitations
of the system as contained in this
section. Sensing is only an aid for some
(generally large and fixed) objects when
moving in reverse on a flat surface at
parking speeds. Traffic control systems,
inclement weather, air brakes, and external
motors and fans may also affect the
function of the sensing system; this may
include reduced performance or a false
activation. To help avoid personal injury, always
use caution when in R (Reverse) and
when using the sensing system.
This system is not designed to
prevent contact with small or moving
objects. The system is designed to
provide a warning to assist the driver in
detecting large stationary objects to avoid
damaging the vehicle. The system may not
detect smaller objects, particularly those
close to the ground. Certain add-on devices such as large
trailer hitches, bike or surfboard racks
and any device that may block the
normal detection zone of the system, may
create false beeps. Note:
Keep the sensors, located on the
bumper or fascia, free from snow, ice and
large accumulations of dirt. If the sensors
are covered, the system ’s accuracy can be
affected. Do not clean the sensors with
sharp objects.
Note: If your vehicle sustains damage to
the bumper or fascia, leaving it misaligned
or bent, the sensing zone may be altered
causing inaccurate measurement of
obstacles or false alarms. Note:
If your vehicle is equipped with
MyKey ™, it is possible to prevent turning
the sensing system off. See MyKey ™
(page
49).
Note: If your vehicle is equipped with a fully
integrated electronic trailer brake controller
(TBC) and a trailer with electric trailer
brakes is connected to your vehicle, the RSS
will be disabled. When the vehicle is shifted
into reverse, the information display will
remain in the Rear Park Aid Off selection.
For more information on the TBC, See
Trailer Sway Control
(page 186).
The sensing system warns the driver of
obstacles within a certain range of the
bumper area. The system turns on
automatically whenever the ignition is
switched on.
When receiving a detection warning, the
radio volume is reduced to a
predetermined level. After the warning
goes away, the radio volume returns to the
previous level.
Rear Sensing System
The rear sensors are only active when the
transmission is in R (Reverse). As the
vehicle moves closer to the obstacle, the
rate of the audible warning increases.
When the obstacle is fewer than 12 inches
(30 centimeters) away, the warning
sounds continuously. If a stationary or
receding object is detected farther than 12
inches (30 centimeters) from the side of
the vehicle, the tone sounds for only three
seconds. Once the system detects an
object approaching, the warning sounds
again.
168
Super Duty (TFA) Parking Aids
Page 196 of 458
Trailer Lamps
WARNING
Never connect any trailer lamp wiring
to the vehicle's tail lamp wiring; this
may damage the electrical system
resulting in fire. Contact your authorized
dealer as soon as possible for assistance
in proper trailer tow wiring installation.
Additional electrical equipment may be
required. Trailer lamps are required on most towed
vehicles. Make sure all running lights, brake
lights, turn signals and hazard lights are
working.
Using a Step Bumper (If Equipped)
The rear bumper is equipped with an
integral hitch and only requires a ball with
a one-inch (25.4 millimeter) shank
diameter. The bumper has a 5000-pound
(2268 kilogram) trailer weight and a
500-pound (227 kilogram) tongue weight
capacity
If it is necessary to relocate the hitch ball
position, you must install a frame-mounted
trailer hitch.
Before Towing a Trailer
Practice turning, stopping and backing up
to get the feel of your vehicle-trailer
combination before starting on a trip.
When turning, make wider turns so the
trailer wheels clear curbs and other
obstacles.
When Towing a Trailer
•
Do not drive faster than 70 mph (113
km/h) during the first 500 miles (800
kilometers).
• Do not make full-throttle starts. •
Check your hitch, electrical connections
and trailer wheel lug nuts thoroughly
after you have traveled 50 miles (80
kilometers).
• When stopped in congested or heavy
traffic during hot weather, place the
gearshift in position P to aid engine and
transmission cooling and to help A/C
performance.
• Turn off the speed control with heavy
loads or in hilly terrain. The speed
control may turn off automatically
when you are towing on long, steep
grades.
• Shift to a lower gear when driving down
a long or steep hill. Do not apply the
brakes continuously, as they may
overheat and become less effective.
• If your transmission is equipped with a
Grade Assist or Tow/Haul feature, use
this feature when towing. This provides
engine braking and helps eliminate
excessive transmission shifting for
optimum fuel economy and
transmission cooling.
• If your vehicle is equipped with
AdvanceTrac with RSC, this system
may turn on during typical cornering
maneuvers with a heavily loaded trailer.
This is normal. Turning the corner at a
slower speed while towing may reduce
this tendency.
• If you are towing a trailer frequently in
hot weather, hilly conditions, at the
gross combined weight rating (or any
combination of these factors), consider
refilling your rear axle with synthetic
gear lubricant (if the axle is not already
filled with it). See Capacities and
Specifications (page 292).
193
Super Duty (TFA) Towing
Page 197 of 458
•
Allow more distance for stopping with
a trailer attached. Anticipate stops and
brake gradually.
• Avoid parking on a grade. However, if
you must park on a grade:
•Turn the steering wheel to point
your vehicle tires away from traffic
flow.
• Set your vehicle parking brake.
• Place the automatic transmission
in position P.
• Place wheel chocks in front and
back of the trailer wheels. (Chocks
not included with vehicle.)
Your vehicle may be equipped with a
temporary or conventional spare tire. A
"temporary" spare tire is different in size
(diameter or width), tread-type
(All-Season or All Terrain) or is from a
different manufacturer than the road tires
on your vehicle. Consult information on the
tire label or Safety Compliance label for
limitations when using.
Launching or Retrieving a Boat or
Personal Watercraft (PWC)
Note: Disconnect the wiring to the trailer
before
backing the trailer into the water.
Note: Reconnect the wiring to the trailer
after
the trailer is removed from the water.
When backing down a ramp during boat
launching or retrieval:
• Do not allow the static water level to
rise above the bottom edge of the rear
bumper.
• Do not allow waves to break higher
than 6 inches (15 centimeters) above
the bottom edge of the rear bumper. Exceeding these limits may allow water to
enter vehicle components:
•
Causing internal damage to the
components.
• Affecting driveability, emissions, and
reliability.
Replace the rear axle lubricant anytime
the rear axle has been submerged in water.
Water may have contaminated the rear
axle lubricant, which is not normally
checked or changed unless a leak is
suspected or other axle repair is required.
TOWING POINTS WARNINGS
Using recovery hooks is dangerous
and should only be done by a person
familiar with proper vehicle recovery
safety practices. Improper use of recovery
hooks may cause hook failure or separation
from the vehicle and could result in serious
injury or death. Always slowly remove the slack from
the recovery strap prior to pulling.
Failure to do so can introduce
significantly higher loads which can cause
the recovery hooks to break off, or the
recovery strap to fail which can cause
serious injury or death. Never link two straps together with
a clevis pin. These heavy metal
objects could become projectiles if
the strap breaks and can cause serious
injury or death. Your vehicle comes equipped with
frame-mounted front recovery hooks.
These hooks should never have a load
applied to them greater than the gross
vehicle weight rating of your vehicle.
194
Super Duty (TFA) Towing
Page 199 of 458
It is acceptable to have your two-wheel
drive vehicle towed with the front wheels
on the ground (without dollies) and the
rear wheels off the ground.
We recommend towing a four-wheel drive
vehicle with all wheels off the ground, such
as using a wheel lift and dollies or flatbed
equipment. However, it is acceptable to
use a wheel lift to raise the rear of your
vehicle so long as, depending on vehicle
configuration, you perform the following
before towing:
•
If your vehicle is equipped with a
manual-shift transfer case, make sure
the front wheel hub locks are in the
FREE position before towing.
• If your vehicle is equipped with an
electronic shift-on-the-fly transfer
case, make sure you turn the
four-wheel drive control to the
2H
position before towing.
Note: Towing an electronic shift-on-the-fly
four-wheel drive vehicle with the front
wheels on the ground without disengaging
the front hubs may cause damage to the
automatic transmission.
Note: Towing a two-wheel drive vehicle or
an electronic shift-on-the-fly four-wheel
drive vehicle with the rear wheels on the
ground for more than 50 miles (80 km) or
faster than 35 mph (56 km/h) may cause
damage to the automatic transmission.
Note: Using wheel lift equipment to tow a
dual rear wheel vehicle requires removing
an outer rear wheel before towing. TOWING THE VEHICLE ON
FOUR WHEELS
Emergency Towing
If your vehicle becomes inoperable
(without access to wheel dollies,
car-hauling trailer, or flatbed transport
vehicle), it can be flat-towed (all wheels
on the ground, regardless of the powertrain
and transmission configuration) under the
following conditions:
•
Your vehicle is facing forward for
towing in a forward direction.
• Place the transmission in position
N. If
you cannot move the transmission into
N
, you may need to override it. See
Transmission (page 140).
• Maximum speed is 35 mph (56 km/h).
• Maximum distance is 50 miles (80
kilometers).
Recreational Towing
Note: Put your climate control system in
recirculated air mode to prevent exhaust
fumes from entering your vehicle. See
Climate Control
(page 102).
Follow these guidelines if you have a need
for recreational towing, such as towing
your vehicle behind a motorhome. We
designed these guidelines to prevent
damage to your transmission.
Two-wheel Drive Vehicles and
Four-wheel Drive Vehicles Equipped
with an Electronic-shift Transfer Case
Do not tow your vehicle with any wheels
on the ground, as vehicle or transmission
damage may occur. It is recommended to
tow your vehicle with all four (4) wheels
off the ground, such as when using a
car-hauling trailer. Otherwise, you cannot
tow your vehicle.
196
Super Duty (TFA) Towing
Page 207 of 458
HAZARD WARNING FLASHERS
Note:
The hazard warning flashers will
operate when the ignition is in any position
or if the key is not in the ignition. If used
when the engine is not running, the battery
will lose charge. As a result, there may be
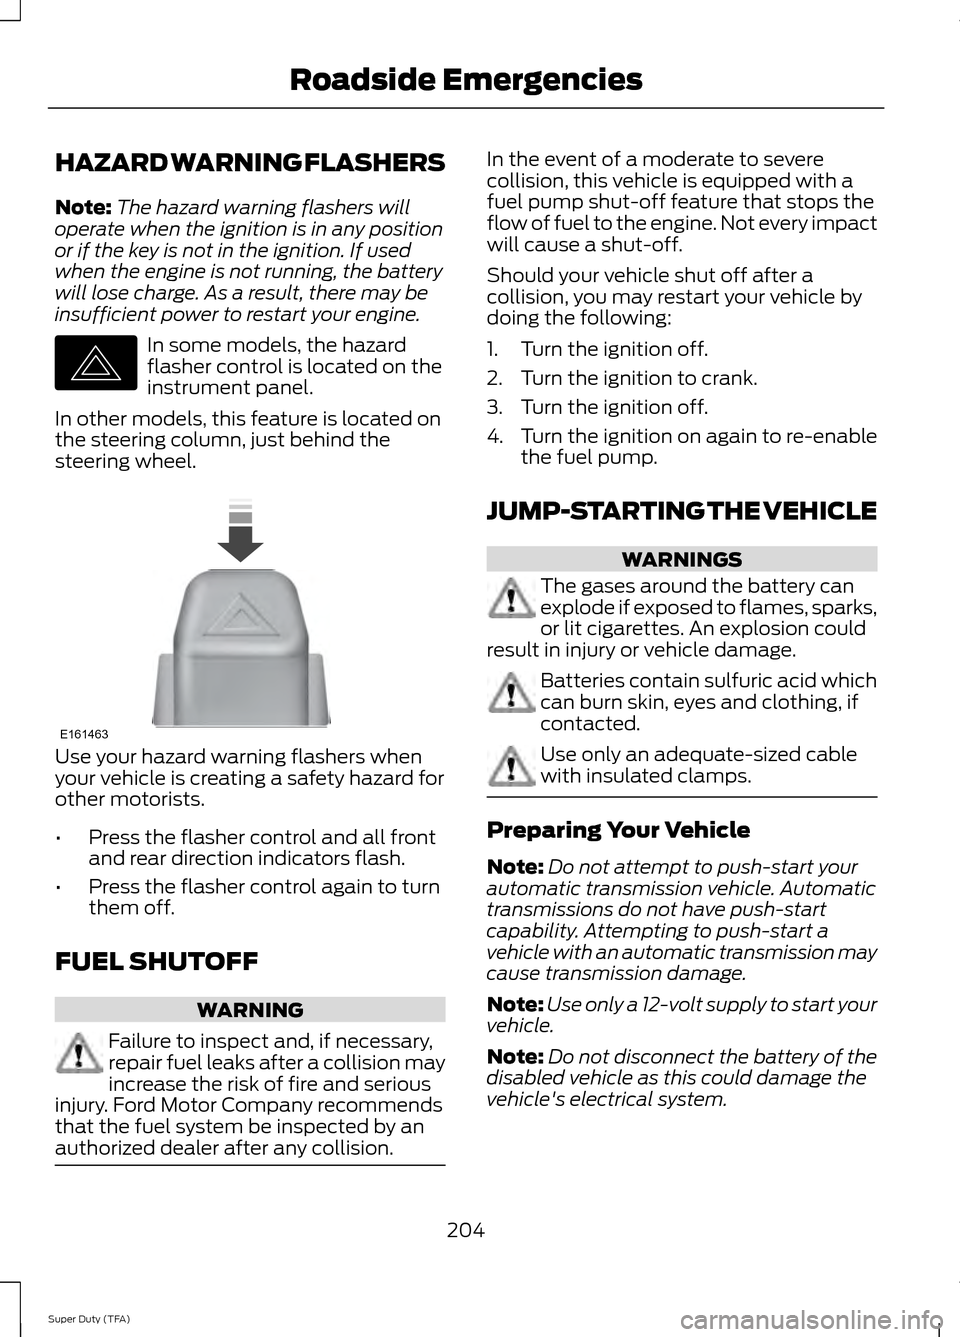
insufficient power to restart your engine. In some models, the hazard
flasher control is located on the
instrument panel.
In other models, this feature is located on
the steering column, just behind the
steering wheel. Use your hazard warning flashers when
your vehicle is creating a safety hazard for
other motorists.
•
Press the flasher control and all front
and rear direction indicators flash.
• Press the flasher control again to turn
them off.
FUEL SHUTOFF WARNING
Failure to inspect and, if necessary,
repair fuel leaks after a collision may
increase the risk of fire and serious
injury. Ford Motor Company recommends
that the fuel system be inspected by an
authorized dealer after any collision. In the event of a moderate to severe
collision, this vehicle is equipped with a
fuel pump shut-off feature that stops the
flow of fuel to the engine. Not every impact
will cause a shut-off.
Should your vehicle shut off after a
collision, you may restart your vehicle by
doing the following:
1. Turn the ignition off.
2. Turn the ignition to crank.
3. Turn the ignition off.
4.
Turn the ignition on again to re-enable
the fuel pump.
JUMP-STARTING THE VEHICLE WARNINGS
The gases around the battery can
explode if exposed to flames, sparks,
or lit cigarettes. An explosion could
result in injury or vehicle damage. Batteries contain sulfuric acid which
can burn skin, eyes and clothing, if
contacted.
Use only an adequate-sized cable
with insulated clamps.
Preparing Your Vehicle
Note:
Do not attempt to push-start your
automatic transmission vehicle. Automatic
transmissions do not have push-start
capability. Attempting to push-start a
vehicle with an automatic transmission may
cause transmission damage.
Note: Use only a 12-volt supply to start your
vehicle.
Note: Do not disconnect the battery of the
disabled vehicle as this could damage the
vehicle's electrical system.
204
Super Duty (TFA) Roadside EmergenciesE142663 E161463
Page 226 of 458
2. Go to the front of the vehicle and
locate the secondary release lever,
which is located under the front of the
hood, to your right of the center of the
vehicle (driver's side), toward the
headlight.
3. Release the hood latch by pushing the secondary release lever to your left,
toward the center of the vehicle.
4. Raise the hood. 5.
To close the hood, lower the hood and
allow it to drop the last 8 to 11 inches
(20 to 30 centimeters).
Note: Make sure that the hood is closed
properly.
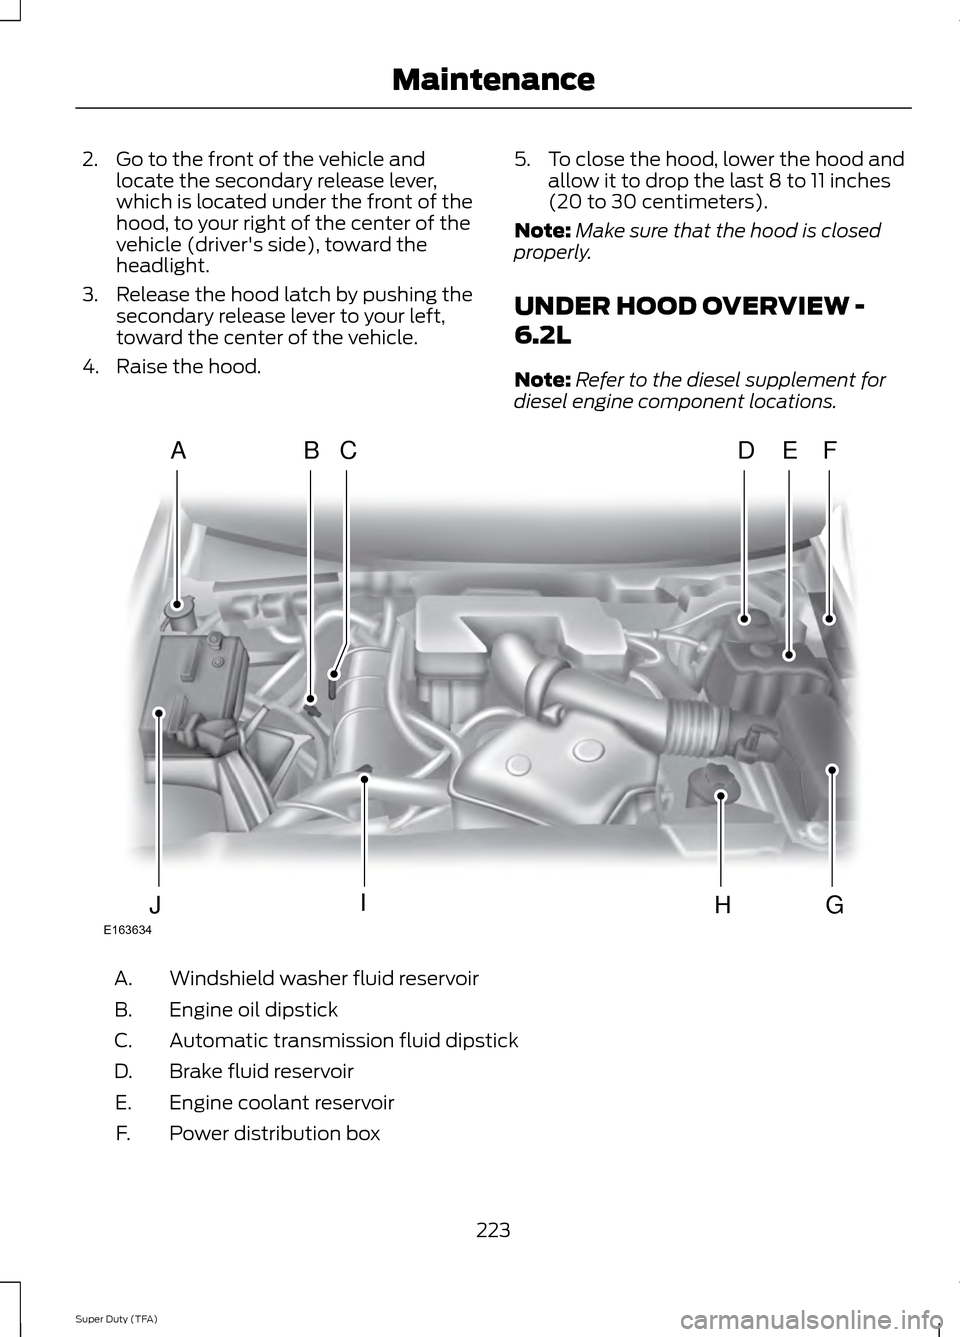
UNDER HOOD OVERVIEW -
6.2L
Note: Refer to the diesel supplement for
diesel engine component locations. Windshield washer fluid reservoir
A.
Engine oil dipstick
B.
Automatic transmission fluid dipstick
C.
Brake fluid reservoir
D.
Engine coolant reservoir
E.
Power distribution box
F.
223
Super Duty (TFA) MaintenanceE163634
ADFEBC
GHIJ
Page 227 of 458
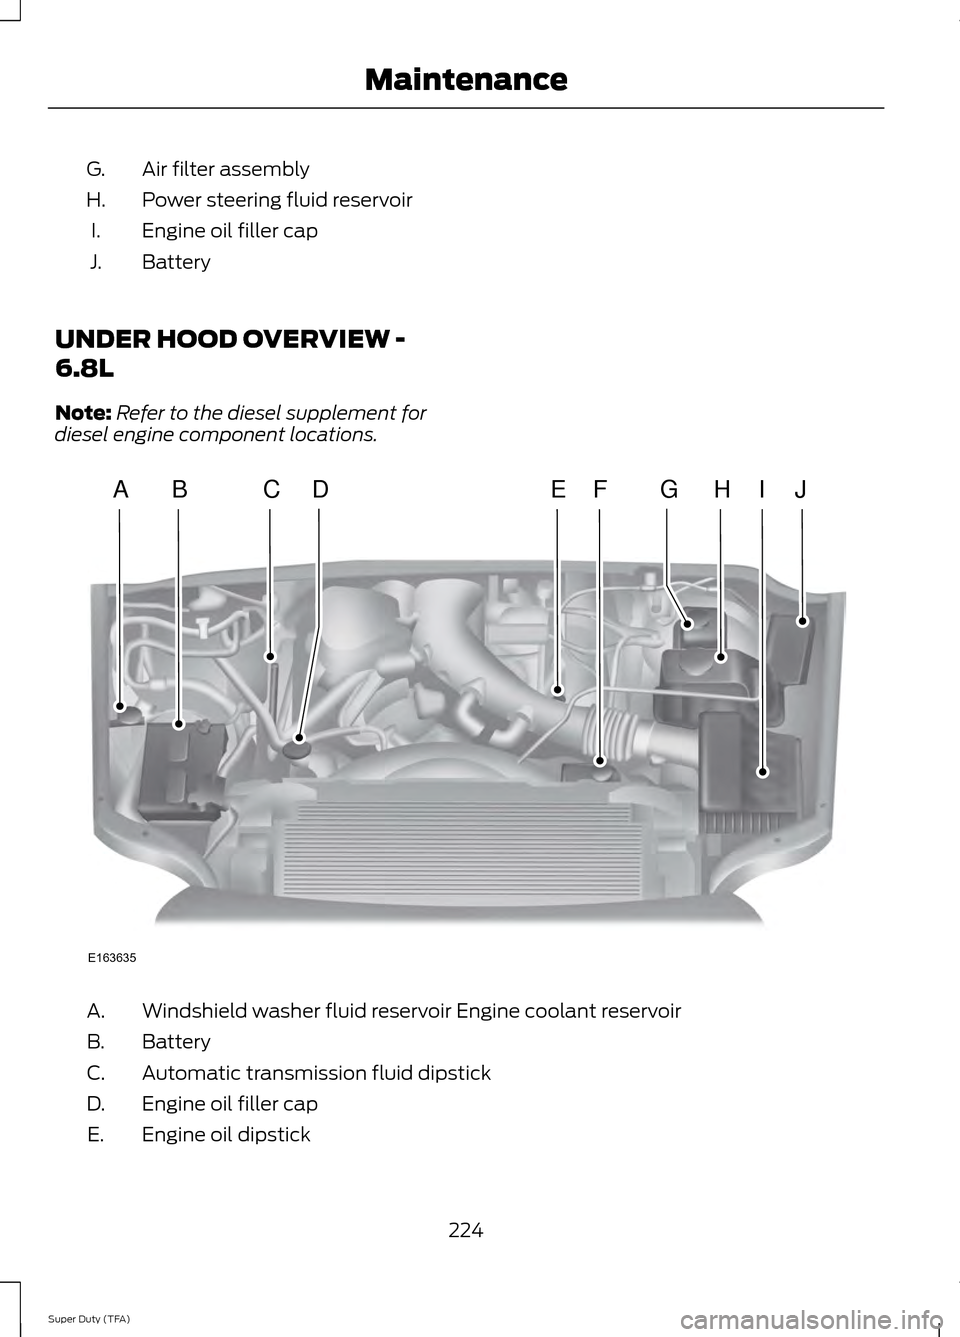
Air filter assembly
G.
Power steering fluid reservoir
H.
Engine oil filler cap
I.
Battery
J.
UNDER HOOD OVERVIEW -
6.8L
Note: Refer to the diesel supplement for
diesel engine component locations. Windshield washer fluid reservoir Engine coolant reservoir
A.
Battery
B.
Automatic transmission fluid dipstick
C.
Engine oil filler cap
D.
Engine oil dipstick
E.
224
Super Duty (TFA) MaintenanceE163635
ABCEHIJFDG