2014 FORD SUPER DUTY change time
[x] Cancel search: change timePage 95 of 458
Diesel Messages
WARNING
When the CLEANING EXHAUST
FILTER message appears in the
information display, do not park near
flammable materials, vapors or structures
until filter cleaning is complete. Action
Message
The coolant additive needs checking. Refer to your dieselsupplement for more information.
CHECK COOLANT
ADDITIVE
Your vehicle has entered the cleaning mode. Various engineactions will raise the exhaust temperature in the Diesel
Particulate Filter system to burn off the particles (exhaust soot). After the vehicle burns the particles off the exhaust temperature will return to normal levels. This message is
NORMAL. Refer to your diesel supplement for more informa- tion.
CLEANING EXHAUST
FILTER
The diesel particulate filter is full of particles (exhaust soot)
and you are not operating the vehicle in a manner that allows
normal cleaning. One of these messages will stay on until the
exhaust filter cleaning has begun, at which time the CLEANING EXHAUST FILTER message displays. We recommend you
drive the vehicle above 30 mph (48 km/h) until the CLEANING EXHAUST FILTER message turns off. Refer to your diesel supplement for more information.
EXHAUST OVER-
LOADED DRIVE TO CLEAN
EXHAUST AT LIMIT
DRIVE TO CLEAN NOW
The diesel particulate filter will continue to fill with particles
(exhaust soot) if you ignore this message. The service engine soon light will illuminate and engine power may be limited, if
cleaning is not permitted. Dealer service will then be required to restore your vehicle to full-power operation.
Your vehicle exhaust system temperature exceeds intended operating range. If this warning occurs, a chime will sound,
followed by reduced engine power. The engine will shut down when your vehicle speed is below 3 mph (5 km/h). Stop the
vehicle as soon as safely possible. Have the system checked by an authorized dealer.
STOP SAFELY NOW
The diluted engine oil needs to be changed. Refer to yourdiesel supplement for more information.
ENGINE OIL DILUTED
92
Super Duty (TFA) Information Displays
Page 107 of 458
A/C: Press to turn air conditioning off and on. Air conditioning cools the vehicle
using outside air. To improve air conditioning when starting your vehicle, drive
with the windows slightly open for two to three minutes. Use air conditioning
with recirculated air to improve cooling performance and efficiency. Note:
Air
conditioning turns on automatically in MAX A/C, defrost and floor and defrost
modes.
E
MAX A/C:
Distributes recirculated air through the instrument panel vents to
cool the vehicle. This position is more economical and efficient than normal air
conditioning. When in MAX A/C mode, pressing
MAX A/C returns you to your
previous settings.
F
Recirculated air:
Press to switch between outside air and recirculated air.
When the air currently in the passenger compartment is recirculating, the LED
on the button illuminates. Using recirculated air can reduce the time needed to
cool the interior and reduce unwanted odors from entering your vehicle. Even
when you do not select this button, air may still recirculate in some instances
in order to reduce vehicle warm-up time in cold conditions or to cool down time
G
in hot conditions. Note: Recirculated air engages automatically when you select
MAX A/C
, or turn on manually in any airflow mode except defrost. Note: You
may notice changes in sound between recirculated mode and other airflow
modes. Note:
For better cooling in hot conditions, recirculated air automatically
engages when the air distribution control is in panel or panel and floor modes
and the air conditioning is on. You can switch to fresh air by pressing the
recirculated air button again.
PASS TEMP:
Press to switch between single and dual zone. Turn to increase
or decrease the air temperature on the passenger side of the vehicle.
H
Fan speed control +:
Press to increase the volume of air circulated in your
vehicle.
I
AUTO:
Press to turn on fully automatic operation. Select the desired
temperature using the temperature control. The system automatically
determines fan speed, air distribution, A/C operation, and outside or recirculated
air, to heat or cool the vehicle to maintain the selected temperature.
J
Fan speed control -:
Press to decrease the volume of air circulated in your
vehicle.
K
HINTS ON CONTROLLING THE
INTERIOR CLIMATE
Note: To reduce fogging of the windshield
during humid weather, adjust the air
distribution control to the windshield air
vents position. Increase the temperature
and fan speed to improve clearing, if
required. Note:
To reduce humidity build-up inside
your vehicle, do not drive with the system
switched off or with recirculated air always
switched on.
Note: Do not place objects under the front
seats as this may interfere with the airflow
to the rear seats.
Note: Remove any snow, ice or leaves from
the air intake area at the base of the
windshield.
104
Super Duty (TFA) Climate Control
Page 126 of 458
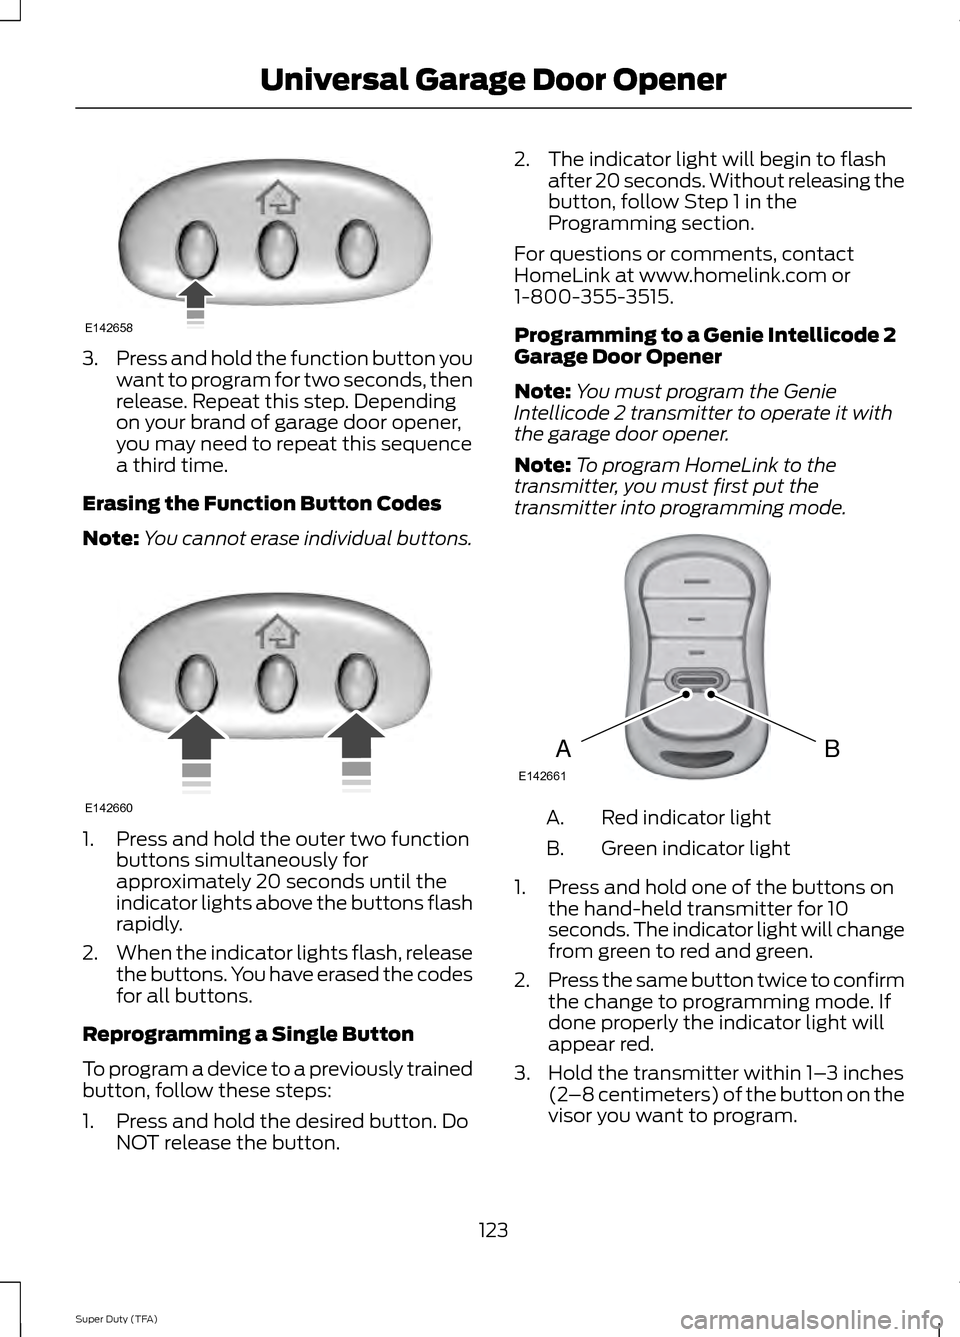
3.
Press and hold the function button you
want to program for two seconds, then
release. Repeat this step. Depending
on your brand of garage door opener,
you may need to repeat this sequence
a third time.
Erasing the Function Button Codes
Note: You cannot erase individual buttons. 1. Press and hold the outer two function
buttons simultaneously for
approximately 20 seconds until the
indicator lights above the buttons flash
rapidly.
2. When the indicator lights flash, release
the buttons. You have erased the codes
for all buttons.
Reprogramming a Single Button
To program a device to a previously trained
button, follow these steps:
1. Press and hold the desired button. Do NOT release the button. 2. The indicator light will begin to flash
after 20 seconds. Without releasing the
button, follow Step 1 in the
Programming section.
For questions or comments, contact
HomeLink at www.homelink.com or
1-800-355-3515.
Programming to a Genie Intellicode 2
Garage Door Opener
Note: You must program the Genie
Intellicode 2 transmitter to operate it with
the garage door opener.
Note: To program HomeLink to the
transmitter, you must first put the
transmitter into programming mode. Red indicator light
A.
Green indicator light
B.
1. Press and hold one of the buttons on the hand-held transmitter for 10
seconds. The indicator light will change
from green to red and green.
2. Press the same button twice to confirm
the change to programming mode. If
done properly the indicator light will
appear red.
3. Hold the transmitter within 1– 3 inches
(2 –8 centimeters) of the button on the
visor you want to program.
123
Super Duty (TFA) Universal Garage Door OpenerE142658 E142660 BAE142661
Page 127 of 458
4. Press and hold both the programmed
Genie button on the hand-held
transmitter and the button you want
to program. The indicator light on the
visor will flash rapidly when the
programming is successful.
Note: The Genie transmitter will transmit
for up to 30 seconds. If HomeLink does not
program within 30 seconds you will need to
press the Genie transmitter again. If the
Genie transmitter indicator light displays
green and red, release the button until the
indicator light turns off before pressing the
button again.
Once you have programmed HomeLink
successfully, you must change the Genie
transmitter out of program mode. To do
this:
1. Press and hold the previously programmed Genie button on the
hand-held transmitter for 10 seconds.
The indicator light will change from red
to red and green.
2. Press the same button twice to confirm
the change. If done correctly the
indicator light will turn green.
Programming HomeLink to the Genie
Intellicode Garage Door Opener Motor
Note: You may need a ladder to access the
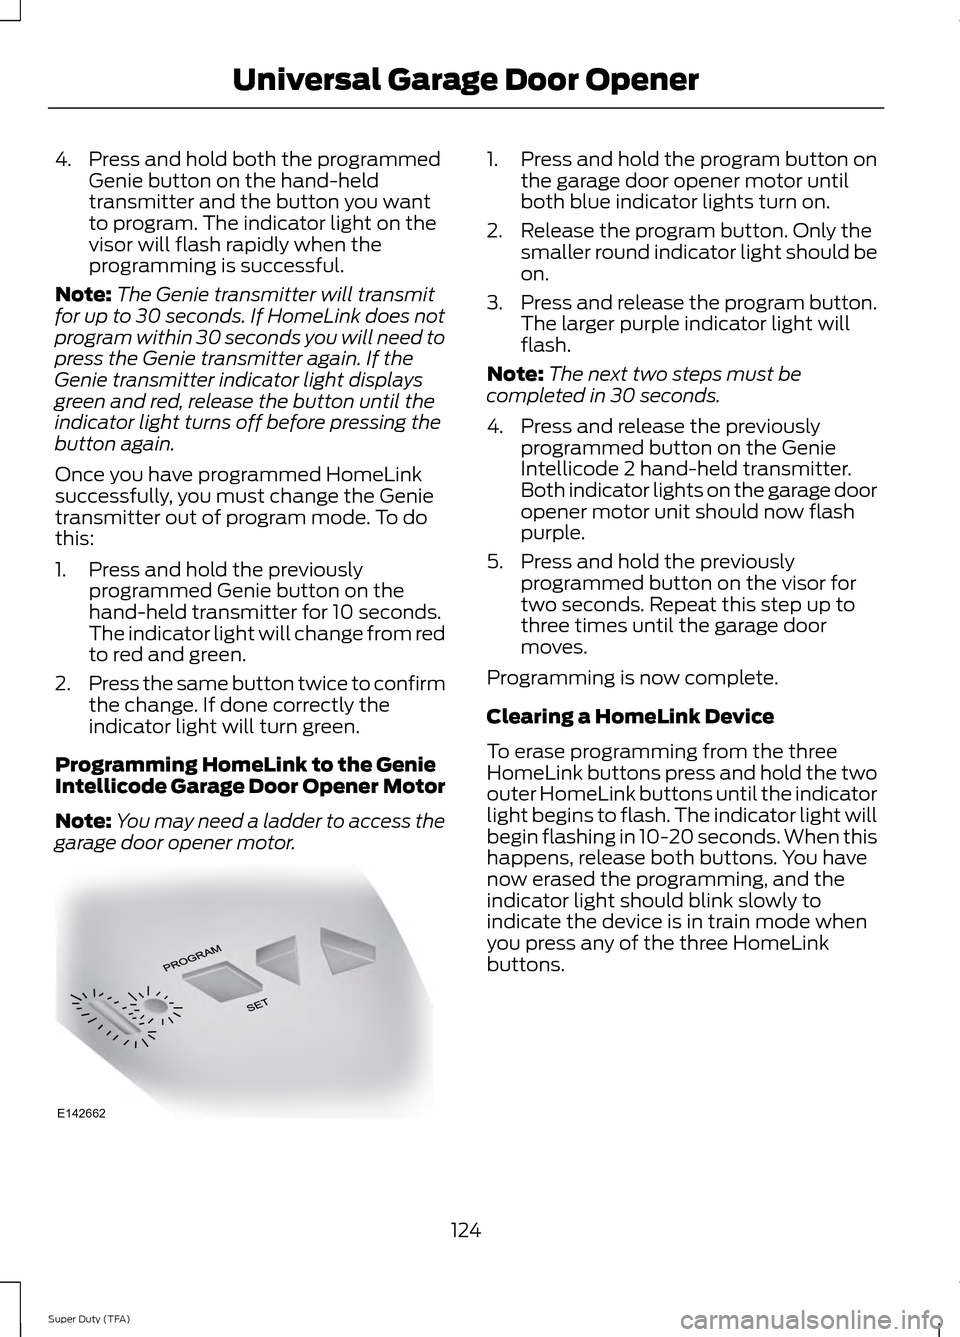
garage door opener motor. 1. Press and hold the program button on
the garage door opener motor until
both blue indicator lights turn on.
2. Release the program button. Only the smaller round indicator light should be
on.
3. Press and release the program button.
The larger purple indicator light will
flash.
Note: The next two steps must be
completed in 30 seconds.
4. Press and release the previously programmed button on the Genie
Intellicode 2 hand-held transmitter.
Both indicator lights on the garage door
opener motor unit should now flash
purple.
5. Press and hold the previously programmed button on the visor for
two seconds. Repeat this step up to
three times until the garage door
moves.
Programming is now complete.
Clearing a HomeLink Device
To erase programming from the three
HomeLink buttons press and hold the two
outer HomeLink buttons until the indicator
light begins to flash. The indicator light will
begin flashing in 10-20 seconds. When this
happens, release both buttons. You have
now erased the programming, and the
indicator light should blink slowly to
indicate the device is in train mode when
you press any of the three HomeLink
buttons.
124
Super Duty (TFA) Universal Garage Door OpenerE142662
Page 137 of 458
FUEL QUALITY
Note:
We recommend that you use only
high quality fuel without additives or other
engine treatments.
Note: Use of any fuel other than those
recommended may cause powertrain
damage, a loss of vehicle performance, and
repairs may not be covered under warranty.
Choosing the Right Fuel
Use only UNLEADED fuel or UNLEADED
fuel blended with a maximum of 15%
ethanol. Do not use fuel ethanol (E85),
diesel fuel, fuel-methanol, leaded fuel or
any other fuel because it could damage or
impair the emission control system. The
use of leaded fuel is prohibited by law.
Your vehicle was not designed to use fuel
or fuel additives with metallic compounds,
including manganese-based additives.
Diesel Engine
Refer to the diesel supplement for
information regarding diesel fuel
recommendations and requirements of
your diesel-powered truck.
Choosing the Right Fuel With a
Flex Fuel Vehicle (If Equipped)
Note: If your vehicle is flex fuel capable, it
will have a yellow bezel placed over the fuel
fill inlet.
Flex fuel vehicles are designed to use
unleaded gasoline or an ethanol fuel blend
that contain up to 85% ethanol. It is also
acceptable to use any mixture of unleaded
gasoline and ethanol fuel that contains up
to 85% ethanol. An ethanol fuel blend that
contains 85% ethanol is labeled as E85 at
the service station. It is best not to alternate repeatedly
between gasoline and E85. If you do switch
fuels, it is recommended that you add as
much fuel as possible—at least half a tank.
Do not add less than five gallons (18.9
liters) when refueling. You should drive the
vehicle immediately after refueling for at
least 5 miles (8 kilometers) to allow the
vehicle to adapt to the change in ethanol
concentration. If you exclusively use E85
fuel, it is recommended to fill the fuel tank
with regular unleaded gasoline at each
scheduled oil change.
Octane Recommendations
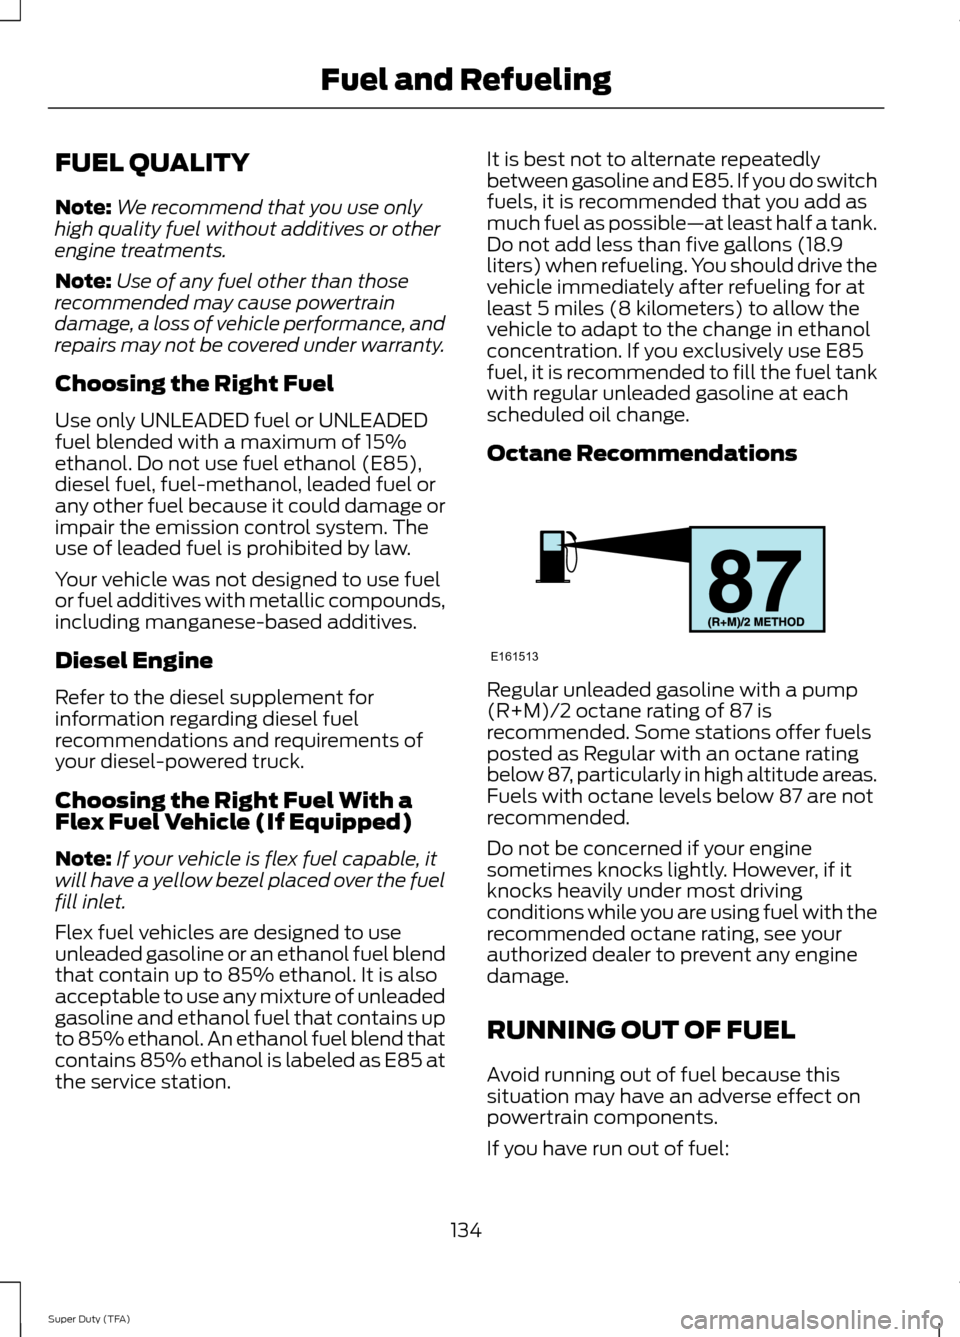
Regular unleaded gasoline with a pump
(R+M)/2 octane rating of 87 is
recommended. Some stations offer fuels
posted as Regular with an octane rating
below 87, particularly in high altitude areas.
Fuels with octane levels below 87 are not
recommended.
Do not be concerned if your engine
sometimes knocks lightly. However, if it
knocks heavily under most driving
conditions while you are using fuel with the
recommended octane rating, see your
authorized dealer to prevent any engine
damage.
RUNNING OUT OF FUEL
Avoid running out of fuel because this
situation may have an adverse effect on
powertrain components.
If you have run out of fuel:
134
Super Duty (TFA) Fuel and RefuelingE161513
Page 154 of 458
If SHIFT DELAYED PULL FORWARD is
displayed in the information display,
transfer case gear tooth blockage is
present. To alleviate this condition, place
the transmission in a forward gear, move
the vehicle forward approximately 5 feet
(1.5 meters), and shift the transmission
back to neutral to allow the transfer case
to complete the range shift.
How Your Vehicle Differs From
Other Vehicles WARNING
Vehicles with a higher center of
gravity such as utility and four-wheel
drive vehicles handle differently than
vehicles with a lower center of gravity.
Utility and four-wheel drive vehicles are
not designed for cornering at speeds as
high as passenger cars any more than
low-slung sports cars are designed to
perform satisfactorily under off-road
conditions. Avoid sharp turns, excessive
speed and abrupt maneuvers in these
vehicles. Failure to drive cautiously could
result in an increased risk of loss of vehicle
control, vehicle rollover, personal injury and
death. Truck and utility vehicles can differ from
some other vehicles. Your vehicle may be
higher to allow it to travel over rough
terrain without getting hung up or
damaging underbody components.
The differences that make your vehicle so
versatile also make it handle differently
than an ordinary passenger car.
Maintain steering wheel control at all
times, especially in rough terrain. Since
sudden changes in terrain can result in
abrupt steering wheel motion, make sure
you grip the steering wheel from the
outside. Do not grip the spokes. Drive cautiously to avoid vehicle damage
from concealed objects such as rocks and
stumps.
You should either know the terrain or
examine maps of the area before driving.
Map out your route before driving in the
area. To maintain steering and braking
control of your vehicle, you must have all
four wheels on the ground and they must
be rolling, not sliding or spinning.
Driving Off-Road With Truck and
Utility Vehicles
Note:
On some models, the initial shift from
two-wheel drive to four-wheel drive while
the vehicle is moving can cause some
momentary clunk and ratcheting sounds.
This is the front drivetrain coming up to
speed and the automatic locking hubs
engaging and is not cause for concern.
Note: Your vehicle may be equipped with
a front air dam that can become damaged
(due to reduced ground clearance) when
taking your vehicle off-road. This air dam
can be taken off by removing two bolts.
Four-wheel drive vehicles are specially
equipped for driving on sand, snow, mud
and rough terrain and have operating
characteristics that are somewhat
different from conventional vehicles, both
on and off the road.
Power is supplied to all four wheels
through a transfer case. On Four-wheel
drive vehicles, the transfer case allows you
to select 4WD when necessary.
Information on transfer case operation and
shifting procedures can be found in this
chapter. Information on transfer case
maintenance can be found in the
Maintenance chapter. You should become
thoroughly familiar with this information
before you operate your vehicle.
151
Super Duty (TFA) Four-Wheel Drive
(If Equipped)
Page 194 of 458
•
TRAILER CONNECTED: Displays
when the system senses a correct
trailer wiring connection (a trailer with
electric trailer brakes) during a given
ignition cycle.
• TRAILER DISCONNECTED:
Displays,
accompanied by a single audible time,
when the system senses a trailer
connection and then a disconnection,
either intentional or unintentional,
during a given ignition cycle. It also
displays if a truck or trailer-wiring fault
occurs causing the trailer to appear
disconnected. This message can also
display if you use the manual control
lever without a trailer connected.
B:
Manual control lever: Slide the control
lever to the left to turn on the trailer's
electric brakes independent of the tow
vehicle's See the following Procedure for
adjusting gain section for instructions on
proper use of this feature. If you use the
manual control while the brake is also
applied, the greater of the two inputs
determines the power sent to the trailer
brakes.
• Stop lamps: Using the manual control
lever illuminates both the trailer brake
lamps and your vehicle brake lamps
except the center high-mount stop
lamp, if you make the proper electrical
connection to the trailer. Pressing your
vehicle brake pedal also illuminates
both trailer and vehicle brake lamps.
Procedure for Adjusting Gain
Note: Only perform this procedure in a
traffic-free environment at speeds of
approximately 20-25 mph (30-40 km/h).
The gain setting sets the trailer brake
controller for the specific towing condition.
You should change the setting as towing
conditions change. Changes to towing
conditions include trailer load, vehicle load,
road conditions and weather. The gain should be set to provide the
maximum trailer braking assistance while
making sure the trailer wheels do not lock
when using the brakes. Locked trailer
wheels may lead to trailer instability.
1.
Make sure the trailer brakes are in good
working condition, functioning normally
and properly adjusted. See your trailer
dealer if necessary.
2. Hook up the trailer and make the electrical connections according to the
trailer manufacturer's instructions.
3. When you plug in a trailer with electric or electric-over-hydraulic brakes,
TRAILER CONNECTED
appears in
the information display.
4. Use the gain adjustment (+ and -) buttons to increase or decrease the
gain setting to the desired starting
point. A gain setting of 6.0 is a good
starting point for heavier loads.
5. In a traffic-free environment, tow the trailer on a dry, level surface at a speed
of 20-25 mph (30-40 km/h) and
squeeze the manual control lever
completely.
6. If the trailer wheels lock up, indicated by squealing tires, reduce the gain
setting. If the trailer wheels turn freely,
increase the gain setting. Repeat Steps
5 and 6 until the gain setting is at a
point just below trailer wheel lock-up.
If towing a heavier trailer, trailer wheel
lock-up may not be attainable even
with the maximum gain setting of 10.
Explanation of Information Display
Warning Messages
Note: An authorized dealer can diagnose
the trailer brake controller to determine
exactly which trailer fault has occurred.
However, your Ford warranty does not cover
this diagnosis if the fault is with the trailer.
191
Super Duty (TFA) Towing
Page 195 of 458
TRAILER BRAKE MODULE FAULT:
Displays in response to faults sensed by
the trailer brake controller, accompanied
by a single tone. If this message appears,
contact an authorized dealer as soon as
possible for diagnosis and repair. The
controller may still function, but
performance may be degraded.
WIRING FAULT ON TRAILER: Displays
when there is a short circuit on the electric
brake output wire. If the
WIRING FAULT
ON TRAILER message displays,
accompanied by a single tone, with no
trailer connected, the problem is with your
vehicle wiring between the trailer brake
controller and the 7-pin connector at the
bumper. If the message only displays with
a trailer connected, the problem is with the
trailer wiring. Consult your trailer dealer for
assistance. This can be a short to ground
(such as a chaffed wire), short to voltage
(such as a pulled pin on trailer emergency
breakaway battery) or the trailer brakes
may be drawing too much current.
Points to Remember
Note: Do not attempt removal of the trailer
brake controller without consulting the
Workshop Manual. Damage to the unit may
result.
• Adjust gain setting before using the
trailer brake controller for the first time.
• Adjust gain setting, using the procedure
above, whenever road, weather and
trailer or vehicle loading conditions
change from when the gain was initially
set.
• Only use the manual control lever for
proper adjustment of the gain during
trailer setup. Misuse, such as
application during trailer sway, could
cause instability of trailer or tow
vehicle. •
Avoid towing in adverse weather
conditions. The trailer brake controller
does not provide anti-lock control of
the trailer wheels. Trailer wheels can
lock up on slippery surfaces, resulting
in reduced stability of trailer and tow
vehicle.
• The trailer brake controller is equipped
with a feature that reduces output at
vehicle speeds below 11 mph (18 km/h)
so trailer and vehicle braking is not jerky
or harsh. This feature is only available
when applying the brakes using your
vehicle's brake pedal, not the
controller.
• The controller interacts with the brake
control system and powertrain control
system of your vehicle to provide the
best performance on different road
conditions.
• Your vehicle's brake system and the
trailer brake system work
independently of each other. Changing
the gain setting on the controller does
not affect the operation of your
vehicle's brakes whether you attach a
trailer or not.
• When you switch the engine off, the
controller output is disabled and the
display and module shut down. The
controller module and display turn on
when you switch the ignition on.
• The trailer brake controller is only a
factory-installed or dealer-installed
item. Ford is not responsible for
warranty or performance of the
controller due to misuse or customer
installation.
192
Super Duty (TFA) Towing