2014 FORD SUPER DUTY warning
[x] Cancel search: warningPage 286 of 458

WARNINGS
Do not attempt to change a tire on
the side of the vehicle close to
moving traffic. Pull far enough off the
road to avoid the danger of being hit when
operating the jack or changing the wheel. Always use the jack provided as
original equipment with your vehicle.
If using a jack other than the one
provided as original equipment with your
vehicle, make sure the jack capacity is
adequate for the vehicle weight, including
any vehicle cargo or modifications. Note:
Passengers should not remain in the
vehicle when the vehicle is being jacked.
Park on a level surface, set the parking
brake and activate the hazard flashers. 1.
Turn the engine off and block the wheel
that is diagonally opposite of the flat
tire using the wheel chock. Note: Lock
the manual hub on the wheel if the
vehicle is a 4x4.
2. Remove the jack, jack handle, lug wrench and spare tire from the
stowage locations.
3. Use the tip of the lug wrench to remove
any wheel trim.
4. Loosen each wheel lug nut ½ turn counterclockwise, but do not remove
them until the wheel is raised off the
ground. F-250 and F-350 single rear wheel
vehicles
1. Insert the hooked end of the jack
handle into the jack and use the handle
to slide the jack under the vehicle.
2. Position the jack according to the following guides: Front (4x2)
Front driver side (4x4)
283
Super Duty (TFA) Wheels and TiresE142551 E162801 E162802 E162803
Page 293 of 458

TECHNICAL SPECIFICATIONS
Wheel Lug Nut Torque Specifications
WARNING
When a wheel is installed, always remove any corrosion, dirt or foreign materials
present on the mounting surfaces of the wheel or the surface of the wheel hub,
brake drum or brake disc that contacts the wheel. Make sure that any fasteners
that attach the rotor to the hub are secured so they do not interfere with the mounting
surfaces of the wheel. Installing wheels without correct metal-to-metal contact at the
wheel mounting surfaces can cause the wheel nuts to loosen and the wheel to come off
while the vehicle is in motion, resulting in loss of control. lbf.ft (Nm)
Bolt size
165 lbf.ft (224 Nm)
M14 x 1.5
* Torque specifications are for nut and bolt threads free of dirt and rust. Use only Ford
recommended replacement fasteners.
On vehicles equipped with single rear wheels, retighten the lug nuts to the specified torque
at 100 miles (160 kilometers) after any wheel disturbance (such as tire rotation, changing
a flat tire, wheel removal).
On vehicles equipped with dual rear wheels, retighten the wheel lug nuts to the specified
torque at 100 miles (160 kilometers), and again at 500 miles (800 kilometers) of new
vehicle operation and after any wheel disturbance (such as tire rotation, changing a flat
tire, wheel removal).
It is important to follow the proper wheel mounting and lug nut torque procedures.
On all two-piece flat wheel nuts, apply one drop of motor oil between the flat washer
and the nut. Do not apply motor oil to the wheel nut threads or the wheel stud threads. 290
Super Duty (TFA) Wheels and TiresE161443
Page 302 of 458
Ford part number /
Ford specification
Ford part name or
equivalent
Capacity
Item
WSH-M1C231-B
3.53 fl oz (104.39
ml)
A/C Refrigerant
Compressor Oil 9
(Diesel engines)
1 Add 8 oz. (236 ml) of Additive Friction Modifier XL-3 or equivalent meeting Ford
Specification EST-M2C118– A for complete refill of limited slip Ford axles. Ford design
rear axles contain a synthetic lubricant that does not require changing unless the axle
has been submerged in water.
2 Add the coolant type originally equipped in your vehicle.
3 Your engine has been designed to use Motorcraft engine oils or equivalent oils that meet
Ford specifications. It is also acceptable to use an engine oil of recommended viscosity
grade that meets API SN requirements and displays the API Certification Mark for gasoline
engines
Note: Do not use API category oils labeled as SN, SM, SL or lower category unless the label
also displays the API certification mark. These oils do not meet the requirements for your
engine and emission system.
4 Do not use supplemental engine oil additives in your engine. They are unnecessary and
could lead to engine damage that is not covered by your Ford warranty.
5 Make sure the correct automatic transmission fluid is used. Transmission fluid
requirements are indicated on the dipstick blade or the dipstick handle. Check the container
to verify the fluid you are adding is of the correct type. Refer to your scheduled maintenance
information to determine the correct service interval.
Note: Automatic transmissions that require MERCON LV should only use MERCON LV fluid.
Use of any fluid other than the recommended fluid may cause transmission damage.
6 Indicates only approximate dry-fill capacity. Some applications may vary based on cooler
size and if equipped with an in-tank cooler. The amount of transmission fluid and fluid
level should be set by the indication on the dipstick’ s normal operating range.
7 See Transmission (page 140). See Checking automatic transmission fluid in this chapter
for the correct dipstick type. Fill to the proper capacity according to dipstick Type A.
8 See Transmission (page 140). See Checking automatic transmission fluid in this chapter
for the correct dipstick type. Fill to the proper capacity according to dipstick Type B.
9 WARNING
The A/C refrigerant system contains refrigerant R-134a under high pressure. Opening
the A/C refrigerant system can cause personal injury. A/C refrigerant system is to
be serviced only by qualified personnel.
299
Super Duty (TFA) Capacities and Specifications
Page 304 of 458
•
MP3 folder mode represents a folder
structure consisting of one level of
folders. The CD player numbers all MP3
tracks on the disc (noted by the .mp3
file extension) and all folders
containing MP3 files, from F001
(folder) T001 (track) to F253 T255.
• Creating discs with only one level of
folders helps with navigation through
the disc files.
If you are burning your own MP3 discs, it is
important to understand how the system
reads the structures you create. While
various files may be present, (files with
extensions other than mp3), only files with
the .mp3 extension are played; other files
are ignored by the system. This enables
you to use the same MP3 disc for a variety
of tasks on your work computer, home
computer and your in-vehicle system. In track mode, the system displays and
plays the structure as if it were only one
level deep (all .mp3 files play, regardless
of being in a specific folder). In folder
mode, the system only plays the .mp3 files
in the current folder.
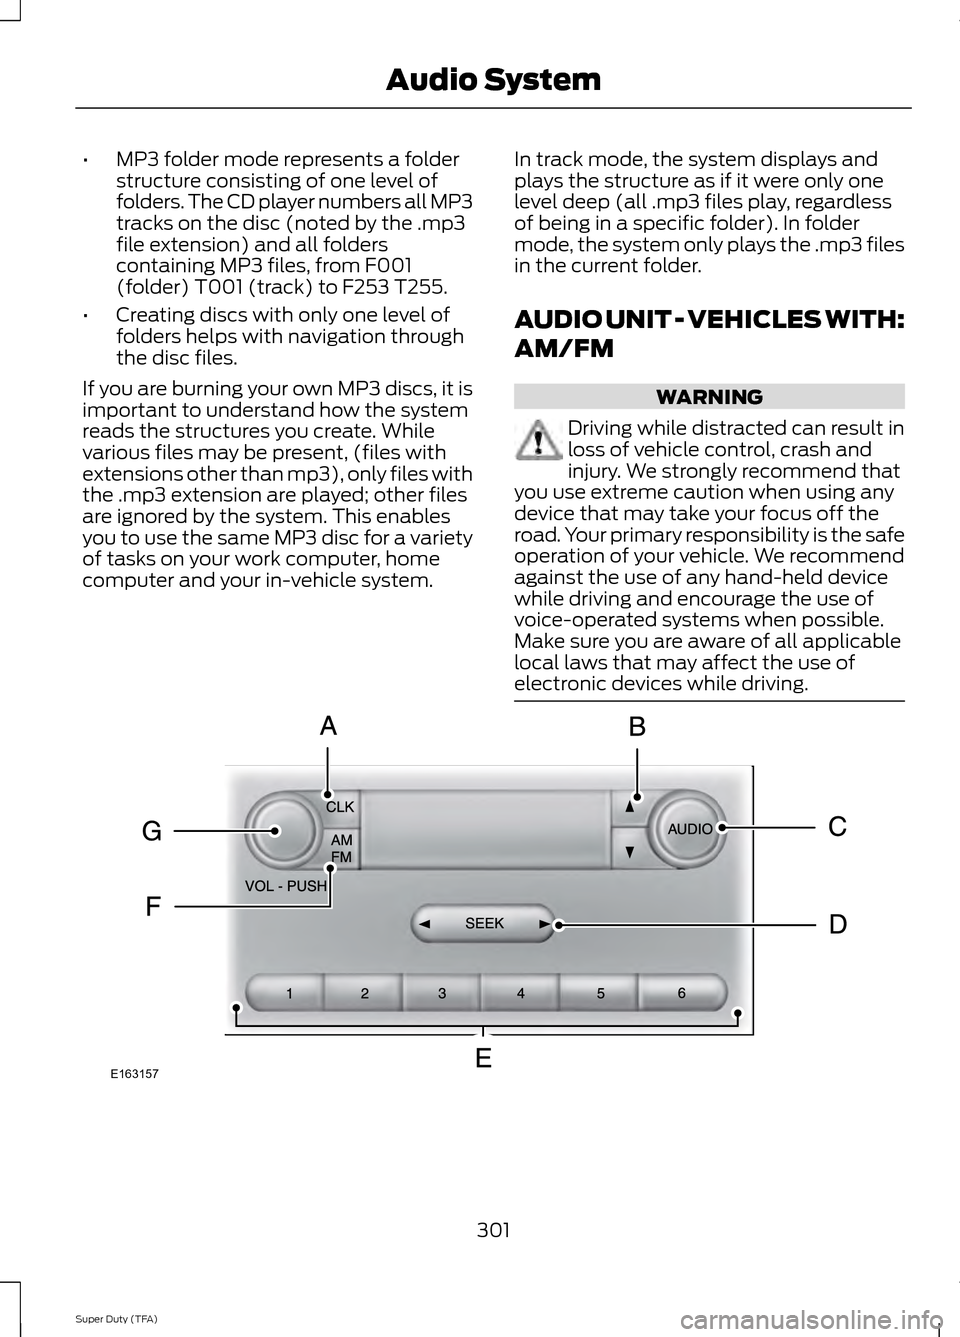
AUDIO UNIT - VEHICLES WITH:
AM/FM WARNING
Driving while distracted can result in
loss of vehicle control, crash and
injury. We strongly recommend that
you use extreme caution when using any
device that may take your focus off the
road. Your primary responsibility is the safe
operation of your vehicle. We recommend
against the use of any hand-held device
while driving and encourage the use of
voice-operated systems when possible.
Make sure you are aware of all applicable
local laws that may affect the use of
electronic devices while driving. 301
Super Duty (TFA) Audio SystemE163157
Page 305 of 458
CLK: Press this button to switch the display between the clock and radio
frequency. To set the time, press and hold the button until the hours start to
flash. Press the arrow buttons (B) to adjust he hours, then repeat to set the
minutes. Press
CLK again to exit clock mode.
A
Tune: Press these arrow buttons to manually search through the radio frequency
band. Press and hold for a fast search. In AUDIO mode, press the buttons to
adjust different sound settings.
B
AUDIO:
Press this button to access settings for Treble, Middle, Bass, Fade and
Balance.
C
SEEK:
Press this button to go to the previous or next strong station on the
frequency band.
D
Memory presets:
Store your favorite radio stations. To store a radio station,
tune to the station, then press and hold a preset button until sound returns.
E
AM/FM:
Press this button to select a frequency band.
F
VOL-PUSH:
Press this button to switch the system off and on. Turn the control
to adjust the volume.
G
AUDIO UNIT - VEHICLES WITH:
AM/FM/CD/SYNC WARNING
Driving while distracted can result in
loss of vehicle control, crash and
injury. We strongly recommend that
you use extreme caution when using any
device that may take your focus off the
road. Your primary responsibility is the safe
operation of your vehicle. We recommend
against the use of any hand-held device
while driving and encourage the use of
voice-operated systems when possible.
Make sure you are aware of all applicable
local laws that may affect the use of
electronic devices while driving. 302
Super Duty (TFA) Audio System
Page 307 of 458

•
Track/Folder is only available on MP3
files when in CD mode. In track mode,
pressing the SEEK arrows allows you
to scroll through all the tracks on the
disc. In folder mode, pressing the SEEK
arrows allows you to scroll through all
the tracks within the selected folder.
Press the
FOLDER buttons to access
other folders.
• COMPRESS
(Compression) is only
available in CD and MP3 modes.
Switching compression on brings the
soft and loud passages together for a
more consistent listening level. Use the
SEEK
buttons and up and down arrow
buttons to switch it on and off.
F
AUX: Press to access the media features
of the SYNC system. See SYNC™ (page
312).
G
SEEK: In radio mode, press and release
these buttons to go to the next (or
previous) preset radio station or disc track.
In CD and MP3 modes, press these buttons
to select the next (or previous) track, or
press and hold to advance (or reverse)
within the same track.
H
Play, Pause and OK: Play and Pause
allow you to play or pause a track when
listening to a CD. OK
allows you to confirm
commands with phone and media features
of the SYNC system. See
SYNC™ (page
312).
I
SHUFFLE: Play music on the selected
CD or MP3 folder in random order.
J
FOLDER: Press to access the next folder
on an MP3 disc.
K
FOLDER: Press to access the previous
folder on an MP3 disc.
L
FF: Press to fast forward in a CD track or
MP3 file manually.
M
REW: Press to rewind in a CD track or
MP3 file manually. N
Memory presets: Store your favorite
radio stations. To store a radio station, tune
to the station, then press and hold a preset
button until sound returns.
O
TEXT/SCAN: In radio, CD and MP3
modes, press and hold to hear a brief
sampling of radio stations, CD tracks or
MP3 files. In CD and MP3 modes, press and
release to display track title, artist name
and disc title. In text mode, sometimes the
display requires additional text to show.
When the < / > indicator is on, press TEXT
and then use the
SEEK buttons to view
the additional display text.
P
AM/FM: Press to select a frequency
band.
Q
VOL-PUSH: Press to switch the system
off and on. Turn it to adjust the volume.
R
CD: Press to enter CD or MP3 mode.
AUDIO UNIT - VEHICLES WITH:
SONY AM/FM/CD WARNING
Driving while distracted can result in
loss of vehicle control, crash and
injury. We strongly recommend that
you use extreme caution when using any
device that may take your focus off the
road. Your primary responsibility is the safe
operation of your vehicle. We recommend
against the use of any hand-held device
while driving and encourage the use of
voice-operated systems when possible.
Make sure you are aware of all applicable
local laws that may affect the use of
electronic devices while driving. Note:
The MyFord Touch system controls
most of the audio features. See
MyFord
Touch ™ (page 348).
304
Super Duty (TFA) Audio System
Page 313 of 458
Possible action
Condition
Radio display
Contact SIRIUS at 1-888-
539-7474 to resolve
subscription issues.
Your satellite service is no
longer available.
Call SIRIUS 1-888-539-7474
Use the channel guide to
turn off the Lock or Skip
function on that station.
All the channels in the
selected category are either
skipped or locked.
None found. Check Channel
Guide.
No action required.
SIRIUS has updated the
channels available for your
vehicle.
Subscription Updated
AUXILIARY INPUT JACK WARNINGS
Driving while distracted can result in
loss of vehicle control, crash and
injury. We strongly recommend that
you use extreme caution when using any
device that may take your focus off the
road. Your primary responsibility is the safe
operation of your vehicle. We recommend
against the use of any hand-held device
while driving and encourage the use of
voice-operated systems when possible.
Make sure you are aware of all applicable
local laws that may affect the use of
electronic devices while driving. For safety reasons, do not connect
or adjust the settings on your
portable music player while your
vehicle is moving. Store the portable music player in a
secure location, such as the center
console or the glove box, when your
vehicle is moving. Hard objects may
become projectiles in a collision or sudden
stop, which may increase the risk of serious
injury. The audio extension cable must be
long enough to allow the portable music
player to be safely stored while your
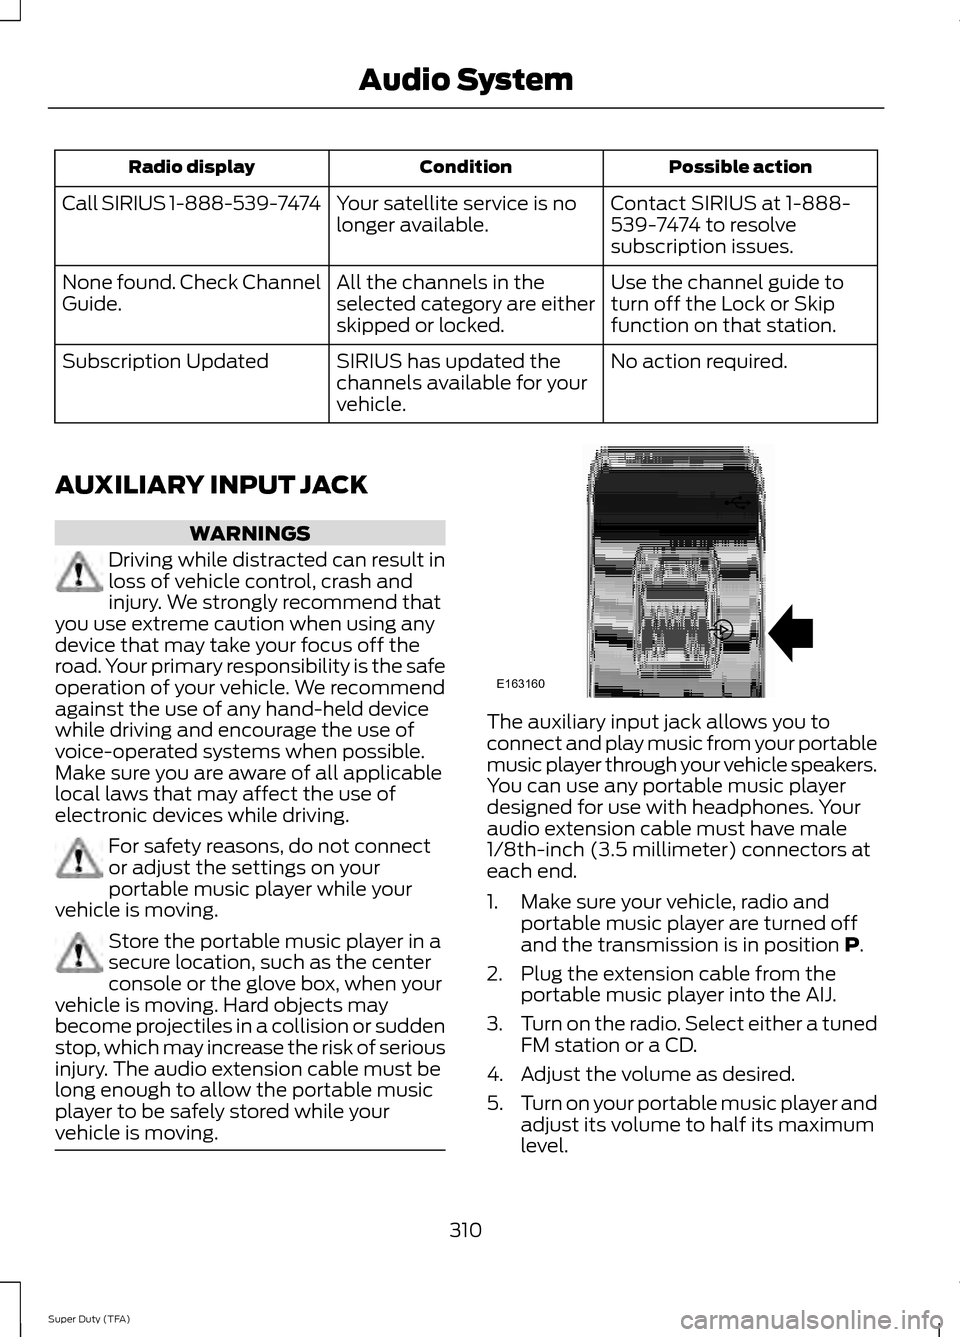
vehicle is moving. The auxiliary input jack allows you to
connect and play music from your portable
music player through your vehicle speakers.
You can use any portable music player
designed for use with headphones. Your
audio extension cable must have male
1/8th-inch (3.5 millimeter) connectors at
each end.
1. Make sure your vehicle, radio and
portable music player are turned off
and the transmission is in position P.
2. Plug the extension cable from the portable music player into the AIJ.
3. Turn on the radio. Select either a tuned
FM station or a CD.
4. Adjust the volume as desired.
5. Turn on your portable music player and
adjust its volume to half its maximum
level.
310
Super Duty (TFA) Audio SystemE163160
Page 316 of 458
Times are subject to change due to
holidays.
SYNC Owner Account
Why do I need a SYNC owner account?
•
Required to activate Vehicle Health
Report and to view the reports online.
• Required to activate the
subscription-based SYNC Services and
to personalize your Saved Points and
Favorites.
• Essential for keeping up with the latest
software downloads available for
SYNC.
• Access to customer support for any
questions you may have.
Driving Restrictions
For your safety, certain features are
speed-dependent and restricted when your
vehicle is traveling over 3 mph (5 km/h).
Safety Information WARNING
Driving while distracted can result in
loss of vehicle control, crash and
injury. We strongly recommend that
you use extreme caution when using any
device that may take your focus off the
road. Your primary responsibility is the safe
operation of your vehicle. We recommend
against the use of any hand-held device
while driving and encourage the use of
voice-operated systems when possible.
Make sure you are aware of all applicable
local laws that may affect the use of
electronic devices while driving. When using SYNC:
•
Do not operate playing devices if the
power cords or cables are broken, split
or damaged. Place cords and cables
out of the way, so they do not interfere
with the operation of pedals, seats,
compartments or safe driving abilities.
• Do not leave playing devices in your
vehicle during extreme conditions as it
could cause them damage. See your
device's manual for further information.
• Do not attempt to service or repair the
system. See an authorized dealer.
Privacy Information
When a cellular phone is connected to
SYNC, the system creates a profile within
your vehicle that is linked to that cellular
phone. This profile is created in order to
offer you more cellular features and to
operate more efficiently. Among other
things, this profile may contain data about
your cellular phone book, text messages
(read and unread), and call history,
including history of calls when your cellular
phone was not connected to the system.
In addition, if you connect a media device,
the system creates and retains an index of
supported media content. The system also
records a short development log of
approximately 10 minutes of all recent
system activity. The log profile and other
system data may be used to improve the
system and help diagnose any problems
that may occur.
The cellular profile, media device index,
and development log will remain in the
vehicle unless you delete them and are
generally accessible only in the vehicle
when the cellular phone or media player
is connected. If you no longer plan to use
the system or the vehicle, we recommend
you perform a Master Reset to erase all
stored information.
313
Super Duty (TFA) SYNC™