2014 FORD F250 fuel cap
[x] Cancel search: fuel capPage 139 of 460

We recommend regular unleaded gasoline
with a pump (R+M)/2 octane rating of 87.
Some stations offer fuels posted as regular
with an octane rating below 87, particularly
in high altitude areas. We do not
recommend fuels with an octane rating
below 87.
Do not be concerned if your engine
sometimes knocks lightly. However, if it
knocks heavily under most driving
conditions while you are using fuel with the
recommended octane rating, see your
authorized dealer to prevent any engine
damage.
RUNNING OUT OF FUEL
Avoid running out of fuel because this
situation may have an adverse effect on
powertrain components.
If you have run out of fuel:
•
You may need to cycle the ignition from
off to on several times after refueling
to allow the fuel system to pump the
fuel from the tank to the engine. On
restarting, cranking time will take a few
seconds longer than normal. With
keyless ignition, just start the engine.
Crank time will be longer than usual.
• Normally, adding 1 gallon (3.8 liters) of
fuel is enough to restart the engine. If
the vehicle is out of fuel and on a steep
grade, more than 1 gallon (3.8 liters)
may be required.
• The service engine soon indicator may
come on. For more information on the
service engine soon indicator, See
Warning Lamps and Indicators
(page 77). Refilling With a Portable Fuel
Container WARNINGS
The fuel system may be under
pressure. If the fuel filler cap is
venting vapor or if you hear a hissing
sound, wait until it stops before completely
removing the fuel filler cap. Otherwise, fuel
may spray out and cause personal injury. Do not try to pry open or push open
the fuel system with foreign objects.
This could damage the fuel system
and its seal and cause personal injury to
you or others. Use the following directions when filling
from a portable fuel container:
1.
Remove the fuel cap from the fuel filler
pipe by rotating it counter clockwise.
2. Slowly insert the portable fuel container into the fuel filler opening.
3. Fill the vehicle with fuel from the portable fuel container.
4. 4. When done, remove the portable fuel container nozzle and reinstall fuel
cap. Insert fuel cap into fuel filler
opening and turn clockwise until a click
is heard.
REFUELING WARNINGS
Fuel vapor burns violently and a fuel
fire can cause severe injuries.
Read and follow all the instructions
on the pump island.
Turn off your engine when you are
refueling.
Do not smoke if you are near fuel or
refueling your vehicle.
136
Super Duty (TFA) Fuel and Refueling
Page 140 of 460

WARNINGS
Keep sparks, flames and smoking
materials away from fuel.
Stay outside your vehicle and do not
leave the fuel pump unattended
when refueling your vehicle. This is
against the law in some places. Keep children away from the fuel
pump; never let children pump fuel.
Do not use personal electronic
devices while refueling.
Use the following guidelines to avoid
electrostatic charge build-up when filling
an ungrounded fuel container:
•
Place approved fuel container on the
ground.
• Do not fill a fuel container while it is in
the vehicle (including the cargo area).
• Keep the fuel pump nozzle in contact
with the fuel container while filling.
• Do not use a device that would hold
the fuel pump handle in the fill position.
Fuel Filler Cap WARNINGS
The fuel system may be under
pressure. If you hear a hissing sound
near the fuel filler door, do not refuel
until the sound stops. Otherwise, fuel may
spray out, which could cause serious
personal injury. If you do not use the proper fuel filler
cap, excessive pressure or vacuum
in the fuel tank may damage the fuel
system or cause the fuel cap to disengage
in a collision, which may result in possible
personal injury. Note:
If you must replace the fuel filler cap,
replace it with a fuel filler cap that is
designed for your vehicle. The customer
warranty may be void for any damage to the
fuel tank or fuel system if the correct
genuine Ford, Motorcraft® or other certified
fuel filler cap is not used.
Your fuel tank filler cap has an indexed
design with a 1/4th turn on and off feature.
When fueling your vehicle:
1. Put the vehicle in P (Park).
2. Turn the engine off.
3. Carefully turn the filler cap counterclockwise until it spins off.
4. Pull to remove the cap from the fuel filler pipe.
5. To install the cap, align the tabs on the
cap with the notches on the filler pipe.
6. Turn the filler cap clockwise 1/4 of a turn clockwise until it clicks at least
once.
If the Check Fuel Cap light or a Check Fuel
Cap message appears in the instrument
cluster and stays on after you start the
engine, the fuel filler cap may not be
properly installed.
If the fuel cap light remains on, at the next
opportunity, safely pull off of the road,
remove the fuel filler cap, align the cap
properly and reinstall it. The check fuel cap
light or Check fuel cap message may not
reset immediately; it may take several
driving cycles for the indicators to turn off.
A driving cycle consists of an engine
start-up (after four or more hours with the
engine off) followed by normal city and
highway driving.
137
Super Duty (TFA) Fuel and Refueling
Page 141 of 460

FUEL CONSUMPTION
Empty reserve is the amount of fuel
remaining in the tank after the fuel gauge
indicates empty. The amount of usable
fuel in the empty reserve varies and should
not be relied upon to increase driving range.
•
The usable capacity of the fuel tank is
the amount of fuel that can be added
into the tank after the gauge indicates
empty
• The advertised capacity is the total fuel
tank size. See Capacities and
Specifications (page 292). It is the
combined usable capacity plus the
empty reserve.
• Due to the empty reserve, you may not
be able to refuel the full amount of the
advertised capacity of the fuel tank
even when the fuel gauge reads empty.
Filling the Tank
For consistent results when filling the fuel
tank:
• Turn the ignition off before fueling; an
inaccurate reading results if the engine
is left running.
• Use the same fill rate
(low-medium-high) each time the tank
is filled.
• Allow no more than two automatic
click-offs when filling.
Results are most accurate when the filling
method is consistent. Calculating Fuel Economy
Do not measure fuel economy during the
first 1000 miles (1600 kilometers) of
driving (this is your engine
’s break-in
period); a more accurate measurement is
obtained after 2000 miles - 3000 miles
(3200 kilometers - 4800 kilometers). Also,
fuel expense, frequency of fill ups or fuel
gauge readings are not accurate ways to
measure fuel economy.
1. Fill the fuel tank completely and record
the initial odometer reading.
2. Each time you fill the tank, record the amount of fuel added.
3. After at least 3 to 5 tank fill ups, fill the
fuel tank and record the current
odometer reading.
4. Subtract your initial odometer reading from the current odometer reading.
5. Calculate fuel economy by dividing miles traveled by gallons used (For
Metric: Multiply liters used by 100, then
divide by kilometers traveled).
Keep a record for at least 1 month and
record the type of driving (city or highway).
This provides an accurate estimate of the
vehicle ’s fuel economy under current
driving conditions. Additionally, keeping
records during summer and winter show
how temperature impacts fuel economy.
In general, lower temperatures mean lower
fuel economy.
Conditions
• Heavily loading a vehicle or towing a
trailer may reduce fuel economy at any
speed.
• Carrying unnecessary weight may
reduce fuel economy (approximately
1 mpg [0.4 km/L] is lost for every 400
pounds [180 kilograms] of weight
carried).
138
Super Duty (TFA) Fuel and Refueling
Page 179 of 460

LOAD LIMIT
Vehicle Loading - with and
without a Trailer
This section will guide you in the
proper loading of your vehicle,
trailer or both, to keep your loaded
vehicle weight within its design
rating capability, with or without
a trailer. Properly loading your
vehicle will provide maximum
return of vehicle design
performance. Before loading your
vehicle, familiarize yourself with
the following terms for
determining your vehicle
’s weight
ratings, with or without a trailer,
from the vehicle ’s Tire Label or
Safety Compliance Certification
Label:
Base Curb Weight - is the weight
of the vehicle including a full tank
of fuel and all standard
equipment. It does not include
passengers, cargo, or optional
equipment.
Vehicle Curb Weight -
is the
weight of your new vehicle when
you picked it up from your
authorized dealer plus any
aftermarket equipment. Payload -
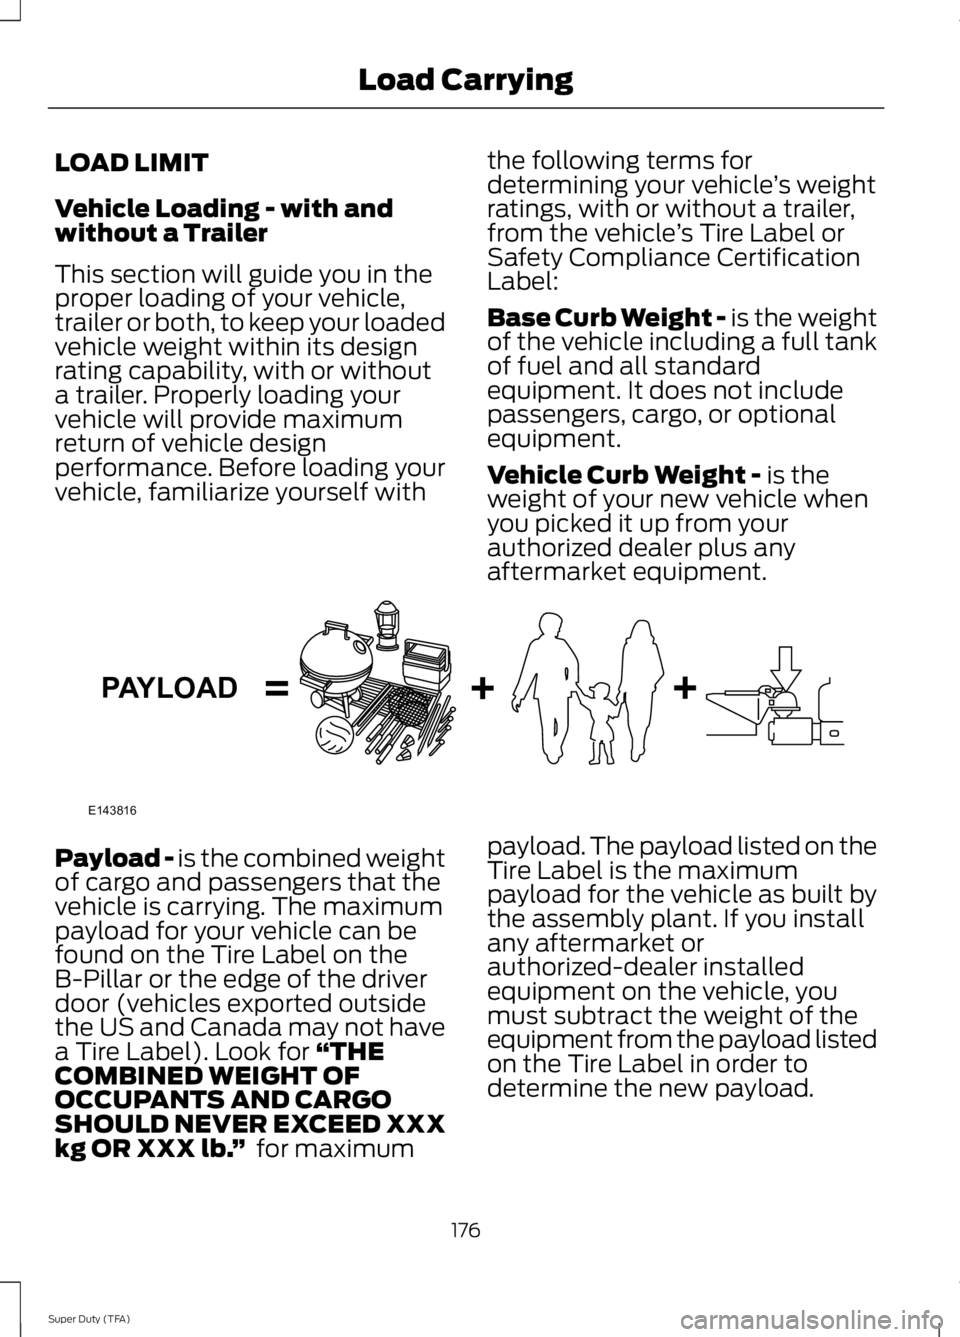
is the combined weight
of cargo and passengers that the
vehicle is carrying. The maximum
payload for your vehicle can be
found on the Tire Label on the
B-Pillar or the edge of the driver
door (vehicles exported outside
the US and Canada may not have
a Tire Label). Look for
“THE
COMBINED WEIGHT OF
OCCUPANTS AND CARGO
SHOULD NEVER EXCEED XXX
kg OR XXX lb. ” for maximum payload. The payload listed on the
Tire Label is the maximum
payload for the vehicle as built by
the assembly plant. If you install
any aftermarket or
authorized-dealer installed
equipment on the vehicle, you
must subtract the weight of the
equipment from the payload listed
on the Tire Label in order to
determine the new payload.
176
Super Duty (TFA) Load CarryingE143816PAYLOAD
Page 198 of 460

Trailer Lamps
WARNING
Never connect any trailer lamp wiring
to the vehicle's tail lamp wiring; this
may damage the electrical system
resulting in fire. Contact your authorized
dealer as soon as possible for assistance
in proper trailer tow wiring installation.
Additional electrical equipment may be
required. Trailer lamps are required on most towed
vehicles. Make sure all running lights, brake
lights, turn signals and hazard lights are
working.
Using a Step Bumper (If Equipped)
The rear bumper is equipped with an
integral hitch and only requires a ball with
a one-inch (25.4 millimeter) shank
diameter. The bumper has a 5000-pound
(2268 kilogram) trailer weight and a
500-pound (227 kilogram) tongue weight
capacity
If it is necessary to relocate the hitch ball
position, you must install a frame-mounted
trailer hitch.
Before Towing a Trailer
Practice turning, stopping and backing up
to get the feel of your vehicle-trailer
combination before starting on a trip.
When turning, make wider turns so the
trailer wheels clear curbs and other
obstacles.
When Towing a Trailer
•
Do not drive faster than 70 mph (113
km/h) during the first 500 miles (800
kilometers).
• Do not make full-throttle starts. •
Check your hitch, electrical connections
and trailer wheel lug nuts thoroughly
after you have traveled 50 miles (80
kilometers).
• When stopped in congested or heavy
traffic during hot weather, place the
gearshift in position P to aid engine and
transmission cooling and to help A/C
performance.
• Turn off the speed control with heavy
loads or in hilly terrain. The speed
control may turn off automatically
when you are towing on long, steep
grades.
• Shift to a lower gear when driving down
a long or steep hill. Do not apply the
brakes continuously, as they may
overheat and become less effective.
• If your transmission is equipped with a
Grade Assist or Tow/Haul feature, use
this feature when towing. This provides
engine braking and helps eliminate
excessive transmission shifting for
optimum fuel economy and
transmission cooling.
• If your vehicle is equipped with
AdvanceTrac with RSC, this system
may turn on during typical cornering
maneuvers with a heavily loaded trailer.
This is normal. Turning the corner at a
slower speed while towing may reduce
this tendency.
• If you are towing a trailer frequently in
hot weather, hilly conditions, at the
gross combined weight rating (or any
combination of these factors), consider
refilling your rear axle with synthetic
gear lubricant (if the axle is not already
filled with it). See Capacities and
Specifications (page 292).
195
Super Duty (TFA) Towing
Page 204 of 460

•
Transmissions give their best fuel
economy when operated in the top
cruise gear and with steady pressure
on the gas pedal.
• Four-wheel-drive operation (if
equipped) is less fuel efficient than
two-wheel-drive operation.
• Close the windows for high-speed
driving.
DRIVING THROUGH WATER
Note: Driving through deep water above
the recommended levels can cause vehicle
damage.
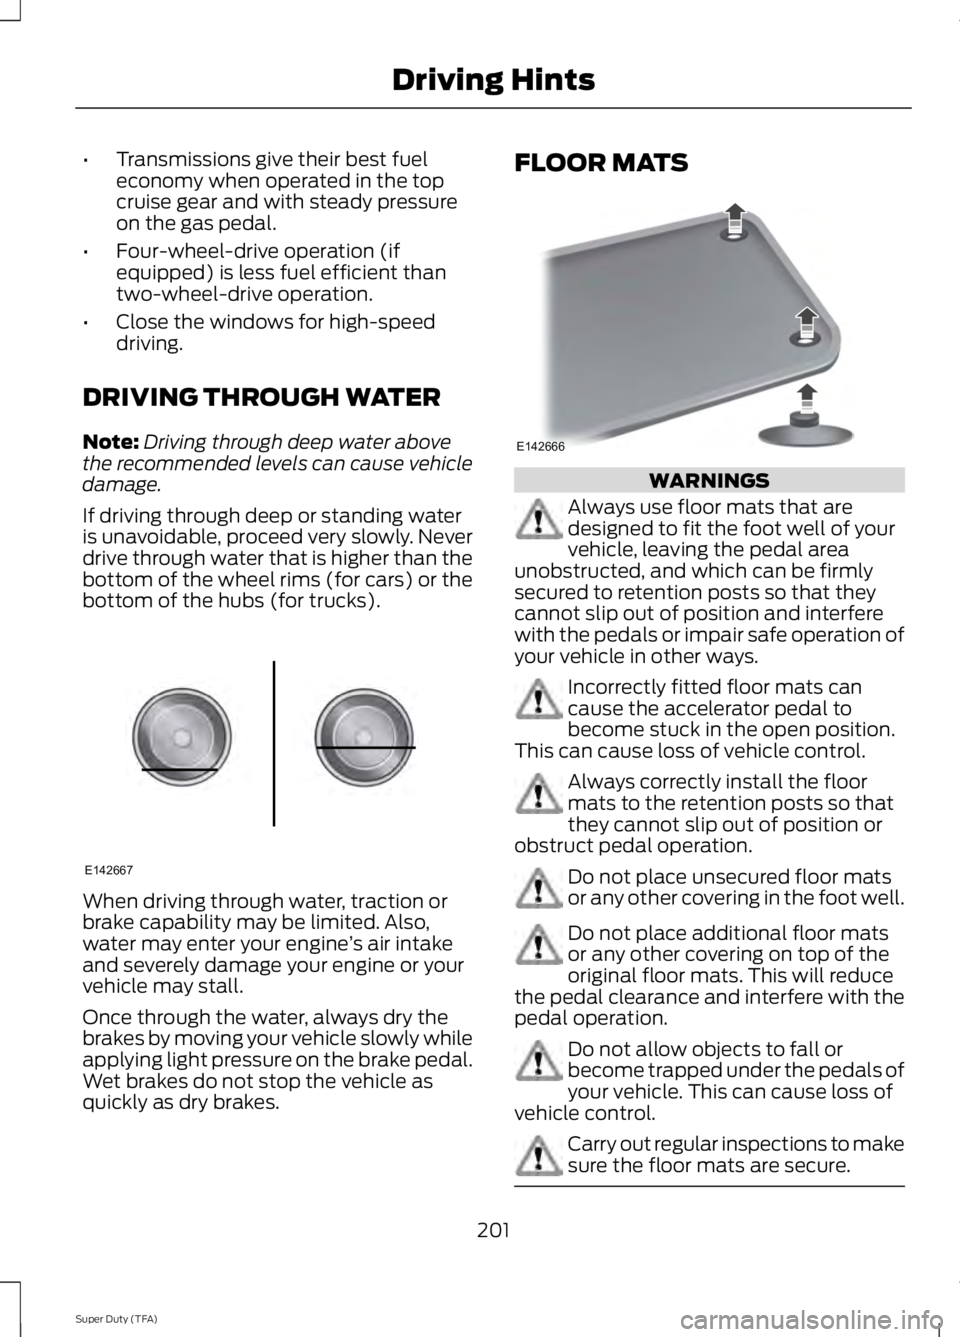
If driving through deep or standing water
is unavoidable, proceed very slowly. Never
drive through water that is higher than the
bottom of the wheel rims (for cars) or the
bottom of the hubs (for trucks). When driving through water, traction or
brake capability may be limited. Also,
water may enter your engine
’s air intake
and severely damage your engine or your
vehicle may stall.
Once through the water, always dry the
brakes by moving your vehicle slowly while
applying light pressure on the brake pedal.
Wet brakes do not stop the vehicle as
quickly as dry brakes. FLOOR MATS
WARNINGS
Always use floor mats that are
designed to fit the foot well of your
vehicle, leaving the pedal area
unobstructed, and which can be firmly
secured to retention posts so that they
cannot slip out of position and interfere
with the pedals or impair safe operation of
your vehicle in other ways. Incorrectly fitted floor mats can
cause the accelerator pedal to
become stuck in the open position.
This can cause loss of vehicle control. Always correctly install the floor
mats to the retention posts so that
they cannot slip out of position or
obstruct pedal operation. Do not place unsecured floor mats
or any other covering in the foot well.
Do not place additional floor mats
or any other covering on top of the
original floor mats. This will reduce
the pedal clearance and interfere with the
pedal operation. Do not allow objects to fall or
become trapped under the pedals of
your vehicle. This can cause loss of
vehicle control. Carry out regular inspections to make
sure the floor mats are secure.
201
Super Duty (TFA) Driving HintsE142667 E142666
Page 208 of 460

HAZARD WARNING FLASHERS
Note:
The hazard warning flashers will
operate when the ignition is in any position
or if the key is not in the ignition. If used
when the engine is not running, the battery
will lose charge. As a result, there may be
insufficient power to restart your engine. In some models, the hazard
flasher control is located on the
instrument panel.
In other models, this feature is located on
the steering column, just behind the
steering wheel. Use your hazard warning flashers when
your vehicle is creating a safety hazard for
other motorists.
•
Press the flasher control and all front
and rear direction indicators flash.
• Press the flasher control again to turn
them off.
FUEL SHUTOFF WARNING
Failure to inspect and, if necessary,
repair fuel leaks after a collision may
increase the risk of fire and serious
injury. Ford Motor Company recommends
that the fuel system be inspected by an
authorized dealer after any collision. In the event of a moderate to severe
collision, this vehicle is equipped with a
fuel pump shut-off feature that stops the
flow of fuel to the engine. Not every impact
will cause a shut-off.
Should your vehicle shut off after a
collision, you may restart your vehicle by
doing the following:
1. Turn the ignition off.
2. Turn the ignition to crank.
3. Turn the ignition off.
4.
Turn the ignition on again to re-enable
the fuel pump.
JUMP-STARTING THE VEHICLE WARNINGS
The gases around the battery can
explode if exposed to flames, sparks,
or lit cigarettes. An explosion could
result in injury or vehicle damage. Batteries contain sulfuric acid which
can burn skin, eyes and clothing, if
contacted.
Use only an adequate-sized cable
with insulated clamps.
Preparing Your Vehicle
Note:
Do not attempt to push-start your
automatic transmission vehicle. Automatic
transmissions do not have push-start
capability. Attempting to push-start a
vehicle with an automatic transmission may
cause transmission damage.
Note: Use only a 12-volt supply to start your
vehicle.
Note: Do not disconnect the battery of the
disabled vehicle as this could damage the
vehicle's electrical system.
205
Super Duty (TFA) Roadside EmergenciesE142663 E161463
Page 230 of 460

Only use oils certified for gasoline engines
by the American Petroleum Institute (API).
An oil with this trademark symbol
conforms to the current engine and
emission system protection standards and
fuel economy requirements of the
International Lubricants Specification
Advisory Council (ILSAC), comprised of
U.S. and Japanese automobile
manufacturers.
1. Check the engine oil level.
2. If the engine oil level is not within the
normal range, add engine oil that
meets Ford specifications. See
Capacities and Specifications for more
information.
3. Remove the engine oil filler cap and use a funnel to pour the engine oil into
the opening.
4. Recheck the engine oil level. Make sure
the oil level is not above the normal
operating range on the engine oil level
dipstick.
5. Install the engine oil level dipstick and ensure it is fully seated.
6. Fully install the engine oil filler cap by turning the filler cap clockwise until
three clicks are heard or until the cap
is fully seated. ENGINE COOLANT CHECK
Checking the Engine Coolant
Note:
If your vehicle is equipped with a
diesel engine, refer to the Diesel
Supplement.
When the engine is cold, check the
concentration and level of the engine
coolant at the intervals listed in the
scheduled maintenance information. See
Scheduled Maintenance (page 430).
Note: Make sure that the level is between
the MIN and MAX marks on the coolant
reservoir.
Note: Coolant expands when it is hot. The
level may extend beyond the MAX mark
Note: If the level is at the MIN mark, below
the MIN mark, or empty, add coolant
immediately. See
Adding Engine Coolant
in this chapter.
The coolant concentration should be
maintained within 48% to 50%, which
equates to a freeze point between
-29°F
(-34°C) and -35°F (-37°C).
Note: For best results, coolant
concentration should be tested with a
refractometer such as Rotunda tool
300-ROB75240 available from your
authorized dealer. Ford does not
recommend the use of hydrometers or
coolant test strips for measuring coolant
concentrations.
Note: Automotive fluids are not
interchangeable. Do not use engine coolant
or antifreeze or windshield washer fluid
outside of its specified function and vehicle
location.
227
Super Duty (TFA) MaintenanceE142732