Page 66 of 143
Protected componentsFuse amp ratingFuse or relay number
Fuel pump diode.—Diode 1
Air conditioning clutch diode.—Diode 2
*Mini fuses.
**Maxi fuses.
UPS Power Distribution Box 1
Protected componentsFuse amp ratingFuse or relay number
Powertrain control module.RelayR1
Daytime running lamps.RelayR2
Starter motor.RelayR3
Blower motor.RelayR4
Horn.RelayR5
Fuel pump.RelayR6
Starter ground.RelayR7
Trailer tow parking lamps.RelayR8
Back-up lamps.RelayR9
Not used.RelayR10
Not used.RelayR11
Air conditioning.RelayR12
63Motorhome (TY3) , enUSAFusesE172543
Page 68 of 143
Protected componentsFuse amp ratingFuse or relay number
Powertrain control module relay keep alivepower.5A*M11
Parking lamps.20A*M12
One-touch start.DiodeD1
Fuel pump.DiodeD2
Air conditioning.DiodeD3
Not used.—R2-1
Powertrain control module vehicle power.30A**J1
Fuel pump.20A**J2
Cigar lighter power point.20A**J3Diagnostic connector.
Blower motor.40A**J4
Headlamps.30A**J5
Ignition switch feeds.40A**J6
Ignition switch feeds.40A**J7
Instrument panel fuse box.50A**J8
Starter motor solenoid.30A**J9
3–channel anti-lock brake system module.40A**J10
4–channel anti-lock brake system module(Hydromax).60A**
Trailer tow electronic brake.30A**J11
Lighting.60A**J12
Vehicle power 3.20A**J13
Horn.20A**J14
3–channel anti-lock brake system module.40A**J15
65Motorhome (TY3) , enUSAFuses
Page 69 of 143
Protected componentsFuse amp ratingFuse or relay number
4–channel anti-lock brake system module.60A**
Trailer tow parking lamps.20A**J16
*Mini fuse.**J-case fuse.
Diode and Relay Module
Locate the module box with the powerdistribution box in from of the radiator.
Protected componentsRelay location
One-touch integrated start (ATO diode).1
Not used.2
Not used.3
Daytime running lamps power relay.4
Hydromax – brake on/off signal isolating relay.5
Reverse lamps relay.6
Starter ground relay.7
Trailer tow parking lamps relay.8
66Motorhome (TY3) , enUSAFusesE161520
Page 72 of 143
Protected componentsFuse amp ratingFuse or relay number
Trailer tow direction indicators.20A22
Cluster run/accessory.10A23
Not used.—24
Body builder right-hand low beam head-lamp feed.10A25
Brake shift interlock actuator.10A26
Not used.—27
Not used.—28
Not used.—29
Not used.—30
Body builder left-hand low beam head-lamp feed.10A31
Not used.—32
Reverse lamps.10A33
Body builder reverse gear.10A34Trailer tow reverse lamps.
Body builder high beam feed.20A35High beam indicator.
Not used.—36
Not used.—37
Body builder run feed.10A38
Not used.—39
Not used.—40
Instrument cluster lighting.10A41
Not used.—42
Not used.—43
Not used.—44
Trailer tow right-hand direction indicator.—Relay 1
69Motorhome (TY3) , enUSAFuses
Page 73 of 143
Protected componentsFuse amp ratingFuse or relay number
Trailer tow left-hand direction indicator.—Relay 2
Right-hand direction indicator.—Relay 3
Left-hand direction indicator.—Relay 4
Not used.—Relay 5
Daytime running lamps.—Relay 6Parking brake.
Daytime running lamps on/off.—Relay 7
Brake transmission shift interlock.—Diode 1
Brake transmission shift interlock.—Diode 2
Not used.—F1
Not used.—F2
Not used.—F3
Brake transmission shift interlock.10AF4
Not used.—F5
Not used.—F6
Not used.—F7
Not used.—F8
Not used.—F9
Not used.—F10
Not used.—F11
Not used.—F12
70Motorhome (TY3) , enUSAFuses
Page 82 of 143

AUTOMATIC TRANSMISSION
FLUID CHECK
WARNING
The dipstick cap and surroundingcomponents may be hot; gloves arerecommended.
Note:Automatic transmission fluidexpands when warmed. To obtain anaccurate fluid check, drive the vehicle untilit is at normal operating temperature(approximately 20 miles [30 km]). If yourvehicle has been operated for an extendedperiod at high speeds, in city traffic duringhot weather or pulling a trailer, the vehicleshould be turned off for about 30 minutesto allow fluid to cool to normal operatingtemperature 150°F - 170°F (66°C - 77°C)before checking.
Refer to your scheduled maintenanceinformation for scheduled intervals for fluidchecks and changes.
Your transmission does not consume fluid.However, the fluid level should be checkedif the transmission is not working properly,(i.e., if the transmission slips or shiftsslowly) or if you notice some sign of fluidleakage. To check the fluid level:
1.Drive the vehicle 20 miles (30 km) oruntil it reaches normal operatingtemperature
2.Park the vehicle on a level surface andengage the parking brake
3.With the engine running, parking brakeengaged and your foot on the brakepedal, move the gearshift lever throughall of the gear ranges. Allow sufficienttime for each gear to engage
4.Latch the gearshift lever in P (Park)and leave the engine running.
5.Remove the dipstick, wiping it cleanwith a clean, dry lint free rag. Ifnecessary, refer to Under HoodOverview in this chapter for thelocation of the dipstick.
6.Install the dipstick making sure it is fullyseated in the filler tube.
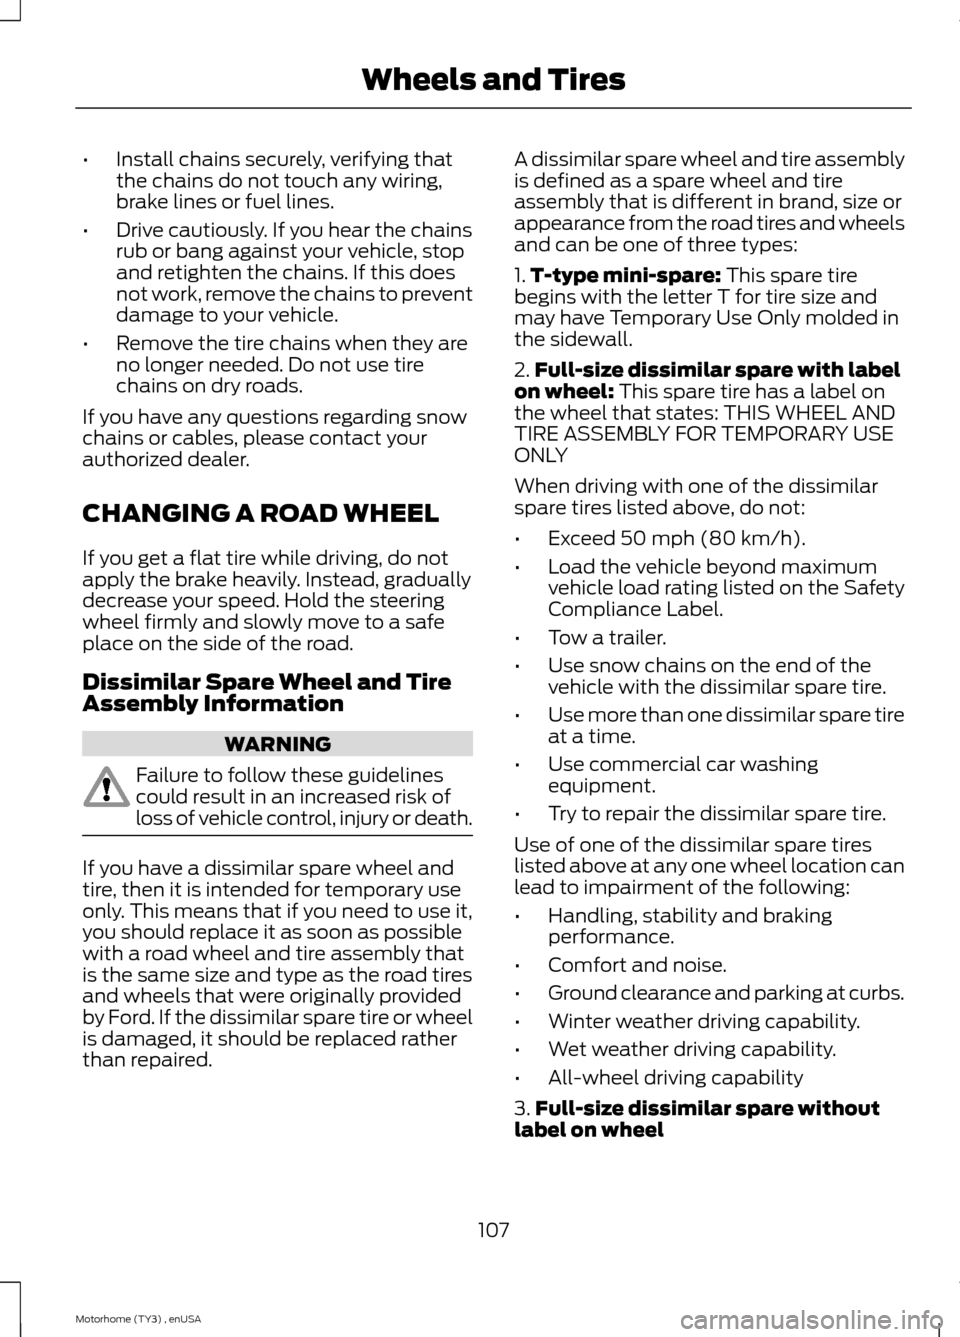
7.Remove the dipstick and inspect thefluid level. The fluid should be in thedesignated area for normal operatingtemperature or ambient temperature.
Do not use supplemental transmissionfluid additives, treatments or cleaningagents. The use of these materials mayaffect transmission operation and resultin damage to internal transmissioncomponents.
Low fluid level
Do not drive the vehicle if there is noindication of fluid on the dipstick and theambient temperature is above 50°F(10°C).
Correct fluid level
79Motorhome (TY3) , enUSAMaintenanceE161551 E161552
Page 110 of 143

•Install chains securely, verifying thatthe chains do not touch any wiring,brake lines or fuel lines.
•Drive cautiously. If you hear the chainsrub or bang against your vehicle, stopand retighten the chains. If this doesnot work, remove the chains to preventdamage to your vehicle.
•Remove the tire chains when they areno longer needed. Do not use tirechains on dry roads.
If you have any questions regarding snowchains or cables, please contact yourauthorized dealer.
CHANGING A ROAD WHEEL
If you get a flat tire while driving, do notapply the brake heavily. Instead, graduallydecrease your speed. Hold the steeringwheel firmly and slowly move to a safeplace on the side of the road.
Dissimilar Spare Wheel and TireAssembly Information
WARNING
Failure to follow these guidelinescould result in an increased risk ofloss of vehicle control, injury or death.
If you have a dissimilar spare wheel andtire, then it is intended for temporary useonly. This means that if you need to use it,you should replace it as soon as possiblewith a road wheel and tire assembly thatis the same size and type as the road tiresand wheels that were originally providedby Ford. If the dissimilar spare tire or wheelis damaged, it should be replaced ratherthan repaired.
A dissimilar spare wheel and tire assemblyis defined as a spare wheel and tireassembly that is different in brand, size orappearance from the road tires and wheelsand can be one of three types:
1.T-type mini-spare: This spare tirebegins with the letter T for tire size andmay have Temporary Use Only molded inthe sidewall.
2.Full-size dissimilar spare with labelon wheel: This spare tire has a label onthe wheel that states: THIS WHEEL ANDTIRE ASSEMBLY FOR TEMPORARY USEONLY
When driving with one of the dissimilarspare tires listed above, do not:
•Exceed 50 mph (80 km/h).
•Load the vehicle beyond maximumvehicle load rating listed on the SafetyCompliance Label.
•Tow a trailer.
•Use snow chains on the end of thevehicle with the dissimilar spare tire.
•Use more than one dissimilar spare tireat a time.
•Use commercial car washingequipment.
•Try to repair the dissimilar spare tire.
Use of one of the dissimilar spare tireslisted above at any one wheel location canlead to impairment of the following:
•Handling, stability and brakingperformance.
•Comfort and noise.
•Ground clearance and parking at curbs.
•Winter weather driving capability.
•Wet weather driving capability.
•All-wheel driving capability
3.Full-size dissimilar spare withoutlabel on wheel
107Motorhome (TY3) , enUSAWheels and Tires
Page 111 of 143

When driving with the full-size dissimilarspare wheel and tire assembly, do not:
•Exceed 70 mph (113 km/h).
•Use more than one dissimilar sparewheel and tire assembly at a time.
•Use commercial car washingequipment.
•Use snow chains on the end of thevehicle with the dissimilar spare wheeland tire assembly.
The usage of a full-size dissimilar sparewheel and tire assembly can lead toimpairment of the following:
•Handling, stability and brakingperformance.
•Comfort and noise.
•Ground clearance and parking at curbs.
•Winter weather driving capability.
•Wet weather driving capability.
•All-wheel driving capability
When driving with the full-size dissimilarspare wheel and tire assembly additionalcaution should be given to:
•Towing a trailer.
•Driving vehicles equipped with acamper body.
•Driving vehicles with a load on thecargo rack.
Drive cautiously when using a full-sizedissimilar spare wheel and tire assemblyand seek service as soon as possible.
Tire Change Procedure
WARNINGS
When one of the front wheels is offthe ground, the transmission alonewill not prevent the vehicle frommoving or slipping off the jack, even if thetransmission is in park (P).
WARNINGS
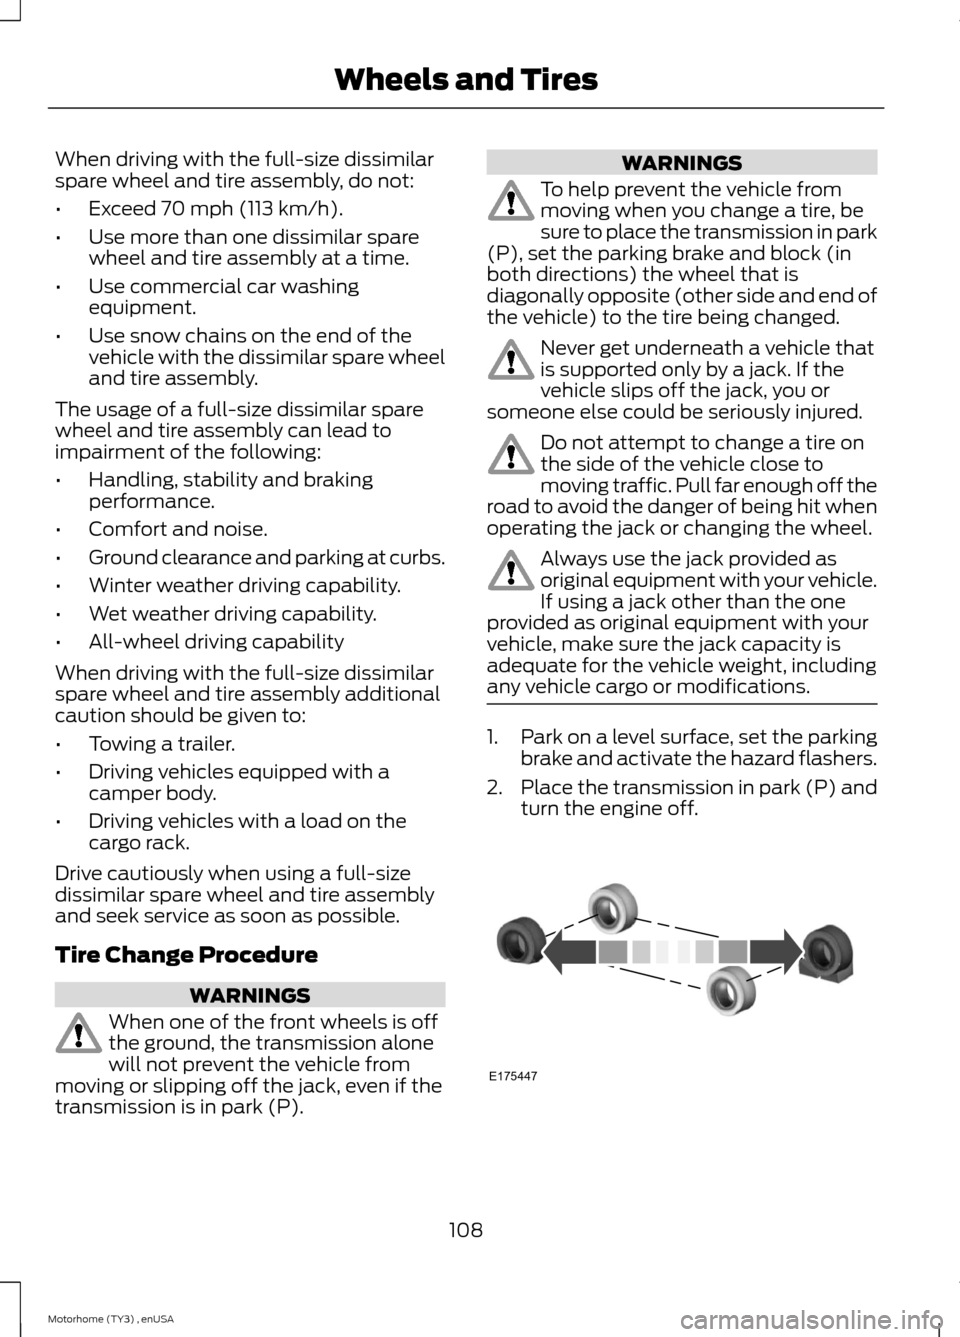
To help prevent the vehicle frommoving when you change a tire, besure to place the transmission in park(P), set the parking brake and block (inboth directions) the wheel that isdiagonally opposite (other side and end ofthe vehicle) to the tire being changed.
Never get underneath a vehicle thatis supported only by a jack. If thevehicle slips off the jack, you orsomeone else could be seriously injured.
Do not attempt to change a tire onthe side of the vehicle close tomoving traffic. Pull far enough off theroad to avoid the danger of being hit whenoperating the jack or changing the wheel.
Always use the jack provided asoriginal equipment with your vehicle.If using a jack other than the oneprovided as original equipment with yourvehicle, make sure the jack capacity isadequate for the vehicle weight, includingany vehicle cargo or modifications.
1.Park on a level surface, set the parkingbrake and activate the hazard flashers.
2.Place the transmission in park (P) andturn the engine off.
108Motorhome (TY3) , enUSAWheels and TiresE175447