2014 FORD EXPLORER ESP
[x] Cancel search: ESPPage 245 of 586

The vehicle brakes will be automatically applied to slow your vehicle to
maintain a safe distance from the vehicle in front. The maximum braking
which is applied by the system is limited and can be overridden by the
driver applying the brakes.
If the system predicts that its maximum braking level will not be
sufficient, an audible warning will sound while the system continues to
brake. This is accompanied by a heads-up display; a red warning bar
illuminating on the windshield. You should take immediate action.
Setting the Gap Distance
Note:It is your responsibility to select a gap appropriate to the driving
conditions.
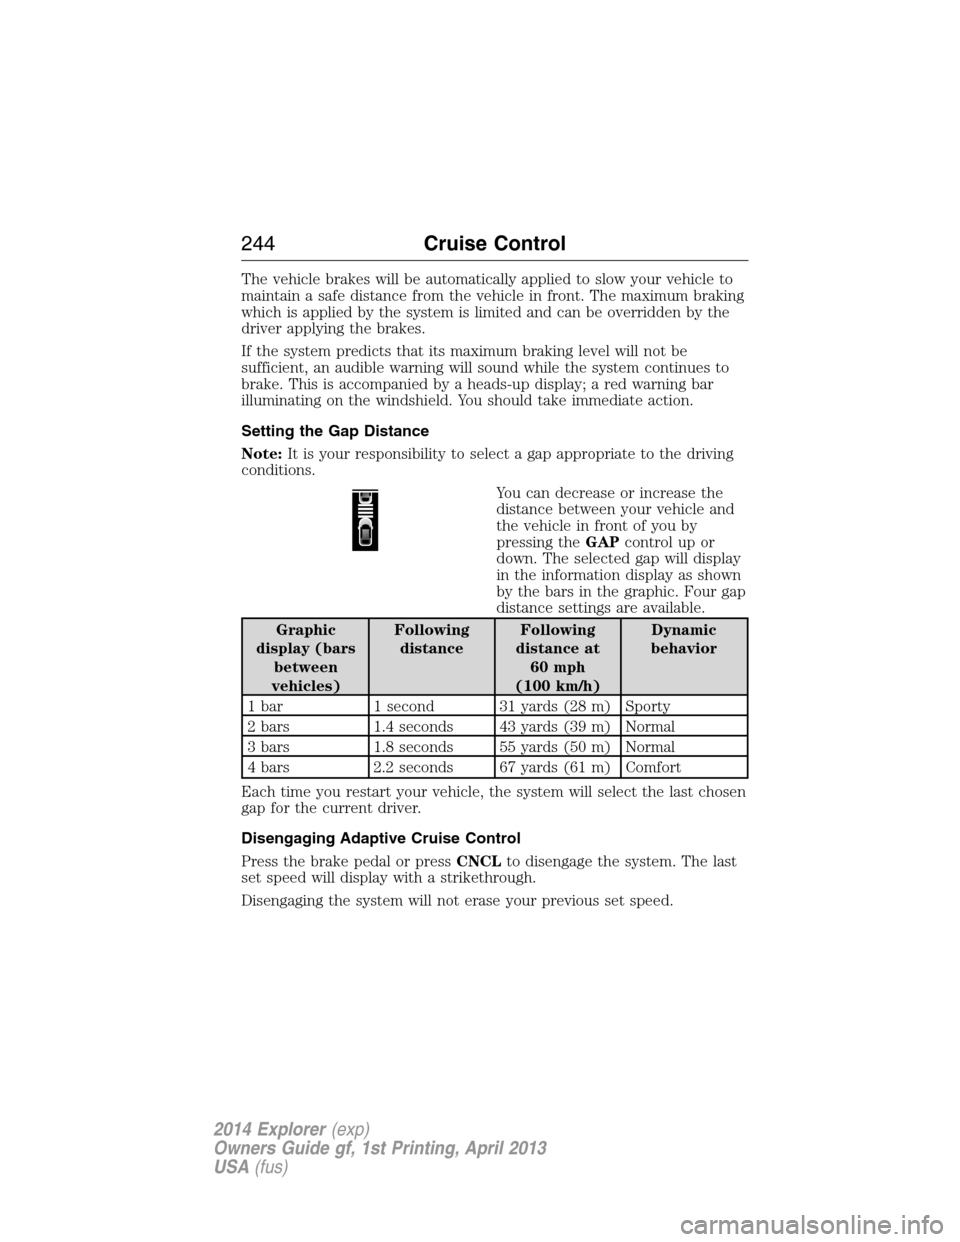
You can decrease or increase the
distance between your vehicle and
the vehicle in front of you by
pressing theGAPcontrol up or
down. The selected gap will display
in the information display as shown
by the bars in the graphic. Four gap
distance settings are available.
Graphic
display (bars
between
vehicles)Following
distanceFollowing
distance at
60 mph
(100 km/h)Dynamic
behavior
1 bar 1 second 31 yards (28 m) Sporty
2 bars 1.4 seconds 43 yards (39 m) Normal
3 bars 1.8 seconds 55 yards (50 m) Normal
4 bars 2.2 seconds 67 yards (61 m) Comfort
Each time you restart your vehicle, the system will select the last chosen
gap for the current driver.
Disengaging Adaptive Cruise Control
Press the brake pedal or pressCNCLto disengage the system. The last
set speed will display with a strikethrough.
Disengaging the system will not erase your previous set speed.
244Cruise Control
2014 Explorer(exp)
Owners Guide gf, 1st Printing, April 2013
USA(fus)
Page 250 of 586

Cause Action
Swirling water, or snow or ice on
the surface of the road may
interfere with the radar signals.Do not use system in these
conditions because it may not
detect any vehicle ahead.
You are in a desert or remote area
with no other vehicles and no
roadside objects.Wait a short time or switch to
normal cruise control.
Due to the nature of radar technology, it is possible to get a blockage
warning and not be blocked. This can happen, for example, when driving
in sparse rural or desert environments. A false blocked condition will
either self-clear or clear after a key cycle.
Switching to Normal Cruise Control
WARNING:Normal cruise control will not brake due to slower
vehicles. Always be aware of which mode is selected and apply
the brakes when necessary.
You can manually change from adaptive cruise control to normal cruise
control through the information display.
The cruise control indicator light will replace the adaptive
cruise control indicator light if normal cruise control is selected.
The gap setting will not be displayed, the system will not
automatically respond to lead vehicles and automatic braking will not be
activated. The system will default to adaptive cruise control when the
engine is started.
Cruise Control249
2014 Explorer(exp)
Owners Guide gf, 1st Printing, April 2013
USA(fus)
Page 251 of 586

DRIVER ALERT (IF EQUIPPED)
WARNING:The driver alert system is designed to aid you. It is
not intended to replace your attention and judgment. You are still
responsible to drive with due care and attention.
Note:The system will store the on/off setting in the information display
menu through ignition cycles.
Note:If enabled in the menu, the system will be active above 40 mph
(64 km/h). When below the activation speed the driver alert system will
inform you the system is unavailable.
Note:The system works as long as one lane marking can be detected by
the camera.
Note:If the camera is blocked or if the windshield is damaged, the
system may not function.
Note:The system may not be available in poor weather or other low
visibility conditions.
The system automatically monitors your driving behavior using various
inputs including the front camera sensor.
If the system detects that your driving alertness is reduced below a
certain threshold, the system will alert you using a chime and a message
in the cluster display
Switching the System On and Off
You may switch the system on or off through the Information Display.
Refer to theInformation Displayschapter. The system on or off setting
is stored and will use your last setting the next time the vehicle is
started.
System Warnings
Note:The system will not issue warnings below approximately 40 mph
(64 km/h).
The warning system is in two stages. At first the system issues a
temporary warning that you need to take a rest. This message will only
appear for a short time. If the system detects further reduction in driving
alertness, another warning may be issued which will remain in the
information display for a longer time. Press OK on the steering wheel
control to clear the warning.
250Driving Aids
2014 Explorer(exp)
Owners Guide gf, 1st Printing, April 2013
USA(fus)
Page 253 of 586

LANE KEEPING SYSTEM (IF EQUIPPED)
WARNING:The system is designed to aid the driver. It is not
intended to replace the driver’s attention and judgment. The
driver is still responsible to drive with due care and attention.
The system detects unintentional drifting toward the outside of the lane
and alerts and/or aids the driver to stay in the lane through the steering
system and instrument cluster display. The system automatically detects
and tracks the road lane markings using a camera that is mounted
behind the interior rear view mirror.
Note:The system works above 40 mph (64 km/h).
Note:The system works as long as one lane marking can be detected by
the camera.
Note:If the camera is blocked or if the windshield is damaged, the
system may not function.
Note:When Aid mode is on and the system detects no driver steering
activity for a short period after system activation, the system alerts the
driver to keep their hands on the steering wheel. The system may detect
a light touch or grip on the steering wheel as hands-off driving.
Switching the System On and Off
Press the button located on the turn signal lever to switch the
system on or off.
Note:The system on/off setting is stored until it is manual changed,
unless a MyKey® is detected. If a MyKey® is detected, the system is
defaulted to on and the mode is set to Alert.
Note:If a MyKey® is detected, pressing the button will not affect the
on/off status of the system. Only the Mode and Intensity settings can be
changed when a MyKey® is present.
System Settings
The system has one standard feature setting and one optional setting
menu available. To view or adjust the settings, refer to theInformation
Displayschapter. The last-known selection for each of these settings is
stored by the system. You do not need to readjust your settings each
time you turn on the system.
Mode:This setting allows the driver to select which of the system
features will be enabled.
252Driving Aids
2014 Explorer(exp)
Owners Guide gf, 1st Printing, April 2013
USA(fus)
Page 262 of 586

System Errors
If either system senses a problem with the left or right sensor, the
BLIS® indicator in the information display will illuminate and remain on.
Also,BLIND SPOT SYSTEM FAULTorCROSS TRAFFIC SYSTEM
FAULTmessage will appear. When problems that may cause the left or
right indicator not to illuminate, only the information display message
faults appear.
Switching the Systems Off and On
One or both systems can be switched off temporarily by using the
information display control; refer to theInformation Displaychapter.
When the BLIS® is switched off, the driver does not receive alerts and
the information display shows BLIND SPOT SYS OFF and/or CTA
SYSTEM OFF. The system switches back on whenever the ignition is
switched on.
One or both systems can also be switched off permanently at your
authorized dealer. Once switched off, switching it back on must also be
done at the dealership.
COLLISION WARNING SYSTEM (IF EQUIPPED)
WARNING:This system is designed to be a supplementary
driving aid. It is not intended to replace the driver’s attention,
and judgment, or the need to apply the brakes. This system does NOT
activate the brakes automatically. Failure to press the brake pedal to
activate the brakes may result in a collision.
WARNING:The collision warning system with brake support
cannot help prevent all collisions. Do not rely on this system to
replace driver judgment and the need to maintain distance and speed.
Note:The system does not detect, warn or respond to potential
collisions with vehicles to the rear or sides of the vehicle.
Note:The collision warning system is active at speeds above
approximately 5 mph (8 km/h).
Driving Aids261
2014 Explorer(exp)
Owners Guide gf, 1st Printing, April 2013
USA(fus)
Page 280 of 586

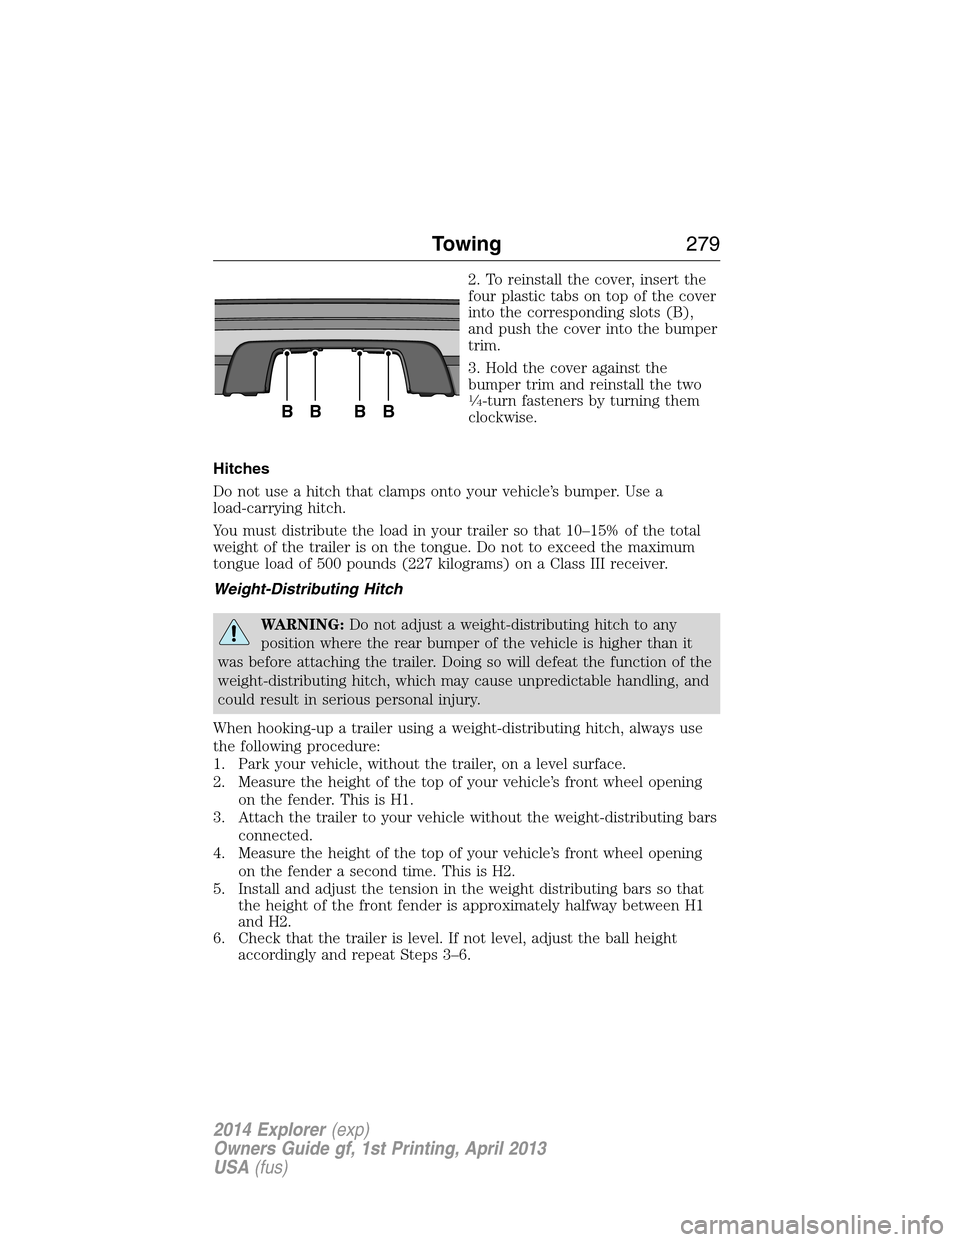
2. To reinstall the cover, insert the
four plastic tabs on top of the cover
into the corresponding slots (B),
and push the cover into the bumper
trim.
3. Hold the cover against the
bumper trim and reinstall the two
1�4-turn fasteners by turning them
clockwise.
Hitches
Do not use a hitch that clamps onto your vehicle’s bumper. Use a
load-carrying hitch.
You must distribute the load in your trailer so that 10–15% of the total
weight of the trailer is on the tongue. Do not to exceed the maximum
tongue load of 500 pounds (227 kilograms) on a Class III receiver.
Weight-Distributing Hitch
WARNING:Do not adjust a weight-distributing hitch to any
position where the rear bumper of the vehicle is higher than it
was before attaching the trailer. Doing so will defeat the function of the
weight-distributing hitch, which may cause unpredictable handling, and
could result in serious personal injury.
When hooking-up a trailer using a weight-distributing hitch, always use
the following procedure:
1. Park your vehicle, without the trailer, on a level surface.
2. Measure the height of the top of your vehicle’s front wheel opening
on the fender. This is H1.
3. Attach the trailer to your vehicle without the weight-distributing bars
connected.
4. Measure the height of the top of your vehicle’s front wheel opening
on the fender a second time. This is H2.
5. Install and adjust the tension in the weight distributing bars so that
the height of the front fender is approximately halfway between H1
and H2.
6. Check that the trailer is level. If not level, adjust the ball height
accordingly and repeat Steps 3–6.
BBBB
Towing279
2014 Explorer(exp)
Owners Guide gf, 1st Printing, April 2013
USA(fus)
Page 290 of 586

ROADSIDE ASSISTANCE
Vehicles Sold in the U.S.: Getting Roadside Assistance
To fully assist you should you have a vehicle concern, Ford Motor
Company offers a complimentary roadside assistance program. This
program is separate from the New Vehicle Limited Warranty. The service
is available:
•24 hours a day, seven days a week
•for the coverage period listed on the Roadside Assistance Card
included in your owner’s manual portfolio.
Roadside assistance will cover:
•a flat tire change with a good spare (except vehicles that have been
supplied with a tire inflation kit).
•battery jump start.
•lock-out assistance (key replacement cost is the customer’s
responsibility).
•fuel delivery – Independent Service Contractors, if not prohibited by
state, local or municipal law, shall deliver up to 2.0 gallons (7.5 liters)
of gasoline or 5.0 gallons (18.9 liters) of diesel fuel to a disabled
vehicle. Fuel delivery service is limited to two no-charge occurrences
within a 12-month period.
•winch out – available within 100 feet (30.5 meters) of a paved or
county maintained road, no recoveries.
•towing – Ford and Lincoln eligible vehicles towed to an authorized
dealer within 35 miles (56 kilometers) of the disablement location or
to the nearest authorized dealer. If a member requests to be towed to
an authorized dealer more than 35 miles (56 kilometers) from the
disablement location, the member shall be responsible for any mileage
costs in excess of 35 miles (56 kilometers).
Trailers shall be covered up to $200 if the disabled eligible vehicle
requires service at the nearest authorized dealer. If the trailer is disabled,
but the towing vehicle is operational, the trailer does not qualify for any
roadside services.
Vehicles Sold in the U.S.: Using Roadside Assistance
Complete the roadside assistance identification card and place it in your
wallet for quick reference. This card is found in the owner’s manual
portfolio in the glove compartment.
Roadside Emergencies289
2014 Explorer(exp)
Owners Guide gf, 1st Printing, April 2013
USA(fus)
Page 300 of 586

The use of leaded fuel in your vehicle without proper conversion may
damage the effectiveness of your emission control system and may cause
engine knocking or serious engine damage. Ford Motor Company or Ford
of Canada is not responsible for any damage caused by use of improper
fuel. Using leaded fuel may also result in difficulty importing your vehicle
back into the United States.
If your vehicle must be serviced while you are traveling or living
in Asia-Pacific Region, Sub-Saharan Africa, U.S. Virgin Islands,
Central America, the Caribbean, and Israel, contact the nearest
authorized dealer. If the authorized dealer cannot help you,
contact:
FORD MOTOR COMPANY
FORD EXPORT OPERATIONS & GLOBAL INITIATIVES
Customer Relationship Center
1555 Fairlane Drive Fairlane Business Park #3
Allen Park, Michigan 48101
U.S.A.
Telephone: (313) 594-4857
FAX: (313) 390-0804 Email: [email protected]
For customers in Guam, the Commonwealth of the Northern
Mariana Islands (CNMI), America Samoa, and the U.S. Virgin
Islands, please feel free to call our Toll-Free Number:(800)
841-FORD (3673)
If your vehicle must be serviced while you are traveling or living
in Puerto Rico, contact the nearest authorized dealer. If the
authorized dealer cannot help you, contact:
FORD MOTOR COMPANY
FORD EXPORT OPERATIONS & GLOBAL INITIATIVES
Customer Relationship Center
1555 Fairlane Drive Fairlane Business Park #3
Allen Park, Michigan 48101
U.S.A.
Telephone: (313) 594-4857
FAX: (313) 390-0804 Email: www.ford.com.pr
Customer Assistance299
2014 Explorer(exp)
Owners Guide gf, 1st Printing, April 2013
USA(fus)