2014 FORD EXPLORER ESP
[x] Cancel search: ESPPage 227 of 586

TERRAIN MANAGEMENT (IF EQUIPPED)
This system optimizes drivability and comfort as well as maximizing
traction while operating on different types of terrain.
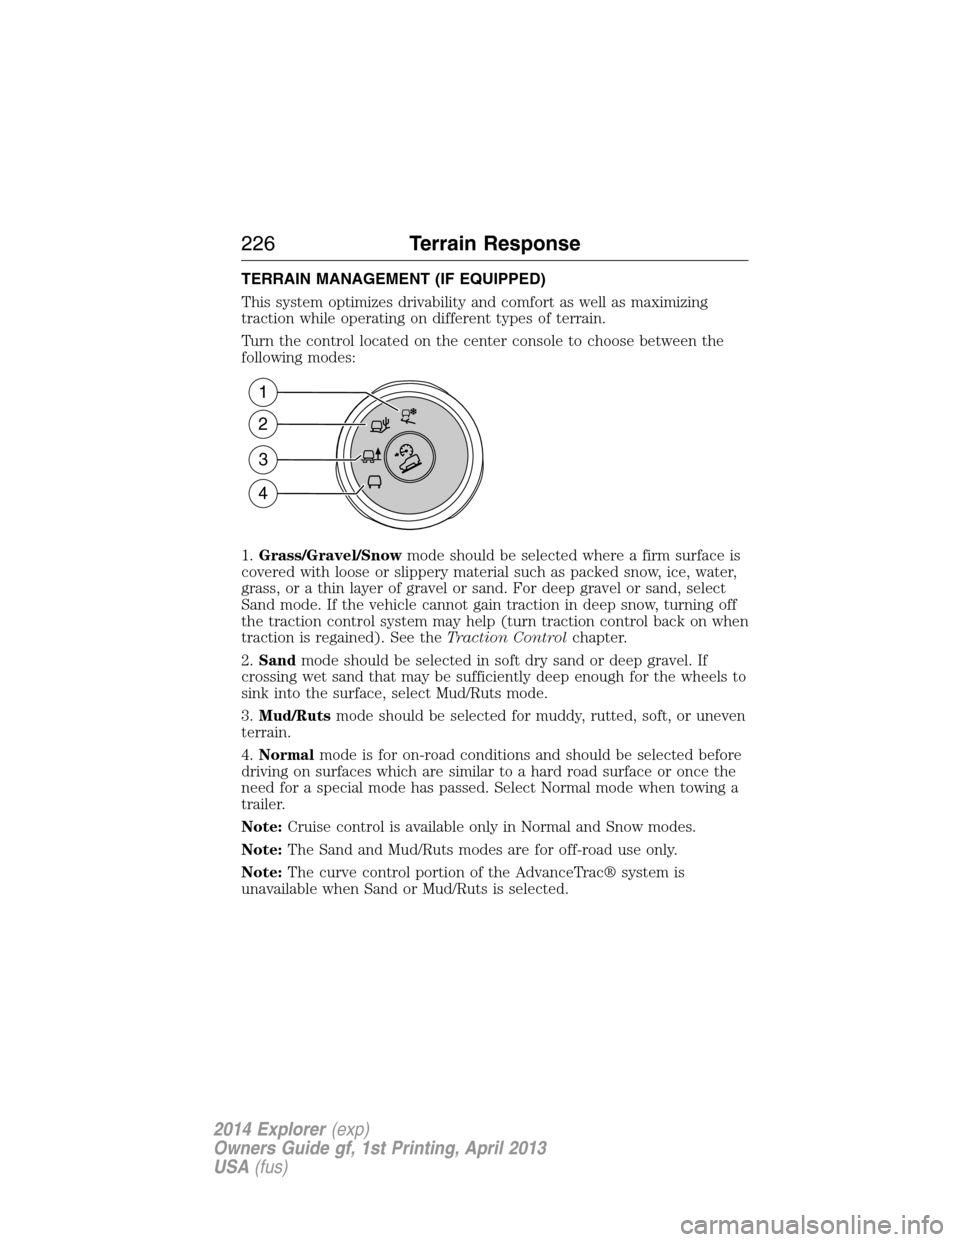
Turn the control located on the center console to choose between the
following modes:
1.Grass/Gravel/Snowmode should be selected where a firm surface is
covered with loose or slippery material such as packed snow, ice, water,
grass, or a thin layer of gravel or sand. For deep gravel or sand, select
Sand mode. If the vehicle cannot gain traction in deep snow, turning off
the traction control system may help (turn traction control back on when
traction is regained). See theTraction Controlchapter.
2.Sandmode should be selected in soft dry sand or deep gravel. If
crossing wet sand that may be sufficiently deep enough for the wheels to
sink into the surface, select Mud/Ruts mode.
3.Mud/Rutsmode should be selected for muddy, rutted, soft, or uneven
terrain.
4.Normalmode is for on-road conditions and should be selected before
driving on surfaces which are similar to a hard road surface or once the
need for a special mode has passed. Select Normal mode when towing a
trailer.
Note:Cruise control is available only in Normal and Snow modes.
Note:The Sand and Mud/Ruts modes are for off-road use only.
Note:The curve control portion of the AdvanceTrac® system is
unavailable when Sand or Mud/Ruts is selected.
1
2
3
4
226Terrain Response
2014 Explorer(exp)
Owners Guide gf, 1st Printing, April 2013
USA(fus)
Page 228 of 586

If the system becomes inoperable, selecting some modes may not be
possible and a message is displayed. If it becomes inoperable due to a
system malfunction, all of the mode indicators on the control turn off
and one of the following messages appears in the information display:
TERRAIN MANAGEMENT SYSTEM FAULT:Cycling the key may
clear the fault. If key cycling does not work, have the system serviced by
an authorized dealer.
MODE CHANGE NOT ACCEPTED, RETRY:A mode change cannot
be made at the time of driver request. Try the mode change again.
HILL DESCENT CONTROL™ (IF EQUIPPED)
WARNING:Hill descent control cannot control descent in all
surface conditions and circumstances, such as ice or extremely
steep grades. Hill descent control is a driver assist system and cannot
substitute for good judgment by the driver. Failure to do so may result
in loss of vehicle control, crash or serious injury.
WARNING:Hill descent control does not provide hill hold at
zero mph (0 km/h). When stopped, the parking brake must be
applied and/or the vehicle must be placed in P (Park) or it may roll
away.
Hill descent control allows the driver to set and maintain vehicle speed
while descending steep grades in various surface conditions.
Hill descent control can maintain vehicle speeds on downhill grades
between 3 mph (5 km/h) and 20 mph (32 km/h). Above 20 mph
(32 km/h), the system remains armed, but descent speed cannot be set
or maintained.
Hill descent control requires a cooling down interval after a period of
sustained use. The amount of time that the feature can remain active
before cooling varies with conditions. The system will provide a warning
in the message center and a chime will sound when the system is about
to disengage for cooling. At this time, manually apply the brakes as
needed to maintain descent speed.
Terrain Response227
2014 Explorer(exp)
Owners Guide gf, 1st Printing, April 2013
USA(fus)
Page 229 of 586

To enable hill descent control and set the descent speed, do the
following:
1. Press and release the hill descent button located in the
center of the terrain management control. A light in the
control will illuminate and chime will sound when this feature
is activated.
2. To increase descent speed, press the accelerator pedal until the
desired speed is reached. To decrease descent speed, press the brake
pedal until the desired speed is reached.
Whether accelerating or decelerating, once the desired descent speed is
reached, remove your feet from the pedals and the chosen vehicle speed
will be maintained.
Note:Noise from the ABS pump motor may be observed during hill
descent control operation. This is a normal characteristic of the ABS and
should be no reason for concern.
Hill descent modes
•At speeds below 20 mph (32 km/h): When the HDC button is pressed
and HDC is active, HILL DESCENT CONTROL ACTIVE will appear in
the message center for several seconds.
•At speeds below 20 mph (32 km/h): When the HDC button is pressed
and conditions are not correct for hill descent activation, the HDC
system will be enabled, the light on the button will be on solid and
HILL DESCENT CONTROL READY will be displayed in the message
center for several seconds.
•At speeds above 20 mph (32 km/h): When the HDC button is pressed,
the HDC system will be enabled, the light on the button will be
illuminated, and FOR HILL CNTRL, 20 MPH OR LESS will be
displayed in the message center for several seconds.
•For HDC to enable, the vehicle must be in a drive gear or (R)
Reverse. If the vehicle is in P (Park) or N (Neutral) and the HDC
button is pressed, FOR HILL CNTRL, SELECT GEAR will be displayed
in the message center for several seconds.
Refer toWarning lamps and indicatorsin theInstrument Cluster
chapter for hill descent control messages.
228Terrain Response
2014 Explorer(exp)
Owners Guide gf, 1st Printing, April 2013
USA(fus)
Page 231 of 586

If a fault is present in the system, a warning message appears in the
information display and does not allow the driver to switch the faulted
system on.
Note:If your vehicle is equipped with MyKey®, it is possible to prevent
turning the sensing system off. Refer to theMyKey®chapter.
Using the Rear Sensing System
The rear sensors are only active when the transmission is inR.Asthe
vehicle moves closer to the obstacle, the rate of the audible warning
increases. When the obstacle is fewer than 12 inches (30 centimeters)
away, the warning sounds continuously. If a stationary or receding object
is detected farther than 12 inches (30 centimeters) from the side of the
vehicle, the tone sounds for only three seconds. Once the system detects
an object approaching, the warning sounds again.
A. Coverage area of up to 6 feet
(2 meters) from the rear bumper
(with a decreased coverage area at
the outer corners of the bumper).
The system detects certain objects while the transmission is inR:
•and moving toward a stationary object at a speed of 3 mph (5 km/h)
or less.
•but not moving, and a moving object is approaching the rear of the
vehicle at a speed of 3 mph (5 km/h) or less.
ACTIVE PARK ASSIST (IF EQUIPPED)
WARNING:This system is designed to be a supplementary park
aid. It may not work in all conditions and is not intended to
replace the driver’s attention and judgment. The driver is responsible
for avoiding hazards and maintaining a safe distance and speed, even
when the system is in use.
Note:The driver is always responsible for controlling the vehicle,
supervising the system and intervening if required.
A
230Parking Aids
2014 Explorer(exp)
Owners Guide gf, 1st Printing, April 2013
USA(fus)
Page 232 of 586

The system detects an available parallel parking space and automatically
steers the vehicle into the space (hands-free) while you control the
accelerator, gearshift and brakes. The system visually and/or audibly
instructs the driver to park the vehicle.
The system may not function correctly if something passes between the
front bumper and the parking space (i.e. a pedestrian or cyclist) or if the
edge of the neighboring parked vehicle is high from the ground (i.e. a
bus, tow truck or flatbed truck).
Note:The sensors may not detect objects in heavy rain or other
conditions that cause disruptive reflections.
Note:The sensors may not detect objects with surfaces that absorb
ultrasonic waves.
Note:After a tire change the system will go through a relearning
procedure. During this time the system performance may deteriorate.
The system should not be used if:
•a foreign object (i.e. bike rack or trailer) is attached to the front or
rear of the vehicle or at another location close to the sensors.
•an overhanging object (i.e. surfboard) is attached to the roof.
•the front bumper or side sensors are damaged (i.e. in a collision) or
obstructed by a foreign object (i.e. front bumper cover).
•a mini-spare tire is in use.
Using Active Park Assist
Press the button; the touch screen
displays a message and a
corresponding graphic to indicate
it’s searching for a parking space.
Use the turn signal to indicate
which side of the vehicle you want
the system to search on.
Note:If the turn signal is not on, the system automatically searches on
the vehicle’s passenger side.
AUTO
P
Parking Aids231
2014 Explorer(exp)
Owners Guide gf, 1st Printing, April 2013
USA(fus)
Page 234 of 586

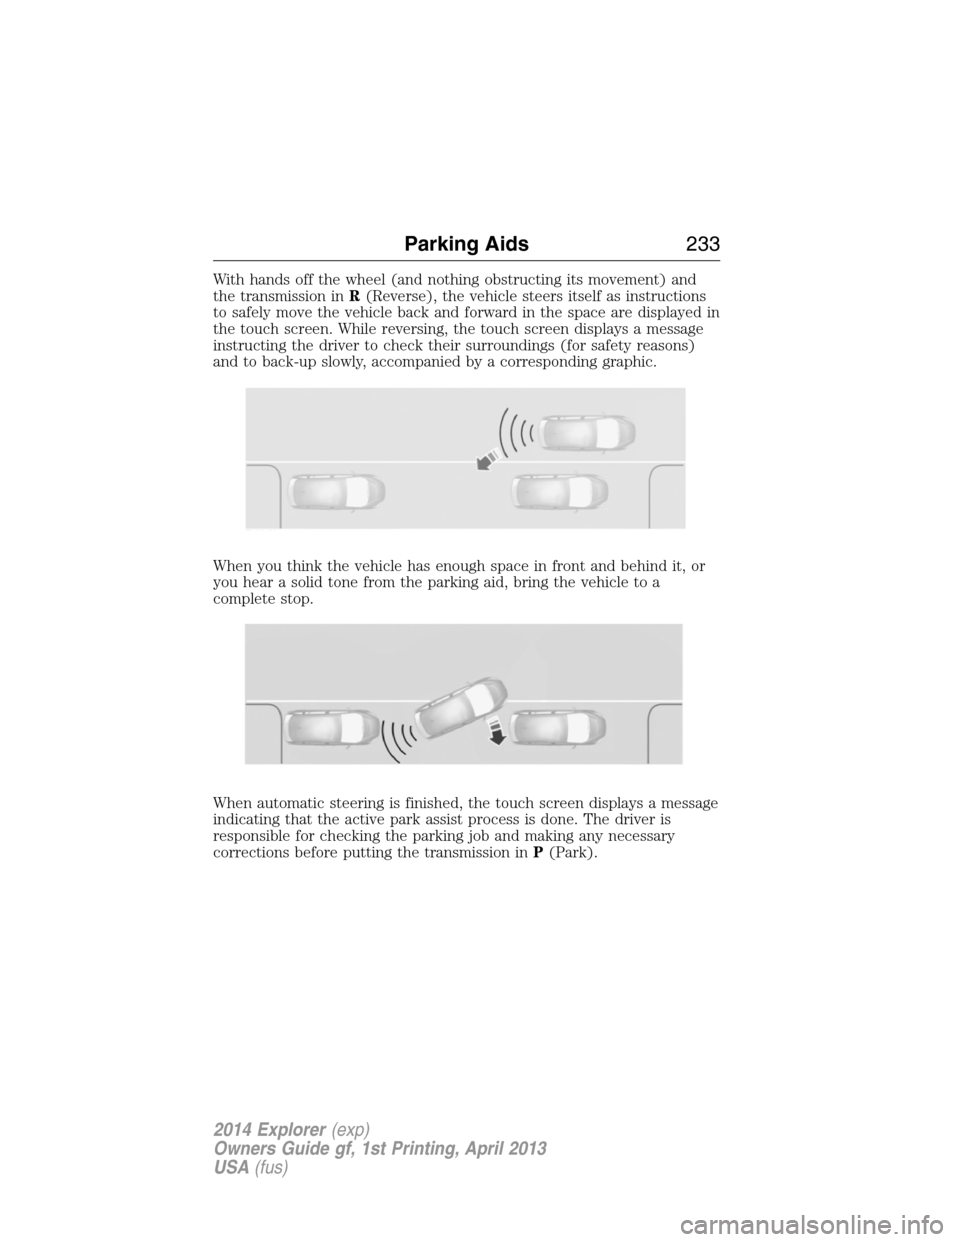
With hands off the wheel (and nothing obstructing its movement) and
the transmission inR(Reverse), the vehicle steers itself as instructions
to safely move the vehicle back and forward in the space are displayed in
the touch screen. While reversing, the touch screen displays a message
instructing the driver to check their surroundings (for safety reasons)
and to back-up slowly, accompanied by a corresponding graphic.
When you think the vehicle has enough space in front and behind it, or
you hear a solid tone from the parking aid, bring the vehicle to a
complete stop.
When automatic steering is finished, the touch screen displays a message
indicating that the active park assist process is done. The driver is
responsible for checking the parking job and making any necessary
corrections before putting the transmission inP(Park).
Parking Aids233
2014 Explorer(exp)
Owners Guide gf, 1st Printing, April 2013
USA(fus)
Page 242 of 586

The indicator will change colors in the instrument cluster.
Changing the Set Speed
Note:If you accelerate by pressing the accelerator pedal, the set speed
will not change. When you release the accelerator pedal, you will return
to the speed that you previously set.
•PressSETup or down and hold to increase or decrease the set speed.
Release the control when you reach the desired speed.
•PressSETup or down and release. The set speed will change in
approximately 1 mph (2 km/h) increments.
•Press the accelerator pedal or brake pedal until you reach the desired
speed. PressSETup and release.
Canceling the Set Speed
PressCNCLor tap the brake pedal. The set speed will not be erased.
Resuming the Set Speed
Press and releaseRES.
Switching Cruise Control Off
Note:The set speed is erased when you switch off cruise control.
Press theOFFcontrol down and release or turn off the ignition.
USING ADAPTIVE CRUISE CONTROL (IF EQUIPPED)
WARNING:Always pay close attention to changing road
conditions, especially when using adaptive cruise control.
Adaptive cruise control cannot replace attentive driving. Failing to
follow any of the warnings below or failing to pay attention to the road
may result in a collision, serious injury or death.
WARNING:Adaptive cruise control is not a collision warning or
avoidance system. Additionally, adaptive cruise control will not
detect:
•stationary or slow moving vehicles below 6 mph (10 km/h)
•pedestrians or objects in the roadway
•oncoming vehicles in the same lane.
Cruise Control241
2014 Explorer(exp)
Owners Guide gf, 1st Printing, April 2013
USA(fus)
Page 243 of 586

WARNING:Do not use the adaptive cruise control when
entering or leaving a highway, in heavy traffic or on roads that
are winding, slippery or unpaved.
WARNING:Do not use in poor visibility, specifically fog, rain,
spray or snow.
Note:It is your responsibility to stay alert, drive safely and be in control
of your vehicle at all times.
The system adjusts your speed to maintain a proper distance between
you and the vehicle in front of you in the same lane. You can select from
one of four GAP settings. The controls are located on the steering wheel.
At startup, the system sets the gap to the last selected setting. Once
activated, you can deactivate the system at any time by pressing the brake
pedal, pressing the steering wheelOFFcontrol or pressing theCNCL
control. In addition, you can temporarily increase the vehicle speed above
the current speed by manually pressing on the accelerator pedal.
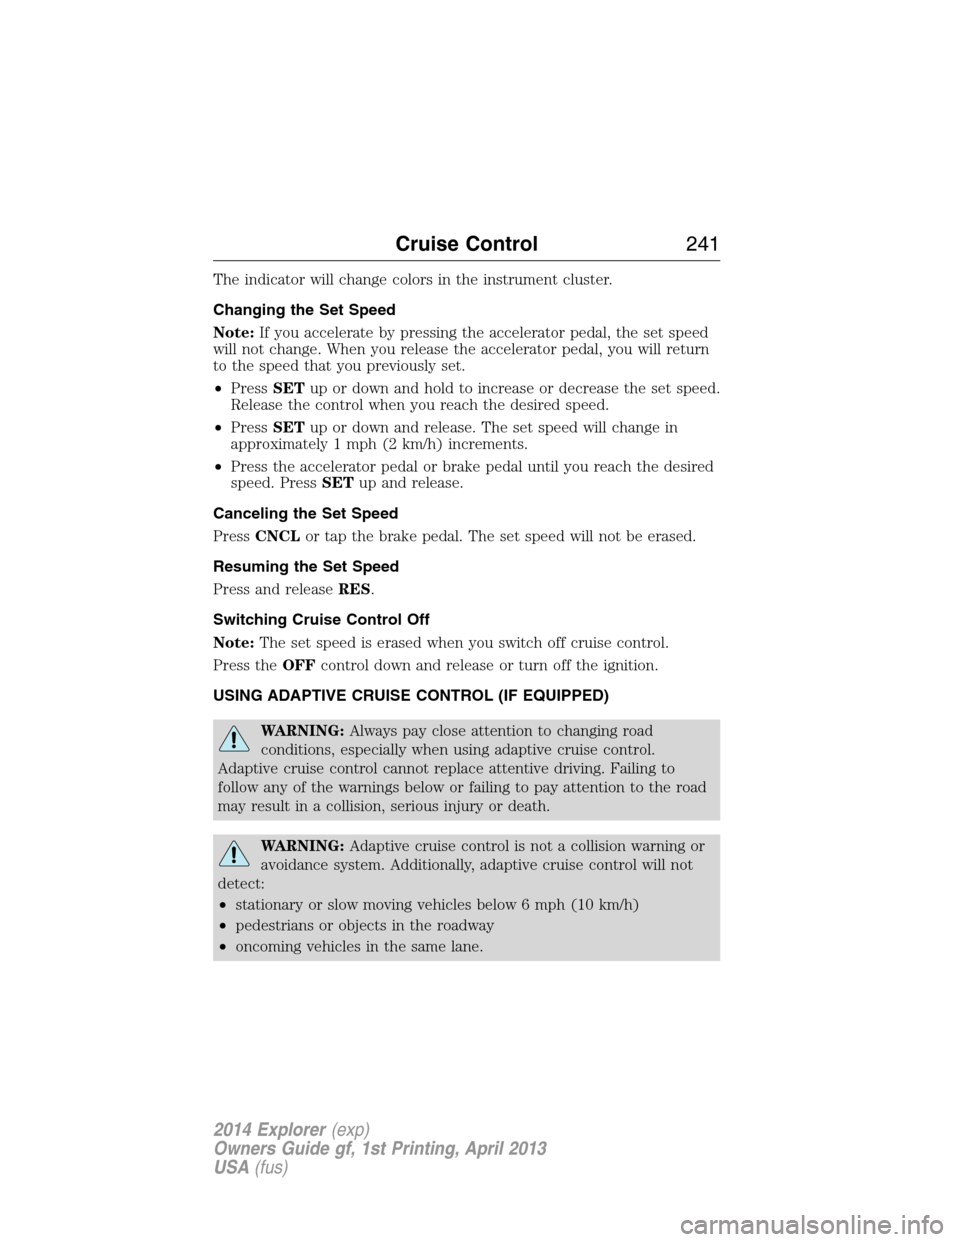
The controls for using your cruise
control are located on the steering
wheel.
Setting Adaptive Cruise Control
1. Press and releaseON.
The information display will show
the gray indicator light, current gap
setting andSET. The system is set
to standby mode.
2. Accelerate to the desired speed.
3. PressSETupward and release. The vehicle speed is stored in the
memory.
SETRES
CNCL
ON
OFFGAP
242Cruise Control
2014 Explorer(exp)
Owners Guide gf, 1st Printing, April 2013
USA(fus)