2014 FORD EXPEDITION Display clock
[x] Cancel search: Display clockPage 89 of 519
AUTOLAMPS
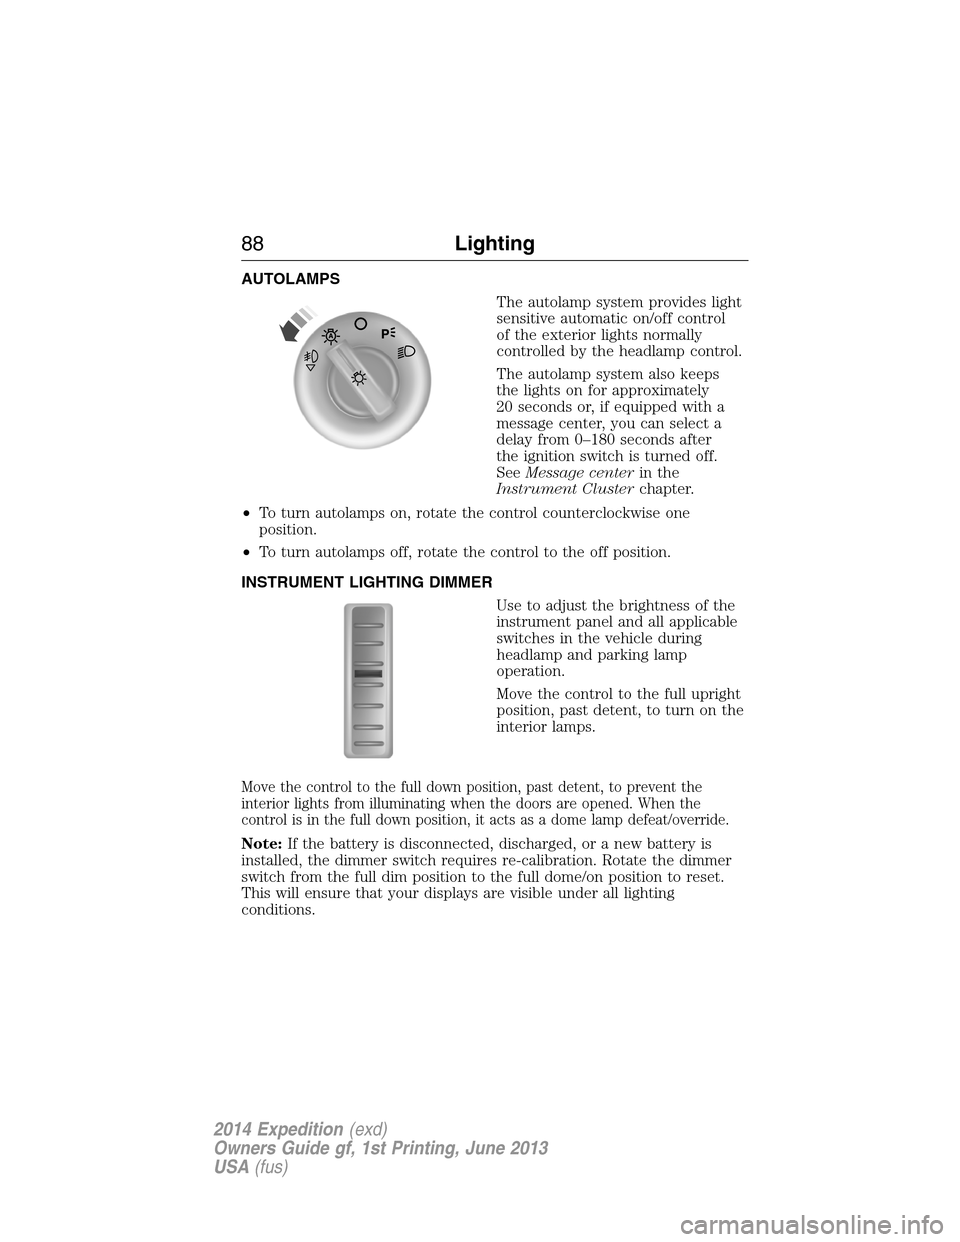
The autolamp system provides light
sensitive automatic on/off control
of the exterior lights normally
controlled by the headlamp control.
The autolamp system also keeps
the lights on for approximately
20 seconds or, if equipped with a
message center, you can select a
delay from 0–180 seconds after
the ignition switch is turned off.
SeeMessage centerin the
Instrument Clusterchapter.
•To turn autolamps on, rotate the control counterclockwise one
position.
•To turn autolamps off, rotate the control to the off position.
INSTRUMENT LIGHTING DIMMER
Use to adjust the brightness of the
instrument panel and all applicable
switches in the vehicle during
headlamp and parking lamp
operation.
Move the control to the full upright
position, past detent, to turn on the
interior lamps.
Move the control to the full down position, past detent, to prevent the
interior lights from illuminating when the doors are opened. When the
control is in the full down position, it acts as a dome lamp defeat/override.
Note:If the battery is disconnected, discharged, or a new battery is
installed, the dimmer switch requires re-calibration. Rotate the dimmer
switch from the full dim position to the full dome/on position to reset.
This will ensure that your displays are visible under all lighting
conditions.
88Lighting
2014 Expedition(exd)
Owners Guide gf, 1st Printing, June 2013
USA(fus)
Page 180 of 519
Easy Fuel® “No Cap” Fuel System
WARNING:The fuel system may be under pressure. If you hear
a hissing sound near the fuel filler door, do not refuel until the
sound stops. Otherwise, fuel may spray out, which could cause serious
personal injury.
When fueling your vehicle:
1. Turn the engine off.
2. Open the fuel door by pulling the indent on the door.
3. Insert the fuel plug key (if equipped) into the locking plug and turn it
counterclockwise to unlock it.
4. Slowly insert the fuel filler nozzle fully into the fuel system, and leave
the nozzle fully inserted until you are done pumping.
5. After you are done pumping fuel, slowly remove the fuel filler
nozzle—allow about ten seconds after pumping fuel before removing the
fuel filler nozzle. This allows residual fuel to drain back into the fuel tank
and not spill onto the vehicle.
6. Reinstall the plug (if equipped) into the fuel fill inlet and turn the key
clockwise to lock.
Note:Do not overfill the tank or fuel spillage will occur.
If the fuel fill inlet was not properly closed, a Check Fuel Fill Inlet
message may appear on the information display. See theInformation
Displayschapter for more information.
At the next opportunity, do the following:
1. Safely pull off the road.
2. Turn off the engine.
3. Open the fuel filler door and remove any visible debris from the fuel
fill opening.
4. Insert either the fuel fill nozzle or the fuel fill funnel provided with the
vehicle several times to dislodge any debris and/or allow the inlet to
close properly.
If this action corrects the problem, the message may not reset
immediately. It may take several driving cycles for the message to turn
off. A driving cycle consists of an engine start-up (after four or more
hours with the engine off) followed by city/highway driving. Continuing
to drive with the message on may cause the service engine soon lamp to
turn on as well.
Fuel and Refueling179
2014 Expedition(exd)
Owners Guide gf, 1st Printing, June 2013
USA(fus)
Page 427 of 519
NAVIGATION CONTROLS
WARNING:Driving while distracted can result in loss of vehicle
control, crash and injury. We strongly recommend that you use
extreme caution when using any device that may take your focus off
the road. Your primary responsibility is the safe operation of your
vehicle. We recommend against the use of any hand-held device while
driving and encourage the use of voice-operated systems when possible.
Make sure you are aware of all applicable local laws that may affect the
use of electronic devices while driving.
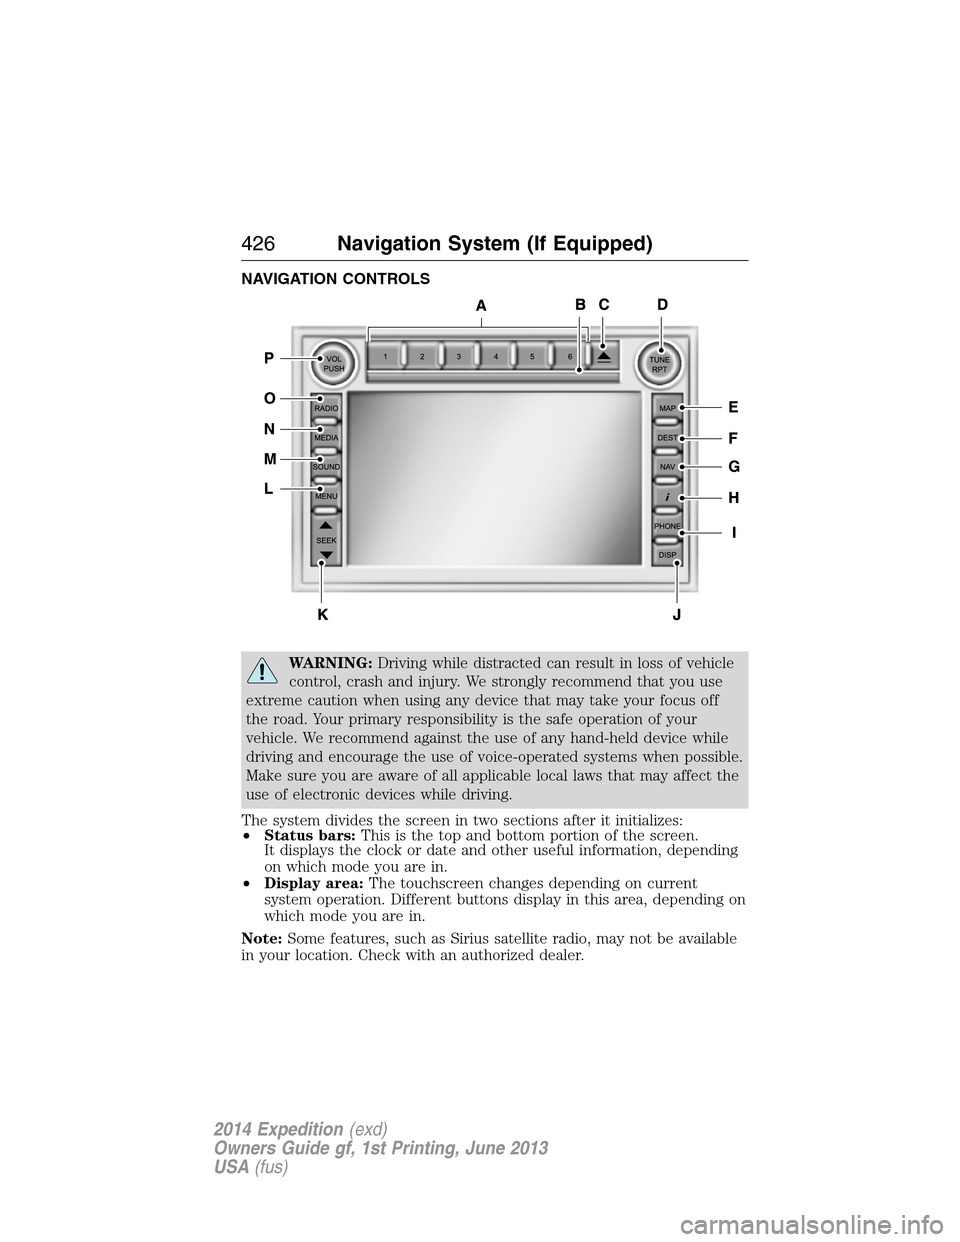
The system divides the screen in two sections after it initializes:
•Status bars:This is the top and bottom portion of the screen.
It displays the clock or date and other useful information, depending
on which mode you are in.
•Display area:The touchscreen changes depending on current
system operation. Different buttons display in this area, depending on
which mode you are in.
Note:Some features, such as Sirius satellite radio, may not be available
in your location. Check with an authorized dealer.
426Navigation System (If Equipped)
2014 Expedition(exd)
Owners Guide gf, 1st Printing, June 2013
USA(fus)
Page 429 of 519
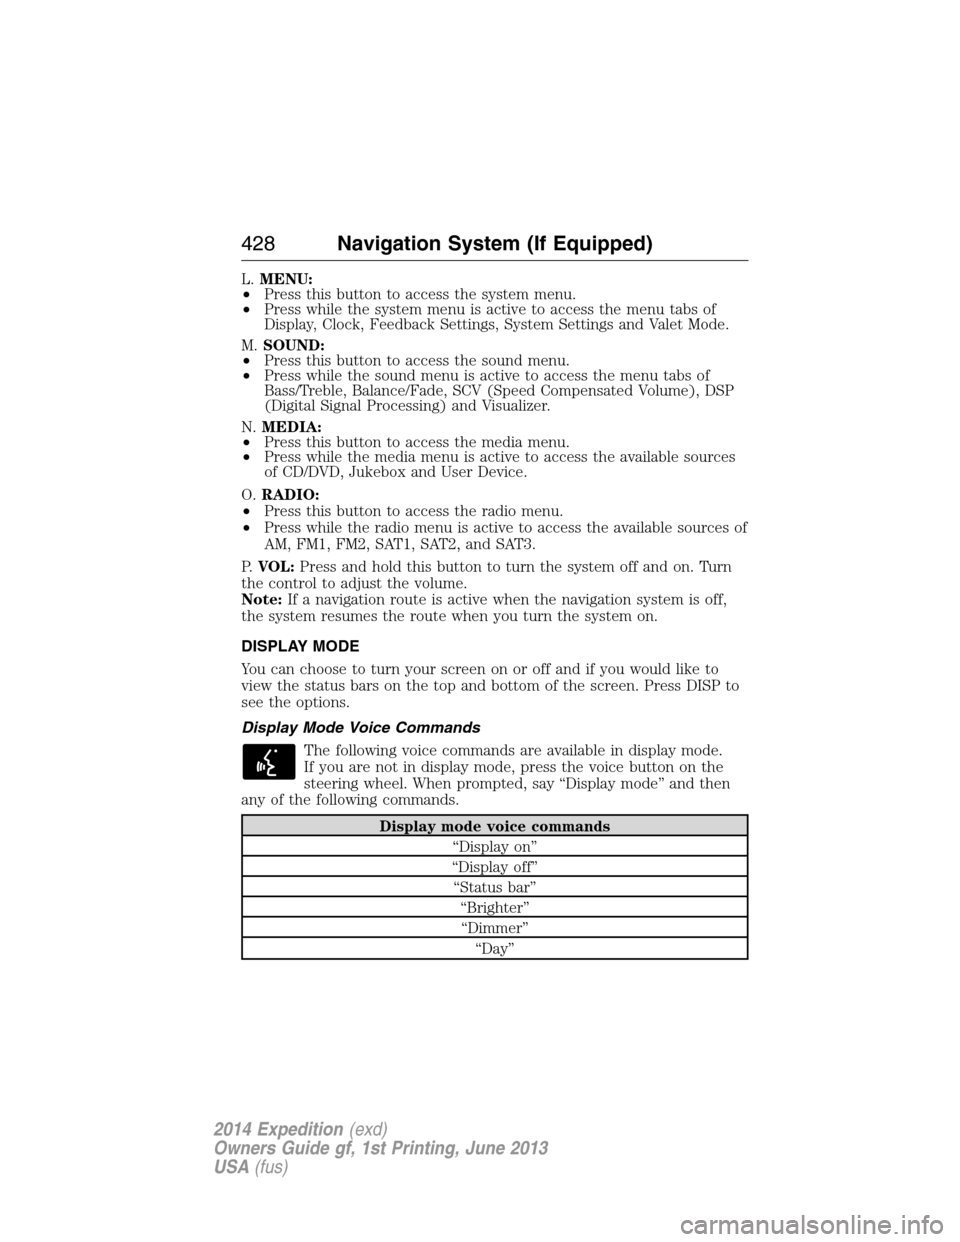
L.MENU:
•Press this button to access the system menu.
•Press while the system menu is active to access the menu tabs of
Display, Clock, Feedback Settings, System Settings and Valet Mode.
M.SOUND:
•Press this button to access the sound menu.
•Press while the sound menu is active to access the menu tabs of
Bass/Treble, Balance/Fade, SCV (Speed Compensated Volume), DSP
(Digital Signal Processing) and Visualizer.
N.MEDIA:
•Press this button to access the media menu.
•Press while the media menu is active to access the available sources
of CD/DVD, Jukebox and User Device.
O.RADIO:
•Press this button to access the radio menu.
•Press while the radio menu is active to access the available sources of
AM, FM1, FM2, SAT1, SAT2, and SAT3.
P.VOL:Press and hold this button to turn the system off and on. Turn
the control to adjust the volume.
Note:If a navigation route is active when the navigation system is off,
the system resumes the route when you turn the system on.
DISPLAY MODE
You can choose to turn your screen on or off and if you would like to
view the status bars on the top and bottom of the screen. Press DISP to
see the options.
Display Mode Voice Commands
The following voice commands are available in display mode.
If you are not in display mode, press the voice button on the
steering wheel. When prompted, say “Display mode” and then
any of the following commands.
Display mode voice commands
“Display on”
“Display off”
“Status bar”
“Brighter”
“Dimmer”
“Day”
428Navigation System (If Equipped)
2014 Expedition(exd)
Owners Guide gf, 1st Printing, June 2013
USA(fus)
Page 434 of 519
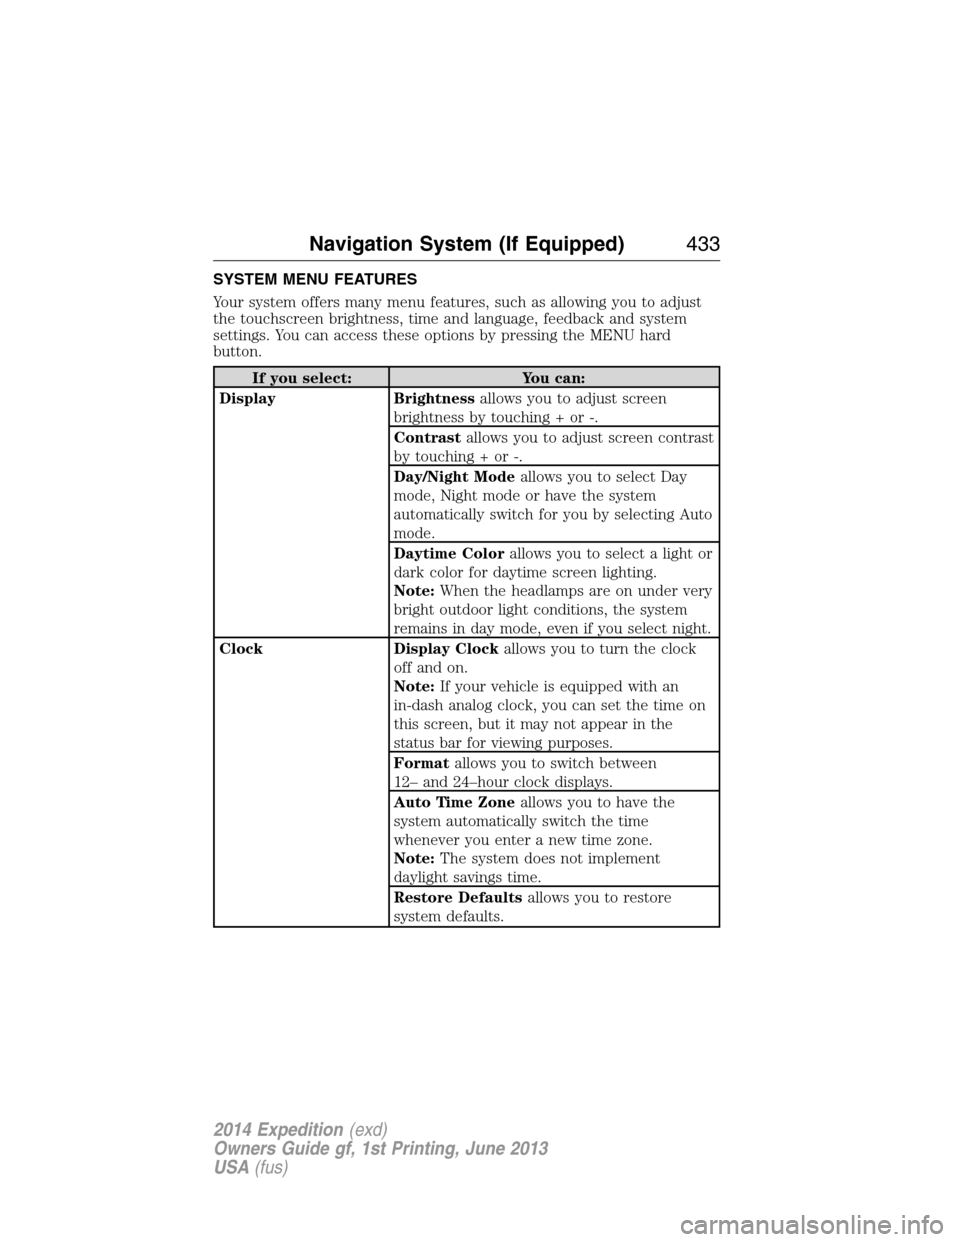
SYSTEM MENU FEATURES
Your system offers many menu features, such as allowing you to adjust
the touchscreen brightness, time and language, feedback and system
settings. You can access these options by pressing the MENU hard
button.
If you select: You can:
Display Brightnessallows you to adjust screen
brightness by touching + or -.
Contrastallows you to adjust screen contrast
by touching + or -.
Day/Night Modeallows you to select Day
mode, Night mode or have the system
automatically switch for you by selecting Auto
mode.
Daytime Colorallows you to select a light or
dark color for daytime screen lighting.
Note:When the headlamps are on under very
bright outdoor light conditions, the system
remains in day mode, even if you select night.
Clock Display Clockallows you to turn the clock
off and on.
Note:If your vehicle is equipped with an
in-dash analog clock, you can set the time on
this screen, but it may not appear in the
status bar for viewing purposes.
Formatallows you to switch between
12– and 24–hour clock displays.
Auto Time Zoneallows you to have the
system automatically switch the time
whenever you enter a new time zone.
Note:The system does not implement
daylight savings time.
Restore Defaultsallows you to restore
system defaults.
Navigation System (If Equipped)433
2014 Expedition(exd)
Owners Guide gf, 1st Printing, June 2013
USA(fus)
Page 517 of 519
R
Radio ..........................................351
Single CD ................................351
Radio reception .........................349
Radio voice commands .....437, 443
Rear heated seats .....................150
Rear seat entertainment
system ........................................362
Rear view camera display ........208
Rear window defroster ............121,
123, 125, 127
Receiving a text message .........393
Recommendations for
attaching safety restraints
for children ..................................24
Relays ................................260–261
Remote entry system
illuminated entry ......................70
locking/unlocking doors ...........67
opening the trunk .....................68
replacing the batteries .............57
Roadside assistance ..................246
Roll stability control .................204
Roof rack ...................................215
S
Safety Belt Maintenance ............45
Safety belts
(see Safety restraints) ...............38
Safety defects, reporting ..........259
Safety information ....................382
Safety restraints ..............38–39, 41
Belt-Minder® ............................42
extension assembly ..................40for adults .............................38–39
for children ...............................24
safety belt maintenance ...........45
seat belt maintenance ..............45
warning light and chime ..........42
Safety restraints -
LATCH anchors ...........................28
Safety seats for children ............24
Safety Compliance
Certification Label ....................343
Satellite Radio ...........................447
Scheduled Maintenance Guide
Normal Scheduled
Maintenance and Log .............499
SD card ......................................461
Seat belts
(see Safety restraints) ...............38
Seats
child safety seats ......................24
cleaning ...................................299
climate control ........................142
filter .........................................341
front seats ...............................136
heated ......................................150
memory seat .....................58, 139
SecuriCode keyless entry
system ..........................................76
SecuriLock passive anti-theft
system ..........................................78
Selecting your media source
(USB, Line in, BT audio) .........412
Setting a destination ................461
Setting the clock .......................351
Side air curtain ...........................52
Side-curtain airbags system .......52
SIRIUS® satellite radio ....443, 461
516Index
2014 Expedition(exd)
Owners Guide gf, 1st Printing, June 2013
USA(fus)