2014 FORD EXPEDITION bulb
[x] Cancel search: bulbPage 7 of 519
Maintenance 269
General information...................................269
Opening and closing the hood............................270
Under hood overview..................................271
Engine oil dipstick....................................272
Engine oil check......................................272
Engine coolant check..................................273
Automatic transmission fluid check........................278
Brake fluid check.....................................278
Fuel filter...........................................279
Washer fluid check....................................279
Battery ............................................279
Checking the wiper blades..............................281
Changing the wiper blades..............................282
Air filter(s).........................................283
Adjusting the headlamps................................286
Changing a bulb......................................287
Removing a headlamp..................................288
Vehicle Care 293
Cleaning products.....................................293
Cleaning the exterior..................................293
Waxing.............................................295
Repairing minor paint damage............................295
Cleaning the engine...................................295
Cleaning the windows and wiper blades.....................296
Cleaning the interior...................................297
Cleaning the instrument panel and instrument cluster lens.......298
Cleaning the alloy wheels...............................300
Vehicle storage.......................................301
6Table of Contents
2014 Expedition(exd)
Owners Guide gf, 1st Printing, June 2013
USA(fus)
Page 103 of 519
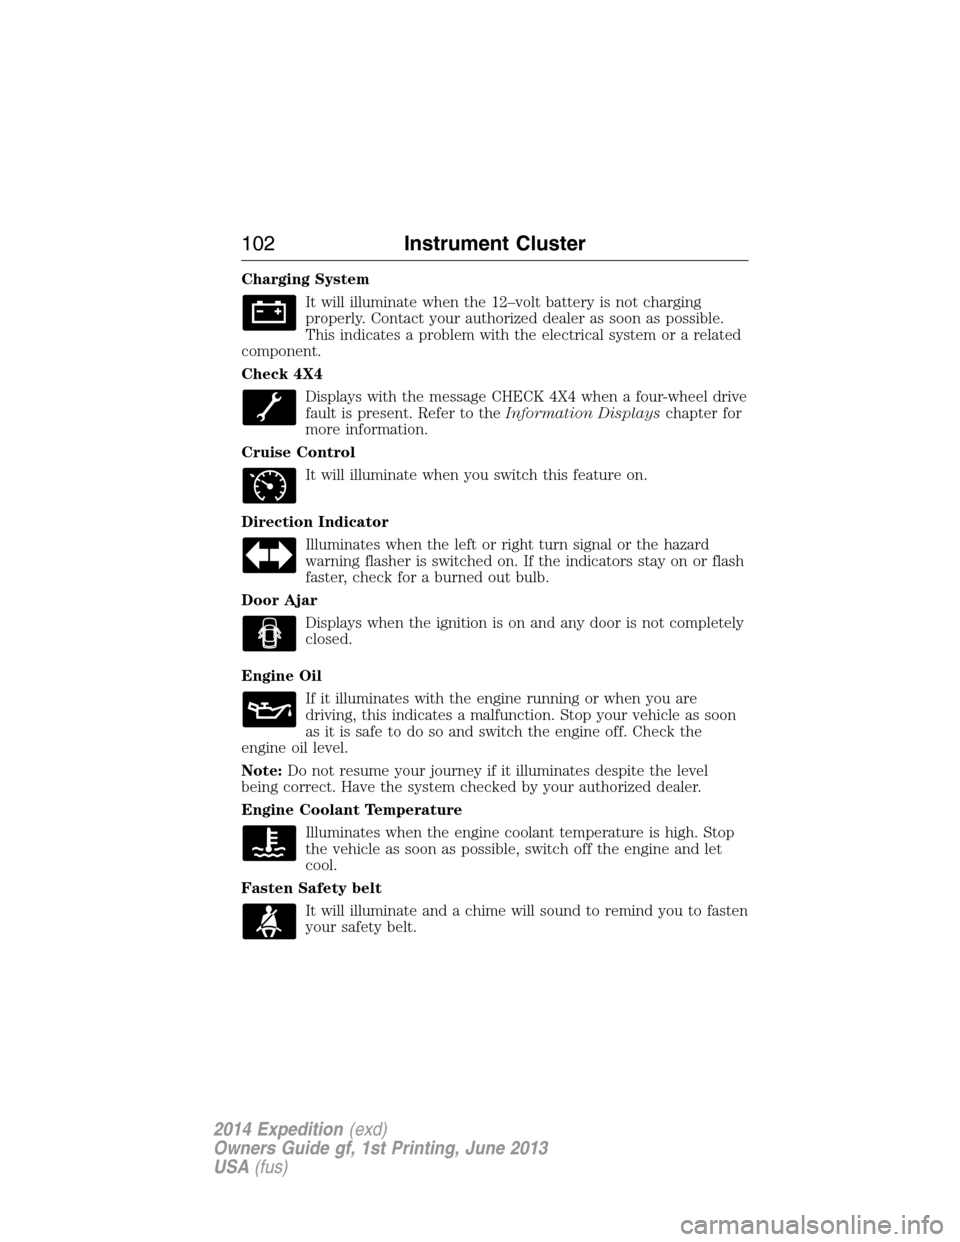
Charging System
It will illuminate when the 12–volt battery is not charging
properly. Contact your authorized dealer as soon as possible.
This indicates a problem with the electrical system or a related
component.
Check 4X4
Displays with the message CHECK 4X4 when a four-wheel drive
fault is present. Refer to theInformation Displayschapter for
more information.
Cruise Control
It will illuminate when you switch this feature on.
Direction Indicator
Illuminates when the left or right turn signal or the hazard
warning flasher is switched on. If the indicators stay on or flash
faster, check for a burned out bulb.
Door Ajar
Displays when the ignition is on and any door is not completely
closed.
Engine Oil
If it illuminates with the engine running or when you are
driving, this indicates a malfunction. Stop your vehicle as soon
as it is safe to do so and switch the engine off. Check the
engine oil level.
Note:Do not resume your journey if it illuminates despite the level
being correct. Have the system checked by your authorized dealer.
Engine Coolant Temperature
Illuminates when the engine coolant temperature is high. Stop
the vehicle as soon as possible, switch off the engine and let
cool.
Fasten Safety belt
It will illuminate and a chime will sound to remind you to fasten
your safety belt.
102Instrument Cluster
2014 Expedition(exd)
Owners Guide gf, 1st Printing, June 2013
USA(fus)
Page 105 of 519

Service Engine Soon
Theservice engine soonindicator light illuminates when the
ignition is first turned to the on position to check the bulb and to
indicate whether the vehicle is ready for Inspection/Maintenance
(I/M) testing. Normally, the “service engine soon” light will stay on until the
engine is cranked, then turn itself off if no malfunctions are present.
However, if after 15 seconds the “service engine soon” light blinks eight
times, it means that the vehicle is not ready for I/M testing. See the
Readiness for inspection/maintenance (I/M) testingin theFuel and
Refuelingchapter.
Solid illumination after the engine is started indicates the on-board
diagnostics system (OBD-II) has detected a malfunction. Refer to
On-board diagnostics (OBD-II)in theFuel and Refuelingchapter.
If the light is blinking, engine misfire is occurring which could damage
your catalytic converter. Drive in a moderate fashion (avoid heavy
acceleration and deceleration) and have your vehicle serviced
immediately by your authorized dealer.
WARNING:Under engine misfire conditions, excessive exhaust
temperatures could damage the catalytic converter, the fuel
system, interior floor coverings or other vehicle components, possibly
causing a fire.
Stability Control System
Displays when the AdvanceTrac®/Traction control is active.
If the light remains on, have the system serviced immediately.
Stability Control System Off
Illuminates when AdvanceTrac®/Traction control has been
disabled by the driver.
Transmission Tow/Haul
Illuminates when the Tow/Haul feature has been activated.
Refer to theTransmissionchapter for transmission function
and operation. If the light flashes steadily, have the system
serviced immediately, damage to the transmission could occur.
104Instrument Cluster
2014 Expedition(exd)
Owners Guide gf, 1st Printing, June 2013
USA(fus)
Page 184 of 519
Readiness for Inspection/Maintenance (I/M) Testing
Some state, provincial and local governments may have
Inspection/Maintenance (I/M) programs to inspect the emission control
equipment on your vehicle. Failure to pass this inspection could prevent
you from getting a vehicle registration.
If the service engine soon indicator is on or the bulb does not
work, the vehicle may need to be serviced. SeeOn-board
Diagnostics (OBD-II)in this chapter.
Your vehicle may not pass the I/M test if the service engine soon
indicator is on or not working properly (bulb is burned out), or if the
OBD-II system has determined that some of the emission control systems
have not been properly checked. In this case, the vehicle is considered
not ready for I/M testing.
If the vehicle’s engine or transmission has just been serviced, or the
battery has recently run down or been replaced, the OBD-II system may
indicate that the vehicle is not ready for I/M testing. To determine if the
vehicle is ready for I/M testing, turn the ignition key to the on position
for 15 seconds without cranking the engine. If the service engine soon
indicator blinks eight times, it means that the vehicle is not ready for I/M
testing; if the service engine soon indicator stays on solid, it means that
the vehicle is ready for I/M testing.
The OBD-II system is designed to check the emission control system
during normal driving. A complete check may take several days. If the
vehicle is not ready for I/M testing, the following driving cycle consisting
of mixed city and highway driving may be performed:
15 minutes of steady driving on an expressway or highway followed by
20 minutes of stop-and-go driving with at least four 30-second idle
periods.
Allow the vehicle to sit for at least eight hours without starting the
engine. Then, start the engine and complete the above driving cycle. The
engine must warm up to its normal operating temperature. Once the
engine is started, do not turn off the engine until the above driving cycle
is complete. If the vehicle is still not ready for I/M testing, the above
driving cycle will have to be repeated.
Fuel and Refueling183
2014 Expedition(exd)
Owners Guide gf, 1st Printing, June 2013
USA(fus)
Page 288 of 519
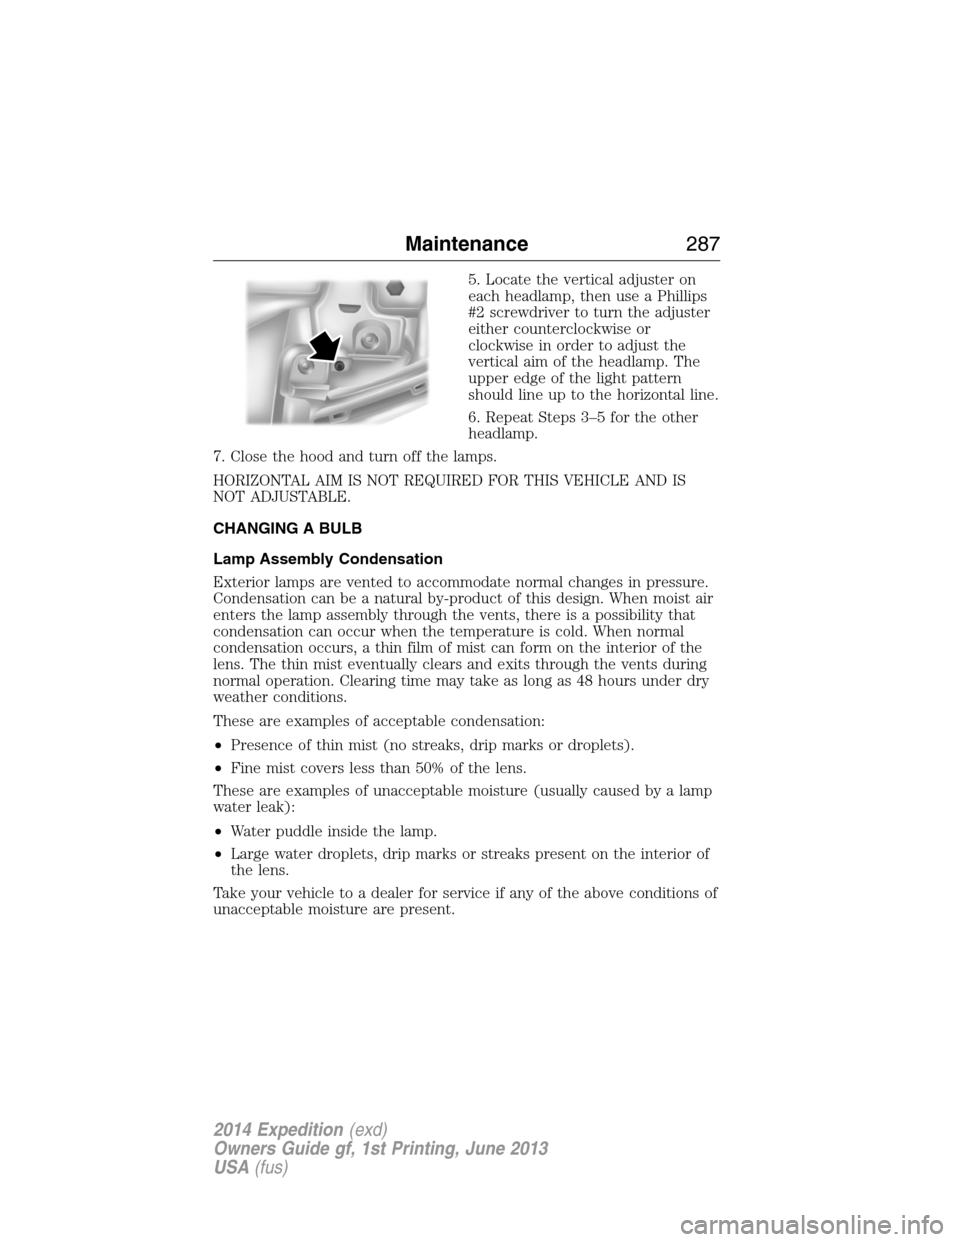
5. Locate the vertical adjuster on
each headlamp, then use a Phillips
#2 screwdriver to turn the adjuster
either counterclockwise or
clockwise in order to adjust the
vertical aim of the headlamp. The
upper edge of the light pattern
should line up to the horizontal line.
6. Repeat Steps 3–5 for the other
headlamp.
7. Close the hood and turn off the lamps.
HORIZONTAL AIM IS NOT REQUIRED FOR THIS VEHICLE AND IS
NOT ADJUSTABLE.
CHANGING A BULB
Lamp Assembly Condensation
Exterior lamps are vented to accommodate normal changes in pressure.
Condensation can be a natural by-product of this design. When moist air
enters the lamp assembly through the vents, there is a possibility that
condensation can occur when the temperature is cold. When normal
condensation occurs, a thin film of mist can form on the interior of the
lens. The thin mist eventually clears and exits through the vents during
normal operation. Clearing time may take as long as 48 hours under dry
weather conditions.
These are examples of acceptable condensation:
•Presence of thin mist (no streaks, drip marks or droplets).
•Fine mist covers less than 50% of the lens.
These are examples of unacceptable moisture (usually caused by a lamp
water leak):
•Water puddle inside the lamp.
•Large water droplets, drip marks or streaks present on the interior of
the lens.
Take your vehicle to a dealer for service if any of the above conditions of
unacceptable moisture are present.
Maintenance287
2014 Expedition(exd)
Owners Guide gf, 1st Printing, June 2013
USA(fus)
Page 289 of 519
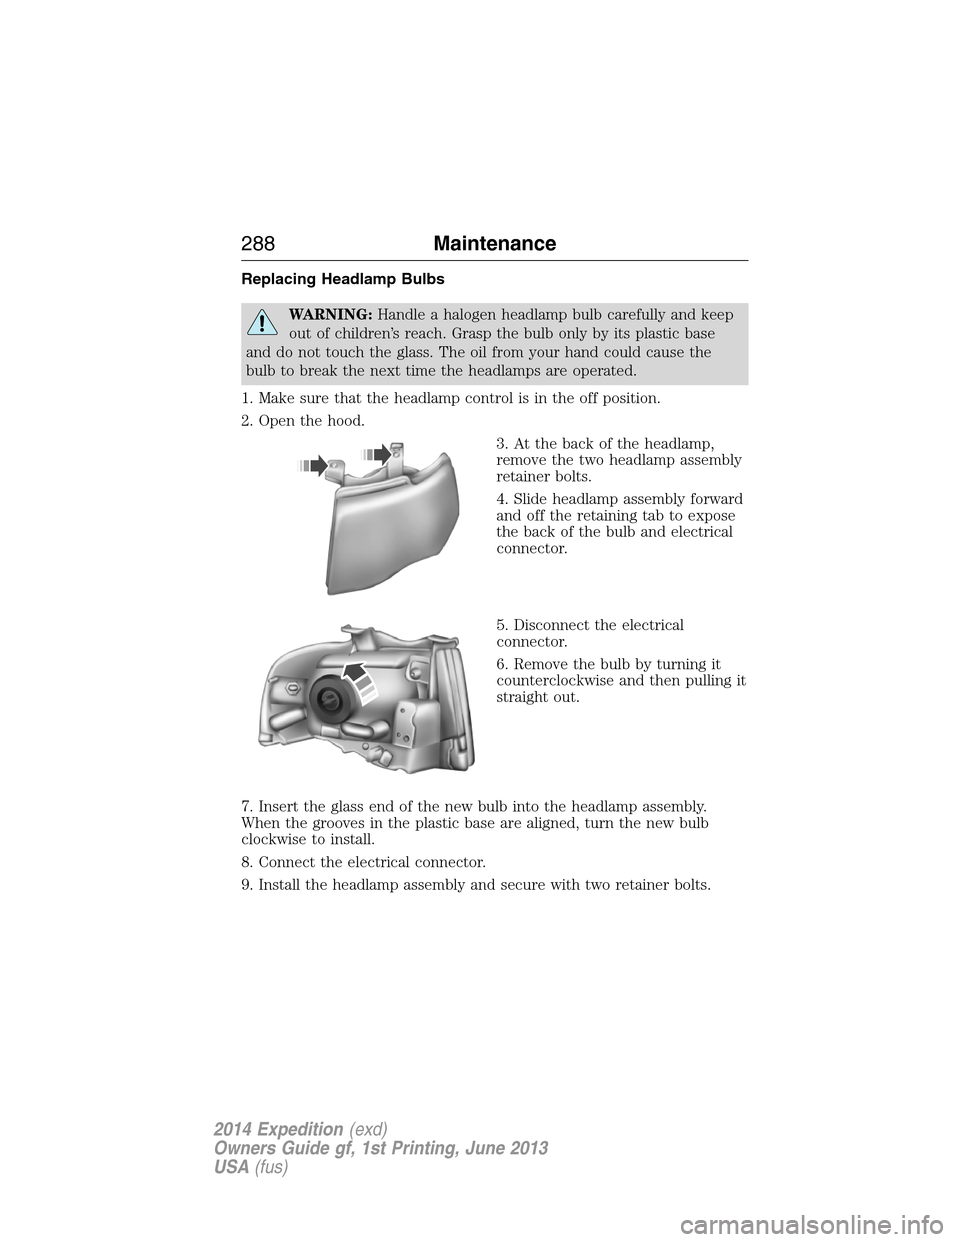
Replacing Headlamp Bulbs
WARNING:Handle a halogen headlamp bulb carefully and keep
out of children’s reach. Grasp the bulb only by its plastic base
and do not touch the glass. The oil from your hand could cause the
bulb to break the next time the headlamps are operated.
1. Make sure that the headlamp control is in the off position.
2. Open the hood.
3. At the back of the headlamp,
remove the two headlamp assembly
retainer bolts.
4. Slide headlamp assembly forward
and off the retaining tab to expose
the back of the bulb and electrical
connector.
5. Disconnect the electrical
connector.
6. Remove the bulb by turning it
counterclockwise and then pulling it
straight out.
7. Insert the glass end of the new bulb into the headlamp assembly.
When the grooves in the plastic base are aligned, turn the new bulb
clockwise to install.
8. Connect the electrical connector.
9. Install the headlamp assembly and secure with two retainer bolts.
288Maintenance
2014 Expedition(exd)
Owners Guide gf, 1st Printing, June 2013
USA(fus)
Page 290 of 519
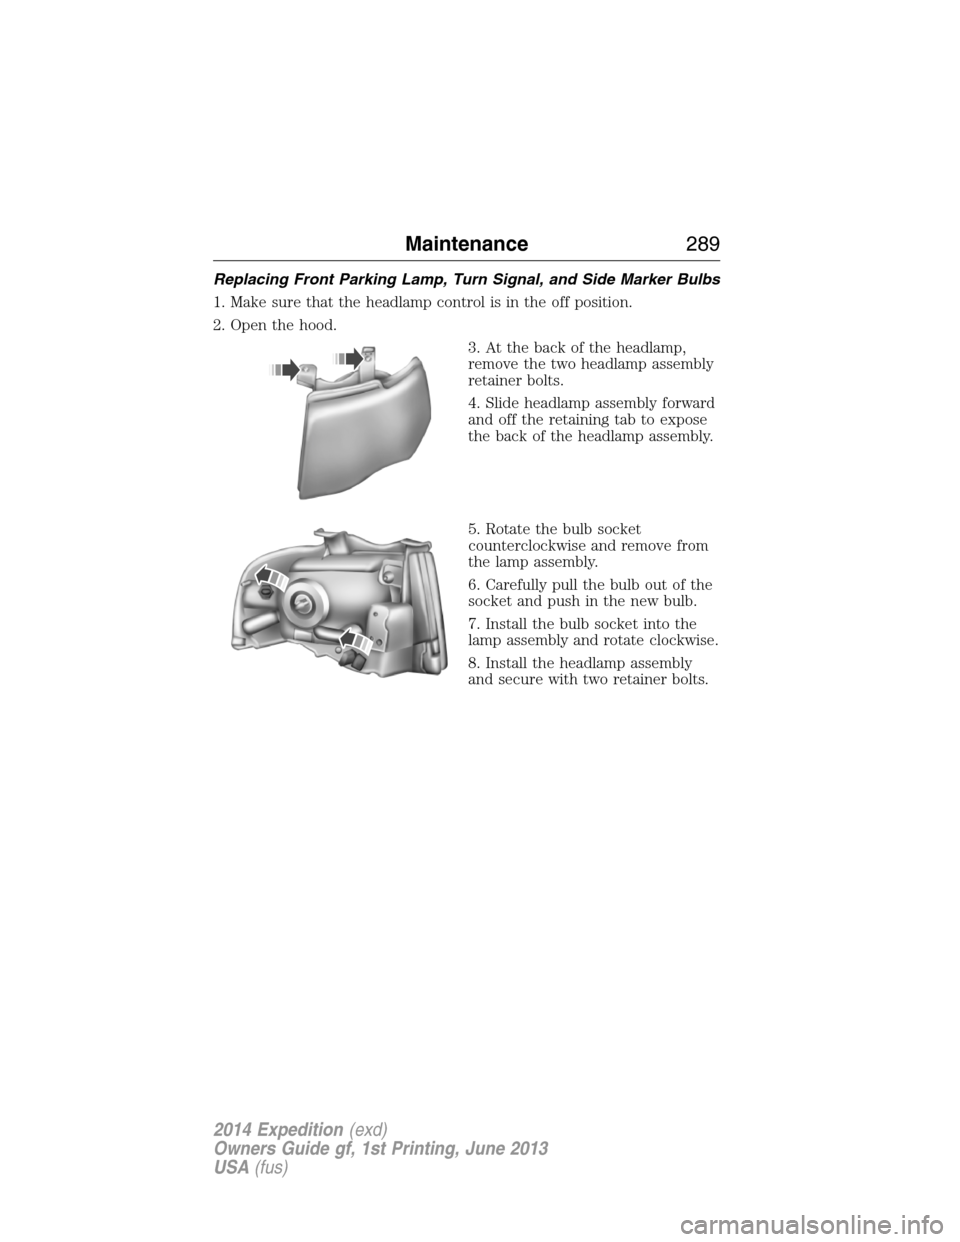
Replacing Front Parking Lamp, Turn Signal, and Side Marker Bulbs
1. Make sure that the headlamp control is in the off position.
2. Open the hood.
3. At the back of the headlamp,
remove the two headlamp assembly
retainer bolts.
4. Slide headlamp assembly forward
and off the retaining tab to expose
the back of the headlamp assembly.
5. Rotate the bulb socket
counterclockwise and remove from
the lamp assembly.
6. Carefully pull the bulb out of the
socket and push in the new bulb.
7. Install the bulb socket into the
lamp assembly and rotate clockwise.
8. Install the headlamp assembly
and secure with two retainer bolts.
Maintenance289
2014 Expedition(exd)
Owners Guide gf, 1st Printing, June 2013
USA(fus)
Page 291 of 519
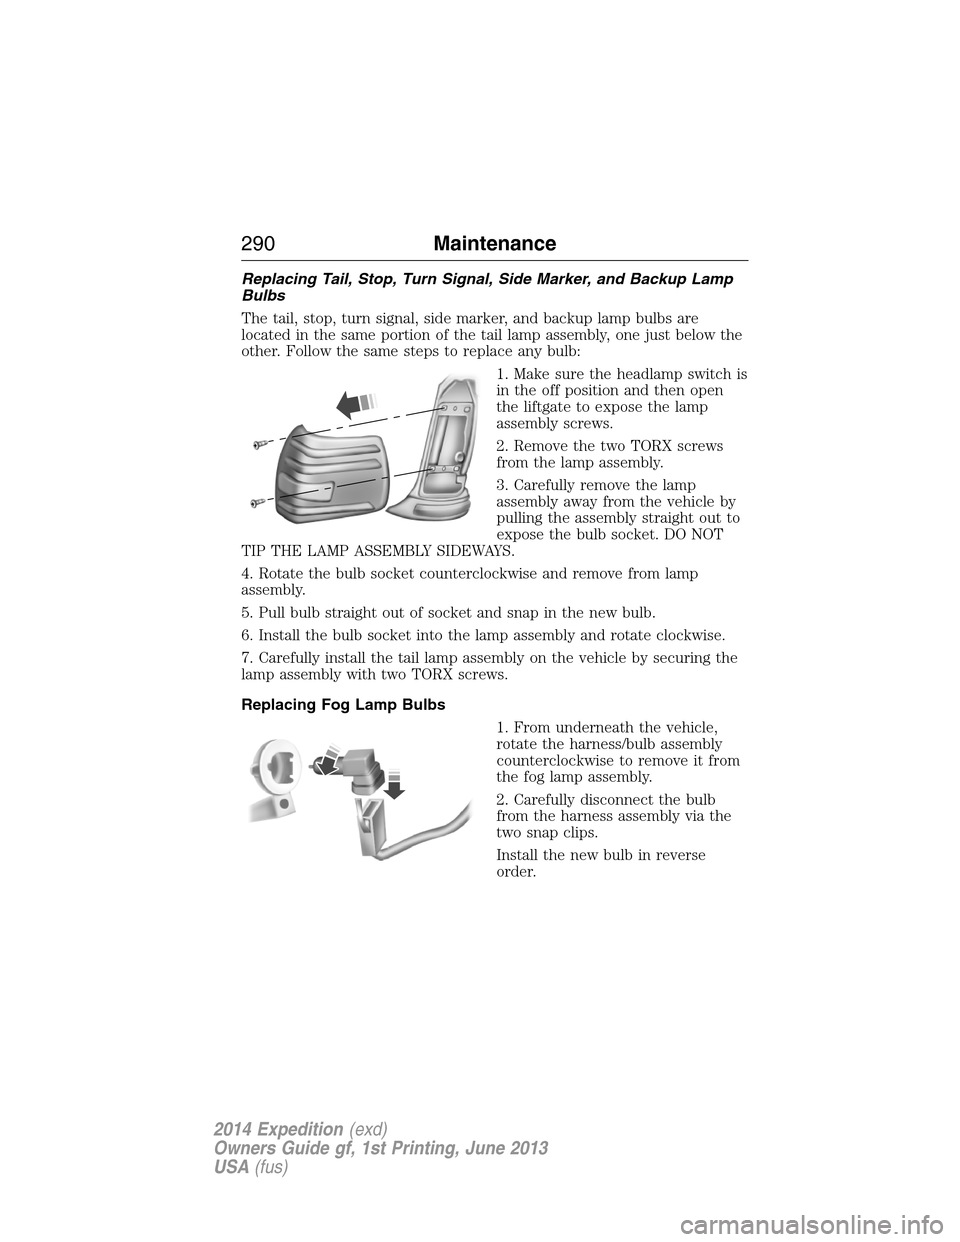
Replacing Tail, Stop, Turn Signal, Side Marker, and Backup Lamp
Bulbs
The tail, stop, turn signal, side marker, and backup lamp bulbs are
located in the same portion of the tail lamp assembly, one just below the
other. Follow the same steps to replace any bulb:
1. Make sure the headlamp switch is
in the off position and then open
the liftgate to expose the lamp
assembly screws.
2. Remove the two TORX screws
from the lamp assembly.
3. Carefully remove the lamp
assembly away from the vehicle by
pulling the assembly straight out to
expose the bulb socket. DO NOT
TIP THE LAMP ASSEMBLY SIDEWAYS.
4. Rotate the bulb socket counterclockwise and remove from lamp
assembly.
5. Pull bulb straight out of socket and snap in the new bulb.
6. Install the bulb socket into the lamp assembly and rotate clockwise.
7. Carefully install the tail lamp assembly on the vehicle by securing the
lamp assembly with two TORX screws.
Replacing Fog Lamp Bulbs
1. From underneath the vehicle,
rotate the harness/bulb assembly
counterclockwise to remove it from
the fog lamp assembly.
2. Carefully disconnect the bulb
from the harness assembly via the
two snap clips.
Install the new bulb in reverse
order.
290Maintenance
2014 Expedition(exd)
Owners Guide gf, 1st Printing, June 2013
USA(fus)