2014 FIAT 500L LIVING clock
[x] Cancel search: clockPage 327 of 420
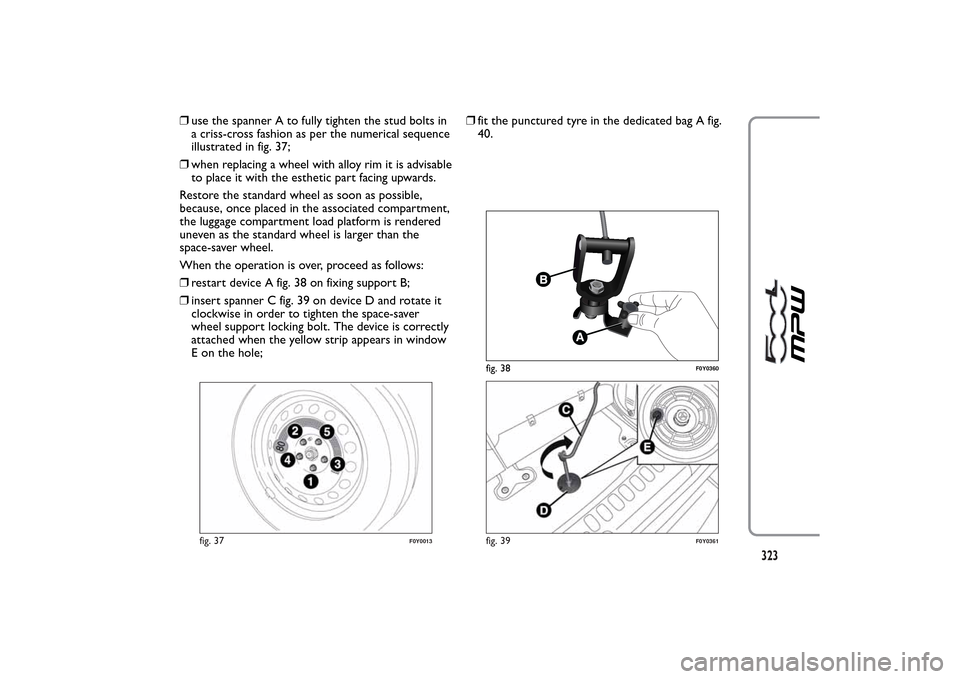
❒use the spanner A to fully tighten the stud bolts in
a criss-cross fashion as per the numerical sequence
illustrated in fig. 37;
❒when replacing a wheel with alloy rim it is advisable
to place it with the esthetic part facing upwards.
Restore the standard wheel as soon as possible,
because, once placed in the associated compartment,
the luggage compartment load platform is rendered
uneven as the standard wheel is larger than the
space-saver wheel.
When the operation is over, proceed as follows:
❒restart device A fig. 38 on fixing support B;
❒insert spanner C fig. 39 on device D and rotate it
clockwise in order to tighten the space-saver
wheel support locking bolt. The device is correctly
attached when the yellow strip appears in window
E on the hole;❒fit the punctured tyre in the dedicated bag A fig.
40.
fig. 37
F0Y0013
fig. 38
F0Y0360
fig. 39
F0Y0361
323
Page 352 of 420
MAKING A PHONE CALL.................................................375
MANAGING AN INCOMING CALL ..............................376
MAKING A SECOND PHONE CALL .............................377
MANAGING TWO PHONE CALLS ................................377
ENDING A CALL..................................................................377
REDIALLING ..........................................................................377
CONTINUING A PHONE CALL .....................................377
ACTIVATION/DEACTIVATION OF THE
MICROPHONE ......................................................................377
TRANSFERRING A CALL...................................................378
SMS MESSAGE READER......................................................378
"MORE" MODE ........................................................................378
TRIP COMPUTER .................................................................378
CLOCK ....................................................................................379eco:Drive .................................................................................379
SETTINGS ...............................................................................381
VOICE COMMANDS ............................................................385
USE OF THE VOICE COMMANDS .................................385
USE OF STEERING WHEEL CONTROLS TO
ACTIVATE VOICE COMMANDS .....................................385
VOICE SESSION STATUS....................................................386
MULTIPLE CHOICE..............................................................386
GLOBAL VOICE COMMANDS.........................................387
PHONE VOICE COMMANDS ..........................................388
RADIO AM/FM/DAB VOICE COMMANDS ..................39
MEDIA VOICE COMMANDS ............................................394
CUSTOMER SERVICE NUMBER LIST ................................397
348
2
Page 363 of 420
SWITCHING THE SYSTEM ON/OFFRADIO (TUNER) MODE
The system switches on/off when the button/knob
(ON/OFF) is pressed (1-fig. 1).
The electronic volume adjustment control rotates
continuously (360°) in both directions without stop
positions.
Turn the button/knob clockwise to increase the radio
volume or counterclockwise to decrease it.
The system has the following tuners: AM, FM and
DAB (for versions/markets, where provided).RADIO MODE SELECTION
Press the RADIO button (12-fig. 1) on the front
panel to activate the radio mode.
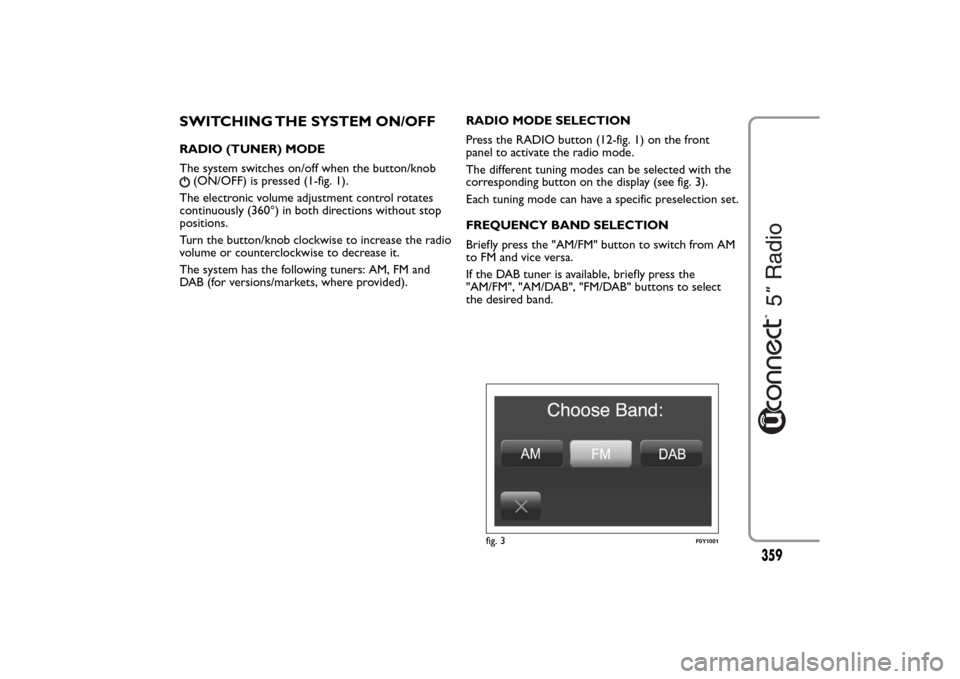
The different tuning modes can be selected with the
corresponding button on the display (see fig. 3).
Each tuning mode can have a specific preselection set.
FREQUENCY BAND SELECTION
Briefly press the "AM/FM" button to switch from AM
to FM and vice versa.
If the DAB tuner is available, briefly press the
"AM/FM", "AM/DAB", "FM/DAB" buttons to select
the desired band.
fig. 3
F0Y1001
359
Page 370 of 420
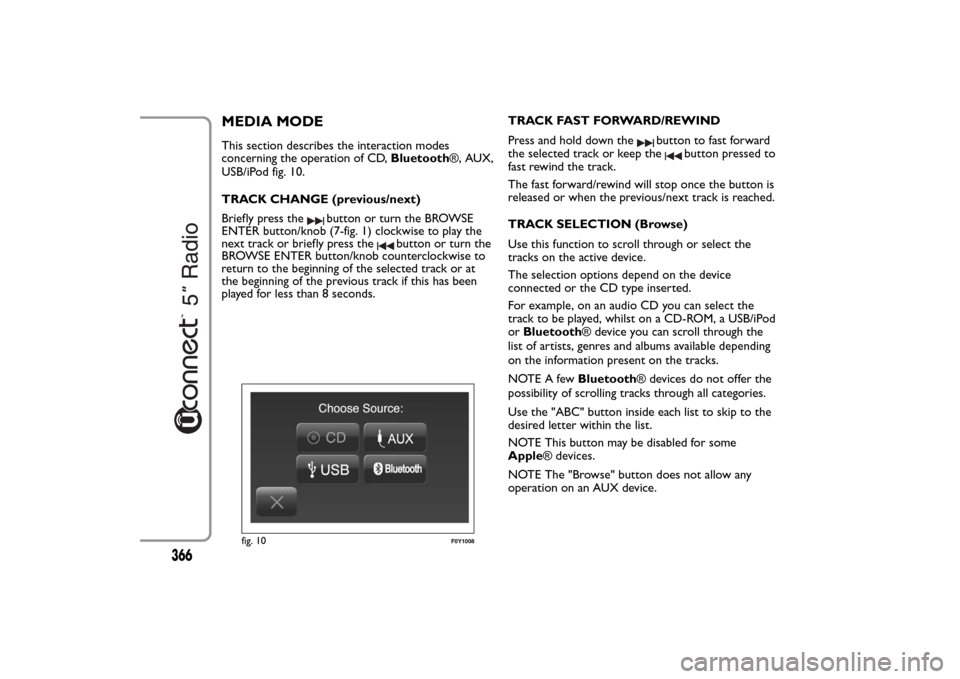
MEDIA MODEThis section describes the interaction modes
concerning the operation of CD,Bluetooth®, AUX,
USB/iPod fig. 10.
TRACK CHANGE (previous/next)
Briefly press the
button or turn the BROWSE
ENTER button/knob (7-fig. 1) clockwise to play the
next track or briefly press the
button or turn the
BROWSE ENTER button/knob counterclockwise to
return to the beginning of the selected track or at
the beginning of the previous track if this has been
played for less than 8 seconds.TRACK FAST FORWARD/REWIND
Press and hold down the
button to fast forward
the selected track or keep the
button pressed to
fast rewind the track.
The fast forward/rewind will stop once the button is
released or when the previous/next track is reached.
TRACK SELECTION (Browse)
Use this function to scroll through or select the
tracks on the active device.
The selection options depend on the device
connected or the CD type inserted.
For example, on an audio CD you can select the
track to be played, whilst on a CD-ROM, a USB/iPod
orBluetooth® device you can scroll through the
list of artists, genres and albums available depending
on the information present on the tracks.
NOTE A fewBluetooth® devices do not offer the
possibility of scrolling tracks through all categories.
Use the "ABC" button inside each list to skip to the
desired letter within the list.
NOTE This button may be disabled for some
Apple® devices.
NOTE The "Browse" button does not allow any
operation on an AUX device.
fig. 10
F0Y1008
366
Page 382 of 420
TRANSFERRING A CALL
The ongoing calls can be transferred from the mobile
phone to the system and vice versa without ending
the calls.
To transfer the call, press the "Transfer" button.
SMS MESSAGE READER
The system can read the messages received by the
mobile phone.
To use this function the mobile phone must support
the SMS exchange function viaBluetooth®.
If this function is not supported by the phone, the
corresponding
button is deactivated (greyed out).
When a text message is received, the display will
show a screen where the options "Listen", "Call" or
"Ignore" can be selected.
Press the
button to access the list of SMS
messages received by the mobile phone (the list
displays a maximum of 60 messages received).
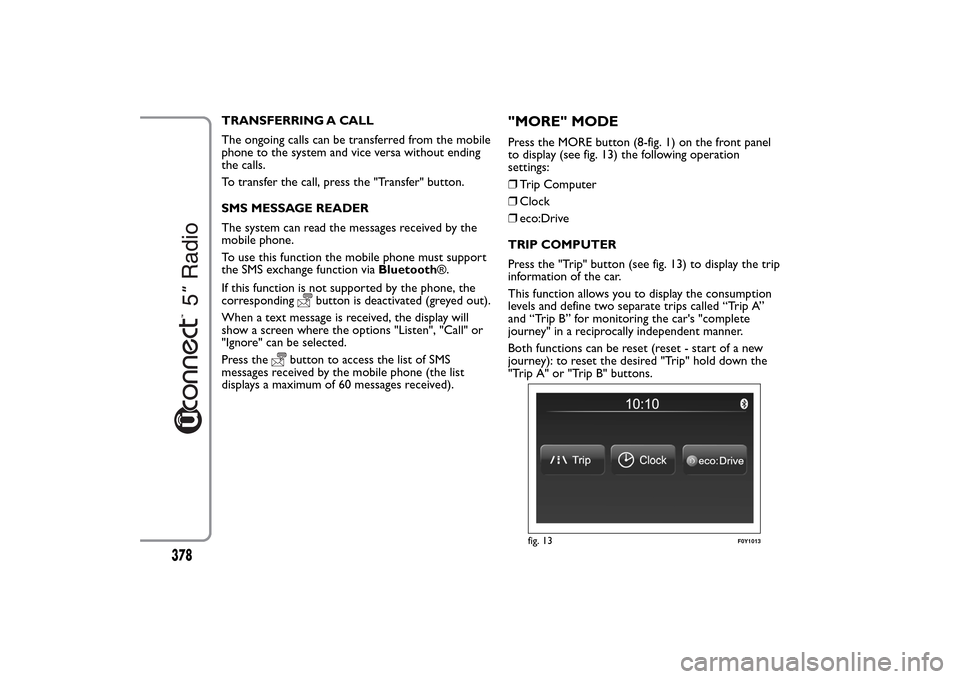
"MORE" MODEPress the MORE button (8-fig. 1) on the front panel
to display (see fig. 13) the following operation
settings:
❒Trip Computer
❒Clock
❒eco:Drive
TRIP COMPUTER
Press the "Trip" button (see fig. 13) to display the trip
information of the car.
This function allows you to display the consumption
levels and define two separate trips called “Trip A”
and “Trip B” for monitoring the car's "complete
journey" in a reciprocally independent manner.
Both functions can be reset (reset - start of a new
journey): to reset the desired "Trip" hold down the
"Trip A" or "Trip B" buttons.
fig. 13
F0Y1013
378
Page 383 of 420
CLOCK
Press the "Clock" button (see fig. 13) to display the
clock.
eco:Drive
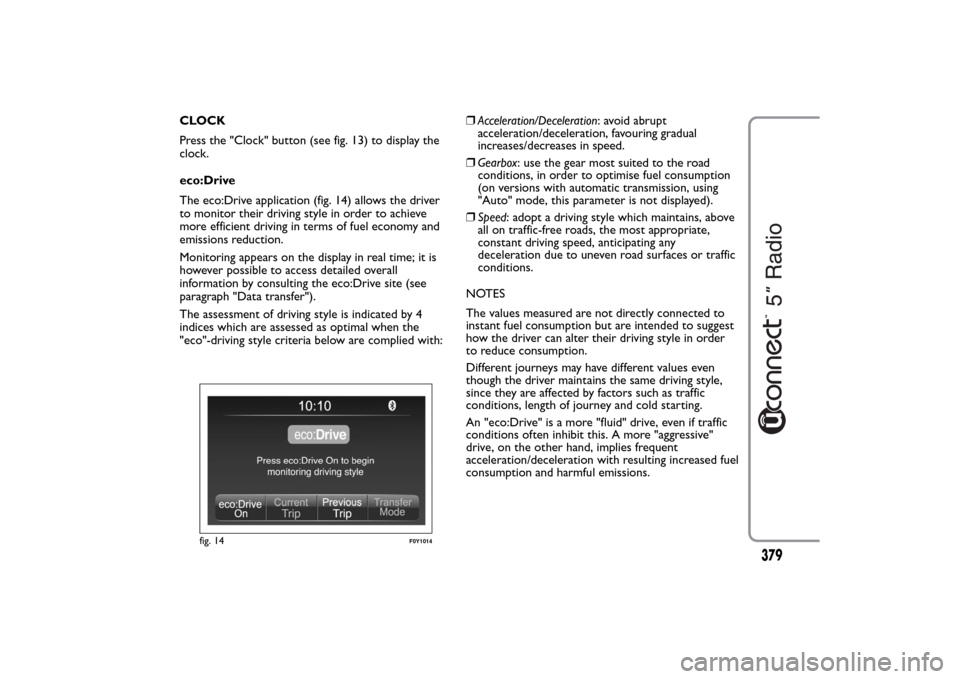
The eco:Drive application (fig. 14) allows the driver
to monitor their driving style in order to achieve
more efficient driving in terms of fuel economy and
emissions reduction.
Monitoring appears on the display in real time; it is
however possible to access detailed overall
information by consulting the eco:Drive site (see
paragraph "Data transfer").
The assessment of driving style is indicated by 4
indices which are assessed as optimal when the
"eco"-driving style criteria below are complied with:❒Acceleration/Deceleration: avoid abrupt
acceleration/deceleration, favouring gradual
increases/decreases in speed.
❒Gearbox: use the gear most suited to the road
conditions, in order to optimise fuel consumption
(on versions with automatic transmission, using
"Auto" mode, this parameter is not displayed).
❒Speed: adopt a driving style which maintains, above
all on traffic-free roads, the most appropriate,
constant driving speed, anticipating any
deceleration due to uneven road surfaces or traffic
conditions.
NOTES
The values measured are not directly connected to
instant fuel consumption but are intended to suggest
how the driver can alter their driving style in order
to reduce consumption.
Different journeys may have different values even
though the driver maintains the same driving style,
since they are affected by factors such as traffic
conditions, length of journey and cold starting.
An "eco:Drive" is a more "fluid" drive, even if traffic
conditions often inhibit this. A more "aggressive"
drive, on the other hand, implies frequent
acceleration/deceleration with resulting increased fuel
consumption and harmful emissions.
fig. 14
F0Y1014
379
Page 387 of 420
Clock & Date
Use this function to set the clock.
Time setting
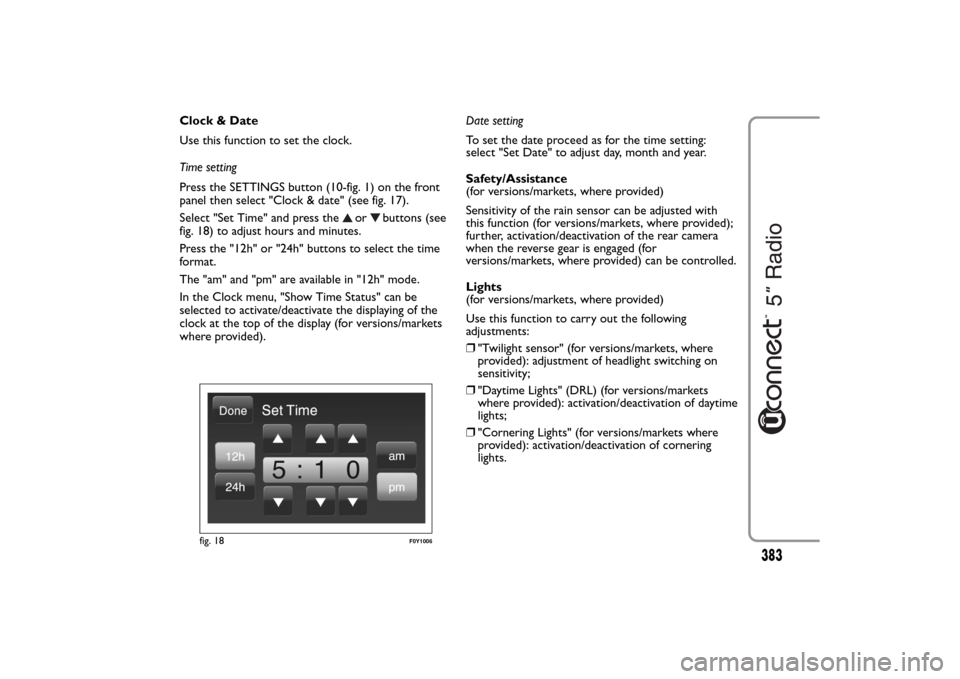
Press the SETTINGS button (10-fig. 1) on the front
panel then select "Clock & date" (see fig. 17).
Select "Set Time" and press the
or
buttons (see
fig. 18) to adjust hours and minutes.
Press the "12h" or "24h" buttons to select the time
format.
The "am" and "pm" are available in "12h" mode.
In the Clock menu, "Show Time Status" can be
selected to activate/deactivate the displaying of the
clock at the top of the display (for versions/markets
where provided).Date setting
To set the date proceed as for the time setting:
select "Set Date" to adjust day, month and year.
Safety/Assistance
(for versions/markets, where provided)
Sensitivity of the rain sensor can be adjusted with
this function (for versions/markets, where provided);
further, activation/deactivation of the rear camera
when the reverse gear is engaged (for
versions/markets, where provided) can be controlled.
Lights
(for versions/markets, where provided)
Use this function to carry out the following
adjustments:
❒"Twilight sensor" (for versions/markets, where
provided): adjustment of headlight switching on
sensitivity;
❒"Daytime Lights" (DRL) (for versions/markets
where provided): activation/deactivation of daytime
lights;
❒"Cornering Lights" (for versions/markets where
provided): activation/deactivation of cornering
lights.
fig. 18
F0Y1006
383