Page 151 of 420

CARRYING CHILDREN SAFELYFor optimal protection in the event of an impact, all
occupants must be seated and wearing adequate
restraint systems, including infants and other
children!
This prescription is compulsory in all EC countries
according to EC Directive 2003/20/EC.
Compared with an adult, a child's head is larger and
heavier in proportion to his/her body and the child's
muscular and bone structures are not fully
developed. Therefore, correct restraint systems
other than adult seat belts are necessary to reduce
as much as possible the risk of injuries in case of
accident, braking or sudden manoeuvre.
Children must be seated safely and comfortably. As
far as the characteristics of the child restraint
systems used, you are advised to keep children in
rearward facing restraint systems for as long as
possible (at least until 3–4 years old); this is the most
protected position in the event of an impact.
The choice of the most suitable child restraint device
depends on the weight of the child; there are
various types of child restraint systems and you are
advised always to choose the one that is most
suitable for the child.
When over 1.50 m in height, from the point of view
of restraint systems, children are considered as
adults and wear seat belts normally.In Europe the characteristics of children restraint
systems are ruled by the regulation ECE-R44, dividing
them into five weight groups:
Group Weight groups
Group0 upto10kg
Group 0+ up to 13 kg
Group 1 9-18 kg
Group 2 15-25 kg
Group 3 22-36 kgAll restraint devices must bear the type-approval
data along with the control mark on a label firmly
secured to the child restraint system which must
never be removed.
Lineaccessori Fiat offers child restraint systems for
each weight group. These devices are recommended
having been specifically designed for Fiat cars.
147GETTING TO KNOW
YOUR CARSAFETYSTARTING AND
DRIVING
WARNING LIGHTS
AND MESSAGES
IN AN EMERGENCY
SERVICING AND
MAINTENANCE
TECHNICAL
SPECIFICATIONS
INDEX
Page 158 of 420

ISOFIX CHILD RESTRAINT SYSTEMThe car is equipped with ISOFIX anchorages, a new
standard which makes fitting a child restraint system
quick, simple and safe.
Isofix systems can be fitted alongside Universal child
restraint systems to different seats of the same
vehicle.
An example of a Universal Isofix child restraint
system for weight group 1 is shown in fig. 134.
fig. 141
WARNING
The figure is indicative and for assembly
purposes only. Secure the child restraint
system according to the instructions, which must
be included with this type of restraint system.
The other weight groups are covered by specific
Isofix child restraint systems, which can be used only
if specifically approved for this car (see list of cars
provided with the child restraint system).IMPORTANT The central rear seat (for versions/
markets, where provided) is not approved for any
type of Isofix child restraint systems.
fig. 141
F0Y0201
154GETTING TO KNOW
YOUR CAR
SAFETY
STARTING AND
DRIVING
WARNING LIGHTS
AND MESSAGES
IN AN EMERGENCY
SERVICING AND
MAINTENANCE
TECHNICAL
SPECIFICATIONS
INDEX
Page 180 of 420

Any electric brake or other device (winch etc.)
should be powered directly by the battery through a
cable with a cross-section of no less than 2.5 mm
2.
In addition to the electrical branches, the car's
electrical system can be connected only to the supply
cable for an electric brake and to the cable for an
internal trailer light, though not more than 15 W. To
connect, use the preset control unit with a battery
cable with cross-section no less than 2.5 mm
2.
IMPORTANT The use of auxiliary loads other than
external lights (electric brake, winch, etc.) must
occur with engine running.
IMPORTANT To install a tow hook contact a Fiat
Dealership.
WARNING
The ABS with which the car may be
equipped will not control the braking
system of the trailer. Particular caution is
required on slippery roads.
WARNING
Never modify the braking system of the
car to control the trailer brake.The
trailer braking system must be fully
independent of the car ’s hydraulic system.INSTALLING A TOW HOOK
The towing device should be fastened to the body by
specialised personnel according to any additional
and/or integrative information supplied by the
Manufacturer of the device.
The towing device must meet current regulations
with reference to Directive 94/20/EC and subsequent
amendments.
For any version the towing device used must be right
for the towable weight of the car on which it is to
be installed.
For the electrical connection a standard connector
should be used which is generally placed on a special
bracket normally fastened to the towing device,
and a special ECU for external trailer light control
must be installed on the car.
7 or 13-pin 12 V DC connections should be used
(CUNA/UNI and ISO/DIN Standards). Follow any
instructions provided by the car manufacturer and/or
the towing device manufacturer.
Installation diagram for basic versions fig. 151
The tow hook structure must be fastened in the
points shown in the figure with a total amount of 8
fastening points to the body.
176GETTING TO KNOW
YOUR CAR
SAFETYSTARTING AND
DRIVINGWARNING LIGHTS
AND MESSAGES
IN AN EMERGENCY
SERVICING AND
MAINTENANCE
TECHNICAL
SPECIFICATIONS
INDEX
Page 208 of 420

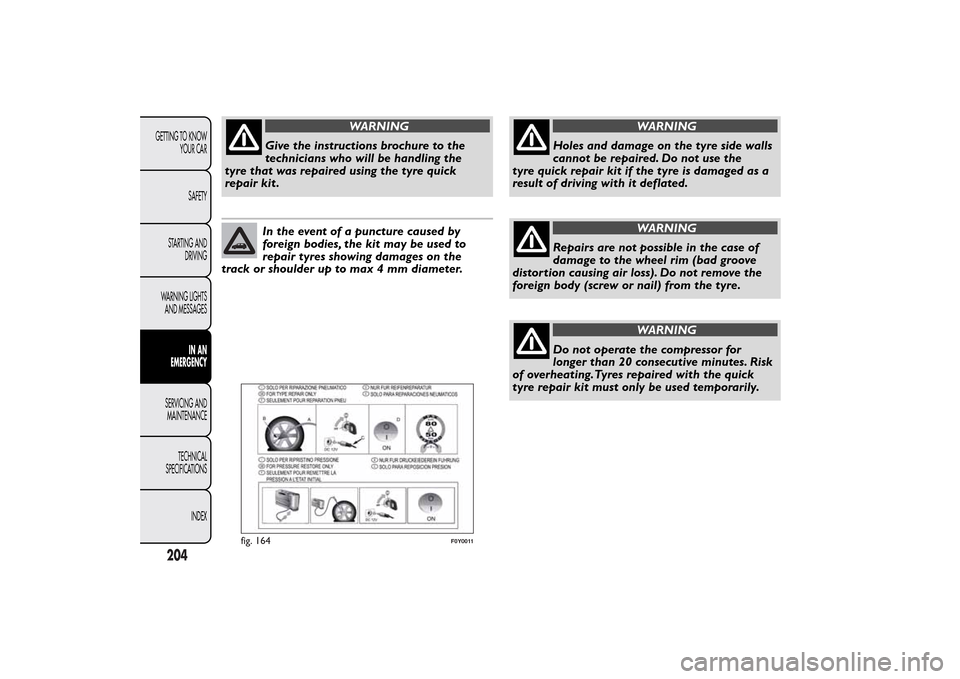
WARNING
Give the instructions brochure to the
technicians who will be handling the
tyre that was repaired using the tyre quick
repair kit .In the event of a puncture caused by
foreign bodies, the kit may be used to
repair tyres showing damages on the
track or shoulder up to max 4 mm diameter.
WARNING
Holes and damage on the tyre side walls
cannot be repaired. Do not use the
tyre quick repair kit if the tyre is damaged as a
result of driving with it deflated.
WARNING
Repairs are not possible in the case of
damage to the wheel rim (bad groove
distortion causing air loss). Do not remove the
foreign body (screw or nail) from the tyre.
WARNING
Do not operate the compressor for
longer than 20 consecutive minutes. Risk
of overheating.Tyres repaired with the quick
tyre repair kit must only be used temporarily.
fig. 164
F0Y0011
204GETTING TO KNOW
YOUR CAR
SAFETY
STARTING AND
DRIVING
WARNING LIGHTS
AND MESSAGES
IN AN
EMERGENCY
SERVICING AND
MAINTENANCE
TECHNICAL
SPECIFICATIONS
INDEX
Page 273 of 420
BRAKESVersions Front service brakes Rear service brakes Parking brake
0.9 TwinAir Turbo 105 HP
Self-ventilated disc DiscControlled by handbrake
lever, acting on the rear
brakes 1.4 16V
1.3 16V MultiJet
1.6 16V MultiJetIMPORTANT Water, ice and salt spread on the roads may deposit on the brake disks reducing braking
efficiency the first time the brakes are applied.SUSPENSIONVersions Front Rear
0.9 TwinAir Turbo 105 HP
Independent, MacPherson type with
lower transversal wishbones and anti-roll
bar secured to an auxiliary crossmemberInterconnected wheels by means of
torsion beam 1.4 16V
1.3 16V MultiJet
1.6 16V MultiJet
269GETTING TO KNOW
YOUR CAR
SAFETY
STARTING AND
DRIVING
WARNING LIGHTS
AND MESSAGES
IN AN EMERGENCY
SERVICING AND
MAINTENANCETECHNICAL
SPECIFICATIONSINDEX
Page 311 of 420
Repositioning of the second row rear seats
To reposition the rear seat, push the seat backwards
as shown in fig. 6 and secure it (when it clicks into
place, this indicates correct positioning).Repositioning the backrest
To bring the backrest back to normal usage position,
lift lever B fig. 7 and then raise the backrest until
vertical engagement position is reached.
IMPORTANT It is advisable to follow the procedures
described above, operating from outside the car.
WARNING
If there are any passengers sitting on the
third row seats, the second row rear seat
must be correctly anchored to the floor and the
backrest must be in vertical position.
fig. 5
F0Y0400
fig. 6
F0Y0077
fig. 7
F0Y0259
307
Page 312 of 420
WARNING
Make sure the backrest is properly
secured at both sides to prevent it
moving forward in the event of sharp braking,
with possible impact with the occupants. A
metallic click is heard when locking is correct .
THIRD ROW SEAT BACKREST FOLDING
Proceed as follows:
❒completely lower the third row rear seat head
restraints;
❒move the seat belts to the side, making sure that
they are correctly extended and not twisted;
❒pull upwards device A fig. 8 to fold the left or right
seat backrest. The backrest will be automatically
folded forwards. If necessary, accompany the
backrest during the initial stage of folding.The load compartment capacity increases when the
seat backrests are folded.
Before tilting the seat backrest fully,
remove any objects laid on it .
WARNING
Do not move the seat when a child is
sitting in the car.
fig. 8
F0Y0381
308
Page 313 of 420
THIRD ROW SEAT BACKREST
REPOSITIONING
Pull toward yourself devices A fig. 9 located behind
the rear seat backrests to reposition the seat
backrests.
IMPORTANT Before moving the backrests, make
sure that covers B are completely folded on the
backrest rear part.
IMPORTANT Do not move the third row seats
before removing the curtain (see "Curtain removal"
in paragraph "Luggage compartment").
WARNING
Make sure the backrests are properly
secured at both sides to prevent them
from moving forward, in the event of sharp
braking, with possible impact with the
occupants. A metallic click is heard when locking
is correct .
BOTTLE/CAN HOLDER COMPARTMENT
It is located between the third row rear seats fig. 10.
fig. 9
F0Y0378
fig. 10
F0Y0382
309