Page 308 of 392
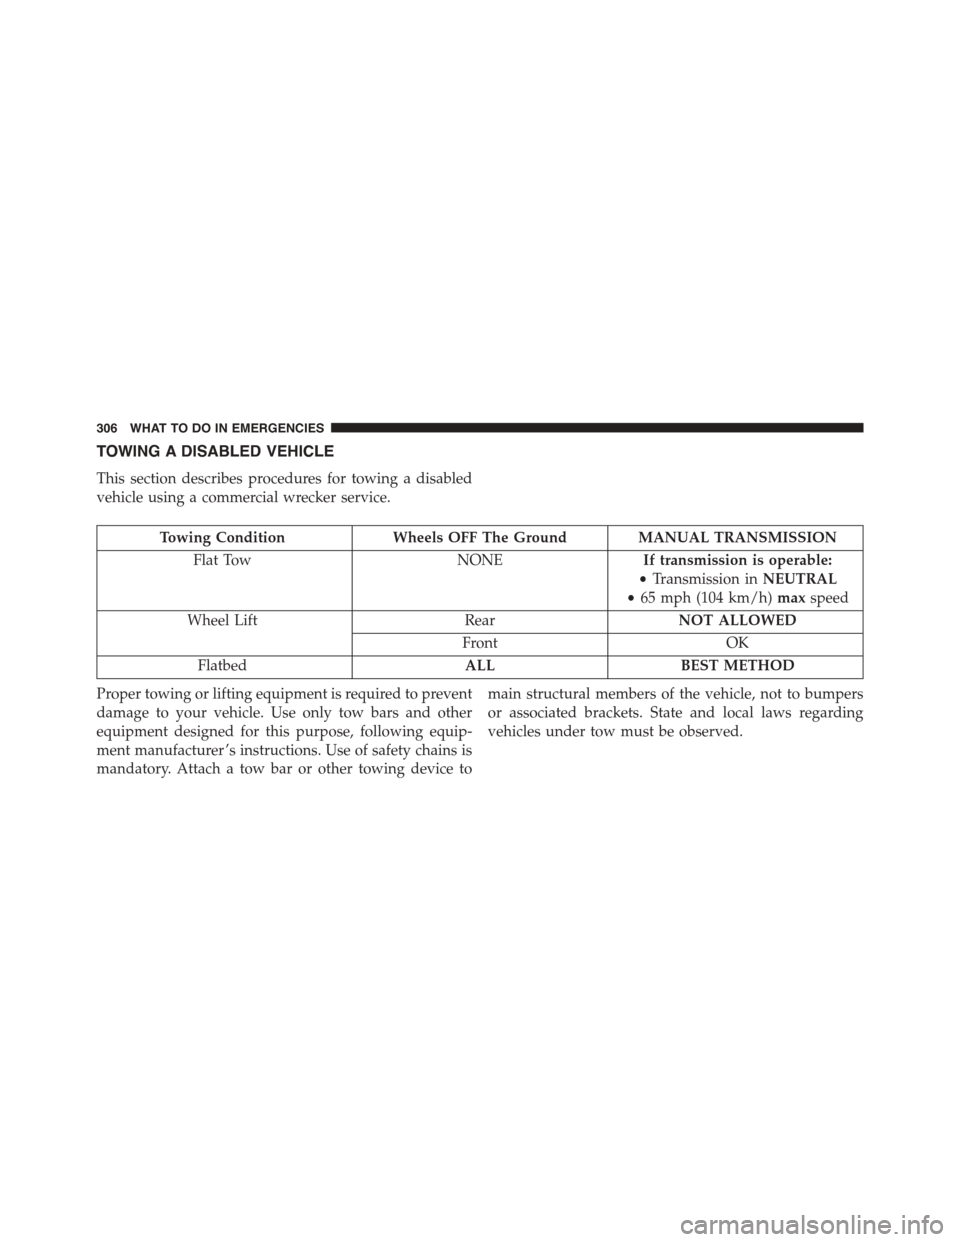
TOWING A DISABLED VEHICLE
This section describes procedures for towing a disabled
vehicle using a commercial wrecker service.
Towing ConditionWheels OFF The Ground MANUAL TRANSMISSION
Flat TowNONEIf transmission is operable:
•Transmission inNEUTRAL
•65 mph (104 km/h)maxspeed
Wheel LiftRearNOT ALLOWED
FrontOK
FlatbedALLBEST METHOD
Proper towing or lifting equipment is required to prevent
damage to your vehicle. Use only tow bars and other
equipment designed for this purpose, following equip-
ment manufacturer ’s instructions. Use of safety chains is
mandatory. Attach a tow bar or other towing device to
main structural members of the vehicle, not to bumpers
or associated brackets. State and local laws regarding
vehicles under tow must be observed.
306 WHAT TO DO IN EMERGENCIES
Page 309 of 392
If you must use the accessories (wipers, defrosters, etc.)
while being towed, the ignition must be in the ON/RUN
position, not the ACC position.
CAUTION!
•DO NOT flat tow any disabled vehicle if condition
is related to a clutch, transmission or driveline
component. Damage to the drivetrain could result.
•Towing this vehicle in violation of the above re-
quirements can cause severe transmission damage.
Damage from improper towing is not covered un-
der the New Vehicle Limited Warranty.
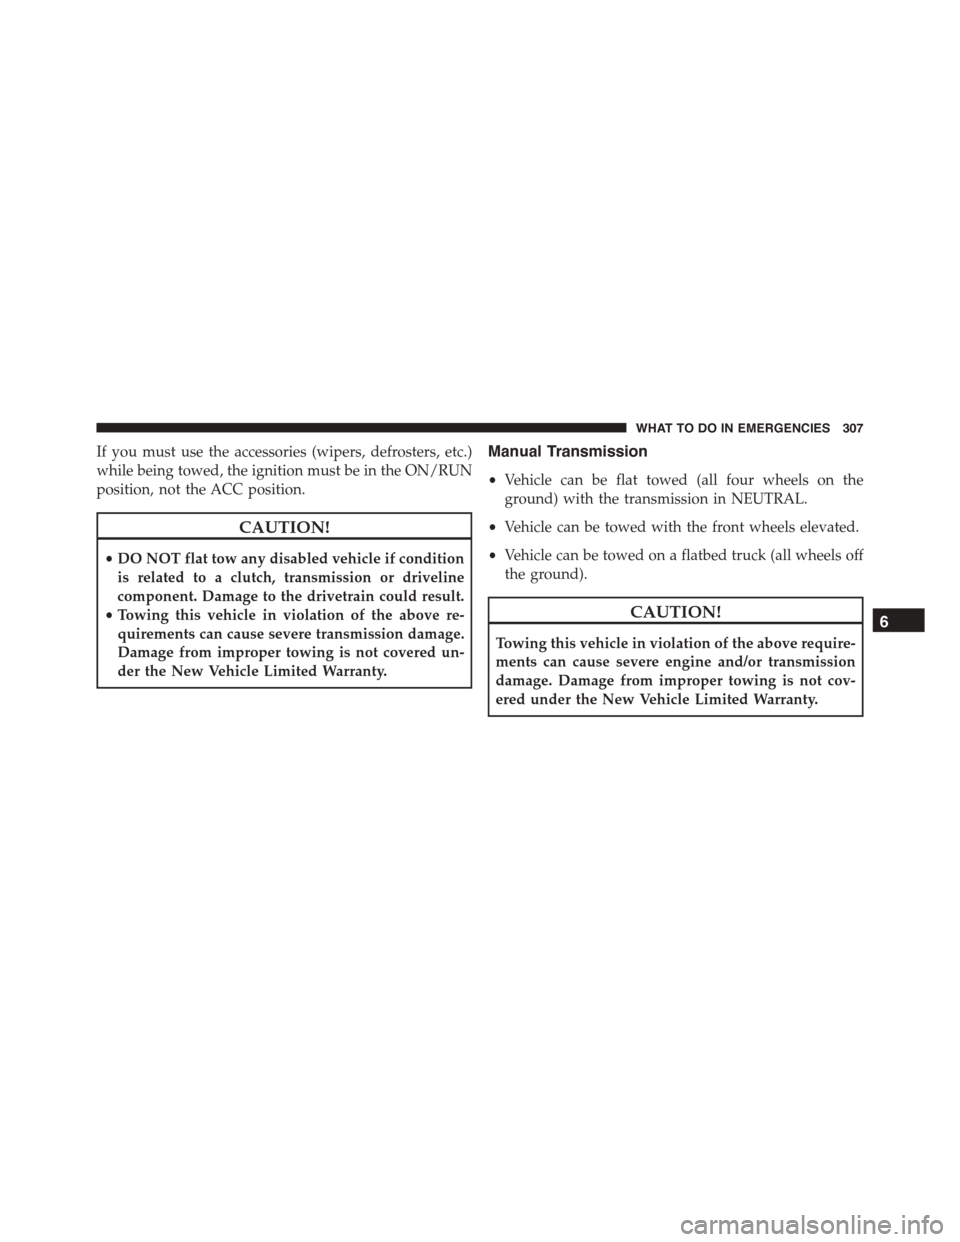
Manual Transmission
•Vehicle can be flat towed (all four wheels on the
ground) with the transmission in NEUTRAL.
•Vehicle can be towed with the front wheels elevated.
•Vehicle can be towed on a flatbed truck (all wheels off
the ground).
CAUTION!
Towing this vehicle in violation of the above require-
ments can cause severe engine and/or transmission
damage. Damage from improper towing is not cov-
ered under the New Vehicle Limited Warranty.
6
WHAT TO DO IN EMERGENCIES 307
Page 314 of 392

ONBOARD DIAGNOSTIC SYSTEM — OBD II
Your vehicle is equipped with a sophisticated onboard
diagnostic system called OBD II. This system monitors
the performance of the emissions, engine, and automatic
transmission control systems. When these systems are
operating properly, your vehicle will provide excellent
performance and fuel economy, as well as engine emis-
sions well within current government regulations.
If any of these systems require service, the OBD II system
will turn on the “Malfunction Indicator Light (MIL).” It
will also store diagnostic codes and other information to
assist your service technician in making repairs. Al-
though your vehicle will usually be drivable and not
need towing, see your authorized dealer for service as
soon as possible.
CAUTION!
•Prolonged driving with the MIL on could cause
further damage to the emission control system. It
could also affect fuel economy and driveability.
The vehicle must be serviced before any emissions
tests can be performed.
•If the MIL is flashing while the engine is running,
severe catalytic converter damage and power loss
will soon occur. Immediate service is required.
EMISSIONS INSPECTION AND MAINTENANCE
PROGRAMS
In some localities, it may be a legal requirement to pass
an inspection of your vehicle’s emissions control system.
Failure to pass could prevent vehicle registration.
312 MAINTAINING YOUR VEHICLE
Page 331 of 392

To minimize the possibility of catalytic converter dam-
age:
•Do not shut off the engine or interrupt the ignition,
when the transmission is in gear and the vehicle is in
motion.
•Do not try to start the engine by pushing or towing the
vehicle.
•Do not idle the engine with any spark plug wires
disconnected or removed, such as when diagnostic
testing, or for prolonged periods during very rough
idle or malfunctioning operating conditions.
Cooling System
WARNING!
•When working near the radiator cooling fan, dis-
connect the fan motor lead or turn the ignition
switch to the OFF position. The fan is temperature
controlled and can start at any time the ignition
switch is in the ON position.
•You or others can be badly burned by hot engine
coolant (antifreeze) or steam from your radiator. If
you see or hear steam coming from under the hood,
do not open the hood until the radiator has had
time to cool. Never try to open a cooling system
pressure cap when the radiator is hot.
7
MAINTAINING YOUR VEHICLE 329
Page 343 of 392
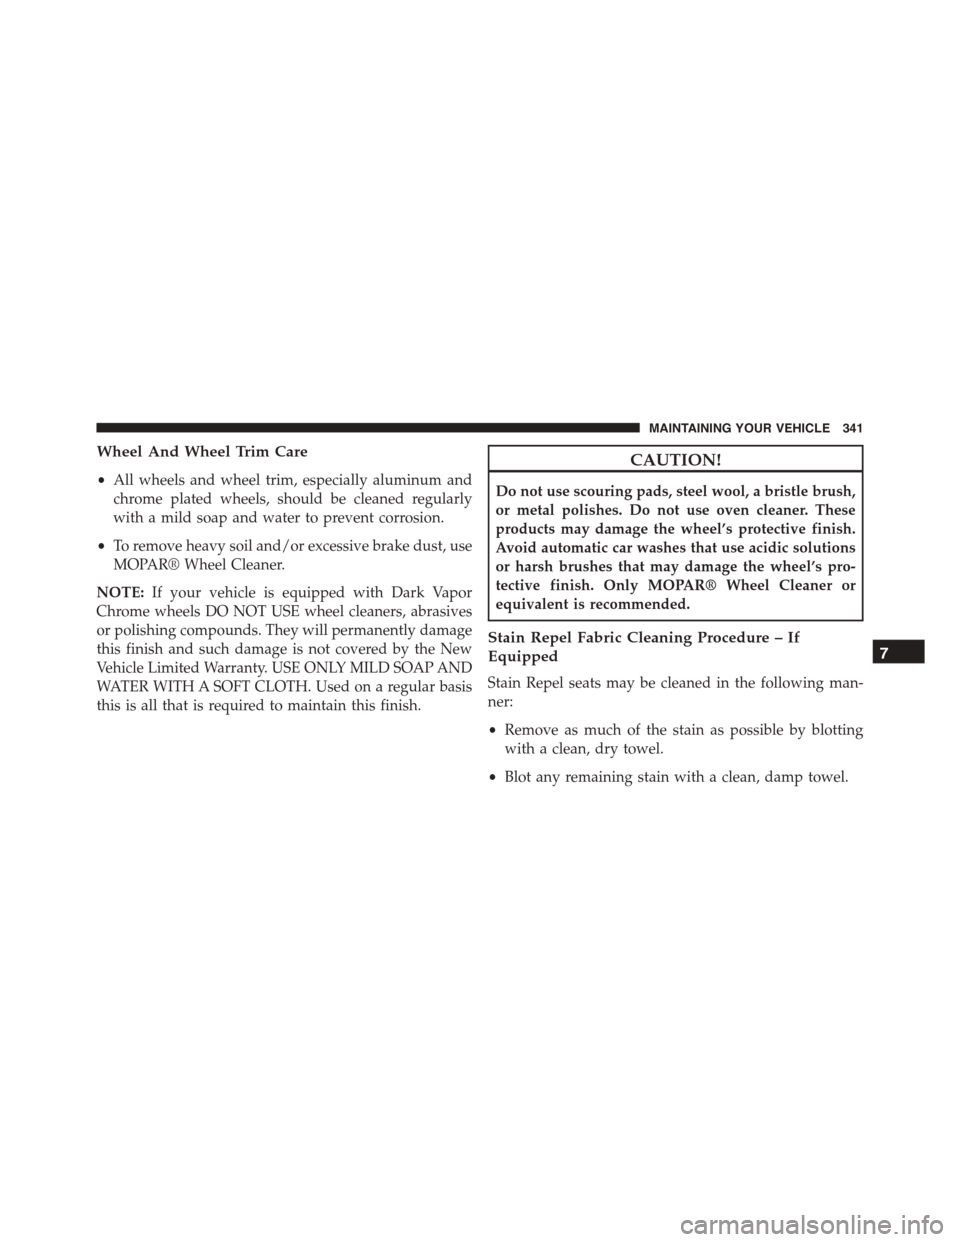
Wheel And Wheel Trim Care
•All wheels and wheel trim, especially aluminum and
chrome plated wheels, should be cleaned regularly
with a mild soap and water to prevent corrosion.
•To remove heavy soil and/or excessive brake dust, use
MOPAR® Wheel Cleaner.
NOTE:If your vehicle is equipped with Dark Vapor
Chrome wheels DO NOT USE wheel cleaners, abrasives
or polishing compounds. They will permanently damage
this finish and such damage is not covered by the New
Vehicle Limited Warranty. USE ONLY MILD SOAP AND
WATER WITH A SOFT CLOTH. Used on a regular basis
this is all that is required to maintain this finish.
CAUTION!
Do not use scouring pads, steel wool, a bristle brush,
or metal polishes. Do not use oven cleaner. These
products may damage the wheel’s protective finish.
Avoid automatic car washes that use acidic solutions
or harsh brushes that may damage the wheel’s pro-
tective finish. Only MOPAR® Wheel Cleaner or
equivalent is recommended.
Stain Repel Fabric Cleaning Procedure – If
Equipped
Stain Repel seats may be cleaned in the following man-
ner:
•Remove as much of the stain as possible by blotting
with a clean, dry towel.
•Blot any remaining stain with a clean, damp towel.
7
MAINTAINING YOUR VEHICLE 341
Page 344 of 392
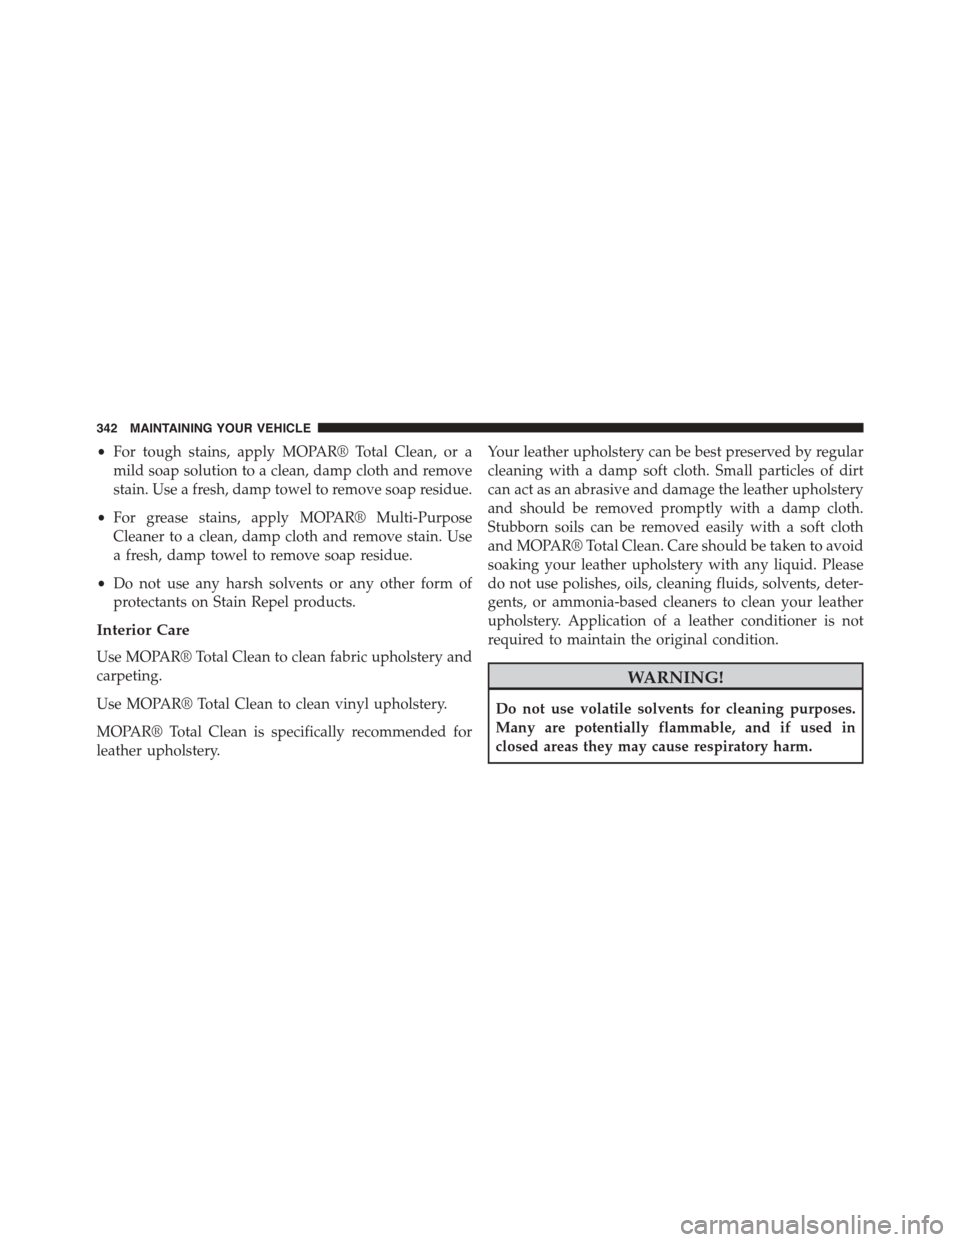
•For tough stains, apply MOPAR® Total Clean, or a
mild soap solution to a clean, damp cloth and remove
stain. Use a fresh, damp towel to remove soap residue.
•For grease stains, apply MOPAR® Multi-Purpose
Cleaner to a clean, damp cloth and remove stain. Use
a fresh, damp towel to remove soap residue.
•Do not use any harsh solvents or any other form of
protectants on Stain Repel products.
Interior Care
Use MOPAR® Total Clean to clean fabric upholstery and
carpeting.
Use MOPAR® Total Clean to clean vinyl upholstery.
MOPAR® Total Clean is specifically recommended for
leather upholstery.
Your leather upholstery can be best preserved by regular
cleaning with a damp soft cloth. Small particles of dirt
can act as an abrasive and damage the leather upholstery
and should be removed promptly with a damp cloth.
Stubborn soils can be removed easily with a soft cloth
and MOPAR® Total Clean. Care should be taken to avoid
soaking your leather upholstery with any liquid. Please
do not use polishes, oils, cleaning fluids, solvents, deter-
gents, or ammonia-based cleaners to clean your leather
upholstery. Application of a leather conditioner is not
required to maintain the original condition.
WARNING!
Do not use volatile solvents for cleaning purposes.
Many are potentially flammable, and if used in
closed areas they may cause respiratory harm.
342 MAINTAINING YOUR VEHICLE
Page 345 of 392

CAUTION!
Do not use Alcohol and Alcohol-based and/or Keton
based cleaning products to clean leather seats, as
damage to the seat may result.
Cleaning Headlights
Your vehicle has plastic headlights that are lighter and
less susceptible to stone breakage than glass headlights.
Plastic is not as scratch resistant as glass and therefore
different lens cleaning procedures must be followed.
To minimize the possibility of scratching the lenses and
reducing light output, avoid wiping with a dry cloth. To
remove road dirt, wash with a mild soap solution fol-
lowed by rinsing.
Do not use abrasive cleaning components, solvents, steel
wool or other aggressive material to clean the lenses.
Glass Surfaces
All glass surfaces should be cleaned on a regular basis
with MOPAR® Glass Cleaner, or any commercial
household-type glass cleaner. Never use an abrasive type
cleaner. Use caution when cleaning the inside rear win-
dow equipped with electric defrosters or the right rear
quarter window equipped with the radio antenna. Do
not use scrapers or other sharp instrument that may
scratch the elements.
When cleaning the rear view mirror, spray cleaner on the
towel or rag that you are using. Do not spray cleaner
directly on the mirror.
Instrument Panel Cover
The instrument panel cover has a low glare surface which
minimizes reflections on the windshield. Do not use
protectants or other products which may cause undesir-
able reflections. Use soap and warm water to restore the
low glare surface.
7
MAINTAINING YOUR VEHICLE 343
Page 362 of 392

MAINTENANCE SCHEDULE
Your vehicle is equipped with an automatic oil change
indicator system. The oil change indicator system will
remind you that it is time to take your vehicle in for
scheduled maintenance.
Based on engine operation conditions, the oil change
indicator message will illuminate. This means that ser-
vice is required for your vehicle. Operating conditions
such as frequent short-trips, trailer tow, extremely hot or
cold ambient temperatures, and E85 fuel usage will
influence when the “Change Oil” message is displayed.
Severe Operating Conditions can cause the change oil
message to illuminate as early as 3,500 miles (5,600 km)
since last reset. Have your vehicle serviced as soon as
possible, within the next 500 miles (805 km).
NOTE:Under no circumstances should oil change inter-
vals exceed 10,000 miles (16,000 km) or twelve months,
whichever comes first.
Severe Duty All Models
Change Engine Oil at 4000 miles (6,500 km) if the vehicle
is operated in a dusty and off road environment. This
type of vehicle use is considered Severe Duty
Once A Month Or Before A Long Trip:
•Check engine oil level
•Check windshield washer fluid level
•Check the tire inflation pressures and look for unusual
wear or damage
•Check the fluid levels of the coolant reservoir, brake
master cylinder, and transmission as needed
•Check function of all interior and exterior lights
360 MAINTENANCE SCHEDULES