Page 105 of 392

WARNING!(Continued)
•Keep the Owner ’s Manual in the car: when kept in
the car, the Owner ’s Manual will be a ready refer-
ence for you and other users unfamiliar with the
system. Please make certain that before using the
system for the first time, all persons have access to
the Owner ’s Manual and read its instructions and
safety information carefully.
SEATS
Seats are a part of the Occupant Restraint System of the
vehicle.
WARNING!
•It is dangerous to ride in a cargo area, inside or
outside of a vehicle. In a collision, people riding in
these areas are more likely to be seriously injured
or killed.
•Do not allow people to ride in any area of your
vehicle that is not equipped with seats and seat
belts. In a collision, people riding in these areas are
more likely to be seriously injured or killed.
•Be sure everyone in your vehicle is in a seat and
using a seat belt properly.
Front Seats Forward/Rearward Adjustment
The adjusting bar is located at the front of the seats, near
the floor.
3
UNDERSTANDING THE FEATURES OF YOUR VEHICLE 103
Page 106 of 392
While sitting in the seat, lift up on the bar and move the
seat forward or rearward. Release the bar once the
desired position is reached. Then, using body pressure,
move forward and rearward on the seat to be sure that
the seat adjusters have latched.
WARNING!
•Adjusting a seat while driving may be dangerous.
Moving a seat while driving could result in loss of
control which could cause a collision and serious
injury or death.
•Seats should be adjusted before fastening the seat
belts and while the vehicle is parked. Serious
injury or death could result from a poorly adjusted
seat belt.
Recline Adjustment
The recline adjustment lever is located on the inboard
side of the seat. To recline the seatback, lift up the recline
lever, lean back until the desired position has been
reached, and release the lever.
Adjusting Bar
104 UNDERSTANDING THE FEATURES OF YOUR VEHICLE
Page 108 of 392

EZ Entry Feature
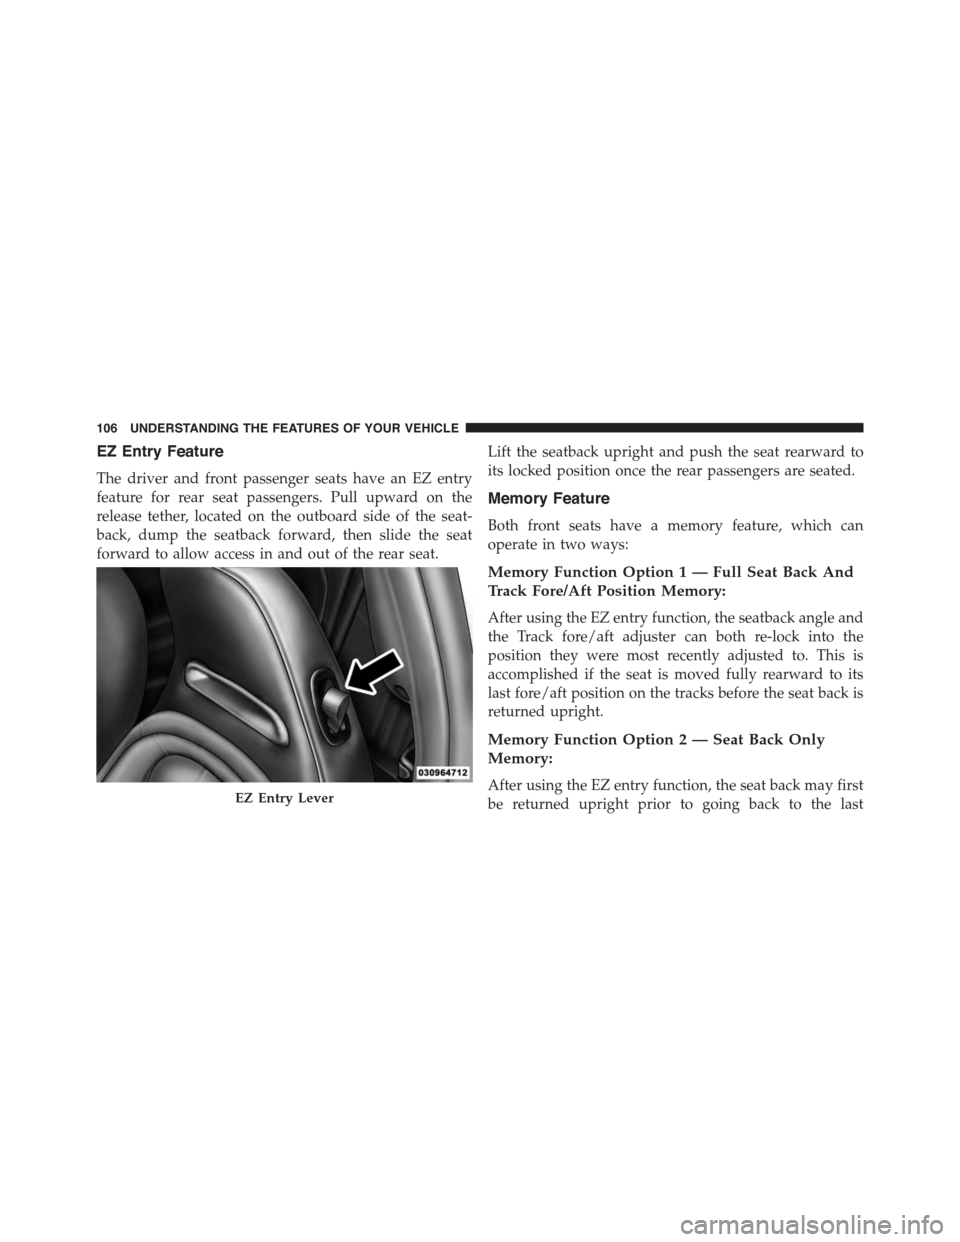
The driver and front passenger seats have an EZ entry
feature for rear seat passengers. Pull upward on the
release tether, located on the outboard side of the seat-
back, dump the seatback forward, then slide the seat
forward to allow access in and out of the rear seat.
Lift the seatback upright and push the seat rearward to
its locked position once the rear passengers are seated.
Memory Feature
Both front seats have a memory feature, which can
operate in two ways:
Memory Function Option 1 — Full Seat Back And
Track Fore/Aft Position Memory:
After using the EZ entry function, the seatback angle and
the Track fore/aft adjuster can both re-lock into the
position they were most recently adjusted to. This is
accomplished if the seat is moved fully rearward to its
last fore/aft position on the tracks before the seat back is
returned upright.
Memory Function Option 2 — Seat Back Only
Memory:
After using the EZ entry function, the seat back may first
be returned upright prior to going back to the lastEZ Entry Lever
106 UNDERSTANDING THE FEATURES OF YOUR VEHICLE
Page 109 of 392

fore/aft (memory) position on the tracks. This results in
the seat back memory being set only – The track will then
be locked forward of its last set fore/aft memory posi-
tion. To then reset the fore/aft track memory feature (to
reestablish Memory Function Option 1), the seat has to be
returned fully rearward to its last fore/aft memory track
position as described in Memory Function Option 1.
Heated Seats — If Equipped
On some models, the front driver and passenger seats
may be equipped with heaters in both the seat cushions
and seatbacks. The controls for the front heated seats are
located on the center instrument panel area.
Press the switch once to turn on the heated
seats. Press the switch a second time to shut the
heating elements off.
NOTE:Once a heat setting is selected, heat will be felt
within two to five minutes.
WARNING!
•Persons who are unable to feel pain to the skin
because of advanced age, chronic illness, diabetes,
spinal cord injury, medication, alcohol use, exhaus-
tion or other physical condition must exercise care
when using the seat heater. It may cause burns
even at low temperatures, especially if used for
long periods of time.
•Do not place anything on the seat or seatback that
insulates against heat, such as a blanket or cushion.
This may cause the seat heater to overheat. Sitting
in a seat that has been overheated could cause
serious burns due to the increased surface tempera-
ture of the seat.
3
UNDERSTANDING THE FEATURES OF YOUR VEHICLE 107
Page 137 of 392
CUPHOLDERS
For the driver and front passenger, cupholders are lo-
cated on the floor console between the front seats.
For rear passengers, there are cupholders located on the
floor between the front driver and passenger seats.
Front Cupholders
Rear Cupholders
3
UNDERSTANDING THE FEATURES OF YOUR VEHICLE 135
Page 139 of 392
Rear Seat Release ButtonsFolded Rear Seats
3
UNDERSTANDING THE FEATURES OF YOUR VEHICLE 137
Page 343 of 392

Wheel And Wheel Trim Care
•All wheels and wheel trim, especially aluminum and
chrome plated wheels, should be cleaned regularly
with a mild soap and water to prevent corrosion.
•To remove heavy soil and/or excessive brake dust, use
MOPAR® Wheel Cleaner.
NOTE:If your vehicle is equipped with Dark Vapor
Chrome wheels DO NOT USE wheel cleaners, abrasives
or polishing compounds. They will permanently damage
this finish and such damage is not covered by the New
Vehicle Limited Warranty. USE ONLY MILD SOAP AND
WATER WITH A SOFT CLOTH. Used on a regular basis
this is all that is required to maintain this finish.
CAUTION!
Do not use scouring pads, steel wool, a bristle brush,
or metal polishes. Do not use oven cleaner. These
products may damage the wheel’s protective finish.
Avoid automatic car washes that use acidic solutions
or harsh brushes that may damage the wheel’s pro-
tective finish. Only MOPAR® Wheel Cleaner or
equivalent is recommended.
Stain Repel Fabric Cleaning Procedure – If
Equipped
Stain Repel seats may be cleaned in the following man-
ner:
•Remove as much of the stain as possible by blotting
with a clean, dry towel.
•Blot any remaining stain with a clean, damp towel.
7
MAINTAINING YOUR VEHICLE 341
Page 345 of 392

CAUTION!
Do not use Alcohol and Alcohol-based and/or Keton
based cleaning products to clean leather seats, as
damage to the seat may result.
Cleaning Headlights
Your vehicle has plastic headlights that are lighter and
less susceptible to stone breakage than glass headlights.
Plastic is not as scratch resistant as glass and therefore
different lens cleaning procedures must be followed.
To minimize the possibility of scratching the lenses and
reducing light output, avoid wiping with a dry cloth. To
remove road dirt, wash with a mild soap solution fol-
lowed by rinsing.
Do not use abrasive cleaning components, solvents, steel
wool or other aggressive material to clean the lenses.
Glass Surfaces
All glass surfaces should be cleaned on a regular basis
with MOPAR® Glass Cleaner, or any commercial
household-type glass cleaner. Never use an abrasive type
cleaner. Use caution when cleaning the inside rear win-
dow equipped with electric defrosters or the right rear
quarter window equipped with the radio antenna. Do
not use scrapers or other sharp instrument that may
scratch the elements.
When cleaning the rear view mirror, spray cleaner on the
towel or rag that you are using. Do not spray cleaner
directly on the mirror.
Instrument Panel Cover
The instrument panel cover has a low glare surface which
minimizes reflections on the windshield. Do not use
protectants or other products which may cause undesir-
able reflections. Use soap and warm water to restore the
low glare surface.
7
MAINTAINING YOUR VEHICLE 343