2014 DODGE DURANGO wheel
[x] Cancel search: wheelPage 112 of 188

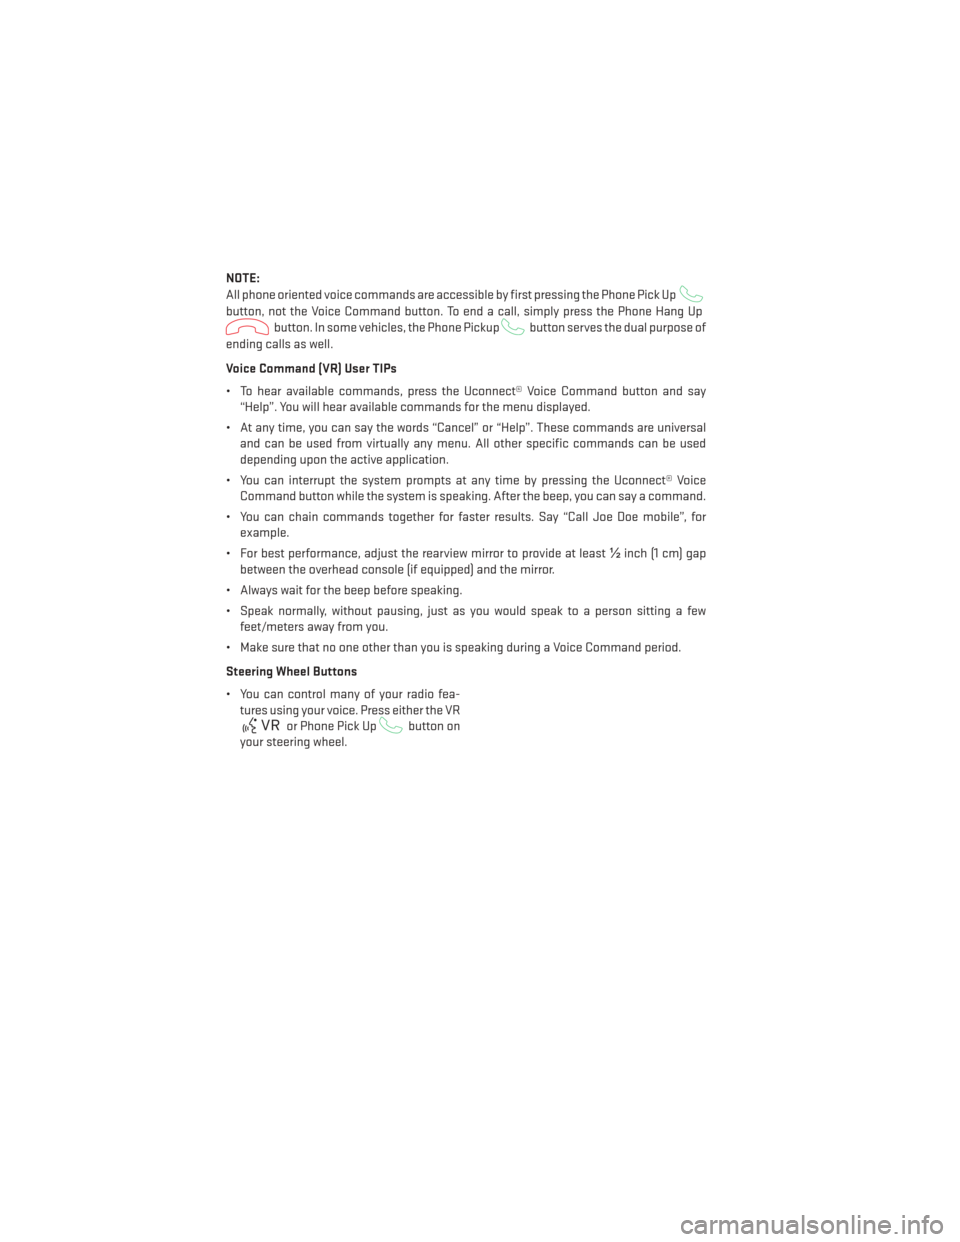
NOTE:
All phone oriented voice commands are accessible by first pressing the Phone Pick Up
button, not the Voice Command button. To end a call, simply press the Phone Hang Up
button. In some vehicles, the Phone Pickupbutton serves the dual purpose of
ending calls as well.
Voice Command (VR) User TIPs
• To hear available commands, press the Uconnect® Voice Command button and say “Help”. You will hear available commands for the menu displayed.
• At any time, you can say the words “Cancel” or “Help”. These commands are universal and can be used from virtually any menu. All other specific commands can be used
depending upon the active application.
• You can interrupt the system prompts at any time by pressing the Uconnect® Voice Command button while the system is speaking. After the beep, you can say a command.
• You can chain commands together for faster results. Say “Call Joe Doe mobile”, for example.
• For best performance, adjust the rearview mirror to provide at least ½inch (1 cm) gap
between the overhead console (if equipped) and the mirror.
• Always wait for the beep before speaking.
• Speak normally, without pausing, just as you would speak to a person sitting a few feet/meters away from you.
• Make sure that no one other than you is speaking during a Voice Command period.
Steering Wheel Buttons
• You can control many of your radio fea- tures using your voice. Press either the VR
or Phone Pick Upbutton on
your steering wheel.
ELECTRONICS
110
Page 113 of 188

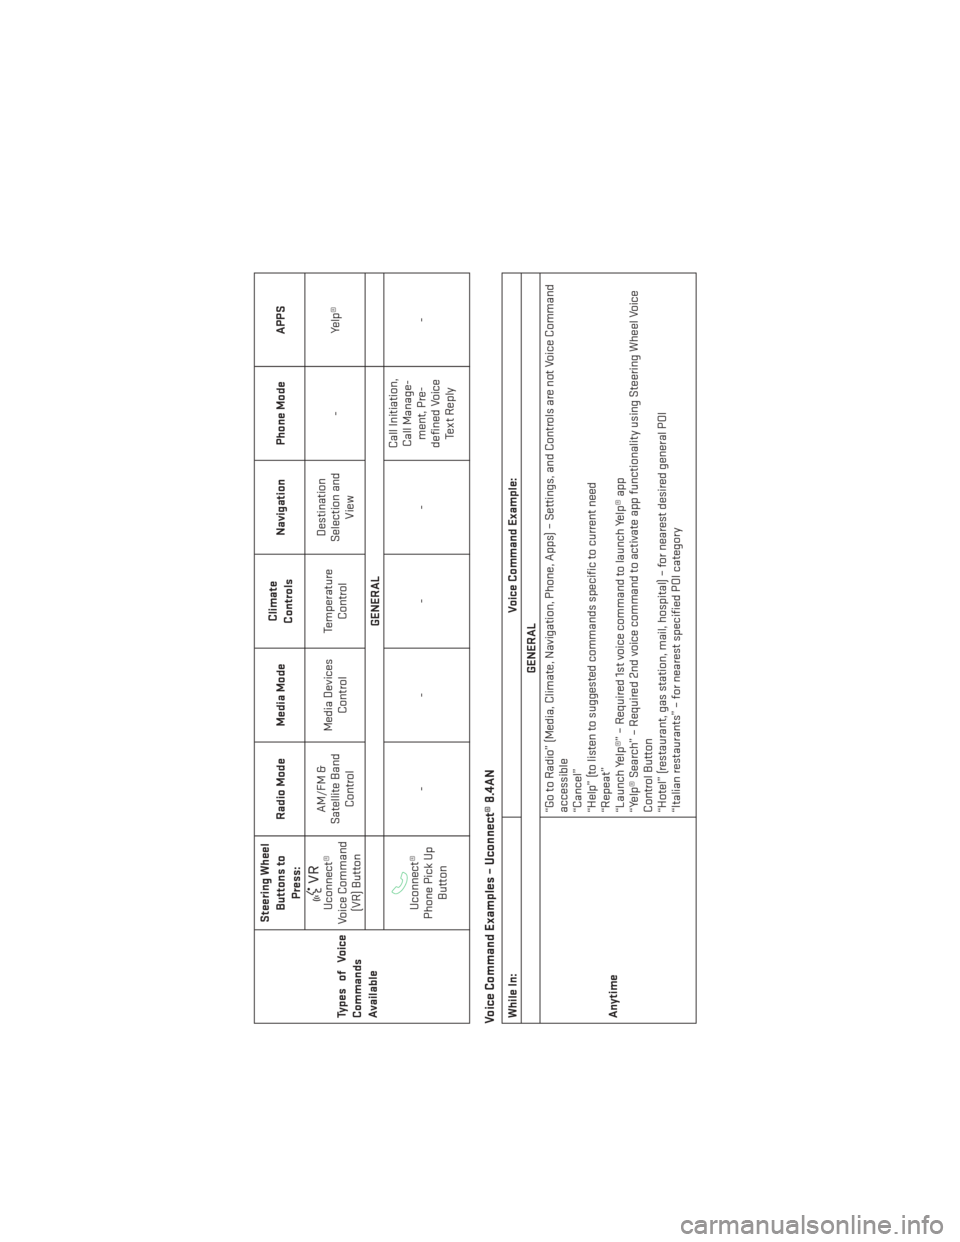
TypesofVoice
Commands
AvailableSteering Wheel
Buttons toPress: Radio Mode Media Mode
Climate
Controls Navigation Phone Mode APPS
Uconnect®
Voice Command (VR) Button AM/FM &
Satellite Band Control Media Devices
Control Temperature
Control Destination
Selection and View -
Yelp®
GENERALUconnect®
Phone Pick Up Button ---- Call Initiation,
Call Manage- ment, Pre-
defined Voice Te x t R e p l y -
Voice Command Examples – Uconnect® 8.4ANWhile In:
Voice Command Example:
GENERAL
Anytime “Go to Radio” (Media, Climate, Navigation, Phone, Apps) – Settings, and Controls are not Voice Command
accessible
“Cancel”
“Help” (to listen to suggested commands specific to current need
“Repeat”
“Launch Yelp®” – Required 1st voice command to launch Yelp® app
“Yelp® Search” – Required 2nd voice command to activate app functionality using Steering Wheel Voice
Control Button
“Hotel” (restaurant, gas station, mail, hospital) – for nearest desired general POI
“Italian restaurants” – for nearest specified POI category
ELECTRONICS
111
Page 116 of 188

While In:Voice Command Example:
APPS
SiriusXM Travel Link (Traffic function
is not voice command accessible
within SiriusXM Travel Link “Show Fuel prices”
“Show Current Weather” – provides access to Forecast as well
“Show Weather map” – multiple map formats available
“Show Sports”
“Show Movie listings”
“Show My favorites”
Yelp® (Yelp® adds it's own audible
prompts, and response time varies
depending on carrier coverage speed) “Launch Yelp®” – Required 1st voice command to launch Yelp® app
“Yelp® Search” – Required 2nd voice command to activate app functionality using Steering Wheel Voice
Control Button
“Hotel” (Restaurant, Gas Station, Hospital) – for nearest desired general POI
ELECTRONICS
114
Page 117 of 188

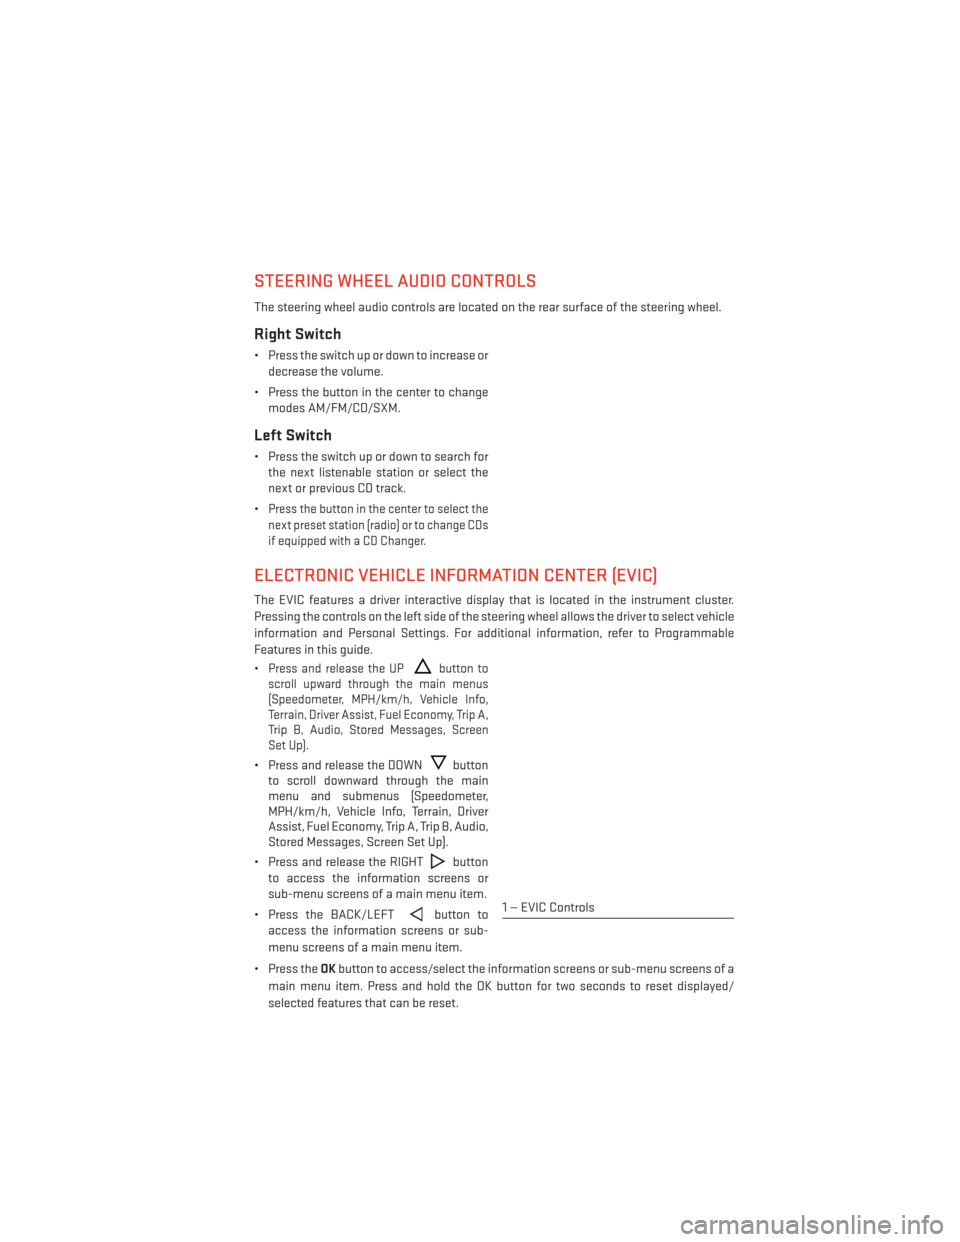
STEERING WHEEL AUDIO CONTROLS
The steering wheel audio controls are located on the rear surface of the steering wheel.
Right Switch
• Press the switch up or down to increase ordecrease the volume.
• Press the button in the center to change modes AM/FM/CD/SXM.
Left Switch
• Press the switch up or down to search forthe next listenable station or select the
next or previous CD track.
•
Press the button in the center to select the
next preset station (radio) or to change CDs
if equipped with a CD Changer.
ELECTRONIC VEHICLE INFORMATION CENTER (EVIC)
The EVIC features a driver interactive display that is located in the instrument cluster.
Pressing the controls on the left side of the steering wheel allows the driver to select vehicle
information and Personal Settings. For additional information, refer to Programmable
Features in this guide.
•
Press and release the UPbutton to
scroll upward through the main menus
(Speedometer, MPH/km/h, Vehicle Info,
Terrain, Driver Assist, Fuel Economy, Trip A,
Trip B, Audio, Stored Messages, Screen
Set Up).
• Press and release the DOWNbutton
to scroll downward through the main
menu and submenus (Speedometer,
MPH/km/h, Vehicle Info, Terrain, Driver
Assist, Fuel Economy, Trip A, Trip B, Audio,
Stored Messages, Screen Set Up).
• Press and release the RIGHT
button
to access the information screens or
sub-menu screens of a main menu item.
• Press the BACK/LEFT
button to
access the information screens or sub-
menu screens of a main menu item.
• Press the OKbutton to access/select the information screens or sub-menu screens of a
main menu item. Press and hold the OK button for two seconds to reset displayed/
selected features that can be reset.1 — EVIC Controls
ELECTRONICS
115
Page 125 of 188

ALL-WHEEL DRIVE OPERATION
Single-Speed Operating Instructions/Precautions
This system contains a single-speed (HI range only) transfer case, which provides conve-
nient full-time all-wheel drive. No driver interaction is required. The Brake Traction Control
(BTC) System, which combines standard ABS and Traction Control, provides resistance to
any wheel that is slipping to allow additional torque transfer to wheels with traction.
NOTE:
This system is not appropriate for conditions where AWD LOW range is recommended. Refer to
“Off-Road Driving Tips” in “Starting and Operating” on the DVD for further information.
Electronically Shifted Transfer Case (Three-Position Switch)
This is an electronic shift transfer case and is operated by the AWD Control Switch (Transfer
Case Switch), which is located on the center console.
This electronically shifted transfer case pro-
vides three mode positions:
• All-wheel drive automatic range (AWDAUTO)
• All-wheel drive low range (LOW RANGE)
• Neutral (NEUTRAL)
When additional traction is required, the LOW
RANGE position can be used to lock the front
and rear driveshafts together forcing the front
and rear wheels to rotate at the same speed.
The LOW RANGE position are designed for
loose, slippery road surfaces only. Driving in
the LOW RANGE positions on dry hard sur-
faced roads may cause increased tire wear
and damage to the driveline components.
When operating your vehicle in LOW RANGE, the engine speed is approximately three times
that of the AWD HI position at a given road speed. Take care not to overspeed the engine and
do not exceed 25 mph (40 km/h).
NOTE:
The “SERV AWD Warning Light” monitors the electronic shift all-wheel drive system. If this
light remains on after engine start up or illuminates during driving, it means that the
all-wheel drive system is not functioning properly and that service is required.
OFF-ROAD CAPABILITIES
123
Page 128 of 188

RECREATIONAL TOWING (BEHIND MOTORHOME, ETC.)
Towing This Vehicle Behind Another Vehicle
Towing
Condition Wheels
OFF the Ground Rear-Wheel Drive
Models All-Wheel Drive
Models With
Single-Speed
Transfer Case All-Wheel Drive Models
With Two-SpeedTransfer Case
Flat Tow NONE NOT ALLOWED NOT ALLOWED •
See Instructions
• Transmission in PARK
• Transfer case in
NEUTRAL (N)
• Tow in forward direction
Dolly Tow Front
NOT ALLOWED NOT ALLOWED NOT ALLOWED
Rear OK NOT ALLOWED NOT ALLOWED
On Trailer ALL OKOK OK
Rear-Wheel Drive Models
DO NOT flat tow this vehicle. Damage to the drivetrain will result.
Recreational towing (for two-wheel drive models) is allowed ONLYif the rear wheels are OFF
the ground. This may be accomplished using a tow dolly or vehicle trailer. If using a tow dolly,
follow this procedure:
1. Properly secure the dolly to the tow vehicle, following the dolly manufacturer's instruc- tions.
2. Drive the rear wheels onto the tow dolly.
3. Firmly apply the parking brake. Shift the transmission into PARK.
4. Turn the ignition switch to the OFF position.
5. Properly secure the rear wheels to the dolly, following the dolly manufacturer’s instruc- tions.
6. Install a suitable clamping device, designed for towing, to secure the front wheels in the straight position.
CAUTION!
Towing with the rear wheels on the ground will cause severe transmission damage.
Damage from improper towing is not covered under the New Vehicle Limited Warranty.
UTILITY
126
Page 129 of 188

All-Wheel Drive Models (Single-Speed Transfer Case)
Recreational towing is not allowed.This model does not have a NEUTRAL position in the
transfer case.
NOTE:
This vehicle may be towed on a flatbed or vehicle trailer provided all four wheels are OFF the
ground.
CAUTION!
Towing this vehicle in violation of the above requirements can cause severe transmis-
sion and/or transfer case damage. Damage from improper towing is not covered under
the New Vehicle Limited Warranty.
All-Wheel Drive Models (Two-Speed Transfer Case)
The transfer case must be shifted into NEUTRAL (N) and the transmission must be in PARK
for recreational towing. The NEUTRAL (N) selection button is at the center of the transfer
case selector switches. Shifts into transfer case NEUTRAL (N) can take place from any
other transfer case mode.
CAUTION!
• DO NOT dolly tow any All-Wheel Drive (AWD) vehicle. Internal damage to the trans- mission or transfer case will occur if a dolly is used when recreational towing.
• Tow only in the forward direction. Towing this vehicle backwards can cause severe
damage to the transfer case.
• The transmission must be in PARK for recreational towing.
• Before recreational towing, perform the procedure outlined under “Shifting Into
NEUTRAL(N)” to be certain that the transfer case is fully in NEUTRAL (N). Otherwise,
internal damage will result.
• Failure to follow these procedures can cause severe transmission and/or transfer
case damage. Damage from improper towing is not covered under the New Vehicle
Limited Warranty.
• Do not use a bumper-mounted clamp-on tow bar on your vehicle. The bumper face
bar will be damaged.
UTILITY
127
Page 130 of 188

Shifting Into NEUTRAL
Use the following procedure to prepare your vehicle for recreational towing:
1. Bring the vehicle to a complete stop, with the engine running.
2. Press and hold the brake pedal.
3. Shift the transmission into NEUTRAL.
4. Using a ballpoint pen or similar object, press and hold the recessed transfer caseNEUTRAL (N) button (located by the selector switch) for four seconds. The light behind
the N symbol will blink, indicating shift in progress. The light will stop blinking (stay on
solid) when the shift to NEUTRAL (N) is complete. A “FOUR WHEEL DRIVE SYSTEM IN
NEUTRAL” message will display on the EVIC (Electronic Vehicle Information Center).
5. After the shift is completed and the NEUTRAL (N) light stays on, release the NEUTRAL (N) button.
6. Shift the transmission into REVERSE.
7. Release the brake pedal for five seconds and ensure that there is no vehicle movement.
8. Shift the transmission back into NEUTRAL.
9. Firmly apply the parking brake.
10. With the transmission and transfer case in NEUTRAL, press and hold the ENGINE START/STOP button until the engine turns off. Turning the engine off will automatically
place the transmission in PARK.
11.
Press the ENGINE STOP/START button again (without pressing the brake pedal), if needed,
to turn the ignition switch to the OFF position.
CAUTION!
Damage to the transmission may occur if the transmission is shifted into PARK with the
transfer case in NEUTRAL (N) and the engine running. With the transfer case in NEUTRAL
(N) ensure that the engine is OFF before shifting the transmission into PARK.
12. Attach the vehicle to the tow vehicle using a suitable tow bar.
13. Release the parking brake.
UTILITY
128