Page 4 of 292
.
.
C3Picasso_en_Chap00a_sommaire_ed01-2014
Child seats 94
dea
ctivating the passenger's front airbag
9
7
Isofix child seats
1
02
Child lock
1
06
Child safety
Instrument panel 1 0
Indicator and warning lamps
1
1
Indicators
20
a
djustment buttons
2
3
MonitoringOver view
Screen without audio equipment 2
4
Screen with audio equipment
2
6
Trip computer
3
7
Multifunction screens
Ventilation 40
Rear screen demist/defrost
4
2
Heating
43
Manual air conditioning
4
3
dual
-zone digital air conditioning
4
5
Scented air freshener
4
8
Front seats
4
9
Rear seats
5
2
Mirrors
54
Steering wheel adjustment
5
5
Comfort
Remote control key 56
Window controls
6
0
do
ors 62
b
oot
65
Panoramic sunroof
6
6
Fuel tank
6
7
Misfuel prevention (
die
sel)
6
9
access
Lighting controls 7 0
LE
d
lamps
7
4
Cornering lighting
7
5
Headlamp adjustment
7
6
Wiper controls
7
7
Courtesy lamps
8
0
bo
ot lamp
8
2
Visibility
Front fittings 83
Rear fittings
87
B
oot fittings
9
0
Fittings
Eco-driving
Contents
Page 9 of 292
7
C3Picasso_en_Chap00b_vue-ensemble_ed01-2014
Instruments and controls
1. Steering lock and ignition.
2. au dio equipment steering mounted control
stalk.
3.
W
iper / screenwash / trip computer control
stalk.
4.
C
entral adjustable air vents.
5.
St
orage tray.
S
cented air freshener.
6.
S
unshine sensor.
7.
P
assenger's airbag.
8.
S
ide adjustable air vent.
9.
P
assenger's airbag deactivation switch.
10.
G
love box.
11.
D
ynamic stability control (DSC/ASR) switch
P
arking sensors switch.
C
entral locking switch.
H
azard warning lamps switch.
S
top & Start switch.
12 .
H
eating / air conditioning controls.
13.
a udio equipment.
14 .
E
mergency or assistance call.
15.
1
2 V socket (100 W max).
16.
U
SB port / auxiliary socket.
17.
C
u p h o l d e r.
18.
H
eated seat controls.
19.
P
arking brake.
.
over view
Page 28 of 292

26
C3Picasso_en_Chap02_ecran-multifonction_ed01-2014
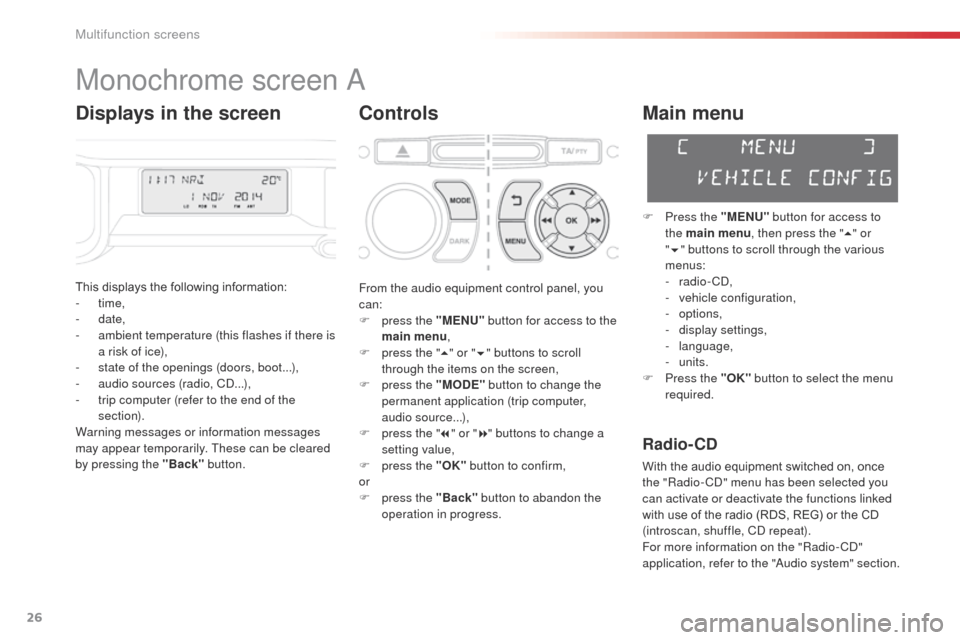
Monochrome screen a
Controls
This displays the following information:
- time,
-
date,
-
a
mbient temperature (this flashes if there is
a risk of ice),
-
s
tate of the openings (doors, boot...),
-
a
udio sources (radio, C
d.
..),
-
t
rip computer (refer to the end of the
section).
Warning messages or information messages
may appear temporarily. These can be cleared
by pressing the "Back" button.
Main menu
F Press the "MENU" button for access to
the main menu , then press the " 5" or
" 6 " buttons to scroll through the various
menus:
-
radio - C
d
,
-
v
ehicle configuration,
-
options,
-
d
isplay settings,
-
language,
-
units.
F
P
ress the "OK" button to select the menu
required.
From the audio equipment control panel, you
can:
F
p
ress the "MENU" button for access to the
main menu ,
F
p
ress the " 5" or " 6" buttons to scroll
through the items on the screen,
F
p
ress the "MODE" button to change the
permanent application (trip computer,
audio source...),
F
p
ress the " 7" or " 8" buttons to change a
setting value,
F
p
ress the "OK" button to confirm,
or
F
p
ress the "Back" button to abandon the
operation in progress.
Radio- CD
With the audio equipment switched on, once
the "Radio- Cd" m enu has been selected you
can activate or deactivate the functions linked
with use of the radio (RDS, REG) or the CD
(introscan, shuffle, C
d
repeat).
For more information on the "Radio-C
d"
application, refer to the "
au
dio system" section.
Displays in the screen
Multifunction screens
Page 33 of 292

31
C3Picasso_en_Chap02_ecran-multifonction_ed01-2014
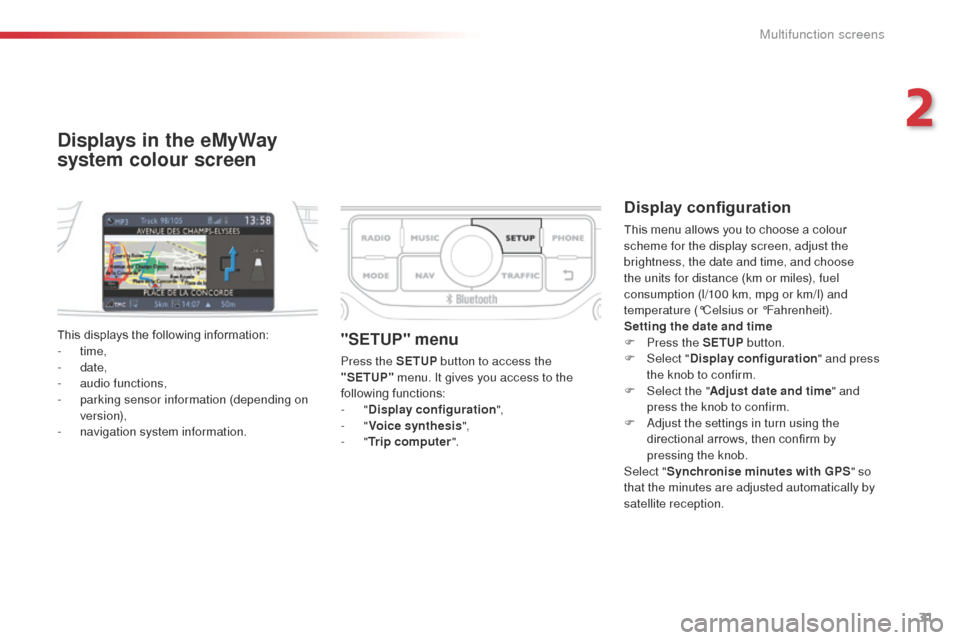
Displays in the eMyWay
system colour screen
Display configuration
This menu allows you to choose a colour
scheme for the display screen, adjust the
brightness, the date and time, and choose
the units for distance (km or miles), fuel
consumption (l/100 km, mpg or km/l) and
temperature (°Celsius or °Fahrenheit).
Setting the date and time
F
P
ress the SETUP button.
F
Sel
ect "Display configuration " and press
the knob to confirm.
F
Sel
ect the " Adjust date and time " and
press the knob to confirm.
F
a
d
just the settings in turn using the
directional arrows, then confirm by
pressing the knob.
Select " Synchronise minutes with GPS " so
that the minutes are adjusted automatically by
satellite reception.
This displays the following information:
-
time,
-
date,
-
a
udio functions,
-
p
arking sensor information (depending on
version),
-
n
avigation system information.
"SETUP" menu
Press the SETUP button to access the
"SETUP" menu. It gives you access to the
following functions:
-
"Display configuration ",
-
"Voice synthesis ",
-
"Trip computer ".
2
Multifunction screens
Page 34 of 292
32
C3Picasso_en_Chap02_ecran-multifonction_ed01-2014
Adjusting the voice synthesis
This menu allows you to adjust the volume for
the navigation instructions and choose the type
of voice (male or female).
For more information, refer to the "
au
dio and
telematics" section.
Trip computer
This menu allows you vies information on the
state of the vehicle. You can choose between
the following functions:
-
"al
ert log"
L
ist of active alerts.
-
"
State of functions"
L
ist of the state of functions (activated,
deactivated or faulty)
For safety reasons, configuration of the
multifunction screen by the driver must
only be done when stationary.
Multifunction screens
Page 35 of 292

33
C3Picasso_en_Chap02_ecran-multifonction_ed01-2014
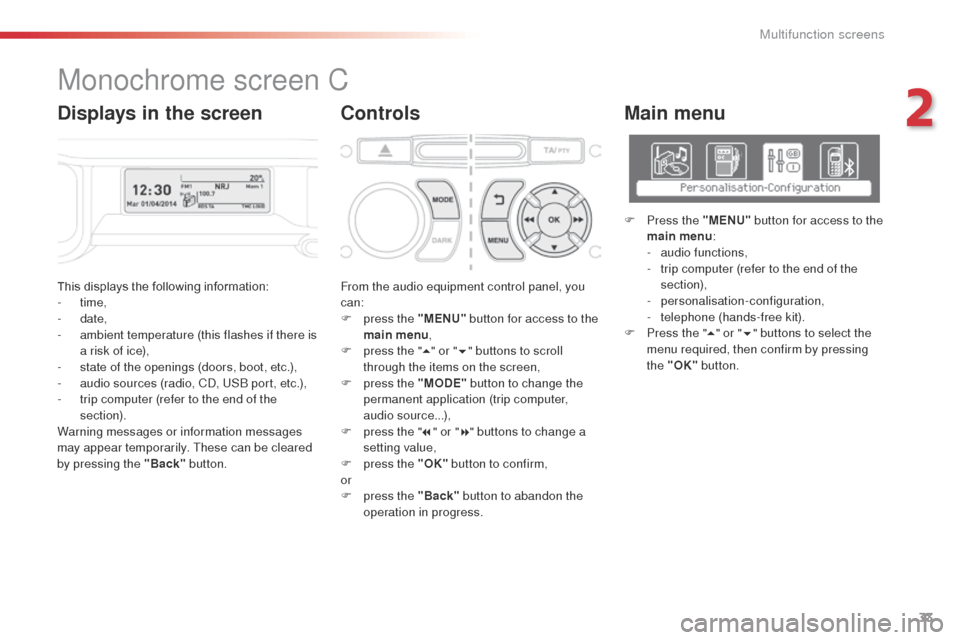
This displays the following information:
- time,
-
date,
-
a
mbient temperature (this flashes if there is
a risk of ice),
-
s
tate of the openings (doors, boot, etc.),
-
a
udio sources (radio, C
d, U
S
b
port, etc.),
-
t
rip computer (refer to the end of the
section).
Warning messages or information messages
may appear temporarily. These can be cleared
by pressing the "Back" button. From the audio equipment control panel, you
can:
F
p
ress the "MENU" button for access to the
main menu ,
F
p
ress the "5" or " 6" buttons to scroll
through the items on the screen,
F
p
ress the "MODE" button to change the
permanent application (trip computer,
audio source...),
F
p
ress the "7" or " 8" buttons to change a
setting value,
F
p
ress the "OK" button to confirm,
or
F
p
ress the "Back" button to abandon the
operation in progress.
Main menu
F Press the "MENU" button for access to the
main menu :
-
a
udio functions,
-
t
rip computer (refer to the end of the
section),
-
personalisation-configuration,
-
t
elephone (hands-free kit).
F
P
ress the " 5" or " 6" buttons to select the
menu required, then confirm by pressing
the "OK" button.
Monochrome screen C
ControlsDisplays in the screen
2
Multifunction screens
Page 36 of 292

34
C3Picasso_en_Chap02_ecran-multifonction_ed01-2014
"Trip computer" menu
Alert log
This summarises the active warning messages,
displaying them in succession in the
multifunction screen.
on
ce this menu has been selected, you can
consult information concerning the status of the
vehicle (alert log, status of functions, etc.)
Status of functions
This summarises the status (active or inactive)
of the vehicle's functions.
Enter distance to destination
This allows you to enter an approximate
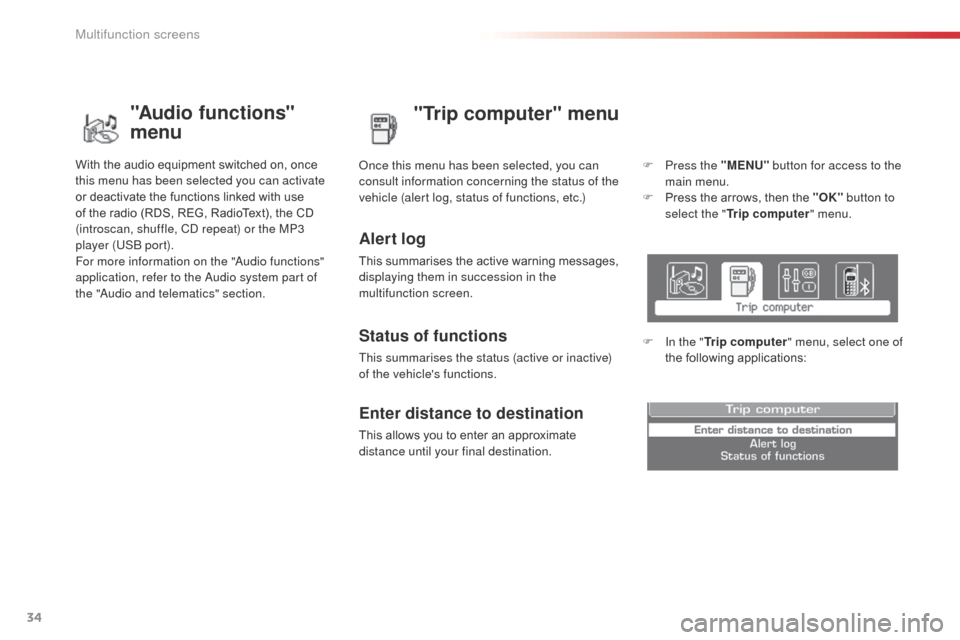
distance until your final destination. F
P
ress the "MENU"
button for access to the
main menu.
F
P
ress the arrows, then the "OK"
button to
select the " Trip computer " menu.
F
I
n the "
Trip computer " menu, select one of
the following applications:
"Audio functions"
menu
With the audio equipment switched on, once
this menu has been selected you can activate
or deactivate the functions linked with use
of the radio (RDS, REG, RadioText), the CD
(introscan, shuffle, C
d
repeat) or the MP3
player (US
b
port).
For more information on the "
au
dio functions"
application, refer to the
a
u
dio system part of
the "
aud
io and telematics" section.
Multifunction screens
Page 39 of 292
37
C3Picasso_en_Chap02_ecran-multifonction_ed01-2014
Tr i p c o m p u t e r
F Press the button, located at the end of the wiper stalk , to display the various items of
trip computer information in succession. The trip computer provides the following
information:
System that gives you information on the current journey (range, fuel consumption…).
Monochrome screen A
Information displays
-
range,
-
c
urrent fuel consumption,
-
S
top & Start time counter,
-
d
istance travelled,
-
a
verage fuel consumption, F
T
he next press then returns you to the
normal display.
-
a
verage speed.
Zero reset
F Press the control for more than two seconds to reset to zero the distance
travelled, the average fuel consumption
and the average speed.
2
Multifunction screens