2014 CHRYSLER 300 SRT ECO mode
[x] Cancel search: ECO modePage 3 of 132
INTRODUCTION/WELCOME
WELCOME FROM CHRYSLER
GROUPLLC ..................2
CONTROLS AT A GLANCE
DRIVER COCKPIT...............4
INSTRUMENT CLUSTER ...........6
GETTING STARTED
KEYFOB ....................8
REMOTE START...............10
KEYLESS ENTER-N-GO™ ..........10
SECURITY ALARM ..............13
SEATBELT ...................14
SUPPLEMENTAL RESTRAINT
SYSTEM (SRS) — AIR BAGS .........14
CHILD RESTRAINTS .............15
FRONTSEATS ................18
REAR SEAT ...................21
HEATEDSEATS ................21
HEATED AND COOLED CUPHOLDERS..22
ADJUSTABLE PEDALS ............23
TILT/TELESCOPING STEERING
COLUMN ...................24
OPERATING YOUR VEHICLE
ENGINE BREAK-IN
RECOMMENDATIONS ............25
TURN SIGNAL/WIPER/WASHER/HIGH
BEAM LEVER . ................26
HEADLIGHT SWITCH ............27
SPEED CONTROL ..............28
ELECTRONIC SHIFTER – 3.6L ENGINE . . 32
TRANSMISSION MODES/AUTOSTICK® . . 33
CLIMATE CONTROLS ............35
BLIND SPOT MONITORING ........36
POWER SUNROOF ..............37
WIND BUFFETING ..............39
ELECTRONICS
YOUR VEHICLE'S SOUND SYSTEM ....40
IDENTIFYING YOUR RADIO ........42
Uconnect® 8.4 & 8.4N AT A GLANCE ....42
RADIO .....................44
SiriusXM SATELLITE RADIO .........45
STEERING WHEEL AUDIO CONTROLS . . 47
SETTING THE ANALOG CLOCK .....47
iPod®/CD/AUX CONTROLS .........48
GARMIN® NAVIGATION (8.4N Only) ....48
SiriusXM TRAVEL LINK (8.4N ONLY) . . . . 51
PLAYING iPod/USB/MP3 DEVICES .....52
Uconnect® PHONE (Bluetooth® HANDS FREE
CALLING)...................54
Uconnect® VOICE COMMAND
(8.4&8.4NONLY) ...............57
ELECTRONIC VEHICLE INFORMATION
CENTER (EVIC) ...............60
PROGRAMMABLE FEATURES .......61UNIVERSAL GARAGE DOOR OPENER
(HomeLink®)
..................62
POWER OUTLETS ..............64
UTILITY
TRAILER TOWING WEIGHTS (MAXIMUM
TRAILER WEIGHT RATINGS) . ......66
RECREATIONAL TOWING (BEHIND
MOTORHOME, ETC.) . . ..........66
SRTAUTOSTICK® .................67
ELECTRONIC CONTROL DAMPING
SYSTEM....................68
PERFORMANCE FEATURES ........69
SUMMER/THREE-SEASON TIRES ......71
WHAT TO DO IN EMERGENCIESROADSIDE ASSISTANCE..........72
INSTRUMENT CLUSTER WARNING
LIGHTS .....................72
IF YOUR ENGINE OVERHEATS .......76
JACKING AND TIRE CHANGING .....76
TIREFIT KIT ..................82
BATTERY LOCATION ............87
JUMP-STARTING ...............88
SHIFT LEVER OVERRIDE — 5 SPEED
TRANSMISSION ...............90
TOWING A DISABLED VEHICLE . . ....92
FREEING A STUCK VEHICLE ........93
EVENT DATA RECORDER (EDR) . . . . . . 93
MAINTAINING YOUR VEHICLEOPENING THE HOOD . . . ........95
FUEL DOOR RELEASE ...........95
ENGINE COMPARTMENT .........97
FLUIDSANDCAPACITIES .........100
MAINTENANCE SCHEDULE . . . . . . . 103
FUSES .....................112
TIRE PRESSURES ...............117
WHEEL AND WHEEL TRIM CARE . . . . . 117
EXTERIOR BULBS ..............118
CONSUMER ASSISTANCE
CHRYSLER GROUP LLC CUSTOMER
CENTER....................119
CHRYSLER CANADA INC. CUSTOMER
CENTER ....................119
PUBLICATIONS ORDERING ........119
ASSISTANCE FOR THE HEARING
IMPAIRED ...................119
REPORTING SAFETY DEFECTS IN THE
UNITEDSTATES ...............120
MOPAR® ACCESSORIESAUTHENTIC ACCESSORIES BY
MOPAR® ...................121
INDEX................... 122
FREQUENTLY ASKED QUESTIONS
FREQUENTLY ASKED QUESTIONS . . . . 125
TABLE OF CONTENTS
Page 9 of 132
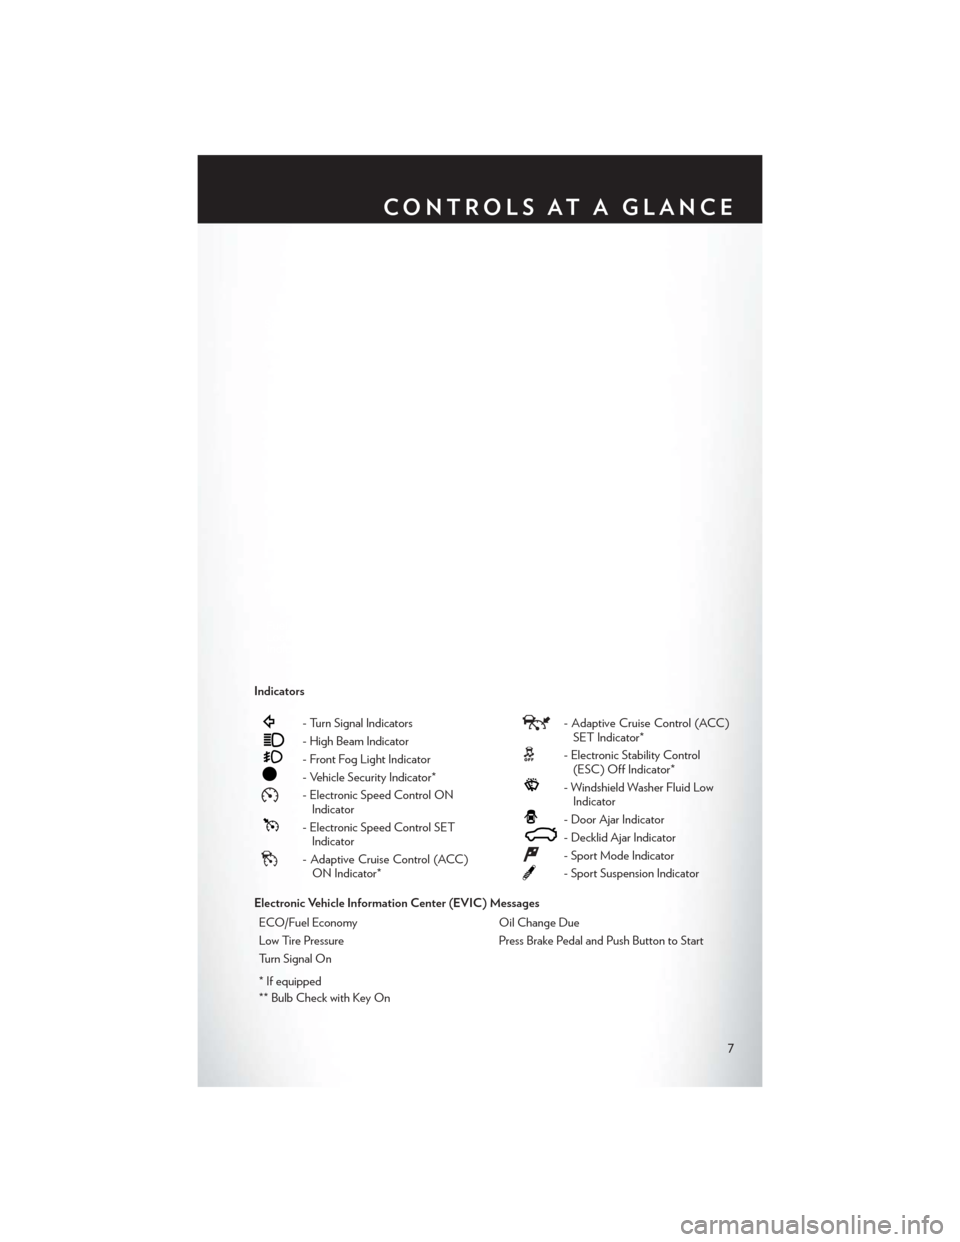
Indicators
- Turn Signal Indicators
- High Beam Indicator
- Front Fog Light Indicator
- Vehicle Security Indicator*
- Electronic Speed Control ONIndicator
- Electronic Speed Control SETIndicator
- Adaptive Cruise Control (ACC)ON Indicator*
- Adaptive Cruise Control (ACC)SET Indicator*
- Electronic Stability Control(ESC) Off Indicator*
- Windshield Washer Fluid LowIndicator
- Door Ajar Indicator
- Decklid Ajar Indicator
- Sport Mode Indicator
- Sport Suspension Indicator
Electronic Vehicle Information Center (EVIC) Messages ECO/Fuel Economy Oil Change Due
Low Tire Pressure Press Brake Pedal and Push Button to Start
Turn Signal On
* If equipped
** Bulb Check with Key On
CONTROLS AT A GLANCE
7
Page 19 of 132
4. Tighten all of the straps as you push the child restraint rearward and downward into the seat.Remove slack in the straps according to the child restraint manufacturer’s instructions.
5. Test that the child restraint is installed tightly by pulling back and forth on the child seat at the belt path. It should not move more than 1 inch (25.4 mm) in any direction.
Installing The Child Restraint Using The Vehicle Seat Belts
• The seat belts in the passenger seating positions are equipped with a Switchable AutomaticLocking Retractor (ALR) that is designed to keep the lap portion of the seat belt tight around
the child restraint. Any seat belt system will loosen with time, so check the belt occasionally,
and pull it tight if necessary.
• Always use the tether anchor when using the seat belt to install a forward facing child restraint, up to the recommended weight limit of the child restraint.
To Install A Child Seat Using An ALR:
1. Pull enough of the seat belt webbing from the retractor to pass it through the belt path of the
child restraint. Do not twist the belt webbing in the belt path.
2. Slide the latch plate into the buckle until you hear a “click.”
3. Pull on the webbing to make the lap portion tight against the child seat.
4. To lock the seat belt, pull down on the shoulder part of the belt until you have pulled all the seat belt webbing out of the retractor. Then, allow the webbing to retract back into the retractor.
As the webbing retracts, you will hear a clicking sound. This means the seat belt is now in the
Automatic Locking mode.
5. Try to pull the webbing out of the retractor. If it is locked, you should not be able to pull out any webbing. If the retractor is not locked, repeat the last step.
6. Finally, pull up on any extra webbing to tighten the lap portion around the child restraint while you push the child restraint rearward and downward into the vehicle seat.
7. If the child restraint has a top tether strap and the seating position has a top tether anchorage, connect the tether strap to the anchorage and tighten the tether strap. See below for
directions to attach a tether anchor.
8. Test that the child restraint is installed tightly by pulling back and forth on the child seat at the belt path. It should not move more than 1 inch (25.4 mm) in any direction.
Installing The Top Tether Strap (With Either Lower Anchors Or Vehicle
Seat Belt):
• When installing a forward-facing child restraint, always secure the top tether strap, up to thetether anchor weight limit, whether the child restraint is installed with the lower anchors or the
vehicle seat belt.
1. Rotate or lift the cover to access the anchor directly behind the seat where you are placing the child restraint.
2. Route the tether strap to provide the most direct path for the strap between the anchor and the child seat.
GETTING STARTED
17
Page 27 of 132
ENGINE BREAK-IN RECOMMENDATIONS
• A long break-in period is not required for the engine and drivetrain (transmission and axle) inyour vehicle.
• Drive moderately during the first 300 miles (500 km). After the initial 60 miles (100 km), speeds up to 50 or 55 mph (80 or 90 km/h) are desirable.
• While cruising, brief full-throttle acceleration within the limits of local traffic laws contributes to a good break-in. Wide-open throttle acceleration in low gear can be detrimental and should
be avoided.
• The engine oil installed in the engine at the factory is a high-quality energy conserving type lubricant. Oil changes should be consistent with anticipated climate conditions under which
vehicle operations will occur. For the recommended viscosity and quality grades, refer to
“Maintaining Your Vehicle.”
NOTE:
A new engine may consume some oil during its first few thousand miles (kilometers) of operation.
This should be considered a normal part of the break-in and not interpreted as an indication of an
engine problem or malfunction.
CAUTION!
Never use Non-Detergent Oil or Straight Mineral Oil in the engine or damage may result.
Engine Break-In Recommendation — SRT Version
• A long break-in period is not required for the drivetrain (engine, transmission, and rear axle) in your new vehicle.
• Drive moderately during the first 500 miles (800 km). After the initial 60 miles (100 km), speeds up to 50 or 55 mph (80 or 90 km/h) are desirable.
• While cruising, brief full-throttle acceleration within the limits of local traffic laws contributes to a good break-in. However, wide-open throttle acceleration in low gear can be detrimental
and should be avoided.
• The engine oil is a high performance synthetic lubricant, the transmission fluid, and axle lubricant installed at the factory is high-quality and energy-conserving. Oil, fluid, and lubricant
changes should be consistent with anticipated climate and conditions under which vehicle
operations will occur. For the recommended viscosity and quality grades, refer to “Maintaining
Your Vehicle”.
NOTE:
A new engine may consume some oil during its first few thousand miles (kilometers) of operation.
This should be considered a normal part of the break-in and not interpreted as an indication of
difficulty.
CAUTION!
Never use Non-Detergent Oil or Straight Mineral Oil in the engine or damage may result.
OPERATING YOUR VEHICLE
25
Page 32 of 132
Mode (ACC Only)
• If desired, the Adaptive Cruise Control mode can be turned off and the system can beoperated as a standard (fixed speed) Cruise Control. When in the standard (fixed speed)
Cruise Control mode the distance setting feature will be disabled and the system will maintain
the speed you set.
• To change modes, press the MODE button when the system is in either the OFF, READY, or SET position. “Cruise Ready” will be displayed if the system was in ACC READY or ACC SET
position. “Cruise Off ” will be displayed if the system was in the ACC OFF position. To switch
back to Adaptive Cruise Control mode, press the MODE button a second time.
• Refer to your Owner's Manual on the DVD for further information.
Forward Collision Warning
• The Forward Collision Warning (FCW) system provides the driver with audible and visual warnings (within the EVIC) when it detects a potential frontal collision. The warnings are
intended to provide the driver with enough time to react and avoid the potential collision.
Changing FCW Status
• The FCW feature has three settings and can be changed within the Uconnect® System: •Far
• Near
•Off
NOTE:
The FCW settings can only be changed when the vehicle is in PARK.
Far
• The default status of FCW is the “Far” setting.
• The far setting provides warnings for potential collisions more distant in front of the vehicle, allowing the driver to have the most reaction time to avoid a collision.
• This setting is designed to provide early warnings per NHTSA (National Highway Traffic Safety Administration) recommendations.
• More cautious drivers that do not mind frequent warnings may prefer this setting.
NOTE:
This setting gives you the most reaction time.
Near
• Changing the FCW status to the “Near” setting, allows the system to warn you of a potential frontal collision when you are much closer.
• This setting provides less reaction time than the “Far” setting, which allows for a more dynamic driving experience.
•
More dynamic or aggressive drivers that want to avoid frequent warnings may prefer this setting.
Off
• Changing the FCW status to “Off ” prevents the system from warning you of a potential frontal collision.
OPERATING YOUR VEHICLE
30
Page 35 of 132

Shifting From REVERSE To DRIVE
• Bring the vehicle to a complete stop, firmly press the brake pedal, then pull the shift lever fullyrearward and release when “D” is highlighted in the EVIC.
• To shift back into REVERSE from DRIVE, bring the vehicle to a complete stop, firmly press the brake pedal, press the lock button on the shift lever, then push the shift lever forward to the
second detent and release when “R” is highlighted in the EVIC.
Shifting From DRIVE To SPORT/LOW
Vehicles Equipped With SPORT Mode
• To shift from DRIVE to SPORT, pull the shift lever rearward until “S” is highlighted in the EVIC.
• To shift back into DRIVE from SPORT, pull the shift lever rearward until “D” is highlighted in the EVIC.
Vehicles Equipped With LOW Mode
• To shift from DRIVE to LOW, pull the shift lever rearward until “L” is highlighted in the EVIC.
• To shift back into DRIVE from LOW, pull the shift lever rearward until “D” is highlighted in the EVIC.
TRANSMISSION MODES/AUTOSTICK®
Sport Mode (If Equipped)
• Sport mode is driver selectable and provides more aggressive shifting, for spirited driving.
• Shifting into SPORT mode can be done anytime the vehicle is in the “D” Drive position.Simply tap the shift lever rearward and release when “S” is highlighted in the EVIC. Tapping
the shift lever rearward a second time will return the vehicle to the “D” Drive position.
NOTE:
When the vehicle is in SPORT mode, a “SPORT” message and green flag icon will be illuminated
in the instrument cluster.
Low Mode (If Equipped)
• LOW range should be used for engine braking when descending very steep grades. In this range, the transmission will downshift for increased engine braking. To switch between DRIVE
and LOW modes, tap the shift lever rearward.
• Shifting into LOW can be done anytime the vehicle is in the “D” DRIVE position.
OPERATING YOUR VEHICLE
33
Page 36 of 132

AUTOSTICK® — If Equipped
NOTE:
AutoStick® is only available on vehicles with SPORT mode.
• When the transmission is in DRIVE, it willoperate automatically, shifting between the
eight available gears. While in SPORT
mode, the transmission will only shift be-
tween seven of the eight available gears.
• To engage AutoStick®, simply tap one of the steering wheel-mounted shift paddles (+/-).
• In AutoStick® mode, the transmission will only shift up or down when (+/-) is manually
selected by the driver, except as described
below. It will remain in the selected gear until
another upshift or downshift is chosen.
• When AutoStick® is active, the current transmission gear is displayed in the EVIC.
• If AutoStick® is engaged while in DRIVE mode, lack of accelerator pedal activity will cause the transmission to revert to automatic operation. The transmission will also upshift automatically
once redline, (where the tachometer needle points to the red portion of the gauge) is reached.
If the accelerator is pressed to the floor, the transmission will downshift when possible (based
on current vehicle speed and gear).
• When AutoStick® is used in SPORT mode, the transmission will only shift up or down when commanded by the driver, except as noted below.
• In either DRIVE or SPORT mode, the transmission will automatically downshift as the vehicle slows to a stop (to prevent engine lugging) and will display the current gear. Tapping the (+)
paddle (at a stop) will allow starting in second gear. After a stop, the driver should manually
upshift (+) the transmission as the vehicle accelerates.
NOTE:
To disengage AutoStick® mode, press and hold the (+) shift paddle until “D” or “S” is once again
displayed in the EVIC. You can shift in or out of the AutoStick® mode at any time without taking
your foot off the accelerator pedal.
OPERATING YOUR VEHICLE
34
Page 46 of 132

RADIO
• To access the Radio mode, touch the Radio soft-key at the lower left of the screen.
• Unless otherwise noted, the information provided on the operation and functionality of theradios in this section is common to all Uconnect® 8.4 radios.
Selecting Radio Stations
• Touch the desired radio band (AM, FM or SAT) soft-key.
Seek Up/Seek Down
• Touch the Seek arrow soft-keys for less than two seconds to seek through radio stations.
• Touch and hold either arrow soft-key for more than two seconds to bypass stations without stopping. The radio will stop at the next available station once the arrow soft-key is released.
Direct Tune
• Tune directly to a radio station by pressing the “Tune” button on the screen, and entering the desired station number.
Store Radio Presets
•
Your radio can store 12 total preset stations. They are shown at the top of your screen. To see all
12 stations, press the arrow soft-key at the top right of the screen to toggle between the six presets.
• To set a station into memory press and hold the desired numbered soft-key for more than two
seconds or until you hear a confirmation beep.
ELECTRONICS
44