Page 65 of 116
.
• After the BEEP, say number (or name).
Receiving A Call — Accept (And End)
• Whe")
Making A Phone Call
• Press the “Phone” button.
• After the BEEP, say “dial” (or “call” a name).
• After the BEEP, say number (or name).
Receiving A Call — Accept (And End)
• When an incoming call rings/is announced on Uconnect®, press the “Phone” button.
• To end a call, press the “Phone” button
.
Mute (Or Unmute) Microphone During Call
• During a call, press the “Voice Command” button.
• After the BEEP, say “mute” (or “mute off ”).
Transfer Ongoing Call Between Handset And Vehicle
• During a call, press the “Voice Command” button.
• After the BEEP, say “transfer call.”
Changing The Volume
• Start a dialogue by pressing the “Phone” button, then adjust the volume during a normal
call.
• Use the radio ON/OFF VOLUME rotary knob to adjust the volume to a comfortable level while the Uconnect® system is speaking. Please note the volume setting for Uconnect® is
different than the audio system.
WARNING!
• Any voice commanded system should be used only in safe driving conditions following
applicable laws regarding phone use. Your attention should be focused on safely operating
the vehicle. Failure to do so may result in a collision causing you and others to be severely
injured or killed.
• In an emergency, to use Uconnect® Phone, your mobile phone must be:
• turned on,
• paired to Uconnect® Phone,
• and have network coverage.
ELECTRONICS
63
Page 66 of 116

Uconnect® VOICE COMMAND
Voice Command Operation
• The Uconnect® Voice Command system allows you to control your AM, FM radio, satelliteradio, disc player, HDD, Uconnect® Phone, a memo recorder, and supported portable media
devices.
• When you press the “Voice Command” button
located on the radio faceplate or
steering wheel, you will hear a beep. The beep is your signal to give a command. If you do not
say a command within a few seconds, the system will present you with a list of options. If you
ever want to interrupt the system while it lists options, press the “Voice Command” button
, listen for the BEEP, and say your command.
NOTE:
Visit http://www.driveuconnect.com/features/voiceCommand/ for more info on which voice
command features apply to your vehicle.
• Start a dialogue by pressing the “Voice Command” button
, you will hear a beep. The
beep is your signal to give a command. Below are a list of voice commands for each of the
different modes.
Common Voice Commands (Examples)
While In: Voice Command Example:
Main Menu “Radio AM” (to switch to the AM radio mode)
“Radio FM” (to switch to the FM radio mode)
“Satellite Radio” (to switch to the Satellite radio mode) “Disc” (to switch to the disc mode)
“USB” (to switch to the USB mode)
“Bluetooth Streaming” (to switch to the Bluetooth® Streaming mode)
“Memo” (to switch to the memo recorder)
“System Setup” (to switch to system setup)
ELECTRONICS
64
Page 67 of 116

“Next Station” (to select the next station)
“Previous Station” (to select the previous station) “Radio Me")
While In:Voice Command Example:
Radio Mode “Frequency” (to change the frequency)
“Next Station” (to select the next station)
“Previous Station” (to select the previous station) “Radio Menu” (to switch to the radio menu)“Main Menu” (to switch to the main menu)
SiriusXM Satellite Radio Mode “Channel Number” (to change the channel by its spoken number)
“Next Channel” (to select the next channel)
“Previous Channel” (to select the previous channel) “List Channel” (to hear a list of available channels)
"Channel Name" (to change the channel by its spoken name) “Select Name” (to say the name of a channel)“Radio Menu” (to switch to the radio menu)“Main Menu” (to switch to the main menu)
Disc Mode “Track” (#) (to change the track)
“Next Track” (to play the next track)
“Previous Track” (to play the previous track) “Main Menu” (to switch to the main menu)
Memo Mode To switch to the voice recorder mode, say “Memo.” The following
are common voice commands for this mode: “New Memo”
(to record a new memo) — During the recording, you may press the Voice Command button
to stop recording. You proceed
by saying one of the following commands:
— “Save” (to save the memo)
— “Continue” (to continue recording) — “Delete” (to delete the recording)
— “Play Memos” (to play previously recorded memos)
— During the playback you may press the Voice Command
button
to stop playing memos. You proceed by saying
one of the following commands:
— “Repeat” (to repeat a memo)
— “Next” (to play the next memo)
— “Previous” (to play the previous memo) — “Delete” (to delete a memo)
— “Delete All” (to delete all memos)
ELECTRONICS
65
Page 68 of 116
 messages (text messages) through the
vehicles")
Voice Text Reply
• If equipped with Uconnect® Voice Command, your Uconnect® 430N / 730N radio may beable to play incoming Short Message Service (SMS) messages (text messages) through the
vehicle's sound system.
• It also allows you to respond by selecting from various predefined phrases.
• Not all phones are compatible with this feature. Refer to the phone compatibility list at www.UconnectPhone.com. Connected mobile phones must be bluetooth-compatible and
paired with your radio.
• Press the “Voice Command” button
and after the BEEP, say “SMS” to get started.
NOTE:
To access the tutorial, press the “Voice Command” button. After the BEEP, say “tutorial.”
Press any hard-key/button or touch the display (Touchscreen radio) to cancel the tutorial.
WARNING!
Any voice commanded system should be used only in safe driving conditions following
applicable laws regarding phone use. Your attention should be focused on safely operating the
vehicle. Failure to do so may result in a collision causing you and others to be severely injured
or killed.
Bluetooth® STREAMING AUDIO
•If equipped with Uconnect® Voice Command,
your Bluetooth®-equipped iPod® devices, cell
phones or other media players, may also be
able to stream music to your vehicles speakers.
Your connected device must be Bluetooth®-
compatible, and paired with your radio (see
www.UconnectPhone.com for pairing instruc-
tions).
•Non-Touchscreen Radios:Press the “AUX”
button on the radio faceplate until "BT" or “Audio Streaming” is displayed on the radio screen.
• Touchscreen-Radios: Press the “RADIO/MEDIA” or “MEDIA” hard-key and then touch the
“AUX” soft-key tab.
ELECTRONICS
66
Page 69 of 116

• The EVIC features a driver interactive dis-play that is located in the instrument cluster.
Pressing the controls on the left side of the
steering wheel")
ELECTRONIC VEHICLE INFORMATION
CENTER (EVIC)
• The EVIC features a driver interactive dis-play that is located in the instrument cluster.
Pressing the controls on the left side of the
steering wheel allows the driver to select
vehicle information and Personal Settings.
For additional information, refer to “Pro-
grammable Features” located in this guide.
• Press and release the MENU button to advance the display to Trip Functions or
Personal settings or to return to the default
System status display.
• Press and release the DOWN
button
to advance the display through the various Trip Functions or Personal Settings.
• Press and release the COMPASS
button to display the compass heading and the outside
temperature.
• Press and release the SELECT
button to accept a selection. The SELECT Button also
resets various Trip Functions.
Compass Calibration
• This compass is self-calibrating, which eliminates the need to set the compass manually. When the vehicle is new, the compass may appear erratic and the EVIC will display “CAL” until
the compass is calibrated.
• You may also calibrate the compass by completing one or more 360 degree turns (in an area free from large metal or metallic objects) until the “CAL” message displayed in the EVIC
turns off. The compass will now function normally.
PROGRAMMABLE FEATURES
Electronic Vehicle Information Center (EVIC)
• The EVIC can be used to program the following Personal Settings. Press and release the
MENU button until Personal Settings displays, then press the DOWN button
to scroll
through the settings. Press the SELECT button
to change the setting.
• Language • Key Off Power Delay
• Auto Unlock On Exit • Illuminated Approach
• RKE Unlock • Hill Start Assist (HSA)
• Sound Horn With Lock • Display Units In
• Flash Lamps With Lock • Calibrate Compass
• Headlamp Off Delay • Compass Variance
• Headlights With Wipers (Available with Auto Headlights Only)
ELECTRONICS
67
Page 70 of 116

Key Fob Programmable Features
• The following features may also be programmed by using the Key Fob transmitter or theignition switch and driver's door lock switch.
NOTE:
Pressing the LOCK button while you are inside the vehicle will activate the Vehicle Security
Alarm. Opening a door with the Vehicle Security Alarm activated will cause the alarm to sound.
Press the UNLOCK button to deactivate the Vehicle Security Alarm.
Unlock On First Press
• To unlock either the driver's side, or all doors, on the first press of the UNLOCK button: • Press and hold the LOCK button for at least four seconds, but no longer than 10 seconds.
Then, press and hold the UNLOCK button while still holding the LOCK button.
• Release both buttons at the same time.
Auto Unlock Doors On Exit
• To have all of the vehicle doors unlock when any door is opened: • Enter your vehicle and close all the doors, and fasten your seat belt.
• Cycle the ignition switch between the LOCK and ON position four times, ending in the
LOCK position (do not start the engine).
• Press the power door UNLOCK switch to unlock the doors. A single chime will indicate that programming is complete.
Sound Horn With Lock
• To turn the horn chirp on or off when the doors are locked: • Press the LOCK button for at least four seconds, but no longer than 10 seconds. Then, press
the PANIC button while still holding the LOCK button.
• Release both buttons at the same time.
Flashing Lights With Lock
• The turn signal lights flashing, when the doors are locked or unlocked, feature can be turned on or off. To turn this feature on or off:• Press and hold the UNLOCK button for at least four seconds, but no longer than 10 sec-
onds. Then, press and hold the LOCK button while still holding the UNLOCK button.
• Release both buttons at the same time.
ELECTRONICS
68
Page 71 of 116

• HomeLink® replaces up to three hand-held transmitters that operate devices such as garagedoor openers, motorized gates, lighting or home security systems")
UNIVERSAL GARAGE DOOR OPENER
(HomeLink®)
• HomeLink® replaces up to three hand-held transmitters that operate devices such as garagedoor openers, motorized gates, lighting or home security systems. The HomeLink® unit is
powered by your vehicles 12 Volt battery.
• The HomeLink® buttons that are located in the overhead console or sunvisor designate the three different HomeLink® channels.
• The HomeLink® indicator is located above the center button.
Before You Begin Programming
HomeLink®
• Ensure that your vehicle is parked outside of the garage before you begin programming.
• For efficient programming and accurate transmission of the radio-frequency signal, it
is recommended that a new battery be
placed in the hand-held transmitter of the
device that is being programmed to the
HomeLink® system.
• Erase all channels before you begin pro- gramming. To erase the channels, place the
ignition switch into the ON/RUN position,
then press and hold the two outside
HomeLink® buttons (I and III) for up to 20 seconds or until the red indicator flashes.
NOTE:
Erasing all channels should only be performed when programming HomeLink® for the first time.
Do not erase channels when programming additional buttons.
• If you have any problems, or require assistance, please call toll-free 1-800-355-3515 or, on the Internet at www.HomeLink.com for information or assistance.
ELECTRONICS
69
Page 72 of 116

Programming A Rolling Code
NOTE:
For programming Garage Door Openers that were manufactured after 1995. These Garage
Door Openers can be identified by the “LEARN” or “TRAIN” button located where the hanging
antenna is attached to the Garage Door Opener. It is NOT the button that is normally used to
open and close the door. The name and color of the button may vary by manufacturer.
1. Place the ignition switch into the ON/RUN position.
2. Place the hand-held transmitter 1 to 3 in (3 to 8 cm) away from the HomeLink® button you wishto program while keeping the HomeLink® indicator light in view.
3. Simultaneously press and hold both the HomeLink® button you want to program and the hand-held transmitter button.
4.
Continue to hold both buttons and observe the indicator light. The HomeLink® indicator will flash
slowly and then rapidly after HomeLink® has received the frequency signal from the hand-held
transmitter. Release both buttons after the indicator light changes from slow to rapid.
5. At the garage door opener motor (in the garage), locate the “LEARN” or “TRAINING” button. This can usually be found where the hanging antenna wire is attached to the garage
door opener motor. Firmly press and release the “LEARN” or “TRAINING” button.
NOTE:
You have 30 seconds in which to initiate the next step after the LEARN button has been pressed.
6. Return to the vehicle and press the programmed HomeLink® button twice (holding the button for two seconds each time). If the device is plugged in and activates, programming is
complete.
NOTE:
If the device does not activate, press the button a third time (for two seconds) to complete the
training.
7. To program the remaining two HomeLink® buttons, repeat each step for each remaining button. DO NOT erase the channels.
ELECTRONICS
70
 1
1 2
2 3
3 4
4 5
5 6
6 7
7 8
8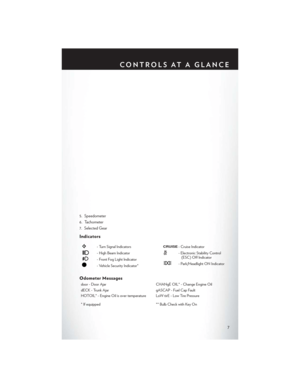 9
9 10
10 11
11 12
12 13
13 14
14 15
15 16
16 17
17 18
18 19
19 20
20 21
21 22
22 23
23 24
24 25
25 26
26 27
27 28
28 29
29 30
30 31
31 32
32 33
33 34
34 35
35 36
36 37
37 38
38 39
39 40
40 41
41 42
42 43
43 44
44 45
45 46
46 47
47 48
48 49
49 50
50 51
51 52
52 53
53 54
54 55
55 56
56 57
57 58
58 59
59 60
60 61
61 62
62 63
63 64
64 65
65 66
66 67
67 68
68 69
69 70
70 71
71 72
72 73
73 74
74 75
75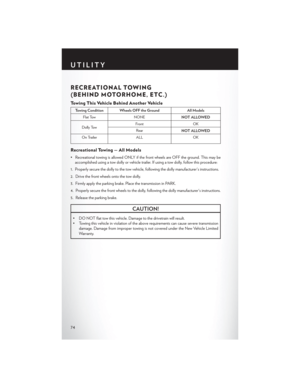 76
76 77
77 78
78 79
79 80
80 81
81 82
82 83
83 84
84 85
85 86
86 87
87 88
88 89
89 90
90 91
91 92
92 93
93 94
94 95
95 96
96 97
97 98
98 99
99 100
100 101
101 102
102 103
103 104
104 105
105 106
106 107
107 108
108 109
109 110
110 111
111 112
112 113
113 114
114 115
115