Page 137 of 394

(29,1)Chevrolet VOLT Owner Manual (GMNA-Localizing-U.S./Canada-6014139) -
2014 - CRC - 9/16/13
Instruments and Controls 5-29
Information Displays
Center Stack Display
The center stack screen displays
Charging, Power Flow, and Energy
Information. See the information that
follows.
Climate Control, Infotainment, and
Vehicle Personalization information
also displays in this screen. For
more information on these
systems, see:
.Automatic Climate Control
System on page 8-1.
.The infotainment system
manual.
.Vehicle Personalization on
page 5-54.
The center stack controls only need
a light touch to operate and work
best with bare hands. The controls
will work with most gloves although
they may take longer to respond.
Use the finger pad rather than the finger tip to minimize response time.
If the controls are not responding,
remove the gloves.
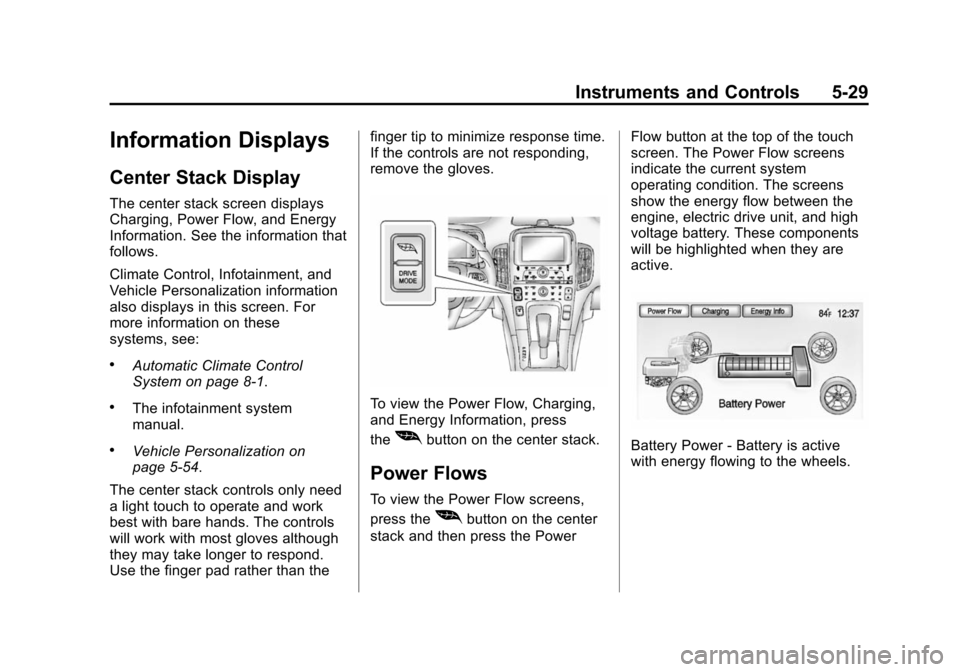
To view the Power Flow, Charging,
and Energy Information, press
the
[button on the center stack.
Power Flows
To view the Power Flow screens,
press the
[button on the center
stack and then press the Power Flow button at the top of the touch
screen. The Power Flow screens
indicate the current system
operating condition. The screens
show the energy flow between the
engine, electric drive unit, and high
voltage battery. These components
will be highlighted when they are
active.
Battery Power - Battery is active
with energy flowing to the wheels.
Page 138 of 394
(30,1)Chevrolet VOLT Owner Manual (GMNA-Localizing-U.S./Canada-6014139) -
2014 - CRC - 9/16/13
5-30 Instruments and Controls
Battery Power - Vehicle is stationary
in electric mode and no power is
flowing to the wheels.
Engine Power - Engine is active
with energy flowing to the wheels.
Engine Power - Vehicle is stationary
in extended range mode and no
power is flowing to the wheels.
Engine and Battery Power - Both
the engine and battery are active
with energy flowing to the wheels.
Regen Power Recovery - Engine is
active. Power from the wheels
returns to the battery during
regenerative braking or coasting.
Regen Power Recovery - Power
from the wheels returns to the
battery during regenerative braking
or coasting.
Page 139 of 394

(31,1)Chevrolet VOLT Owner Manual (GMNA-Localizing-U.S./Canada-6014139) -
2014 - CRC - 9/16/13
Instruments and Controls 5-31
Power Off - No power is flowing to
the wheels.
Programmable Charging
Important Information About
Portable Electric Vehicle Charging
.Charging an electric vehicle can
stress a building’s electrical
system more than a typical
household appliance.
.Before you plug in to any
electrical outlet, have a qualified
electrician inspect and verify the
electrical system (electrical
outlet, wiring, junctions, and protection devices) for
heavy-duty service at a 12 amp
continuous load.
.Electrical outlets may wear out
with normal usage or be
damaged over time, making
them unsuitable for electric
vehicle charging.
.Check the electrical outlet/plug
while charging and discontinue
use if the electrical outlet/plug is
hot, then have the electrical
outlet serviced by a qualified
electrician.
.When outdoors, plug into an
electrical outlet that is
weather-proof while in use.
.Mount the charging cord to
reduce strain on the electrical
outlet/plug.
{Warning
Improper use of portable electric
vehicle charge cords may cause
a fire, electrical shock, or burns,
and may result in damage to
property, serious injury, or death.
.Do not use extension cords,
multi-outlet power strips,
splitters, grounding adaptors,
surge protectors, or similar
devices.
.Do not use an electrical outlet
that is worn or damaged,
or one that will not hold the
plug firmly in place.
.Do not use an electrical outlet
that is not properly grounded.
.Do not use an electrical outlet
that is on a circuit with other
electrical loads.
See the charge cord user guide.
Page 140 of 394

(32,1)Chevrolet VOLT Owner Manual (GMNA-Localizing-U.S./Canada-6014139) -
2014 - CRC - 9/16/13
5-32 Instruments and Controls
Programmable Charge Modes
This vehicle has three
programmable charge modes.
To view the current charge mode
status in the center stack display,
press the
[button on the center
stack and then press the Charging
button at the top of the touch
screen.
The Charge Start and Charge
Complete time estimations are also
displayed on the screen. These
estimations are most accurate when
the vehicle is plugged in and in
moderate temperature conditions.
Also, to get an accurate time
estimate, the vehicle uses an
internal clock for programmable
charging, not the clock in the center
stack. Charge Mode Status
Immediately:
The vehicle starts
charging as soon as it is connected
to an electrical outlet. See Plug-In
Charging on page 9-47.
Delayed Departure Time: The
vehicle estimates the charging start
time considering the programmed
departure time for the current day of
the week. Charging begins at the
start time and is complete by the
departure time only if sufficient time
is allowed after the charge cord is
plugged in.
Page 141 of 394

(33,1)Chevrolet VOLT Owner Manual (GMNA-Localizing-U.S./Canada-6014139) -
2014 - CRC - 9/16/13
Instruments and Controls 5-33
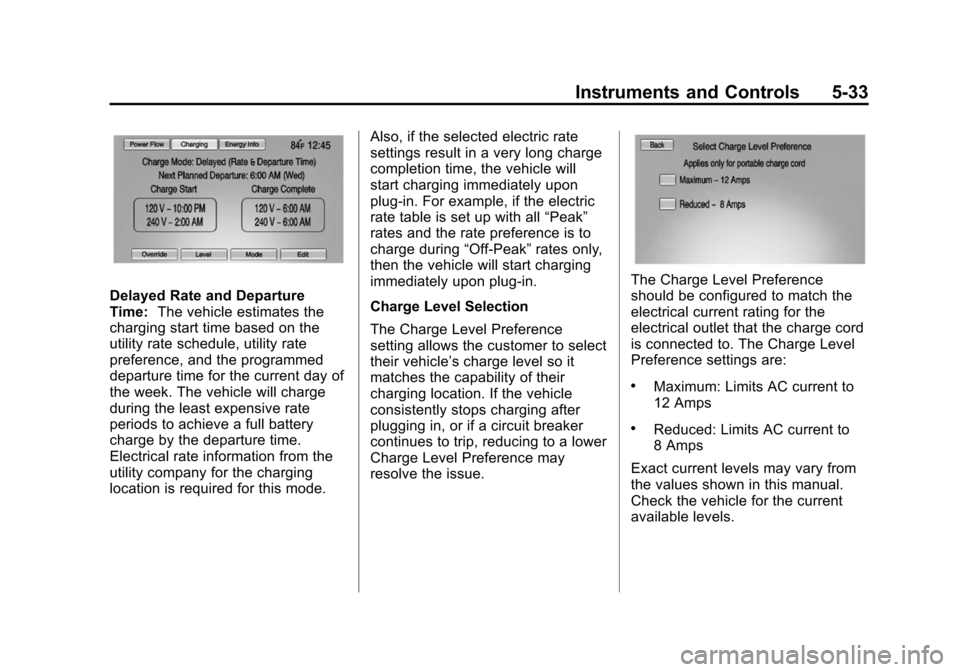
Delayed Rate and Departure
Time:The vehicle estimates the
charging start time based on the
utility rate schedule, utility rate
preference, and the programmed
departure time for the current day of
the week. The vehicle will charge
during the least expensive rate
periods to achieve a full battery
charge by the departure time.
Electrical rate information from the
utility company for the charging
location is required for this mode. Also, if the selected electric rate
settings result in a very long charge
completion time, the vehicle will
start charging immediately upon
plug-in. For example, if the electric
rate table is set up with all
“Peak”
rates and the rate preference is to
charge during “Off-Peak”rates only,
then the vehicle will start charging
immediately upon plug-in.
Charge Level Selection
The Charge Level Preference
setting allows the customer to select
their vehicle’s charge level so it
matches the capability of their
charging location. If the vehicle
consistently stops charging after
plugging in, or if a circuit breaker
continues to trip, reducing to a lower
Charge Level Preference may
resolve the issue.The Charge Level Preference
should be configured to match the
electrical current rating for the
electrical outlet that the charge cord
is connected to. The Charge Level
Preference settings are:
.Maximum: Limits AC current to
12 Amps
.Reduced: Limits AC current to
8 Amps
Exact current levels may vary from
the values shown in this manual.
Check the vehicle for the current
available levels.
Page 142 of 394

(34,1)Chevrolet VOLT Owner Manual (GMNA-Localizing-U.S./Canada-6014139) -
2014 - CRC - 9/16/13
5-34 Instruments and Controls
The Charge Level Preference
setting can be changed at any time
while the center stack display is
operable.
For some vehicles, the Charge
Level Preference must be updated
prior to the vehicle being charged
and the Charge Level Preference
will reset to a default value when the
vehicle is shifted from P (Park).
{Warning
Using a charge level that exceeds
the electrical circuit or electrical
outlet capacity may start a fire or
damage the electrical circuit. Use
the lowest charge level until a
qualified electrician inspects your
electrical circuit capacity. Use the
lowest charge level if the
electrical circuit or electrical outlet
capacity is not known.Charge Mode Selection
From the Charge Mode Status
screen, press Mode.Select one option:
.Immediately upon plug in.
.Delayed based on
departure time.
.Delayed based on electric rates
& departure time.
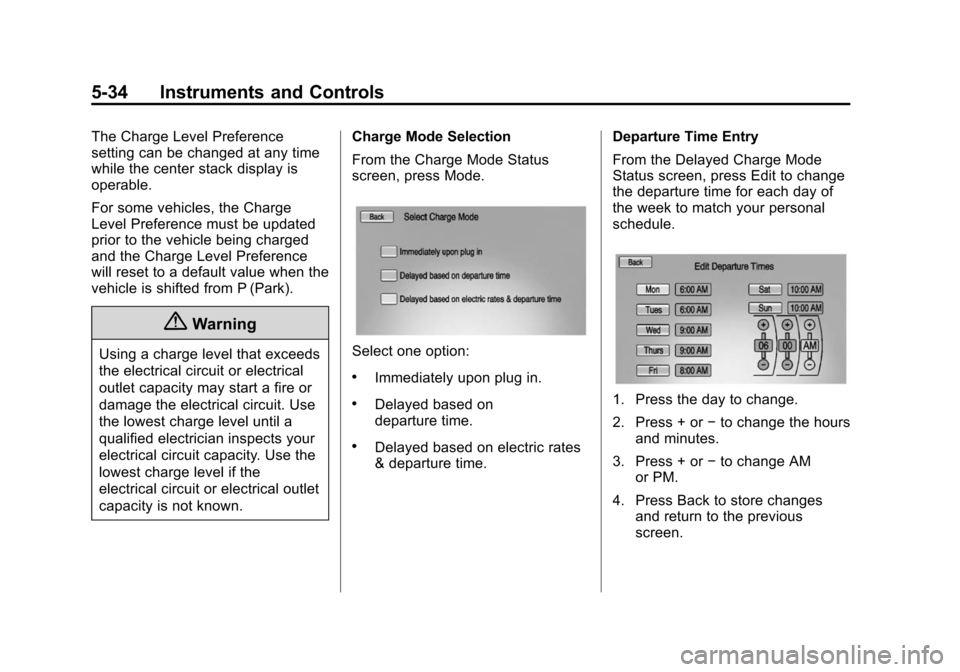
Departure Time Entry
From the Delayed Charge Mode
Status screen, press Edit to change
the departure time for each day of
the week to match your personal
schedule.
1. Press the day to change.
2. Press + or
−to change the hours
and minutes.
3. Press + or −to change AM
or PM.
4. Press Back to store changes and return to the previous
screen.
Page 143 of 394

(35,1)Chevrolet VOLT Owner Manual (GMNA-Localizing-U.S./Canada-6014139) -
2014 - CRC - 9/16/13
Instruments and Controls 5-35
Charge Rate Selection
From the Delayed Rate and
Departure Time Charge Mode
Status screen, press Edit.
Select one of the following:
.Edit Electric Rate Schedule.
.Edit Departure Time Schedule.
See“Departure Time Entry.”
.Select Charge Rate Preference.
Charge Rate Preference Selection
From the Departure Time & Rate
Information screen, press Select
Charge Rate Preference.
Press one of the following options to
select the Charge Rate Preference:
.Charge during Peak, Mid-Peak,
and Off-Peak Rates: The vehicle
can charge during any rate
period to satisfy the next
planned departure time.
However, it will select when to
charge to minimize the total cost
of the charge.
.Charge during Mid-Peak and
Off-Peak Rates: The vehicle will
charge during Off-Peak and/or
Mid-Peak rate periods only and
will select when to charge to
minimize the total cost of the
charge.
.Charge during Off-Peak Rates:
The vehicle will only charge
during Off-Peak rate periods.
Charging begins at the start time
and is complete by the departure
time only if sufficient time is allowed
after the charge cord is plugged in.
For example, if the vehicle is
plugged in for only one hour prior to
the departure time, and the battery
is completely discharged, the
vehicle will not be fully charged by
the departure time regardless of the
rate selection.
Also, if the selected electric rate
settings result in a very long charge
completion time, the vehicle will
start charging immediately upon
plug-in. For example, if the electric
rate table is set up with all “Peak”
rates and the rate preference is to
charge during “Off-Peak”rates only,
then the vehicle will start charging
immediately upon plug-in.
Page 144 of 394

(36,1)Chevrolet VOLT Owner Manual (GMNA-Localizing-U.S./Canada-6014139) -
2014 - CRC - 9/16/13
5-36 Instruments and Controls
Electric Rate Plan Selection
Electric rates, or cost per unit, may
vary based on time, weekday/
weekend, and season. During the
day when the demand for electricity
is high, the rates are usually higher
and called Peak rates. At night
when the demand for electricity is
low, the rates are usually lower and
called Off-Peak rates. In some
areas, a Mid-Peak rate is offered.
Contact the utility company to obtain
the rate schedule for your area. The
summer and winter start dates must
be established to use a summer/
winter schedule.
From the Departure Time & Rate
Information screen, press Edit
Electric Rate Schedule.
To edit the Summer/Winter
Schedule:
1. Press Summer/Winter Schedule.
2. Press Edit.
To edit the Yearly Schedule:
1. Press Yearly Schedule.
2. Press Edit.Summer/Winter Schedule Start
Date Entering
From the Select Electric Rate Plan
screen, press Summer/Winter
Schedule then press Edit.
1. Press Summer Start.
2. Press + or
−to set the month
and day for the start of summer.
3. Press Winter Start.
4. Press + or −to set the month
and day for the start of winter.
5. Press Edit Summer Schedule or Edit Winter Schedule to edit the
daily electric rate schedule.