2014 CHEVROLET SILVERADO steering
[x] Cancel search: steeringPage 293 of 546
Black plate (25,1)Chevrolet Silverado Owner Manual (GMNA-Localizing-U.S./Canada/Mexico-
5853506) - 2014 - crc 2nd - 5/15/13
Driving and Operating 9-25
Lift the switch up to move the
pedals closer to your body. Press
the switch down to move the
pedals away.
Before you start driving, fully press
the brake pedal to confirm the
adjustment is right for you. While
driving, make only small
adjustments.
The vehicle may have a memory
function, which lets pedal settings
be saved and recalled. SeeMemory
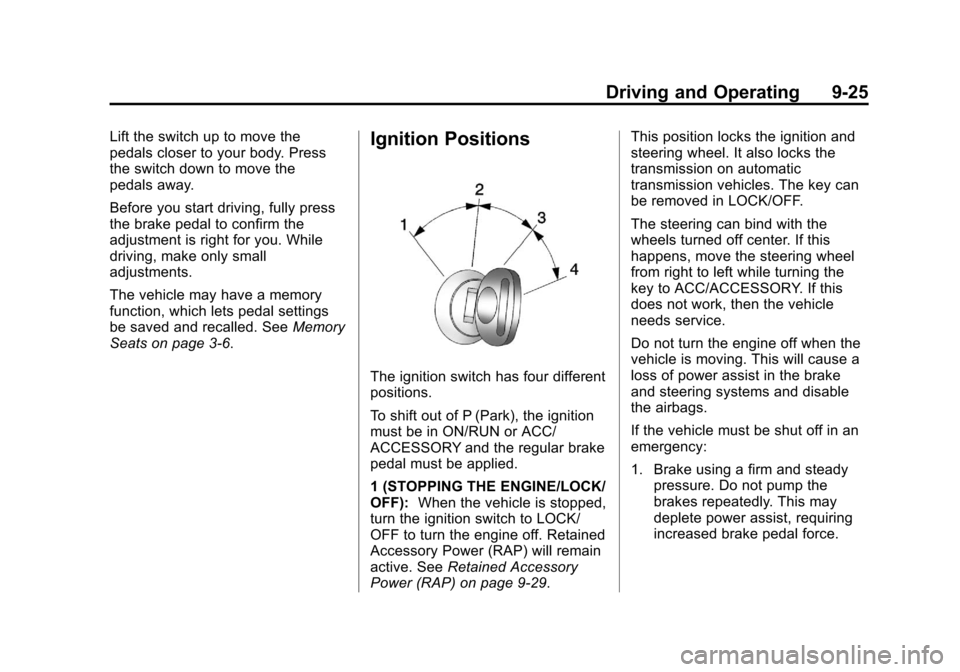
Seats on page 3-6.Ignition Positions
The ignition switch has four different
positions.
To shift out of P (Park), the ignition
must be in ON/RUN or ACC/
ACCESSORY and the regular brake
pedal must be applied.
1 (STOPPING THE ENGINE/LOCK/
OFF): When the vehicle is stopped,
turn the ignition switch to LOCK/
OFF to turn the engine off. Retained
Accessory Power (RAP) will remain
active. See Retained Accessory
Power (RAP) on page 9-29. This position locks the ignition and
steering wheel. It also locks the
transmission on automatic
transmission vehicles. The key can
be removed in LOCK/OFF.
The steering can bind with the
wheels turned off center. If this
happens, move the steering wheel
from right to left while turning the
key to ACC/ACCESSORY. If this
does not work, then the vehicle
needs service.
Do not turn the engine off when the
vehicle is moving. This will cause a
loss of power assist in the brake
and steering systems and disable
the airbags.
If the vehicle must be shut off in an
emergency:
1. Brake using a firm and steady
pressure. Do not pump the
brakes repeatedly. This may
deplete power assist, requiring
increased brake pedal force.
Page 294 of 546
Black plate (26,1)Chevrolet Silverado Owner Manual (GMNA-Localizing-U.S./Canada/Mexico-
5853506) - 2014 - crc 2nd - 5/15/13
9-26 Driving and Operating
2. Shift the vehicle to neutral. Thiscan be done while the vehicle is
moving. After shifting to neutral,
continue to firmly apply the
brakes and steer the vehicle to a
safe location.
3. Come to a complete stop. Shift to P (Park) with an automatic
transmission, or Neutral with a
manual transmission. Turn the
ignition to LOCK/OFF.
4. Set the parking brake. See Parking Brake on page 9-55.
{Warning
Turning off the vehicle while
moving may cause loss of power
assist in the brake and steering
systems and disable the airbags.
While driving, only shut the
vehicle off in an emergency. If the vehicle cannot be pulled over,
and must be shut off while driving,
turn the ignition to ACC/
ACCESSORY.
On vehicles with an automatic
transmission, the shift lever must be
in P (Park) to turn the ignition switch
to LOCK/OFF.
{Caution
Using a tool to force the key to
turn in the ignition could cause
damage to the switch or break the
key. Use the correct key, make
sure it is all the way in, and turn it
only with your hand. If the key
cannot be turned by hand, see
your dealer.
2 (ACC/ACCESSORY): This
position lets things like the radio
and the windshield wipers operate
while the engine is off. It also
unlocks the steering wheel. Use this
position if the vehicle must be
pushed or towed. 3 (ON/RUN):
This position can be
used to operate the electrical
accessories and to display some
instrument cluster warning and
indicator lights. This position can
also be used for service and
diagnostics, and to verify the proper
operation of the malfunction
indicator lamp as may be required
for emission inspection purposes.
The switch stays in this position
when the engine is running. The
transmission is also unlocked in this
position on automatic transmission
vehicles.
If the key is left in the ACC/
ACCESSORY or ON/RUN position
with the engine off, the battery could
be drained. The vehicle may not
start if the battery is allowed to drain
for an extended period of time.
4 (START): This is the position that
starts the engine. When the engine
starts, release the key. The ignition
switch returns to ON/RUN for
driving.
Page 296 of 546
Black plate (28,1)Chevrolet Silverado Owner Manual (GMNA-Localizing-U.S./Canada/Mexico-
5853506) - 2014 - crc 2nd - 5/15/13
9-28 Driving and Operating
damage, this system also
prevents cranking if the engine
is already running. Engine
cranking can be stopped by
turning the ignition switch to the
ACC/ACCESSORY or LOCK/
OFF position.
When the low fuel warning light
is on and the FUEL LEVEL LOW
message is displayed in the
Driver Information Center (DIC),
the Computer-Controlled
Cranking System is disabled to
prevent possible vehicle
component damage. When this
happens, hold the ignition switch
in the START position to
continue engine cranking.
{Caution
Cranking the engine for long
periods of time, by returning the
ignition to the START position
immediately after cranking has
ended, can overheat and damage(Continued)
Caution (Continued)
the cranking motor, and drain the
battery. Wait at least 15 seconds
between each try, to let the
cranking motor cool down.
2. If the engine does not start after five to 10 seconds, especially in
very cold weather (below
−18°C or 0°F), it could be
flooded with too much gasoline.
Try pushing the accelerator
pedal all the way to the floor and
holding it there while holding the
key in START for up to
15 seconds. Wait at least
15 seconds between each try, to
allow the cranking motor to cool
down. When the engine starts,
let go of the key and accelerator.
If the vehicle starts briefly but
then stops again, do the same
thing. This clears the extra
gasoline from the engine. Do not
race the engine immediately
after starting it. Operate the engine and transmission gently
until the oil warms up and
lubricates all moving parts.
Fast Idle System
If equipped, this feature is available
only with cruise control. The manual
fast idle switch is operated using the
cruise control buttons on the left
side of the steering wheel.
This system can be used to
increase engine idle speed
whenever the following conditions
are met:
.The parking brake is set.
.The brake pedal is not pressed.
.The vehicle must not be moving
and the accelerator must not be
pressed.
To control the fast idle:
.To enable the Fast Idle System,
press and release the cruise
control on/off button and ensure
that the switch indicator light
is lit.
Page 310 of 546
Black plate (42,1)Chevrolet Silverado Owner Manual (GMNA-Localizing-U.S./Canada/Mexico-
5853506) - 2014 - crc 2nd - 5/15/13
9-42 Driving and Operating
Drive Systems
Four-Wheel Drive
If equipped, you can send the
engine's driving power to all four
wheels for extra traction. To get the
most satisfaction out of four-wheel
drive, you must be familiar with its
operation. Read the following before
using four-wheel drive. See the
appropriate text for the transfer case
in the vehicle.
{Caution
Driving on clean, dry pavement in
Four-Wheel Drive High or
Four-Wheel Drive Low for an
extended period of time may
cause premature wear on the
vehicle's powertrain. Do not drive
on clean, dry pavement in
Four-Wheel Drive High or
Four-Wheel Drive Low for
extended periods of time.While driving on clean, dry
pavement and during tight turns,
you may experience vibration in the
steering system.
Shifting into Four-Wheel Drive Low
will turn Traction Control and
StabiliTrak
®off. See
Traction
Control/Electronic Stability Control
on page 9-57.
Front Axle
The front axle engages and
disengages automatically when you
shift the transfer case. Some delay
for the axle to engage or disengage
is normal.
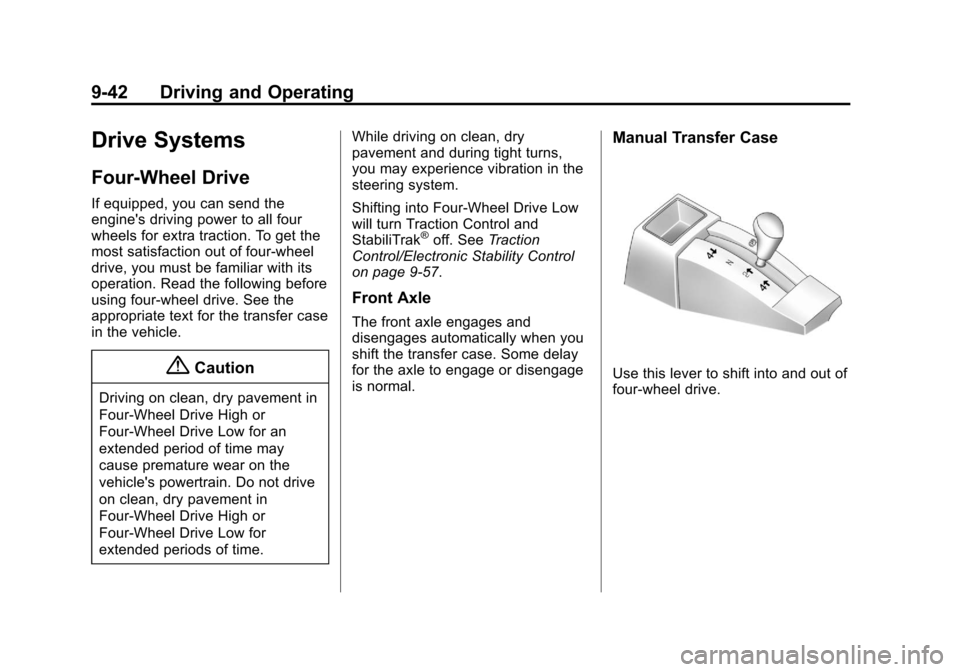
Manual Transfer Case
Use this lever to shift into and out of
four-wheel drive.
Page 314 of 546
Black plate (46,1)Chevrolet Silverado Owner Manual (GMNA-Localizing-U.S./Canada/Mexico-
5853506) - 2014 - crc 2nd - 5/15/13
9-46 Driving and Operating
Electronic Transfer Case
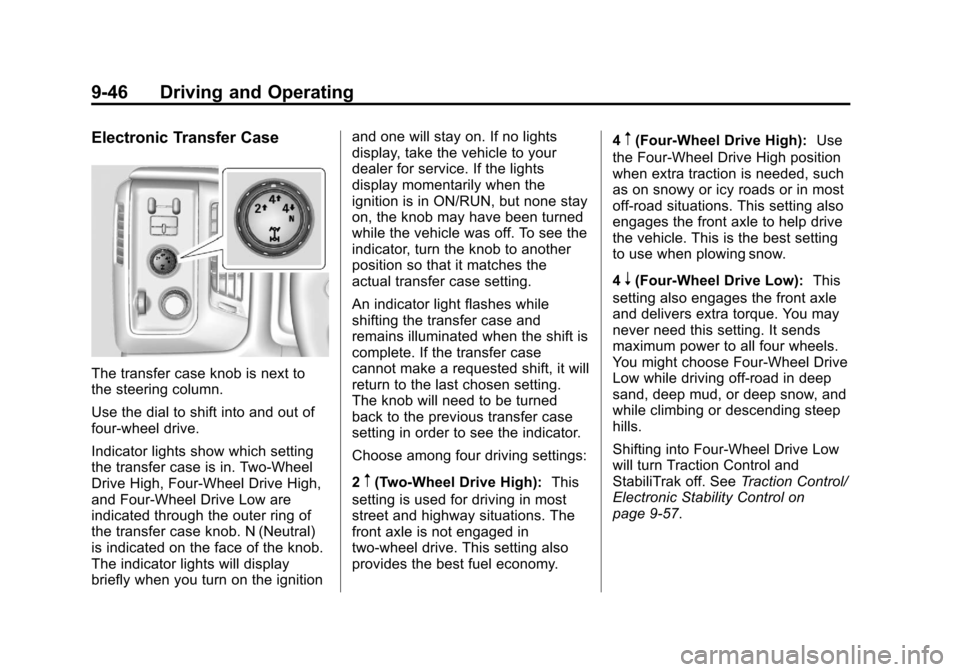
The transfer case knob is next to
the steering column.
Use the dial to shift into and out of
four-wheel drive.
Indicator lights show which setting
the transfer case is in. Two-Wheel
Drive High, Four-Wheel Drive High,
and Four-Wheel Drive Low are
indicated through the outer ring of
the transfer case knob. N (Neutral)
is indicated on the face of the knob.
The indicator lights will display
briefly when you turn on the ignitionand one will stay on. If no lights
display, take the vehicle to your
dealer for service. If the lights
display momentarily when the
ignition is in ON/RUN, but none stay
on, the knob may have been turned
while the vehicle was off. To see the
indicator, turn the knob to another
position so that it matches the
actual transfer case setting.
An indicator light flashes while
shifting the transfer case and
remains illuminated when the shift is
complete. If the transfer case
cannot make a requested shift, it will
return to the last chosen setting.
The knob will need to be turned
back to the previous transfer case
setting in order to see the indicator.
Choose among four driving settings:
2
m(Two-Wheel Drive High):
This
setting is used for driving in most
street and highway situations. The
front axle is not engaged in
two-wheel drive. This setting also
provides the best fuel economy. 4
m(Four-Wheel Drive High):
Use
the Four-Wheel Drive High position
when extra traction is needed, such
as on snowy or icy roads or in most
off-road situations. This setting also
engages the front axle to help drive
the vehicle. This is the best setting
to use when plowing snow.
4
n(Four-Wheel Drive Low): This
setting also engages the front axle
and delivers extra torque. You may
never need this setting. It sends
maximum power to all four wheels.
You might choose Four-Wheel Drive
Low while driving off-road in deep
sand, deep mud, or deep snow, and
while climbing or descending steep
hills.
Shifting into Four-Wheel Drive Low
will turn Traction Control and
StabiliTrak off. See Traction Control/
Electronic Stability Control on
page 9-57.
Page 318 of 546
Black plate (50,1)Chevrolet Silverado Owner Manual (GMNA-Localizing-U.S./Canada/Mexico-
5853506) - 2014 - crc 2nd - 5/15/13
9-50 Driving and Operating
Automatic Transfer Case
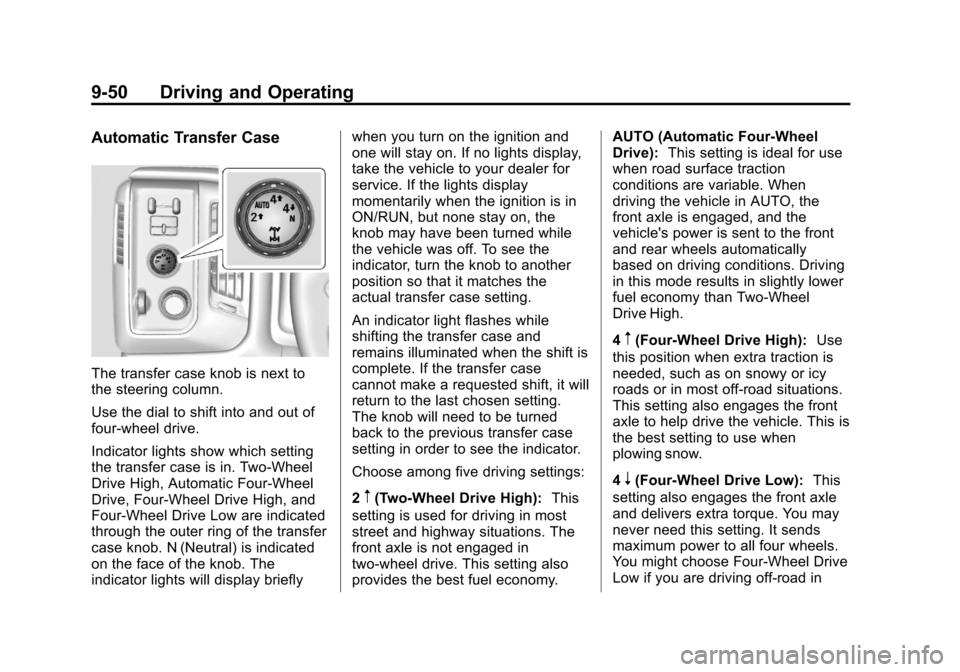
The transfer case knob is next to
the steering column.
Use the dial to shift into and out of
four-wheel drive.
Indicator lights show which setting
the transfer case is in. Two-Wheel
Drive High, Automatic Four-Wheel
Drive, Four-Wheel Drive High, and
Four-Wheel Drive Low are indicated
through the outer ring of the transfer
case knob. N (Neutral) is indicated
on the face of the knob. The
indicator lights will display brieflywhen you turn on the ignition and
one will stay on. If no lights display,
take the vehicle to your dealer for
service. If the lights display
momentarily when the ignition is in
ON/RUN, but none stay on, the
knob may have been turned while
the vehicle was off. To see the
indicator, turn the knob to another
position so that it matches the
actual transfer case setting.
An indicator light flashes while
shifting the transfer case and
remains illuminated when the shift is
complete. If the transfer case
cannot make a requested shift, it will
return to the last chosen setting.
The knob will need to be turned
back to the previous transfer case
setting in order to see the indicator.
Choose among five driving settings:
2
m(Two-Wheel Drive High):
This
setting is used for driving in most
street and highway situations. The
front axle is not engaged in
two-wheel drive. This setting also
provides the best fuel economy. AUTO (Automatic Four-Wheel
Drive):
This setting is ideal for use
when road surface traction
conditions are variable. When
driving the vehicle in AUTO, the
front axle is engaged, and the
vehicle's power is sent to the front
and rear wheels automatically
based on driving conditions. Driving
in this mode results in slightly lower
fuel economy than Two-Wheel
Drive High.
4
m(Four-Wheel Drive High): Use
this position when extra traction is
needed, such as on snowy or icy
roads or in most off-road situations.
This setting also engages the front
axle to help drive the vehicle. This is
the best setting to use when
plowing snow.
4
n(Four-Wheel Drive Low): This
setting also engages the front axle
and delivers extra torque. You may
never need this setting. It sends
maximum power to all four wheels.
You might choose Four-Wheel Drive
Low if you are driving off-road in
Page 323 of 546
Black plate (55,1)Chevrolet Silverado Owner Manual (GMNA-Localizing-U.S./Canada/Mexico-
5853506) - 2014 - crc 2nd - 5/15/13
Driving and Operating 9-55
suddenly slows or stops. Always
leave enough room up ahead to
stop, even with ABS.
Using ABS
Do not pump the brakes. Just hold
the brake pedal down firmly and let
ABS work. You might hear the ABS
pump or motor operating and feel
the brake pedal pulsate, but this is
normal.
Braking in Emergencies
ABS allows you to steer and brake
at the same time. In many
emergencies, steering can help
more than even the very best
braking.
Parking Brake
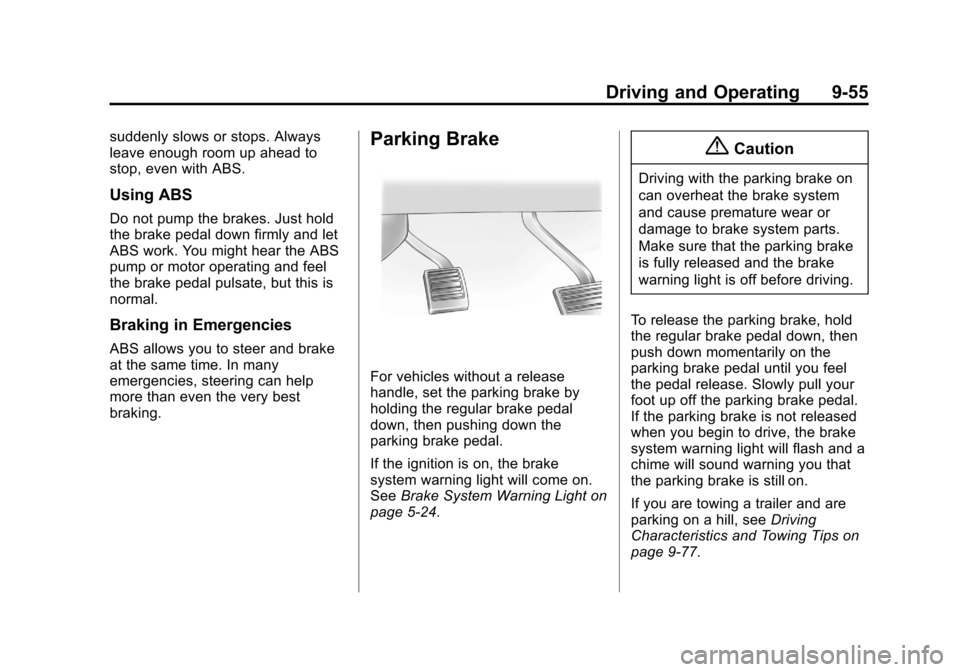
For vehicles without a release
handle, set the parking brake by
holding the regular brake pedal
down, then pushing down the
parking brake pedal.
If the ignition is on, the brake
system warning light will come on.
SeeBrake System Warning Light on
page 5-24.
{Caution
Driving with the parking brake on
can overheat the brake system
and cause premature wear or
damage to brake system parts.
Make sure that the parking brake
is fully released and the brake
warning light is off before driving.
To release the parking brake, hold
the regular brake pedal down, then
push down momentarily on the
parking brake pedal until you feel
the pedal release. Slowly pull your
foot up off the parking brake pedal.
If the parking brake is not released
when you begin to drive, the brake
system warning light will flash and a
chime will sound warning you that
the parking brake is still on.
If you are towing a trailer and are
parking on a hill, see Driving
Characteristics and Towing Tips on
page 9-77.
Page 324 of 546
Black plate (56,1)Chevrolet Silverado Owner Manual (GMNA-Localizing-U.S./Canada/Mexico-
5853506) - 2014 - crc 2nd - 5/15/13
9-56 Driving and Operating
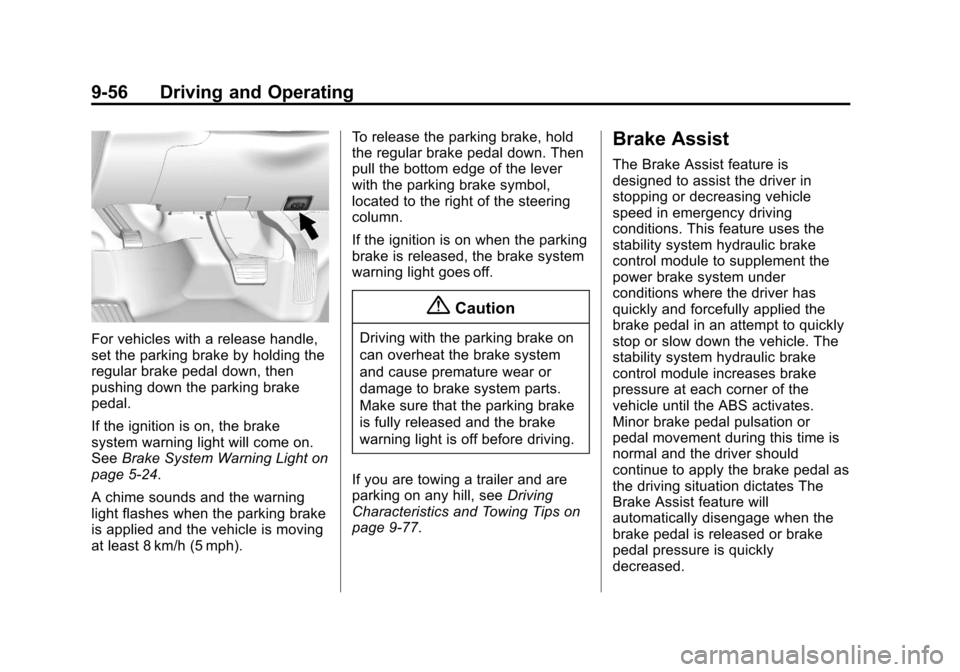
For vehicles with a release handle,
set the parking brake by holding the
regular brake pedal down, then
pushing down the parking brake
pedal.
If the ignition is on, the brake
system warning light will come on.
SeeBrake System Warning Light on
page 5-24.
A chime sounds and the warning
light flashes when the parking brake
is applied and the vehicle is moving
at least 8 km/h (5 mph). To release the parking brake, hold
the regular brake pedal down. Then
pull the bottom edge of the lever
with the parking brake symbol,
located to the right of the steering
column.
If the ignition is on when the parking
brake is released, the brake system
warning light goes off.
{Caution
Driving with the parking brake on
can overheat the brake system
and cause premature wear or
damage to brake system parts.
Make sure that the parking brake
is fully released and the brake
warning light is off before driving.
If you are towing a trailer and are
parking on any hill, see Driving
Characteristics and Towing Tips on
page 9-77.
Brake Assist
The Brake Assist feature is
designed to assist the driver in
stopping or decreasing vehicle
speed in emergency driving
conditions. This feature uses the
stability system hydraulic brake
control module to supplement the
power brake system under
conditions where the driver has
quickly and forcefully applied the
brake pedal in an attempt to quickly
stop or slow down the vehicle. The
stability system hydraulic brake
control module increases brake
pressure at each corner of the
vehicle until the ABS activates.
Minor brake pedal pulsation or
pedal movement during this time is
normal and the driver should
continue to apply the brake pedal as
the driving situation dictates The
Brake Assist feature will
automatically disengage when the
brake pedal is released or brake
pedal pressure is quickly
decreased.