2014 CHEVROLET SILVERADO 1500 steering
[x] Cancel search: steeringPage 374 of 542
Black plate (4,1)Chevrolet Silverado Owner Manual (GMNA-Localizing-U.S./Canada/Mexico-
5853506) - 2014 - CRC 3rd Edition - 8/29/13
10-4 Vehicle Care
This vehicle has an airbag system.
Before attempting to do your own
service work, seeServicing the
Airbag-Equipped Vehicle on
page 3-35.
Keep a record with all parts receipts
and list the mileage and the date of
any service work performed. See
Maintenance Records on
page 11-16.
{Caution
Even small amounts of
contamination can cause damage
to vehicle systems. Do not allow
contaminants to contact the fluids,
reservoir caps, or dipsticks.
Hood
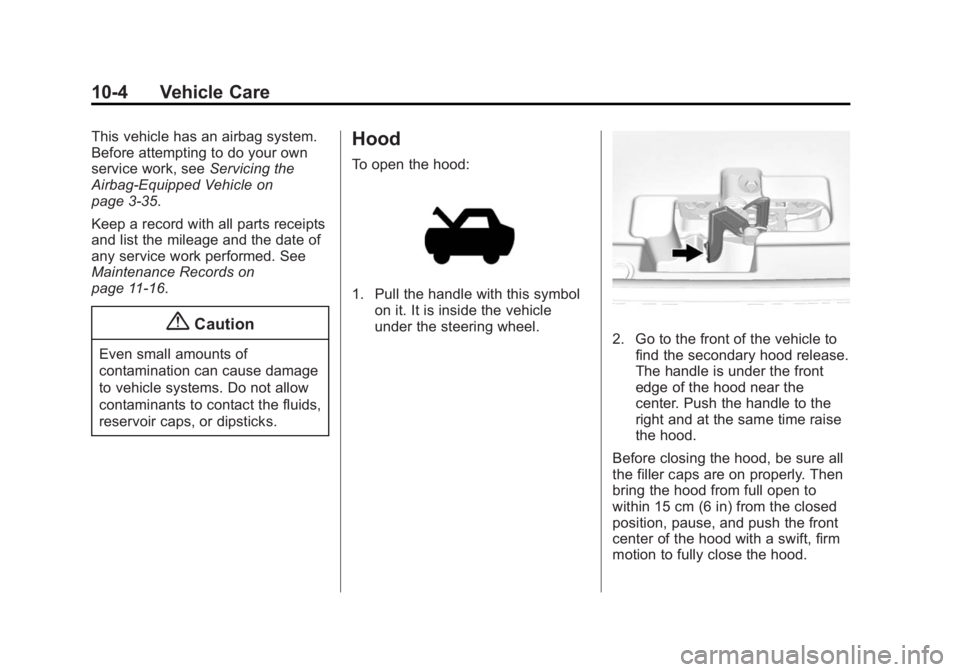
To open the hood:
1. Pull the handle with this symbol on it. It is inside the vehicle
under the steering wheel.
2. Go to the front of the vehicle tofind the secondary hood release.
The handle is under the front
edge of the hood near the
center. Push the handle to the
right and at the same time raise
the hood.
Before closing the hood, be sure all
the filler caps are on properly. Then
bring the hood from full open to
within 15 cm (6 in) from the closed
position, pause, and push the front
center of the hood with a swift, firm
motion to fully close the hood.
Page 380 of 542
Black plate (10,1)Chevrolet Silverado Owner Manual (GMNA-Localizing-U.S./Canada/Mexico-
5853506) - 2014 - CRC 3rd Edition - 8/29/13
10-10 Vehicle Care
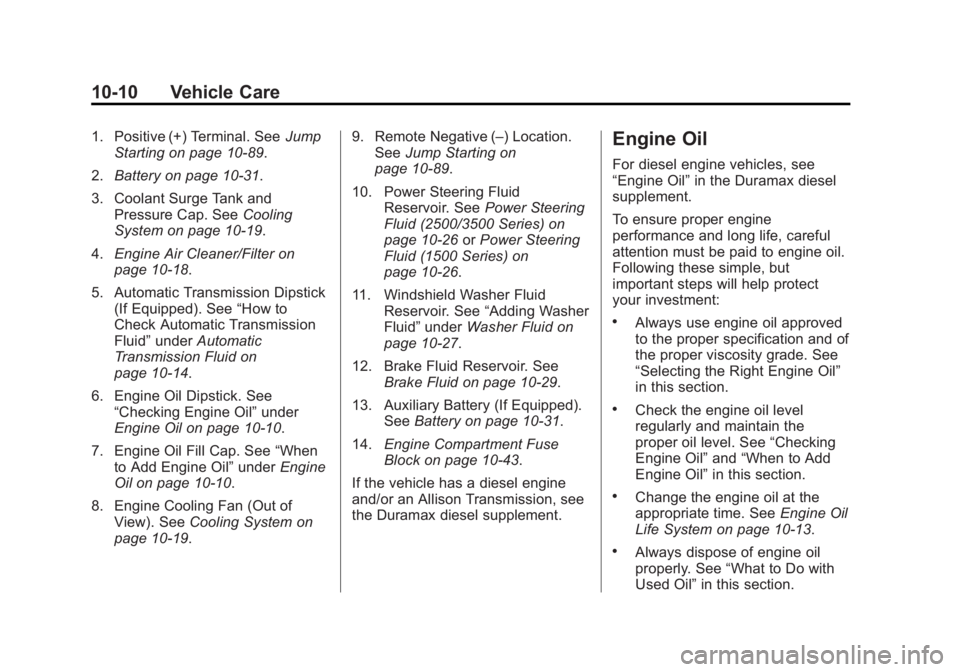
1. Positive (+) Terminal. SeeJump
Starting on page 10-89.
2. Battery on page 10-31.
3. Coolant Surge Tank and Pressure Cap. See Cooling
System on page 10-19.
4. Engine Air Cleaner/Filter on
page 10-18.
5. Automatic Transmission Dipstick (If Equipped). See “How to
Check Automatic Transmission
Fluid” under Automatic
Transmission Fluid on
page 10-14.
6. Engine Oil Dipstick. See “Checking Engine Oil” under
Engine Oil on page 10-10.
7. Engine Oil Fill Cap. See “When
to Add Engine Oil” underEngine
Oil on page 10-10.
8. Engine Cooling Fan (Out of View). See Cooling System on
page 10-19. 9. Remote Negative (–) Location.
See Jump Starting on
page 10-89.
10. Power Steering Fluid Reservoir. See Power Steering
Fluid (2500/3500 Series) on
page 10-26 orPower Steering
Fluid (1500 Series) on
page 10-26.
11. Windshield Washer Fluid Reservoir. See “Adding Washer
Fluid” under Washer Fluid on
page 10-27.
12. Brake Fluid Reservoir. See Brake Fluid on page 10-29.
13. Auxiliary Battery (If Equipped). SeeBattery on page 10-31.
14. Engine Compartment Fuse
Block on page 10-43.
If the vehicle has a diesel engine
and/or an Allison Transmission, see
the Duramax diesel supplement.Engine Oil
For diesel engine vehicles, see
“Engine Oil” in the Duramax diesel
supplement.
To ensure proper engine
performance and long life, careful
attention must be paid to engine oil.
Following these simple, but
important steps will help protect
your investment:
.Always use engine oil approved
to the proper specification and of
the proper viscosity grade. See
“Selecting the Right Engine Oil”
in this section.
.Check the engine oil level
regularly and maintain the
proper oil level. See “Checking
Engine Oil” and“When to Add
Engine Oil” in this section.
.Change the engine oil at the
appropriate time. See Engine Oil
Life System on page 10-13.
.Always dispose of engine oil
properly. See “What to Do with
Used Oil” in this section.
Page 396 of 542
Black plate (26,1)Chevrolet Silverado Owner Manual (GMNA-Localizing-U.S./Canada/Mexico-
5853506) - 2014 - CRC 3rd Edition - 8/29/13
10-26 Vehicle Care
{Caution
After driving in the overheated
engine protection operating
mode, the engine oil will be
severely degraded. Any repairs
performed before the engine is
cool may cause engine damage.
Allow the engine to cool before
attempting any repair. Repair the
cause of coolant loss, change the
oil, and reset the oil life system.
SeeEngine Oil on page 10-10.
Engine Fan
If the vehicle has a clutched engine
cooling fan, when the clutch is
engaged, the fan spins faster to
provide more air to cool the engine.
In most everyday driving conditions,
the fan is spinning slower and the
clutch is not fully engaged. This
improves fuel economy and reduces
fan noise. Under heavy vehicle
loading, trailer towing, and/or high
outside temperatures, the fan speed increases as the clutch more fully
engages, so an increase in fan
noise may be heard. This is normal
and should not be mistaken as the
transmission slipping or making
extra shifts. It is merely the cooling
system functioning properly. The fan
will slow down when additional
cooling is not required and the
clutch disengages.
This fan noise may also be heard
when starting the engine. It will go
away as the fan clutch partially
disengages.
If the vehicle has electric cooling
fans, the fans may be heard
spinning at low speed during most
everyday driving. The fans may turn
off if no cooling is required. Under
heavy vehicle loading, trailer towing,
high outside temperatures,
or operation of the air conditioning
system, the fans may change to
high speed and an increase in fan
noise may be heard. This is normal
and indicates that the cooling
system is functioning properly. The
fans will change to low speed when
additional cooling is no longer
required.
The electric engine cooling fans
may run after the engine has been
turned. off. This is normal and no
service is required.
Power Steering Fluid
(1500 Series)
The vehicle has electric power
steering and does not use power
steering fluid.
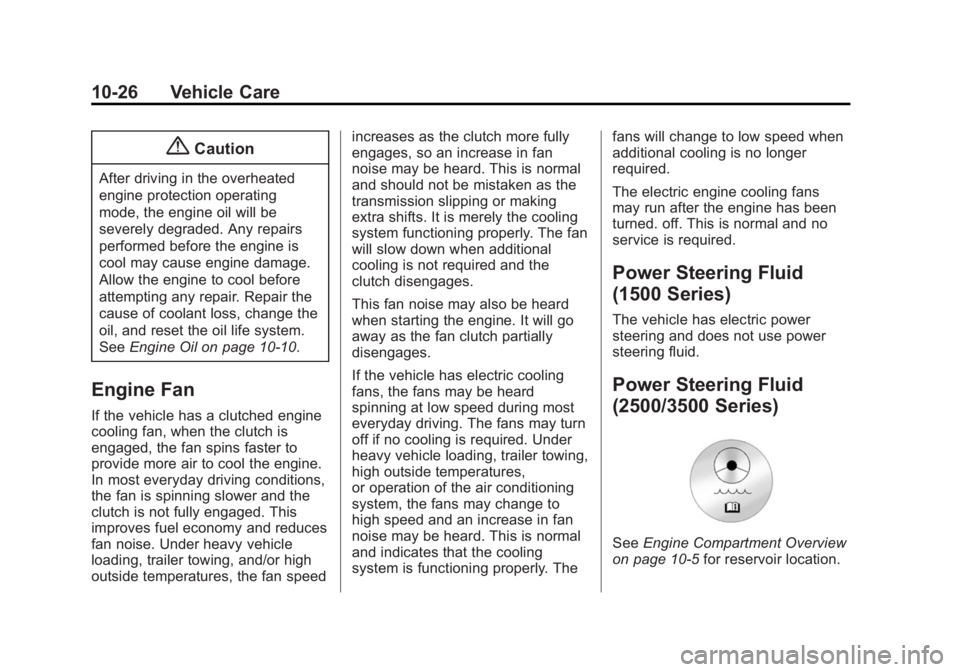
Power Steering Fluid
(2500/3500 Series)
See
Engine Compartment Overview
on page 10-5 for reservoir location.
Page 397 of 542
Black plate (27,1)Chevrolet Silverado Owner Manual (GMNA-Localizing-U.S./Canada/Mexico-
5853506) - 2014 - CRC 3rd Edition - 8/29/13
Vehicle Care 10-27
When to Check Power Steering
Fluid
It is not necessary to regularly
check power steering fluid unless
there is a leak suspected in the
system or an unusual noise is
heard. A fluid loss in this system
could indicate a problem. Have the
system inspected and repaired.
Wait for the power steering system
to cool, with the engine off, before
checking the fluid.
How to Check Power Steering
Fluid
To check the power steering fluid:
1. Turn the key off and let theengine compartment cool down.
2. Wipe the cap and the top of the reservoir clean.
3. Unscrew the cap and wipe the dipstick with a clean rag.
4. Replace the cap and completely tighten it. 5. Remove the cap again and look
at the fluid level on the dipstick.
The level should be between the
ADD and FULL marks. If necessary,
add only enough fluid to bring the
level up to the hashed area between
the ADD and FULL marks.
What to Use
To determine what kind of fluid to
use, see Recommended Fluids and
Lubricants on page 11-12. Always
use the proper fluid.
{Caution
Use of the incorrect fluid may
damage the vehicle and the
damages may not be covered by
the vehicle warranty. Always use
the correct fluid listed in
Recommended Fluids and
Lubricants on page 11-12.
Washer Fluid
What to Use
When windshield washer fluid needs
to be added, be sure to read the
manufacturer's instructions before
use. Use a fluid that has sufficient
protection against freezing in an
area where the temperature may fall
below freezing.
Adding Washer Fluid
The vehicle has a low washer fluid
message on the DIC that comes on
when the washer fluid is low. The
message is displayed for
15 seconds at the start of each
ignition cycle. When the WASHER
FLUID LOW ADD FLUID message
displays, washer fluid will need to
be added to the windshield washer
fluid reservoir.
Page 419 of 542
Black plate (49,1)Chevrolet Silverado Owner Manual (GMNA-Localizing-U.S./Canada/Mexico-
5853506) - 2014 - CRC 3rd Edition - 8/29/13
Vehicle Care 10-49
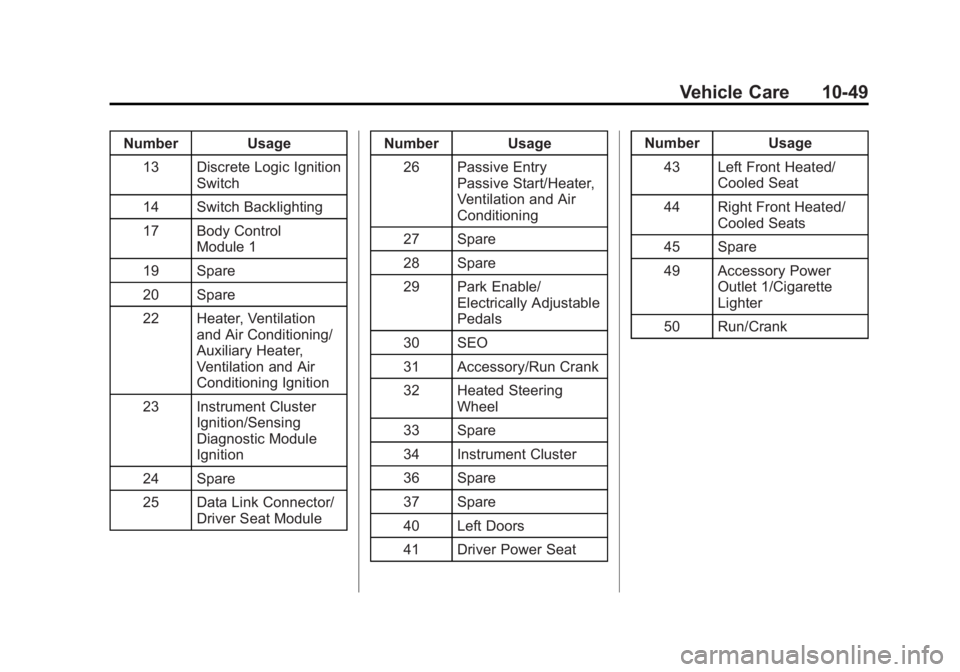
Number Usage13 Discrete Logic Ignition Switch
14 Switch Backlighting
17 Body Control Module 1
19 Spare
20 Spare
22 Heater, Ventilation and Air Conditioning/
Auxiliary Heater,
Ventilation and Air
Conditioning Ignition
23 Instrument Cluster Ignition/Sensing
Diagnostic Module
Ignition
24 Spare
25 Data Link Connector/ Driver Seat Module Number Usage
26 Passive Entry Passive Start/Heater,
Ventilation and Air
Conditioning
27 Spare
28 Spare
29 Park Enable/ Electrically Adjustable
Pedals
30 SEO
31 Accessory/Run Crank
32 Heated Steering Wheel
33 Spare
34 Instrument Cluster
36 Spare
37 Spare
40 Left Doors
41 Driver Power Seat Number Usage
43 Left Front Heated/ Cooled Seat
44 Right Front Heated/ Cooled Seats
45 Spare
49 Accessory Power Outlet 1/Cigarette
Lighter
50 Run/Crank
Page 421 of 542
Black plate (51,1)Chevrolet Silverado Owner Manual (GMNA-Localizing-U.S./Canada/Mexico-
5853506) - 2014 - CRC 3rd Edition - 8/29/13
Vehicle Care 10-51
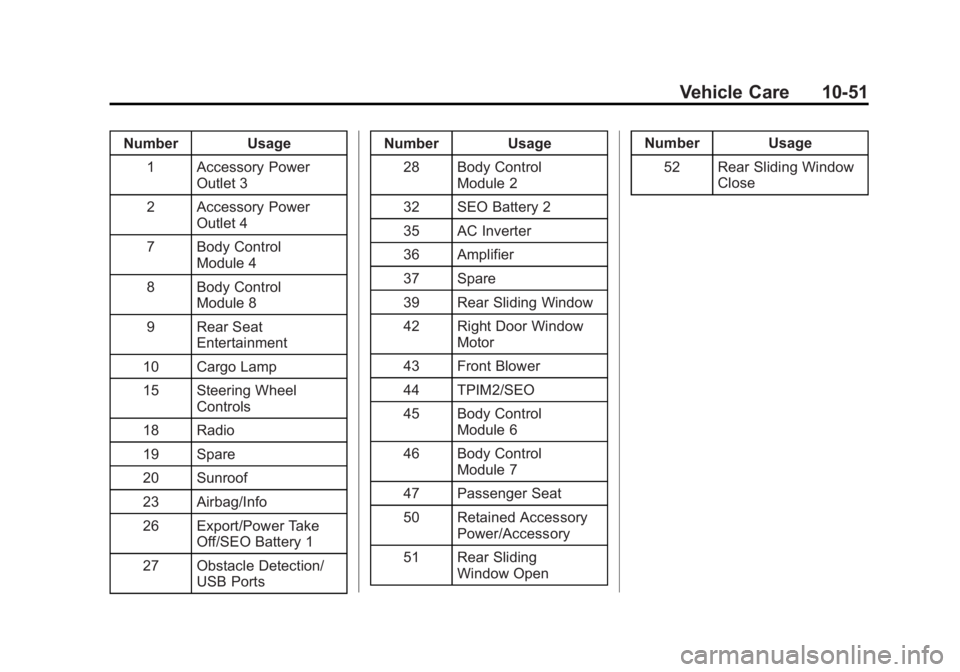
Number Usage1 Accessory Power Outlet 3
2 Accessory Power Outlet 4
7 Body Control Module 4
8 Body Control Module 8
9 Rear Seat Entertainment
10 Cargo Lamp
15 Steering Wheel Controls
18 Radio
19 Spare
20 Sunroof
23 Airbag/Info
26 Export/Power Take Off/SEO Battery 1
27 Obstacle Detection/ USB Ports Number Usage
28 Body Control Module 2
32 SEO Battery 2
35 AC Inverter
36 Amplifier
37 Spare
39 Rear Sliding Window
42 Right Door Window Motor
43 Front Blower
44 TPIM2/SEO
45 Body Control Module 6
46 Body Control Module 7
47 Passenger Seat
50 Retained Accessory Power/Accessory
51 Rear Sliding Window Open Number Usage
52 Rear Sliding Window Close
Page 436 of 542
Black plate (66,1)Chevrolet Silverado Owner Manual (GMNA-Localizing-U.S./Canada/Mexico-
5853506) - 2014 - CRC 3rd Edition - 8/29/13
10-66 Vehicle Care
4. If the vehicle has an uplevelDIC, use the DIC controls on the
right side of the steering wheel
to scroll to the Tire Pressure
screen under the DIC info page.
If the vehicle has a base level
DIC, use the trip odometer reset
stem to scroll to the Tire
Pressure screen.
5. If the vehicle has an uplevel DIC, press and hold the
V(Set/
Reset) button located in the
center of the DIC controls.
If the vehicle has a base level
DIC, press and hold the trip
odometer reset stem for about
five seconds. A message asking
if the process should begin
should appear. Select yes and
press the trip odometer reset
stem to confirm the selection.
The horn sounds twice to signal
the receiver is in relearn mode
and the TIRE LEARNING
ACTIVE message displays on
the DIC screen. 6. Start with the driver side
front tire.
7. Place the relearn tool against the tire sidewall, near the valve
stem. Then press the button to
activate the TPMS sensor.
A horn chirp confirms that the
sensor identification code has
been matched to this tire and
wheel position.
8. Proceed to the passenger side front tire, and repeat the
procedure in Step 7.
9. Proceed to the passenger side rear tire, and repeat the
procedure in Step 7.
10. Proceed to the driver side rear tire, and repeat the procedure
in Step 7. The horn sounds two
times to indicate the sensor
identification code has been
matched to the driver side rear
tire, and the TPMS sensor
matching process is no longer
active. The TIRE LEARNING
ACTIVE message on the DIC
display screen goes off. 11. Turn the ignition switch to
LOCK/OFF.
12. Set all four tires to the recommended air pressure
level as indicated on the Tire
and Loading Information label.
Tire Inspection
We recommend that the tires,
including the spare tire, if the
vehicle has one, be inspected
for signs of wear or damage at
least once a month.
Replace the tire if:
.The indicators at three or
more places around the tire
can be seen.
.There is cord or fabric
showing through the tire's
rubber.
.The tread or sidewall is
cracked, cut, or snagged
deep enough to show cord or
fabric.
Page 446 of 542
Black plate (76,1)Chevrolet Silverado Owner Manual (GMNA-Localizing-U.S./Canada/Mexico-
5853506) - 2014 - CRC 3rd Edition - 8/29/13
10-76 Vehicle Care
{Caution
If the vehicle does not have dual
wheels and has a tire size other
than P265/65R18, P275/55R20,
LT265/70R17, LT265/70R18,
LT265/60R20, P285/50R20,
P285/45R22, or 285/45R22, use
tire chains only where legal and
only when necessary. Use chains
that are the proper size for the
tires. Install them on the tires of
the rear axle. Do not use chains
on the tires of the front axle.
Tighten them as tightly as
possible with the ends securely
fastened. Drive slowly and follow
the chain manufacturer's
instructions. If the chains contact
the vehicle, stop and retighten
them. If the contact continues,
slow down until it stops. Driving
too fast or spinning the wheels
with chains on will damage the
vehicle.
If a Tire Goes Flat
It is unusual for a tire to blowout
while driving, especially if the tires
are maintained properly. If air goes
out of a tire, it is much more likely to
leak out slowly. But if there ever is a
blowout, here are a few tips about
what to expect and what to do:
If a front tire fails, the flat tire
creates a drag that pulls the vehicle
toward that side. Take your foot off
the accelerator pedal and grip the
steering wheel firmly. Steer to
maintain lane position, and then
gently brake to a stop, well off the
road, if possible.
A rear blowout, particularly on a
curve, acts much like a skid and
may require the same correction as
used in a skid. Stop pressing the
accelerator pedal and steer to
straighten the vehicle. It may be
very bumpy and noisy. Gently brake
to a stop, well off the road,
if possible.{Warning
Driving on a flat tire will cause
permanent damage to the tire.
Re-inflating a tire after it has been
driven on while severely
underinflated or flat may cause a
blowout and a serious crash.
Never attempt to re-inflate a tire
that has been driven on while
severely underinflated or flat.
Have your dealer or an authorized
tire service center repair or
replace the flat tire as soon as
possible.
{Warning
Lifting a vehicle and getting under
it to do maintenance or repairs is
dangerous without the
appropriate safety equipment and
training. If a jack is provided with
the vehicle, it is designed only for(Continued)