2014 CHEVROLET SILVERADO 1500 towing
[x] Cancel search: towingPage 308 of 542
Black plate (42,1)Chevrolet Silverado Owner Manual (GMNA-Localizing-U.S./Canada/Mexico-
5853506) - 2014 - CRC 3rd Edition - 8/29/13
9-42 Driving and Operating
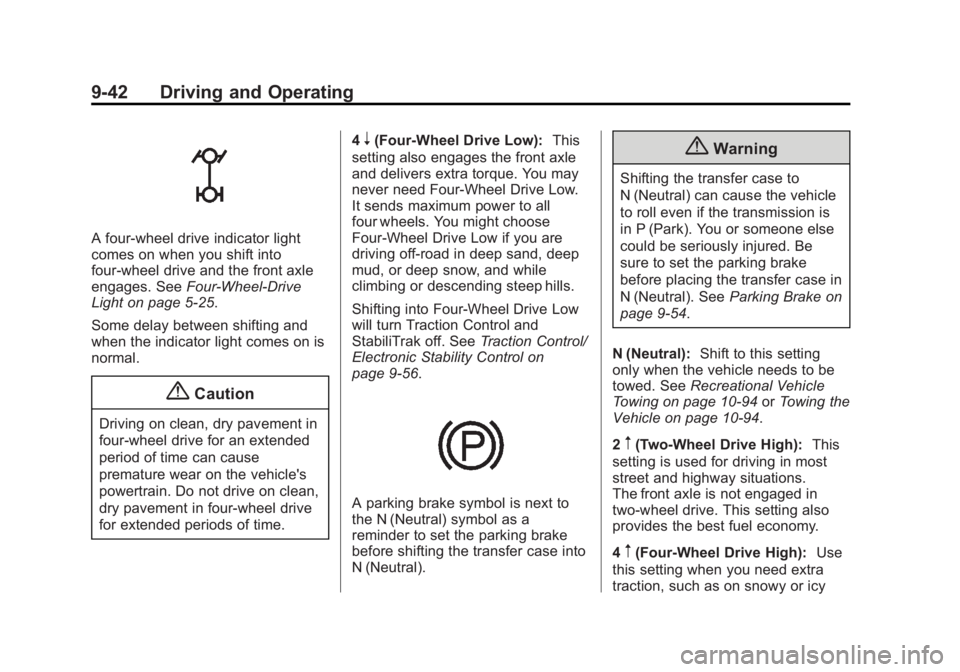
A four-wheel drive indicator light
comes on when you shift into
four-wheel drive and the front axle
engages. SeeFour-Wheel-Drive
Light on page 5-25.
Some delay between shifting and
when the indicator light comes on is
normal.
{Caution
Driving on clean, dry pavement in
four-wheel drive for an extended
period of time can cause
premature wear on the vehicle's
powertrain. Do not drive on clean,
dry pavement in four-wheel drive
for extended periods of time. 4
n(Four-Wheel Drive Low):
This
setting also engages the front axle
and delivers extra torque. You may
never need Four-Wheel Drive Low.
It sends maximum power to all
four wheels. You might choose
Four-Wheel Drive Low if you are
driving off-road in deep sand, deep
mud, or deep snow, and while
climbing or descending steep hills.
Shifting into Four-Wheel Drive Low
will turn Traction Control and
StabiliTrak off. See Traction Control/
Electronic Stability Control on
page 9-56.
A parking brake symbol is next to
the N (Neutral) symbol as a
reminder to set the parking brake
before shifting the transfer case into
N (Neutral).
{Warning
Shifting the transfer case to
N (Neutral) can cause the vehicle
to roll even if the transmission is
in P (Park). You or someone else
could be seriously injured. Be
sure to set the parking brake
before placing the transfer case in
N (Neutral). See Parking Brake on
page 9-54.
N (Neutral): Shift to this setting
only when the vehicle needs to be
towed. See Recreational Vehicle
Towing on page 10-94 orTowing the
Vehicle on page 10-94.
2
m(Two-Wheel Drive High): This
setting is used for driving in most
street and highway situations.
The front axle is not engaged in
two-wheel drive. This setting also
provides the best fuel economy.
4
m(Four-Wheel Drive High): Use
this setting when you need extra
traction, such as on snowy or icy
Page 312 of 542
Black plate (46,1)Chevrolet Silverado Owner Manual (GMNA-Localizing-U.S./Canada/Mexico-
5853506) - 2014 - CRC 3rd Edition - 8/28/13
9-46 Driving and Operating
{Warning
Shifting the transfer case to
N (Neutral) can cause the vehicle
to roll even if the transmission is
in P (Park). You or someone else
could be seriously injured. Be
sure to set the parking brake
before placing the transfer case in
N (Neutral). SeeParking Brake on
page 9-54.
N (Neutral): Shift the vehicle's
transfer case to N (Neutral) only
when towing the vehicle. See
Recreational Vehicle Towing on
page 10-94 orTowing the Vehicle
on page 10-94.
If the SERVICE 4WD message
stays on, take the vehicle to your
dealer for service. See “SERVICE
4WD” under Transmission
Messages on page 5-41. Shifting Into Four-Wheel
Drive High
Turn the knob to the Four-Wheel
Drive High position. This can be
done at any speed up to 121 km/h
(75 mph), except when shifting from
Four-Wheel Drive Low. The
indicator light will flash while
shifting. It will remain on when the
shift is completed.
Shifting Into Two-Wheel
Drive High
Turn the knob to the Two-Wheel
Drive High position. This can be
done at any speed, except when
shifting from Four-Wheel Drive Low.
See
“Shifting Out of Four-Wheel
Drive Low” later in this section.
Shifting Into Four-Wheel
Drive Low
When Four-Wheel Drive Low is
engaged, vehicle speed should be
kept below 72 km/h (45 mph).
Extended high-speed operation in
Four-Wheel Drive Low may damage
or shorten the life of the drivetrain. To shift to the Four-Wheel Drive
Low position, the ignition must be in
ON/RUN and the vehicle must be
stopped or moving less than 5 km/h
(3 mph) with the transmission in
N (Neutral). The preferred method
for shifting into Four-Wheel Drive
Low is to have the vehicle moving
1.6 to 3.2 km/h (1 to 2 mph). Turn the
knob to the Four-Wheel Drive Low
position. You must wait for the
Four-Wheel Drive Low indicator light
to stop flashing before shifting the
transmission into gear.
{Caution
Shifting the transmission into gear
before the requested mode
indicator light has stopped
flashing could damage the
transfer case. To help avoid
damaging the vehicle, always wait
for the mode indicator lights to
stop flashing before shifting the
transmission into gear.
Page 316 of 542
Black plate (50,1)Chevrolet Silverado Owner Manual (GMNA-Localizing-U.S./Canada/Mexico-
5853506) - 2014 - CRC 3rd Edition - 8/28/13
9-50 Driving and Operating
axle to help drive the vehicle. This is
the best setting to use when
plowing snow.
4
n(Four-Wheel Drive Low):This
setting also engages the front axle
and delivers extra torque. You may
never need this setting. It sends
maximum power to all four wheels.
You might choose Four-Wheel Drive
Low if you are driving off-road in
deep sand, deep mud, or deep
snow, and while climbing or
descending steep hills.
Shifting into Four-Wheel Drive Low
will turn Traction Control and
StabiliTrak off. See Traction Control/
Electronic Stability Control on
page 9-56.
{Warning
Shifting the transfer case to
N (Neutral) can cause the vehicle
to roll even if the transmission is
in P (Park). You or someone else
(Continued)
Warning (Continued)
could be seriously injured. Be
sure to set the parking brake
before placing the transfer case in
N (Neutral). SeeParking Brake on
page 9-54.
N (Neutral): Shift the vehicle's
transfer case to N (Neutral) only
when towing the vehicle. See
Recreational Vehicle Towing on
page 10-94 orTowing the Vehicle
on page 10-94.
If the SERVICE 4WD message
stays on, take the vehicle to your
dealer for service. See “SERVICE
4WD” under Transmission
Messages on page 5-41.
Shifting Into Four-Wheel Drive
High or AUTO (Automatic
Four-Wheel Drive)
Turn the knob to the Four-Wheel
Drive High or AUTO position. This
can be done at any speed, except
when shifting from Four-Wheel Drive Low. The indicator light will
flash while shifting. It will remain on
when the shift is completed.
Shifting Into Two-Wheel
Drive High
Turn the knob to the Two-Wheel
Drive High position. This can be
done at any speed, except when
shifting from Four-Wheel Drive Low.
The indicator light will flash while
shifting. It will remain on when the
shift is completed.
Shifting Into Four-Wheel
Drive Low
When Four-Wheel Drive Low is
engaged, vehicle speed should be
kept below 72 km/h (45 mph).
Extended high-speed operation in
Four-Wheel Drive Low may damage
or shorten the life of the drivetrain.
To shift to the Four-Wheel Drive
Low position, the ignition must be in
ON/RUN and the vehicle must be
stopped or moving less than 5 km/h
(3 mph) with the transmission in
N (Neutral). The preferred method
Page 320 of 542
Black plate (54,1)Chevrolet Silverado Owner Manual (GMNA-Localizing-U.S./Canada/Mexico-
5853506) - 2014 - CRC 3rd Edition - 8/28/13
9-54 Driving and Operating
suddenly slows or stops. Always
leave enough room up ahead to
stop, even with ABS.
Using ABS
Do not pump the brakes. Just hold
the brake pedal down firmly and let
ABS work. You might hear the ABS
pump or motor operating and feel
the brake pedal pulsate, but this is
normal.
Braking in Emergencies
ABS allows you to steer and brake
at the same time. In many
emergencies, steering can help
more than even the very best
braking.
Parking Brake
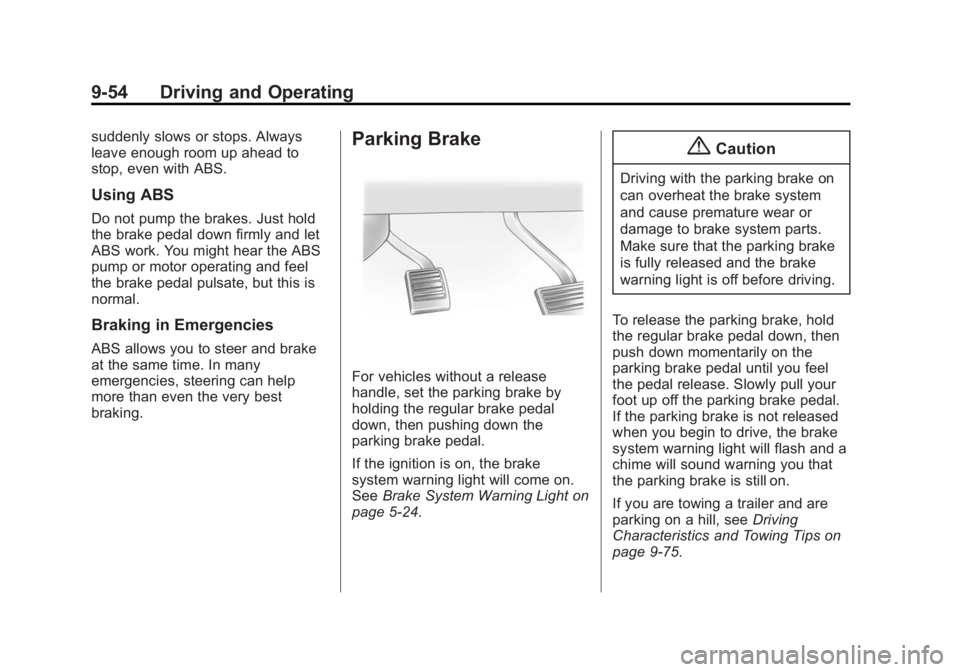
For vehicles without a release
handle, set the parking brake by
holding the regular brake pedal
down, then pushing down the
parking brake pedal.
If the ignition is on, the brake
system warning light will come on.
SeeBrake System Warning Light on
page 5-24.
{Caution
Driving with the parking brake on
can overheat the brake system
and cause premature wear or
damage to brake system parts.
Make sure that the parking brake
is fully released and the brake
warning light is off before driving.
To release the parking brake, hold
the regular brake pedal down, then
push down momentarily on the
parking brake pedal until you feel
the pedal release. Slowly pull your
foot up off the parking brake pedal.
If the parking brake is not released
when you begin to drive, the brake
system warning light will flash and a
chime will sound warning you that
the parking brake is still on.
If you are towing a trailer and are
parking on a hill, see Driving
Characteristics and Towing Tips on
page 9-75.
Page 321 of 542
Black plate (55,1)Chevrolet Silverado Owner Manual (GMNA-Localizing-U.S./Canada/Mexico-
5853506) - 2014 - CRC 3rd Edition - 8/28/13
Driving and Operating 9-55
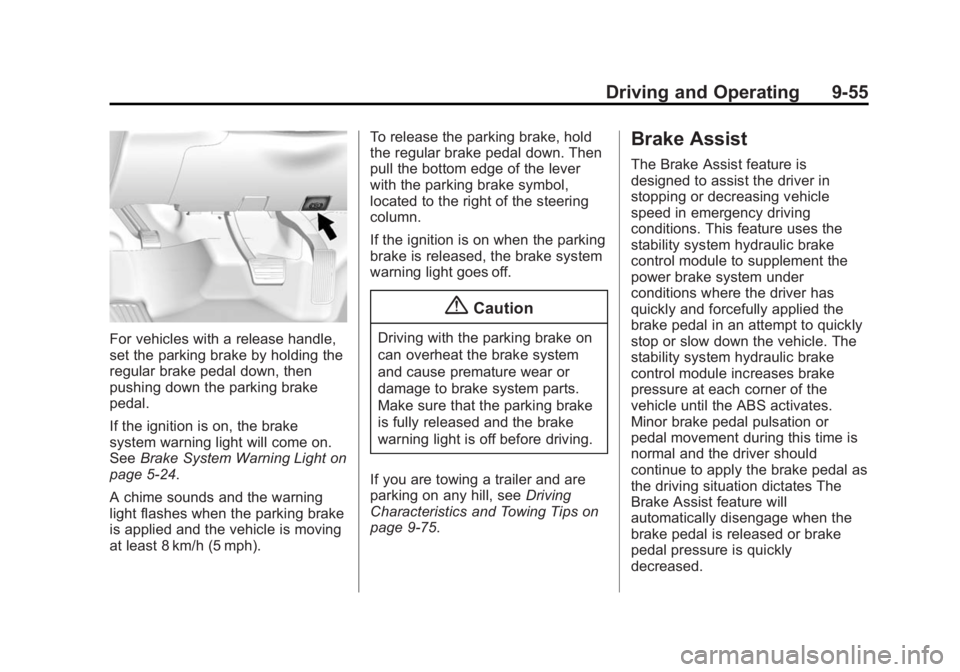
For vehicles with a release handle,
set the parking brake by holding the
regular brake pedal down, then
pushing down the parking brake
pedal.
If the ignition is on, the brake
system warning light will come on.
SeeBrake System Warning Light on
page 5-24.
A chime sounds and the warning
light flashes when the parking brake
is applied and the vehicle is moving
at least 8 km/h (5 mph). To release the parking brake, hold
the regular brake pedal down. Then
pull the bottom edge of the lever
with the parking brake symbol,
located to the right of the steering
column.
If the ignition is on when the parking
brake is released, the brake system
warning light goes off.
{Caution
Driving with the parking brake on
can overheat the brake system
and cause premature wear or
damage to brake system parts.
Make sure that the parking brake
is fully released and the brake
warning light is off before driving.
If you are towing a trailer and are
parking on any hill, see Driving
Characteristics and Towing Tips on
page 9-75.
Brake Assist
The Brake Assist feature is
designed to assist the driver in
stopping or decreasing vehicle
speed in emergency driving
conditions. This feature uses the
stability system hydraulic brake
control module to supplement the
power brake system under
conditions where the driver has
quickly and forcefully applied the
brake pedal in an attempt to quickly
stop or slow down the vehicle. The
stability system hydraulic brake
control module increases brake
pressure at each corner of the
vehicle until the ABS activates.
Minor brake pedal pulsation or
pedal movement during this time is
normal and the driver should
continue to apply the brake pedal as
the driving situation dictates The
Brake Assist feature will
automatically disengage when the
brake pedal is released or brake
pedal pressure is quickly
decreased.
Page 331 of 542
Black plate (65,1)Chevrolet Silverado Owner Manual (GMNA-Localizing-U.S./Canada/Mexico-
5853506) - 2014 - CRC 3rd Edition - 8/28/13
Driving and Operating 9-65
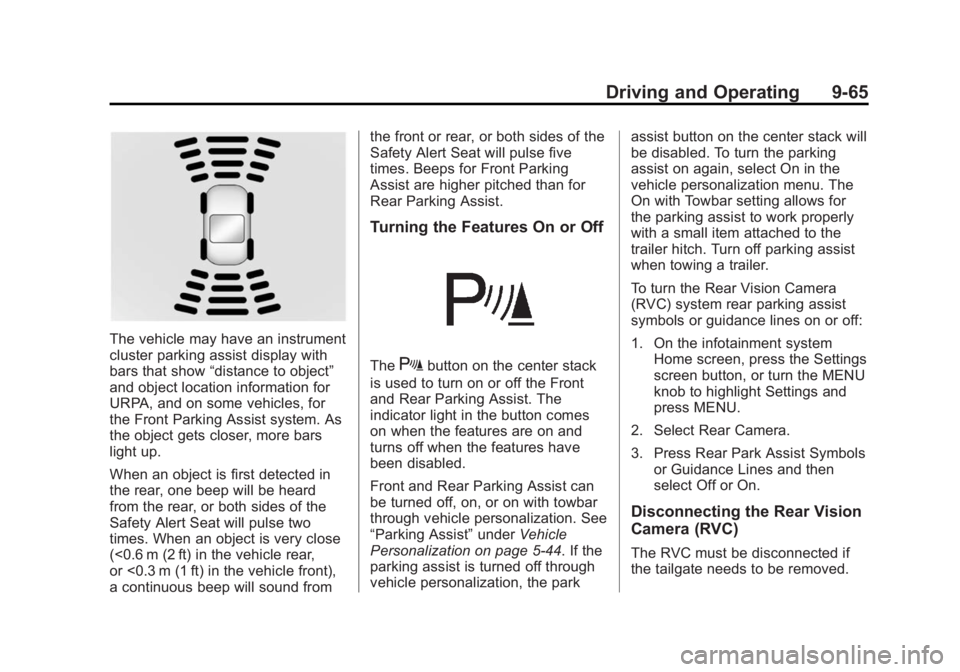
The vehicle may have an instrument
cluster parking assist display with
bars that show“distance to object”
and object location information for
URPA, and on some vehicles, for
the Front Parking Assist system. As
the object gets closer, more bars
light up.
When an object is first detected in
the rear, one beep will be heard
from the rear, or both sides of the
Safety Alert Seat will pulse two
times. When an object is very close
(<0.6 m (2 ft) in the vehicle rear,
or <0.3 m (1 ft) in the vehicle front),
a continuous beep will sound from the front or rear, or both sides of the
Safety Alert Seat will pulse five
times. Beeps for Front Parking
Assist are higher pitched than for
Rear Parking Assist.
Turning the Features On or Off
TheXbutton on the center stack
is used to turn on or off the Front
and Rear Parking Assist. The
indicator light in the button comes
on when the features are on and
turns off when the features have
been disabled.
Front and Rear Parking Assist can
be turned off, on, or on with towbar
through vehicle personalization. See
“Parking Assist” underVehicle
Personalization on page 5-44. If the
parking assist is turned off through
vehicle personalization, the park assist button on the center stack will
be disabled. To turn the parking
assist on again, select On in the
vehicle personalization menu. The
On with Towbar setting allows for
the parking assist to work properly
with a small item attached to the
trailer hitch. Turn off parking assist
when towing a trailer.
To turn the Rear Vision Camera
(RVC) system rear parking assist
symbols or guidance lines on or off:
1. On the infotainment system
Home screen, press the Settings
screen button, or turn the MENU
knob to highlight Settings and
press MENU.
2. Select Rear Camera.
3. Press Rear Park Assist Symbols or Guidance Lines and then
select Off or On.
Disconnecting the Rear Vision
Camera (RVC)
The RVC must be disconnected if
the tailgate needs to be removed.
Page 341 of 542
Black plate (75,1)Chevrolet Silverado Owner Manual (GMNA-Localizing-U.S./Canada/Mexico-
5853506) - 2014 - CRC 3rd Edition - 8/28/13
Driving and Operating 9-75
Filling a Portable Fuel
Container
{Warning
Filling a portable fuel container
while it is in the vehicle can cause
fuel vapors that can ignite either
by static electricity or other
means. You or others could be
badly burned and the vehicle
could be damaged. Always:
.Use approved fuel
containers.
.Remove the container from
the vehicle, trunk, or pickup
bed before filling.
.Place the container on the
ground.
.Place the nozzle inside the fill
opening of the container
before dispensing fuel, and(Continued)
Warning (Continued)
keep it in contact with the fill
opening until filling is
complete.
.Fill the container no more
than 95% full to allow for
expansion.
.Do not smoke, light matches,
or use lighters while
pumping fuel.
.Avoid using cell phones or
other electronic devices.
Trailer Towing
General Towing
Information
Only use towing equipment that has
been designed for the vehicle.
Contact your dealer or trailering
dealer for assistance with preparing
the vehicle for towing a trailer. Read
the entire section before towing a
trailer.
For towing a disabled vehicle, see
Towing the Vehicle on page 10-94.
For towing the vehicle behind
another vehicle such as a motor
home, seeRecreational Vehicle
Towing on page 10-94.
Driving Characteristics
and Towing Tips
Driving with a Trailer
When towing a trailer:
.Become familiar with the state
and local laws that apply to
trailer towing.
Page 342 of 542
Black plate (76,1)Chevrolet Silverado Owner Manual (GMNA-Localizing-U.S./Canada/Mexico-
5853506) - 2014 - CRC 3rd Edition - 8/28/13
9-76 Driving and Operating
.Do not tow a trailer during the
first 800 km (500 mi) to prevent
damage to the engine, axle,
or other parts.
.Then during the first 800 km
(500 mi) of trailer towing, do not
drive over 80 km/h (50 mph) and
do not make starts at full throttle.
.Vehicles can tow in D (Drive).
Shift the transmission to a lower
gear if the transmission shifts
too often under heavy loads and/
or hilly conditions.
.Turn off Park Assist when
towing.
{Warning
When towing a trailer, exhaust
gases may collect at the rear of
the vehicle and enter if the
liftgate, trunk/hatch, or rear-most
window is open.
When towing a trailer:(Continued)
Warning (Continued)
.Do not drive with the liftgate,
trunk/hatch, or rear-most
window open.
.Fully open the air outlets on
or under the instrument
panel.
.Also adjust the climate
control system to a setting
that brings in only outside air.
See“Climate Control
Systems” in the Index.
For more information about
Carbon Monoxide, see Engine
Exhaust on page 9-33.
Towing a trailer requires a certain
amount of experience. The
combination you are driving is
longer and not as responsive as the
vehicle itself. Get acquainted with
the handling and braking of the rig
before setting out for the open road. Before starting, check all trailer hitch
parts and attachments, safety
chains, electrical connectors, lamps,
tires, and mirrors. If the trailer has
electric brakes, start the
combination moving and then apply
the trailer brake controller by hand
to be sure the brakes work.
During the trip, check occasionally
to be sure that the load is secure
and the lamps and any trailer
brakes still work.
Following Distance
Stay at least twice as far behind the
vehicle ahead as you would when
driving the vehicle without a trailer.
This can help to avoid heavy
braking and sudden turns.
Passing
More passing distance is needed
when towing a trailer. The
combination will not accelerate as
quickly and is longer so it is
necessary to go much farther
beyond the passed vehicle before
returning to the lane.