Page 57 of 98
Chevrolet Orlando Infotainment System (GMNA-Localizing-Canada-
6081467) - 2014 - CRC - 6/13/13
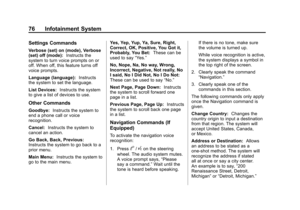
Infotainment System 57
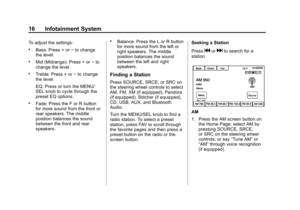
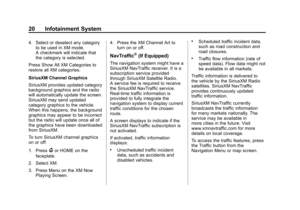
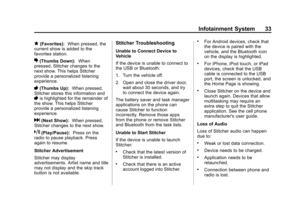
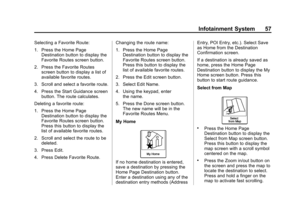
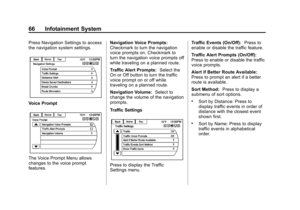
Selecting a Favorite Route:
1. Press the Home PageDestination bu")
Black plate (57,1)Chevrolet Orlando Infotainment System (GMNA-Localizing-Canada-
6081467) - 2014 - CRC - 6/13/13
Infotainment System 57
Selecting a Favorite Route:
1. Press the Home PageDestination button to display the
Favorite Routes screen button.
2. Press the Favorite Routes screen button to display a list of
available favorite routes.
3. Scroll and select a favorite route.
4. Press the Start Guidance screen button. The route calculates.
Deleting a favorite route:
1. Press the Home Page Destination button to display the
Favorite Routes screen button.
Press this button to display the
list of available favorite routes.
2. Scroll and select the route to be deleted.
3. Press Edit.
4. Press Delete Favorite Route. Changing the route name:
1. Press the Home Page
Destination button to display the
Favorite Routes screen button.
Press this button to display the
list of available favorite routes.
2. Press the Edit screen button.
3. Select Edit Name.
4. Using the keypad, enter the name.
5. Press the Done screen button. The new name will be in the
Favorite Routes Menu.
My Home
If no home destination is entered,
save a destination by pressing the
Home Page Destination button.
Enter a destination using any of the
destination entry methods (Address Entry, POI Entry, etc.). Select Save
as Home from the Destination
Confirmation screen.
If a destination is already saved as
home, press the Home Page
Destination button to display the My
Home screen button. Press this
button to start route guidance.
Select from Map
.Press the Home Page
Destination button to display the
Select from Map screen button.
Press this button to display the
map screen with a scroll symbol
centered on the map.
.Press the Zoom in/out button on
the screen and press the map to
locate the destination to select.
Press and hold a finger on the
map to activate fast scrolling.
Page 58 of 98
Black plate (58,1)Chevrolet Orlando Infotainment System (GMNA-Localizing-Canada-
6081467) - 2014 - CRC - 6/13/13
58 Infotainment System
.Press the Go button on the
bottom of the screen to display
the Destination Confirmation
screen.
.Press the Start Guidance screen
button. The route calculates.
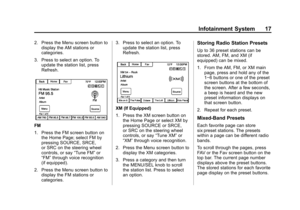
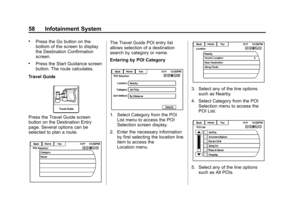
Travel Guide
Press the Travel Guide screen
button on the Destination Entry
page. Several options can be
selected to plan a route.
The Travel Guide POI entry list
allows selection of a destination
search by category or name.
Entering by POI Category
1. Select Category from the POI List menu to access the POI
Selection screen display.
2. Enter the necessary information by first selecting the location line
item to access the
Location menu.
3. Select any of the line optionssuch as Nearby.
4. Select Category from the POI Selection menu to access the
POI List.
5. Select any of the line optionssuch as All POIs.
Page 59 of 98
Chevrolet Orlando Infotainment System (GMNA-Localizing-Canada-
6081467) - 2014 - CRC - 6/13/13
Infotainment System 59
6. Select Sort Method from the POISelection menu to access the
S")
Black plate (59,1)Chevrolet Orlando Infotainment System (GMNA-Localizing-Canada-
6081467) - 2014 - CRC - 6/13/13
Infotainment System 59
6. Select Sort Method from the POISelection menu to access the
Search Order menu. Select one
of the two options available.
These options are By Distance
or By Name.
7. Select Search.
8. Select the desired POI.
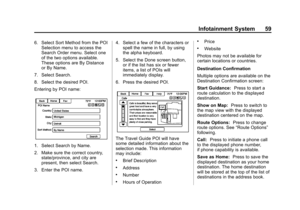
Entering by POI name:
1. Select Search by Name.
2. Make sure the correct country, state/province, and city are
present, then select Search.
3. Enter the POI name. 4. Select a few of the characters or
spell the name in full, by using
the alpha keyboard.
5. Select the Done screen button, or if the list has six or fewer
items, a list of POIs will
immediately display.
6. Press the desired POI.
The Travel Guide POI will have
some detailed information about the
selection made. This information
may include:
.Brief Description
.Address
.Number
.Hours of Operation
.Price
.Website
Photos may not be available for
certain locations or countries.
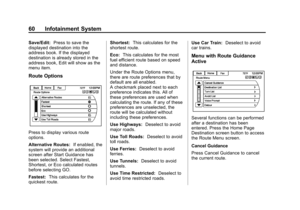
Destination Confirmation
Multiple options are available on the
Destination Confirmation screen:
Start Guidance: Press to start a
route calculation to the displayed
destination.
Show on Map: Press to switch to
the map view with the displayed
destination centered on the map.
Route Options: Press to change
route options. See “Route Options”
following.
Call: Press to initiate a phone call
to the displayed phone number,
if phone capability is available.
Save as Home: Press to save the
displayed destination as your home
destination. The home destination
will be stored at the top of the list of
destinations in the address book.
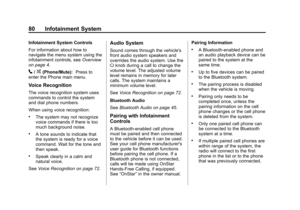
Page 60 of 98
Chevrolet Orlando Infotainment System (GMNA-Localizing-Canada-
6081467) - 2014 - CRC - 6/13/13
60 Infotainment System
Save/Edit:Press to save the
displayed destination into the
addre")
Black plate (60,1)Chevrolet Orlando Infotainment System (GMNA-Localizing-Canada-
6081467) - 2014 - CRC - 6/13/13
60 Infotainment System
Save/Edit:Press to save the
displayed destination into the
address book. If the displayed
destination is already stored in the
address book, Edit will show as the
menu item.
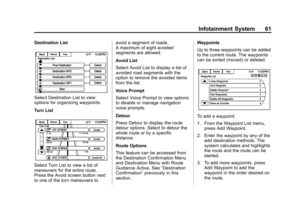
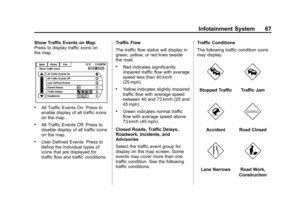
Route Options
Press to display various route
options.
Alternative Routes: If enabled, the
system will provide an additional
screen after Start Guidance has
been selected. Select Fastest,
Shortest, or Eco calculated routes
before selecting GO.
Fastest: This calculates for the
quickest route. Shortest:
This calculates for the
shortest route.
Eco: This calculates for the most
fuel efficient route based on speed
and distance.
Under the Route Options menu,
there are route preferences that by
default are all enabled.
A checkmark placed next to each
preference indicates this. All of
these preferences are used when
calculating the route. If any of these
preferences are unselected, the
route will be calculated without
including these preferences.
Use Highways: Deselect to avoid
major roads.
Use Toll Roads: Deselect to avoid
toll roads.
Use Ferries: Deselect to avoid
ferries.
Use Tunnels: Deselect to avoid
tunnels.
Use Time Restricted: Deselect to
avoid time restricted roads. Use Car Train:
Deselect to avoid
car trains.
Menu with Route Guidance
Active
Several functions can be performed
after a destination has been
entered. Press the Home Page
Destination screen button to access
the Route Menu screen.
Cancel Guidance
Press Cancel Guidance to cancel
the current route.
Page 61 of 98
Chevrolet Orlando Infotainment System (GMNA-Localizing-Canada-
6081467) - 2014 - CRC - 6/13/13
Infotainment System 61
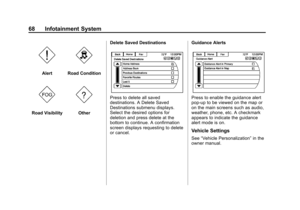
Destination List
Select Destination List to view
options for org")
Black plate (61,1)Chevrolet Orlando Infotainment System (GMNA-Localizing-Canada-
6081467) - 2014 - CRC - 6/13/13
Infotainment System 61
Destination List
Select Destination List to view
options for organizing waypoints.
Turn List
Select Turn List to view a list of
maneuvers for the entire route.
Press the Avoid screen button next
to one of the turn maneuvers toavoid a segment of roads.
A maximum of eight avoided
segments are allowed.
Avoid List
Select Avoid List to display a list of
avoided road segments with the
option to remove the avoided items
from the list.
Voice Prompt
Select Voice Prompt to view options
to disable or manage navigation
voice prompts.
Detour
Press Detour to display the route
detour options. Select to detour the
whole route or by a specific
distance.
Route Options
This feature can be accessed from
the Destination Confirmation Menu
and Destination Menu with Route
Guidance Active. See
“Destination
Confirmation” previously in this
section. Waypoints
Up to three waypoints can be added
to the current route. The waypoints
can be sorted (moved) or deleted.
To add a waypoint:
1. From the Waypoint List menu,
press Add Waypoint.
2. Enter the waypoint by any of the add destination methods. The
system calculates and highlights
the route and the route can be
started.
3. To add more waypoints, press Add Waypoint to add the
waypoint in the order desired on
the route.
Page 62 of 98
Chevrolet Orlando Infotainment System (GMNA-Localizing-Canada-
6081467) - 2014 - CRC - 6/13/13
62 Infotainment System
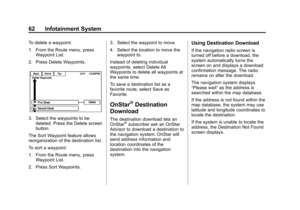
To delete a waypoint:
1. From the Route menu, pressWaypoint List")
Black plate (62,1)Chevrolet Orlando Infotainment System (GMNA-Localizing-Canada-
6081467) - 2014 - CRC - 6/13/13
62 Infotainment System
To delete a waypoint:
1. From the Route menu, pressWaypoint List.
2. Press Delete Waypoints.
3. Select the waypoints to be deleted. Press the Delete screen
button.
The Sort Waypoint feature allows
reorganization of the destination list.
To sort a waypoint:
1. From the Route menu, press Waypoint List.
2. Press Sort Waypoints. 3. Select the waypoint to move.
4. Select the location to move the
waypoint to.
Instead of deleting individual
waypoints, select Delete All
Waypoints to delete all waypoints at
the same time.
To save a destination list as a
favorite route, select Save as
Favorite.
OnStar®Destination
Download
The destination download lets an
OnStar®subscriber ask an OnStar
Advisor to download a destination to
the navigation system. OnStar will
send address information and
location coordinates of the
destination into the navigation
system.
Using Destination Download
If the navigation radio screen is
turned off before a download, the
system automatically turns the
screen on and displays a download
confirmation message. The radio
remains on after the download.
The navigation system displays
“Please wait” as the address is
searched within the map database.
If the address is not found within the
map database, the system may use
latitude and longitude coordinates to
locate the destination.
If the system is unable to locate the
address, the Destination Not Found
screen displays.
Page 63 of 98
Chevrolet Orlando Infotainment System (GMNA-Localizing-Canada-
6081467) - 2014 - CRC - 6/13/13
Infotainment System 63
Route Guidance Not Active
If an OnStar destination is
downloaded")
Black plate (63,1)Chevrolet Orlando Infotainment System (GMNA-Localizing-Canada-
6081467) - 2014 - CRC - 6/13/13
Infotainment System 63
Route Guidance Not Active
If an OnStar destination is
downloaded while route guidance is
not active, the navigation system
displays a pop-up screen with the
following screen functions:
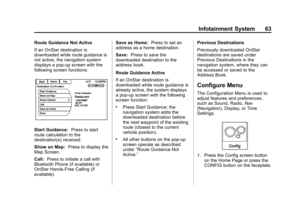
Start Guidance:Press to start
route calculation to the
destination(s) received.
Show on Map: Press to display the
Map Screen.
Call: Press to initiate a call with
Bluetooth Phone (if available) or
OnStar Hands-Free Calling (if
available). Save as Home:
Press to set an
address as a home destination.
Save: Press to save the
downloaded destination to the
address book.
Route Guidance Active
If an OnStar destination is
downloaded while route guidance is
already active, the system displays
a pop-up screen with the following
screen function:
.Press Start Guidance; the
navigation system adds the
downloaded destination before
the next waypoint of the existing
route (closest to the current
vehicle position).
.All other buttons on the pop-up
screen operate as described
under “Route Guidance Not
Active.” Previous Destinations
Previously downloaded OnStar
destinations are saved under
Previous Destinations in the
navigation system, where they can
be accessed or saved to the
Address Book.
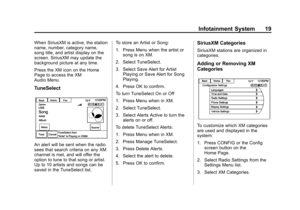
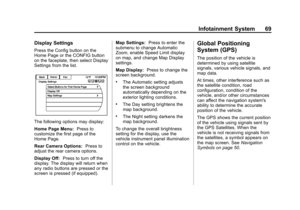
Configure Menu
The Configuration Menu is used to
adjust features and preferences,
such as Sound, Radio, Nav
(Navigation), Display, or Time
Settings.
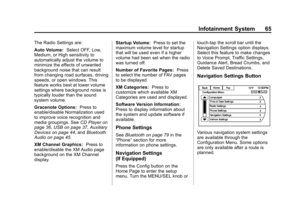
1. Press the Config screen button
on the Home Page or press the
CONFIG button on the faceplate.
Page 64 of 98
Chevrolet Orlando Infotainment System (GMNA-Localizing-Canada-
6081467) - 2014 - CRC - 6/13/13
64 Infotainment System
2. Press the scroll bar until thedesired option displays. Select")
Black plate (64,1)Chevrolet Orlando Infotainment System (GMNA-Localizing-Canada-
6081467) - 2014 - CRC - 6/13/13
64 Infotainment System
2. Press the scroll bar until thedesired option displays. Select
the desired settings to change.
See the owner manual for
information on adjusting most
vehicle settings. See “Navigation
Settings” and“Navigation
Settings Button” later in this
section.
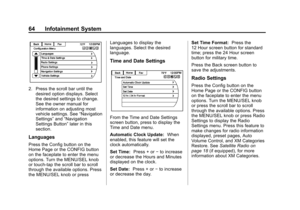
Languages
Press the Config button on the
Home Page or the CONFIG button
on the faceplate to enter the menu
options. Turn the MENU/SEL knob
or touch-tap the scroll bar to scroll
through the available options. Press
the MENU/SEL knob or press Languages to display the
languages. Select the desired
language.
Time and Date Settings
From the Time and Date Settings
screen button, press to display the
Time and Date menu.
Automatic Clock Update:
When
enabled, this feature will set the
clock automatically.
Set Time: Press + or−to increase
or decrease the Hours and Minutes
displayed on the clock.
Set Date: Press + or−to increase
or decrease the day. Set Time Format:
Press the
12 Hour screen button for standard
time; press the 24 Hour screen
button for military time.
Press the Back screen button to
save the adjustments.
Radio Settings
Press the Config button on the
Home Page or the CONFIG button
on the faceplate to enter the menu
options. Turn the MENU/SEL knob
or press the scroll bar to scroll
through the available options. Press
the MENU/SEL knob or press Radio
Settings to display the Radio
Settings menu. Press this feature to
make changes for radio information
displayed, preset pages, Auto
Volume Control, and XM Categories
Restore. See Satellite Radio on
page 18 (if equipped), for more
information about XM Categories.


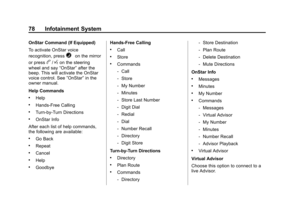


Chevrolet Orlando Infotainment System (GMNA-Localizing-Canada-
6081467) - 2014 - CRC - 6/13/13
58 Infotainment System
.Press the Go button on the
bottom of the screen to display
the")