2014 CHEVROLET EXPRESS PASSANGER transmission
[x] Cancel search: transmissionPage 262 of 406

Black plate (12,1)Chevrolet Express Owner Manual (GMNA-Localizing-U.S./Canada/Mexico-
6014662) - 2014 - crc - 8/26/13
10-12 Vehicle Care
Checking the Fluid Level
Prepare the vehicle as follows:
1. Park the vehicle on a levelplace. Keep the engine running.
2. With the parking brake applied, place the shift lever in P (Park).
3. With your foot on the brake pedal, move the shift lever
through each gear range,
pausing for about three seconds
in each range. Then, position the
shift lever in P (Park).
4. Let the engine run at idle for three minutes or more.
Then, without shutting off the
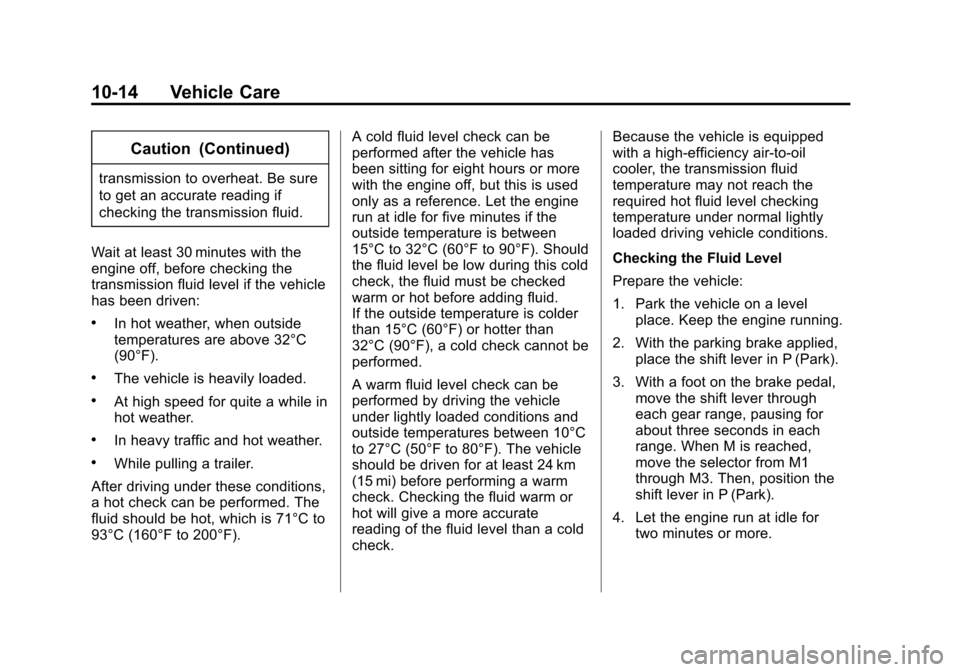
engine, use the steps that follow.The transmission dipstick is near
the center of the engine
compartment and will be labeled
with the graphic shown.
See Engine Compartment Overview
on page 10-6.
1. Flip the handle up, pull out the
dipstick, and wipe it with a clean
rag or paper towel.
2. Push it back in all the way, wait three seconds, then pull it back
out again.
3. Check both sides of the dipstick,and read the lower level. The
fluid level must be in the COLD
area for a cold check or in the
HOT or cross-hatched area for a
hot check. Be sure to keep the
dipstick pointed down to get an
accurate reading. 4. If the fluid level is in the
acceptable range, push the
dipstick back in all the way; then
flip the handle down to lock the
dipstick in place.
How to Add Automatic
Transmission Fluid
Refer to Recommended Fluids and
Lubricants on page 11-12 to
determine what kind of transmission
fluid to use.
Using a funnel, add fluid down the
transmission dipstick tube only after
checking the transmission fluid
while it is hot. A cold check is used
only as a reference. If the fluid level
is low, add only enough of the
proper fluid to bring the level up to
the HOT area for a hot check.
It does not take much fluid,
generally less than 0.5 L (1 pt). Do
not overfill.
Page 263 of 406

Black plate (13,1)Chevrolet Express Owner Manual (GMNA-Localizing-U.S./Canada/Mexico-
6014662) - 2014 - crc - 8/26/13
Vehicle Care 10-13
{Caution
Use of the incorrect automatic
transmission fluid may damage
the vehicle, and the damage may
not be covered by the vehicle
warranty. Always use the
automatic transmission fluid listed
inRecommended Fluids and
Lubricants on page 11-12.
.After adding fluid, recheck the
fluid level as described under
“How to Check Automatic
Transmission Fluid,” earlier in
this section.
.When the correct fluid level is
obtained, push the dipstick back
in all the way; then flip the
handle down to lock the dipstick
in place.
Automatic Transmission
Fluid (6-Speed
Transmission)
When to Check and Change
Automatic Transmission Fluid
It is usually not necessary to check
the transmission fluid level. The only
reason for fluid loss is a
transmission leak or overheated
transmission. If a small leak is
suspected, use the following
procedures to check the fluid level.
However, if there is a large leak, it
may be necessary to have the
vehicle towed to a dealer and have
it repaired before driving the vehicle
further.
Change the fluid and filter at the
intervals listed in Maintenance
Schedule on page 11-3, and be sure
to use the transmission fluid listed in
Recommended Fluids and
Lubricants on page 11-12.
How to Check Automatic
Transmission Fluid
Because this operation can be
difficult, it is recommended to have
this check done at your dealer,
which can monitor the transmission
temperature. The transmission fluid
level increases with temperature. To
obtain a highly accurate fluid level
check, the transmission temperature
must be measured.
If it is decided to check the fluid
level, be sure to follow all the
instructions here, or a false reading
on the dipstick may occur.
{Caution
Too much or too little fluid can
damage the transmission. Too
much can mean that some of the
fluid could come out and fall on
hot engine parts or exhaust
system parts, starting a fire. Too
little fluid could cause the
(Continued)
Page 264 of 406

Black plate (14,1)Chevrolet Express Owner Manual (GMNA-Localizing-U.S./Canada/Mexico-
6014662) - 2014 - crc - 8/26/13
10-14 Vehicle Care
Caution (Continued)
transmission to overheat. Be sure
to get an accurate reading if
checking the transmission fluid.
Wait at least 30 minutes with the
engine off, before checking the
transmission fluid level if the vehicle
has been driven:
.In hot weather, when outside
temperatures are above 32°C
(90°F).
.The vehicle is heavily loaded.
.At high speed for quite a while in
hot weather.
.In heavy traffic and hot weather.
.While pulling a trailer.
After driving under these conditions,
a hot check can be performed. The
fluid should be hot, which is 71°C to
93°C (160°F to 200°F). A cold fluid level check can be
performed after the vehicle has
been sitting for eight hours or more
with the engine off, but this is used
only as a reference. Let the engine
run at idle for five minutes if the
outside temperature is between
15°C to 32°C (60°F to 90°F). Should
the fluid level be low during this cold
check, the fluid must be checked
warm or hot before adding fluid.
If the outside temperature is colder
than 15°C (60°F) or hotter than
32°C (90°F), a cold check cannot be
performed.
A warm fluid level check can be
performed by driving the vehicle
under lightly loaded conditions and
outside temperatures between 10°C
to 27°C (50°F to 80°F). The vehicle
should be driven for at least 24 km
(15 mi) before performing a warm
check. Checking the fluid warm or
hot will give a more accurate
reading of the fluid level than a cold
check.Because the vehicle is equipped
with a high-efficiency air-to-oil
cooler, the transmission fluid
temperature may not reach the
required hot fluid level checking
temperature under normal lightly
loaded driving vehicle conditions.
Checking the Fluid Level
Prepare the vehicle:
1. Park the vehicle on a level
place. Keep the engine running.
2. With the parking brake applied, place the shift lever in P (Park).
3. With a foot on the brake pedal, move the shift lever through
each gear range, pausing for
about three seconds in each
range. When M is reached,
move the selector from M1
through M3. Then, position the
shift lever in P (Park).
4. Let the engine run at idle for two minutes or more.
Page 265 of 406

Black plate (15,1)Chevrolet Express Owner Manual (GMNA-Localizing-U.S./Canada/Mexico-
6014662) - 2014 - crc - 8/26/13
Vehicle Care 10-15
Then, without shutting off the
engine, use the steps that follow.
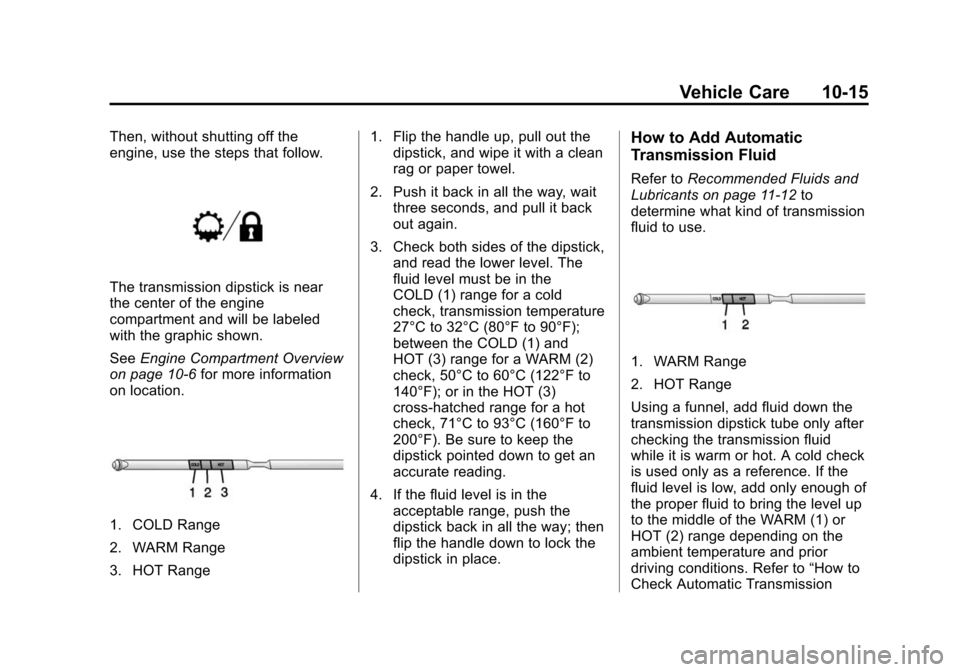
The transmission dipstick is near
the center of the engine
compartment and will be labeled
with the graphic shown.
SeeEngine Compartment Overview
on page 10-6 for more information
on location.
1. COLD Range
2. WARM Range
3. HOT Range 1. Flip the handle up, pull out the
dipstick, and wipe it with a clean
rag or paper towel.
2. Push it back in all the way, wait three seconds, and pull it back
out again.
3. Check both sides of the dipstick, and read the lower level. The
fluid level must be in the
COLD (1) range for a cold
check, transmission temperature
27°C to 32°C (80°F to 90°F);
between the COLD (1) and
HOT (3) range for a WARM (2)
check, 50°C to 60°C (122°F to
140°F); or in the HOT (3)
cross-hatched range for a hot
check, 71°C to 93°C (160°F to
200°F). Be sure to keep the
dipstick pointed down to get an
accurate reading.
4. If the fluid level is in the acceptable range, push the
dipstick back in all the way; then
flip the handle down to lock the
dipstick in place.
How to Add Automatic
Transmission Fluid
Refer to Recommended Fluids and
Lubricants on page 11-12 to
determine what kind of transmission
fluid to use.
1. WARM Range
2. HOT Range
Using a funnel, add fluid down the
transmission dipstick tube only after
checking the transmission fluid
while it is warm or hot. A cold check
is used only as a reference. If the
fluid level is low, add only enough of
the proper fluid to bring the level up
to the middle of the WARM (1) or
HOT (2) range depending on the
ambient temperature and prior
driving conditions. Refer to “How to
Check Automatic Transmission
Page 266 of 406

Black plate (16,1)Chevrolet Express Owner Manual (GMNA-Localizing-U.S./Canada/Mexico-
6014662) - 2014 - crc - 8/26/13
10-16 Vehicle Care
Fluid”earlier in this section for
instructions on driving to achieve
warm or hot transmission fluid.
It does not take much fluid,
generally less than 0.5 L (1 pt). Do
not overfill.
{Caution
Use of the incorrect automatic
transmission fluid may damage
the vehicle, and the damage may
not be covered by the vehicle
warranty. Always use the
automatic transmission fluid listed
in Recommended Fluids and
Lubricants on page 11-12.
.After adding fluid, recheck the
fluid level as described under
“How to Check Automatic
Transmission Fluid,” earlier in
this section.
.When the correct fluid level is
obtained, push the dipstick back
in all the way; then flip the
handle down to lock the dipstick
in place.
Engine Air Cleaner/Filter
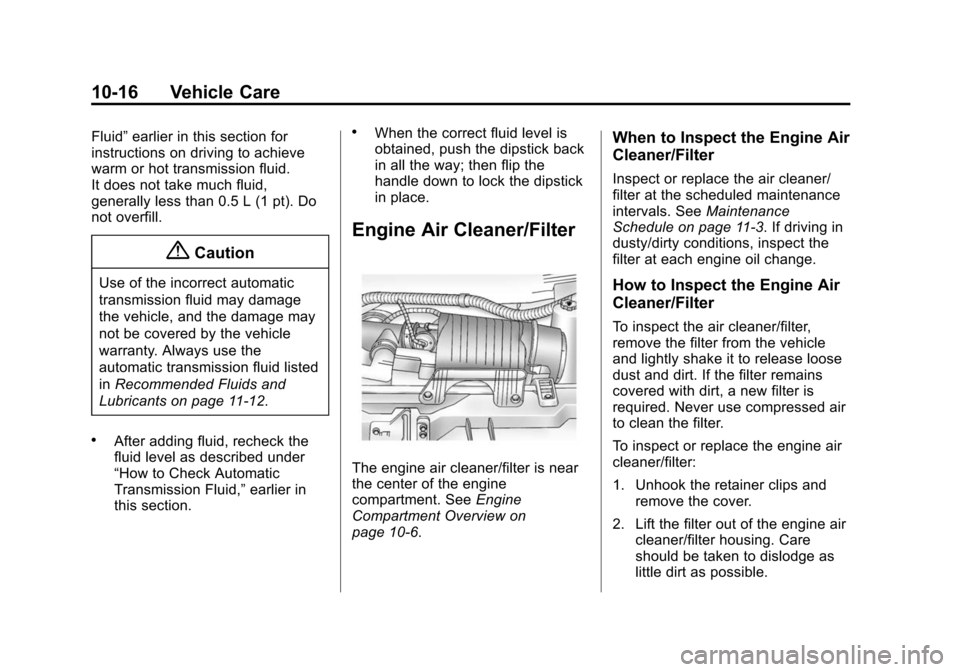
The engine air cleaner/filter is near
the center of the engine
compartment. See Engine
Compartment Overview on
page 10-6.
When to Inspect the Engine Air
Cleaner/Filter
Inspect or replace the air cleaner/
filter at the scheduled maintenance
intervals. See Maintenance
Schedule on page 11-3. If driving in
dusty/dirty conditions, inspect the
filter at each engine oil change.
How to Inspect the Engine Air
Cleaner/Filter
To inspect the air cleaner/filter,
remove the filter from the vehicle
and lightly shake it to release loose
dust and dirt. If the filter remains
covered with dirt, a new filter is
required. Never use compressed air
to clean the filter.
To inspect or replace the engine air
cleaner/filter:
1. Unhook the retainer clips and
remove the cover.
2. Lift the filter out of the engine air cleaner/filter housing. Care
should be taken to dislodge as
little dirt as possible.
Page 273 of 406

Black plate (23,1)Chevrolet Express Owner Manual (GMNA-Localizing-U.S./Canada/Mexico-
6014662) - 2014 - crc - 8/26/13
Vehicle Care 10-23
Warning (Continued)
If you keep driving when the
engine is overheated, the liquids
in it can catch fire. You or others
could be badly burned. Stop the
engine if it overheats, and get out
of the vehicle until the engine
is cool.
If No Steam is Coming from
the Engine Compartment
If an engine overheat warning is
displayed but no steam can be seen
or heard, the problem may not be
too serious. Sometimes the engine
can get a little too hot when the
vehicle:
.Climbs a long hill on a hot day.
.Stops after high-speed driving.
.Idles for long periods in traffic.
.Tows a trailer. See“Driving on
Grades” underTrailer Towing on
page 9-51. If the overheat warning is displayed
with no sign of steam:
1. Turn the air off.
2. Turn the heater on to the highest
temperature and to the highest
fan speed. Open the windows as
necessary.
3. When it is safe to do so, pull off the road, shift to P (Park) or
N (Neutral) and let the
engine idle.
If the engine coolant temperature
gauge is no longer in the overheat
zone or an overheat warning no
longer displays, the vehicle can be
driven. Continue to drive the vehicle
slowly for about 10 minutes. Keep a
safe vehicle distance from the
vehicle in front. If the warning does
not come back on, continue to drive
normally and have the cooling
system checked for proper fit and
function.
If the warning continues, pull over,
stop, and park the vehicle
right away. If there is still no sign of steam,
push down the accelerator until the
engine speed is about twice as fast
as normal idle speed for at least
three minutes while parked. If the
warning is still on, turn off the
engine until it cools down.
If the decision is made not to lift the
hood, get service help right away.
Engine Fan
The vehicle has a clutched engine
cooling fan. When the clutch is
engaged, the fan spins faster to
provide more air to cool the engine.
In most everyday driving conditions,
the fan is spinning slower and the
clutch is not fully engaged. This
improves fuel economy and reduces
fan noise. Under heavy vehicle
loading, trailer towing, and/or high
outside temperatures, the fan speed
increases as the clutch more fully
engages, so an increase in fan
noise may be heard. This is normal
and should not be mistaken as the
transmission slipping or making
Page 282 of 406

Black plate (32,1)Chevrolet Express Owner Manual (GMNA-Localizing-U.S./Canada/Mexico-
6014662) - 2014 - crc - 8/26/13
10-32 Vehicle Care
If the vehicle starts in any other
position, contact your dealer for
service.
Automatic Transmission
Shift Lock Control
Function Check
{Warning
When you are doing this
inspection, the vehicle could
move suddenly. If the vehicle
moves, you or others could be
injured.
1. Before starting this check, be sure there is enough room
around the vehicle. It should be
parked on a level surface.
2. Apply the parking brake. Be ready to apply the regular brake
immediately if the vehicle begins
to move. 3. With the engine off, turn the
ignition on, but do not start the
engine. Without applying the
regular brake, try to move the
shift lever out of P (Park) with
normal effort. If the shift lever
moves out of P (Park), contact
your dealer for service.
Ignition Transmission
Lock Check
If equipped with a key type ignition,
while parked and with the parking
brake set, try to turn the ignition to
LOCK/OFF in each shift lever
position.
.The ignition should turn to
LOCK/OFF only when the shift
lever is in P (Park).
.The ignition key should come
out only in LOCK/OFF.
Contact your dealer if service is
required.
Park Brake and P (Park)
Mechanism Check
{Warning
When you are doing this check,
the vehicle could begin to move.
You or others could be injured
and property could be damaged.
Make sure there is room in front
of the vehicle in case it begins to
roll. Be ready to apply the regular
brake at once should the vehicle
begin to move.
Park on a fairly steep hill, with the
vehicle facing downhill. Keeping
your foot on the regular brake, set
the parking brake.
.To check the parking brake's
holding ability: With the engine
running and the transmission in
N (Neutral), slowly remove foot
pressure from the regular brake
pedal. Do this until the vehicle is
held by the parking brake only.
Page 292 of 406

Black plate (42,1)Chevrolet Express Owner Manual (GMNA-Localizing-U.S./Canada/Mexico-
6014662) - 2014 - crc - 8/26/13
10-42 Vehicle Care
Mini Fuse Usage14 Windshield Washer
16 Horn
17 Transmission
18 Air Conditioning Compressor
19 Engine Control Module Battery
20 Spare
21 Left Stop/Turn Trailer
22 Spare
23 Spare
24 Fuel Pump
25 Auxiliary Power Outlet
26 Body Control Module 3
27 Special Equipment Option
28 Airbag Mini Fuse Usage
29 Steering Wheel Sensor
30 Engine Control Module Ignition/
Glow Plug Module
31 Transmission Control Module
Ignition
32 Transmission Control Module
Battery
33 Rear Parking Aid Module
34 Spare
35 Fuel Operated Heater Module
36 Fuel System Control Module
Battery
51 Left High-Beam Headlamp Mini Fuse Usage
52 Right High-Beam Headlamp
53 Left Low-Beam Headlamp
54 Right Low-Beam Headlamp
55 Wiper
56 Canister Vent Solenoid
58 Body Control Module 2
59 Body Control Module 1
61 Spare
62 Oxygen Sensor 2 (Post), EV Fan
(Diesel)
63 Spare
64 Mass Air Flow/ Canister Vent