2014 CHEVROLET EXPRESS PASSANGER four wheel drive
[x] Cancel search: four wheel drivePage 145 of 406

Black plate (1,1)Chevrolet Express Owner Manual (GMNA-Localizing-U.S./Canada/Mexico-
6014662) - 2014 - crc - 8/26/13
Lighting 6-1
Lighting
Exterior Lighting
Exterior Lamp Controls . . . . . . . . 6-1
Exterior Lamps OffReminder . . . . . . . . . . . . . . . . . . . . 6-2
Headlamp High/Low-Beam Changer . . . . . . . . . . . . . . . . . . . . . 6-2
Flash-to-Pass . . . . . . . . . . . . . . . . . 6-2
Daytime Running Lamps (DRL) . . . . . . . . . . . . . . . . 6-2
Automatic Headlamp System . . . . . . . . . . . . . . . . . . . . . . 6-3
Hazard Warning Flashers . . . . . 6-4
Turn and Lane-Change Signals . . . . . . . . . . . . . . . . . . . . . . 6-4
Interior Lighting
Instrument Panel IlluminationControl . . . . . . . . . . . . . . . . . . . . . . 6-5
Dome Lamps . . . . . . . . . . . . . . . . . 6-5
Reading Lamps . . . . . . . . . . . . . . . 6-6
Lighting Features
Entry/Exit Lighting . . . . . . . . . . . . . 6-6
Battery Load Management . . . . 6-6
Battery Power Protection . . . . . . 6-7
Exterior Lighting
Exterior Lamp Controls
The exterior lamp control is on the
instrument panel to the left of the
steering wheel.
There are four positions:
O(Off): Briefly turn the control to
this position to turn the automatic
headlamps and Daytime Running
Lamps (DRL) off or back on.
For vehicles first sold in Canada,
the off position only works for
vehicles that are shifted into the
P (Park) position. AUTO (Automatic):
Automatically
turns the exterior lamps on and off,
depending on outside lighting.
;(Parking Lamps): Turns on the
parking lamps including all lamps,
except the headlamps.
2(Headlamps): Turns on the
headlamps together with the parking
lamps and instrument panel lights.
If the headlamps are turned on
while the vehicle is on, the
headlamps turn off automatically
10 minutes after the ignition is
turned off. If the headlamps are
turned on while the vehicle is off,
the headlamps will continue to stay
on. To prevent the battery from
being drained, turn the control to the
Oposition.
A warning chime sounds if the driver
door is opened while the ignition
switch is off and the headlamps
are on.
Page 162 of 406
Black plate (10,1)Chevrolet Express Owner Manual (GMNA-Localizing-U.S./Canada/Mexico-
6014662) - 2014 - crc - 8/26/13
7-10 Infotainment System
f(Tune):Turn clockwise or
counterclockwise to increase or
decrease the station frequency.
©SEEK or¨SEEK: Press©
SEEK to go to the previous or¨
SEEK to go to the next station and
stay there.
To scan stations, press and hold
either button for two seconds until a
beep sounds. The radio goes to a
station, plays for a few seconds,
then goes to the next station. The
station frequency flashes while the
radio is in the scan mode. Press
either button again to stop scanning.
The radio seeks and scans stations
only with a strong signal that are in
the selected band.
To scan presets within the current
selected band by pressing and
holding either SEEK button for
four seconds until a double beep
sounds. The radio goes to a stored
preset, plays for a few seconds if a
strong signal is present, then goes to the next stored preset. The
station frequency flashes while the
radio is in the scan mode.
Setting Preset Stations
If the radio does not have a FAV
button, up to 18 stations (six FM1,
six FM2, and six AM), can be
programmed on the six numbered
softkeys, by performing the following
steps:
1. Turn the radio on.
2. Press BAND to select FM1,
FM2, or AM.
3. Tune in the desired station.
4. Press and hold one of the six numbered softkeys for
three seconds until a beep
sounds. When that softkey is
pressed and released, the
station that was set, returns.
5. Repeat Steps 2–4 for each softkey.
Storing a Radio Station as a
Favorite
Drivers are encouraged to set up
radio station favorites while the
vehicle is parked. Tune to favorite
stations using the presets, favorites
button, and steering wheel controls,
if the vehicle has this feature. See
Defensive Driving on page 9-3.
FAV (Favorites): If the vehicle has
a FAV button, a maximum of
36 stations can be programmed as
favorites using the six softkeys
below the radio station frequency
tabs and by using the radio favorites
page button (FAV button). Press the
FAV button to go through up to
six pages of favorites, each having
six favorite stations available per
page. Each page of favorites can
contain any combination of AM and
FM stations.
The balance/fade and tone settings
that were previously adjusted, are
stored with the favorite stations.
Page 191 of 406
Black plate (1,1)Chevrolet Express Owner Manual (GMNA-Localizing-U.S./Canada/Mexico-
6014662) - 2014 - crc - 8/26/13
Driving and Operating 9-1
Driving and
Operating
Driving Information
Distracted Driving . . . . . . . . . . . . . 9-2
Defensive Driving . . . . . . . . . . . . . 9-3
Drunk Driving . . . . . . . . . . . . . . . . . 9-3
Control of a Vehicle . . . . . . . . . . . 9-3
Braking . . . . . . . . . . . . . . . . . . . . . . . 9-3
Steering . . . . . . . . . . . . . . . . . . . . . . . 9-4
Off-Road Recovery . . . . . . . . . . . . 9-4
Loss of Control . . . . . . . . . . . . . . . . 9-5
Driving on Wet Roads . . . . . . . . . 9-5
Highway Hypnosis . . . . . . . . . . . . 9-6
Hill and Mountain Roads . . . . . . 9-7
Winter Driving . . . . . . . . . . . . . . . . . 9-7
If the Vehicle Is Stuck . . . . . . . . . 9-9
Vehicle Load Limits . . . . . . . . . . 9-10
Starting and Operating
New Vehicle Break-In . . . . . . . . 9-14
Ignition Positions . . . . . . . . . . . . 9-15
Starting the Engine . . . . . . . . . . 9-17
Fast Idle System . . . . . . . . . . . . . 9-18Engine Heater . . . . . . . . . . . . . . . 9-19
Retained Accessory
Power (RAP) . . . . . . . . . . . . . . . 9-20
Shifting Into Park . . . . . . . . . . . . 9-20
Shifting out of Park . . . . . . . . . . 9-21
Parking over Things That Burn . . . . . . . . . . . . . . . . . . 9-22
Engine Exhaust
Engine Exhaust . . . . . . . . . . . . . . 9-22
Running the Vehicle WhileParked . . . . . . . . . . . . . . . . . . . . . 9-23
Automatic Transmission
Automatic Transmission (SixSpeed) . . . . . . . . . . . . . . . . . . . . . 9-23
Automatic Transmission (Four Speed) . . . . . . . . . . . . . . . . . . . . . 9-26
Manual Mode . . . . . . . . . . . . . . . . 9-29
Tow/Haul Mode . . . . . . . . . . . . . . 9-30
Drive Systems
All-Wheel Drive . . . . . . . . . . . . . . 9-31
Brakes
Antilock Brake System (ABS) . . . . . . . . . . . . . . 9-31
Parking Brake . . . . . . . . . . . . . . . 9-32
Ride Control Systems
Traction Control/Electronic Stability Control . . . . . . . . . . . . 9-33
Locking Rear Axle . . . . . . . . . . . 9-35
Cruise Control
Cruise Control . . . . . . . . . . . . . . . 9-35
Driver Assistance Systems
Ultrasonic Parking Assist . . . . 9-38
Rear Vision Camera (RVC) . . . . . . . . . . . . . 9-39
Fuel
Fuel . . . . . . . . . . . . . . . . . . . . . . . . . 9-42
Recommended Fuel . . . . . . . . . 9-43
Gasoline Specifications . . . . . . 9-44
California FuelRequirements . . . . . . . . . . . . . . 9-44
Fuels in Foreign Countries . . . 9-44
Fuel Additives . . . . . . . . . . . . . . . 9-44
E85 or FlexFuel . . . . . . . . . . . . . . 9-44
Filling the Tank . . . . . . . . . . . . . . 9-45
Filling a Portable Fuel Container . . . . . . . . . . . . . . . . . . . 9-47
Page 221 of 406

Black plate (31,1)Chevrolet Express Owner Manual (GMNA-Localizing-U.S./Canada/Mexico-
6014662) - 2014 - crc - 8/26/13
Driving and Operating 9-31
Drive Systems
All-Wheel Drive
If the vehicle has this feature,
engine power is sent to all four
wheels when extra traction is
needed. This is like four-wheel
drive, but there is no separate lever
or switch to engage or disengage
the front axle. It is fully automatic,
and adjusts itself as needed for road
conditions.
Brakes
Antilock Brake
System (ABS)
This vehicle has ABS, an advanced
electronic braking system that helps
prevent a braking skid.
When the vehicle begins to drive
away, ABS checks itself.
A momentary motor or clicking noise
might be heard while this test is
going on, and it might even be
noticed that the brake pedal moves
a little. This is normal.
If there is a problem with ABS, this
warning light stays on. SeeAntilock
Brake System (ABS) Warning Light
on page 5-22. If driving safely on a wet road and it
becomes necessary to slam on the
brakes and continue braking to
avoid a sudden obstacle, a
computer senses that the wheels
are slowing down. If one of the
wheels is about to stop rolling, the
computer will separately work the
brakes at each wheel.
ABS can change the brake pressure
to each wheel, as required, faster
than any driver could. This can help
you steer around the obstacle while
braking hard.
As the brakes are applied, the
computer keeps receiving updates
on wheel speed and controls
braking pressure accordingly.
Remember: ABS does not change
the time needed to get a foot up to
the brake pedal or always decrease
stopping distance. If you get too
close to the vehicle in front of you,
there will not be enough time to
apply the brakes if that vehicle
Page 310 of 406

Black plate (60,1)Chevrolet Express Owner Manual (GMNA-Localizing-U.S./Canada/Mexico-
6014662) - 2014 - crc - 8/26/13
10-60 Vehicle Care
using a TPMS relearn tool, in the
following order: driver side front tire,
passenger side front tire, passenger
side rear tire, and driver side rear.
See your dealer for service or to
purchase a relearn tool.
There are two minutes to match the
first tire/wheel position, and
five minutes overall to match all four
tire/wheel positions. If it takes
longer, the matching process stops
and must be restarted.
The TPMS sensor matching
process is:
1. Set the parking brake.
2. Turn the ignition to ON/RUN withthe engine off.
3. Press the Remote Keyless Entry (RKE) transmitter's
QandK
buttons at the same time for
approximately five seconds. The
horn sounds twice to signal the
receiver is in relearn mode and
TIRE LEARNING ACTIVE
message displays on the DIC
screen. If the vehicle does not have
RKE, press the Driver
Information Center (DIC) vehicle
information button until the
PRESS
VTO RELEARN TIRE
POSITIONS message displays.
The horn sounds twice to signal
the receiver is in relearn mode
and TIRE LEARNING ACTIVE
message displays on the DIC
screen.
If the vehicle does not have RKE
or DIC buttons, press the trip
odometer reset stem on the
instrument cluster until the
PRESS VTO RELEARN TIRE
POSITIONS message displays.
The horn sounds twice to signal
the receiver is in relearn mode
and TIRE LEARNING ACTIVE
message displays on the DIC
screen.
4. Start with the driver side front tire.
5. Place the relearn tool against the tire sidewall, near the valve
stem. Then press the button to activate the TPMS sensor.
A horn chirp confirms that the
sensor identification code has
been matched to this tire and
wheel position.
6. Proceed to the passenger side front tire, and repeat the
procedure in Step 5.
7. Proceed to the passenger side rear tire, and repeat the
procedure in Step 5.
8. Proceed to the driver side rear tire, and repeat the procedure in
Step 5. The horn sounds two
times to indicate the sensor
identification code has been
matched to the driver side rear
tire, and the TPMS sensor
matching process is no longer
active. The TIRE LEARNING
ACTIVE message on the DIC
display screen goes off.
9. Turn the ignition switch to LOCK/OFF.
Page 333 of 406
Black plate (83,1)Chevrolet Express Owner Manual (GMNA-Localizing-U.S./Canada/Mexico-
6014662) - 2014 - crc - 8/26/13
Vehicle Care 10-83
{Caution
If the jumper cables are
connected or removed in the
wrong order, electrical shorting
may occur and damage the
vehicle. The repairs would not be
covered by the vehicle warranty.
Always connect and remove the
jumper cables in the correct order,
making sure that the cables do
not touch each other or other
metal.
Jumper Cable Removal
Reverse the sequence exactly when
removing the jumper cables.
Towing the Vehicle
{Caution
Incorrectly towing a disabled
vehicle may cause damage. The
damage would not be covered by
the vehicle warranty. Do not lash
or hook to the chassis
components —including the front
and rear subframes, suspension
control arms, and links —during
towing and recovery of a disabled
vehicle, or when securing the
vehicle. Use the proper nylon
strap harnesses around the tires
to secure the vehicle.
Have the vehicle towed on a flatbed
car carrier or a wheel lift tow truck.
If a wheel lift tow truck is used, the
drive wheels cannot contact the
road while the vehicle is being
towed. A wheel dolly must be used
to lift all drive wheels off the ground. Consult your dealer or a
professional towing service if the
disabled vehicle must be towed.
To tow the vehicle behind another
vehicle for recreational purposes,
such as behind a motor home, see
“Recreational Vehicle Towing”
following.
Recreational Vehicle
Towing
Recreational vehicle towing means
towing the vehicle behind another
vehicle, such as behind a motor
home. The two most common types
of recreational vehicle towing are
known as dinghy towing and dolly
towing. Dinghy towing is towing the
vehicle with all four wheels on the
ground. Dolly towing is towing the
vehicle with two wheels on the
ground and two wheels up on a
device known as a dolly.
Page 334 of 406
Black plate (84,1)Chevrolet Express Owner Manual (GMNA-Localizing-U.S./Canada/Mexico-
6014662) - 2014 - crc - 8/26/13
10-84 Vehicle Care
Here are some important things to
consider before recreational vehicle
towing:
.What is the towing capacity of
the towing vehicle? Be sure to
read the tow vehicle
manufacturer's
recommendations.
.What is the distance that will be
traveled? Some vehicles have
restrictions on how far and how
long they can tow.
.Is the proper towing equipment
going to be used? See your
dealer or trailering professional
for additional advice and
equipment recommendations.
.Is the vehicle ready to be
towed? Just as preparing the
vehicle for a long trip, make sure
the vehicle is prepared to be
towed.
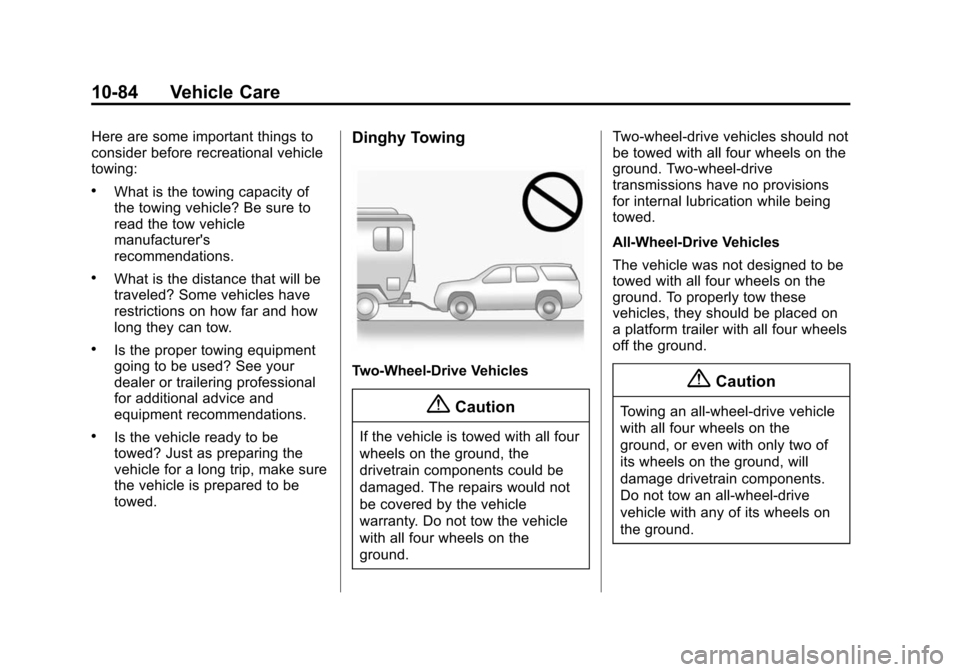
Dinghy Towing
Two-Wheel-Drive Vehicles
{Caution
If the vehicle is towed with all four
wheels on the ground, the
drivetrain components could be
damaged. The repairs would not
be covered by the vehicle
warranty. Do not tow the vehicle
with all four wheels on the
ground.Two-wheel-drive vehicles should not
be towed with all four wheels on the
ground. Two-wheel-drive
transmissions have no provisions
for internal lubrication while being
towed.
All-Wheel-Drive Vehicles
The vehicle was not designed to be
towed with all four wheels on the
ground. To properly tow these
vehicles, they should be placed on
a platform trailer with all four wheels
off the ground.
{Caution
Towing an all-wheel-drive vehicle
with all four wheels on the
ground, or even with only two of
its wheels on the ground, will
damage drivetrain components.
Do not tow an all-wheel-drive
vehicle with any of its wheels on
the ground.
Page 335 of 406
Black plate (85,1)Chevrolet Express Owner Manual (GMNA-Localizing-U.S./Canada/Mexico-
6014662) - 2014 - crc - 8/26/13
Vehicle Care 10-85
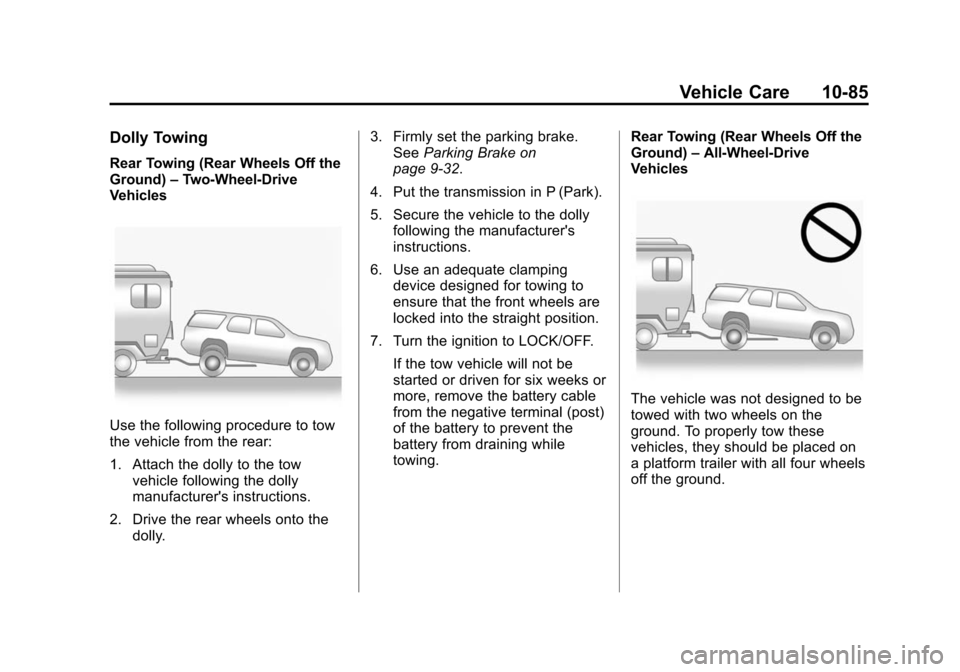
Dolly Towing
Rear Towing (Rear Wheels Off the
Ground)–Two-Wheel-Drive
Vehicles
Use the following procedure to tow
the vehicle from the rear:
1. Attach the dolly to the tow
vehicle following the dolly
manufacturer's instructions.
2. Drive the rear wheels onto the dolly. 3. Firmly set the parking brake.
See Parking Brake on
page 9-32.
4. Put the transmission in P (Park).
5. Secure the vehicle to the dolly following the manufacturer's
instructions.
6. Use an adequate clamping device designed for towing to
ensure that the front wheels are
locked into the straight position.
7. Turn the ignition to LOCK/OFF. If the tow vehicle will not be
started or driven for six weeks or
more, remove the battery cable
from the negative terminal (post)
of the battery to prevent the
battery from draining while
towing. Rear Towing (Rear Wheels Off the
Ground)
–All-Wheel-Drive
Vehicles
The vehicle was not designed to be
towed with two wheels on the
ground. To properly tow these
vehicles, they should be placed on
a platform trailer with all four wheels
off the ground.