Page 39 of 406

Black plate (13,1)Chevrolet Express Owner Manual (GMNA-Localizing-U.S./Canada/Mexico-
6014662) - 2014 - crc - 8/26/13
Keys, Doors, and Windows 2-13
On the lower portion of each mirror
is an auxiliary convex mirror.
A convex mirror's surface is curved
so you can see more from the driver
seat. The auxiliary convex mirrors
can be adjusted manually by
pressing the mirror.
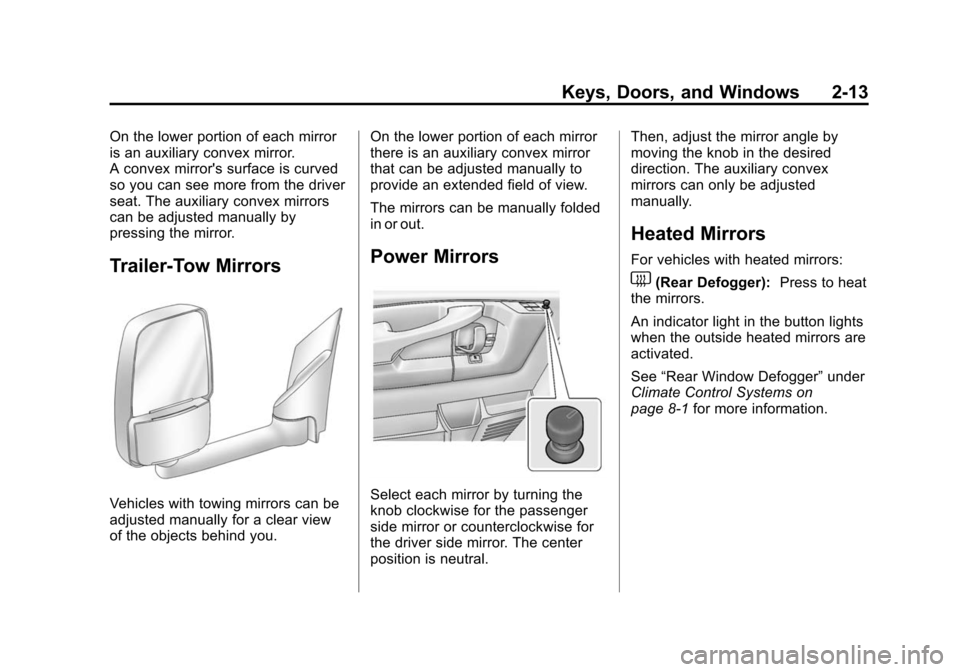
Trailer-Tow Mirrors
Vehicles with towing mirrors can be
adjusted manually for a clear view
of the objects behind you.On the lower portion of each mirror
there is an auxiliary convex mirror
that can be adjusted manually to
provide an extended field of view.
The mirrors can be manually folded
in or out.
Power Mirrors
Select each mirror by turning the
knob clockwise for the passenger
side mirror or counterclockwise for
the driver side mirror. The center
position is neutral.Then, adjust the mirror angle by
moving the knob in the desired
direction. The auxiliary convex
mirrors can only be adjusted
manually.
Heated Mirrors
For vehicles with heated mirrors:
1(Rear Defogger):
Press to heat
the mirrors.
An indicator light in the button lights
when the outside heated mirrors are
activated.
See “Rear Window Defogger” under
Climate Control Systems on
page 8-1 for more information.
Page 40 of 406

Black plate (14,1)Chevrolet Express Owner Manual (GMNA-Localizing-U.S./Canada/Mexico-
6014662) - 2014 - crc - 8/26/13
2-14 Keys, Doors, and Windows
Interior Mirrors
Interior Rearview Mirrors
Adjust the rearview mirror for a clear
view of the area behind your
vehicle.
Do not spray glass cleaner directly
on the mirror. Use a soft towel
dampened with water.
Manual Rearview Mirror
For vehicles with a manual rearview
mirror, push the tab forward for
daytime use and pull it for nighttime
use to avoid glare from the
headlamps from behind.
Cargo vans without rear door glass
may not have an inside rearview
mirror.
Windows
{Warning
Never leave a child, a helpless
adult, or a pet alone in a vehicle,
especially with the windows
closed in warm or hot weather.
They can be overcome by the
extreme heat and suffer
permanent injuries or even death
from heat stroke.
Manual Windows
Operate the manual windows by
turning the hand crank on each door
to raise or lower the side door
windows.
Power Windows
{Warning
Children could be seriously
injured or killed if caught in the
path of a closing window. Never
leave keys in a vehicle with
children. SeeKeys on page 2-1.
Page 41 of 406

Black plate (15,1)Chevrolet Express Owner Manual (GMNA-Localizing-U.S./Canada/Mexico-
6014662) - 2014 - crc - 8/26/13
Keys, Doors, and Windows 2-15
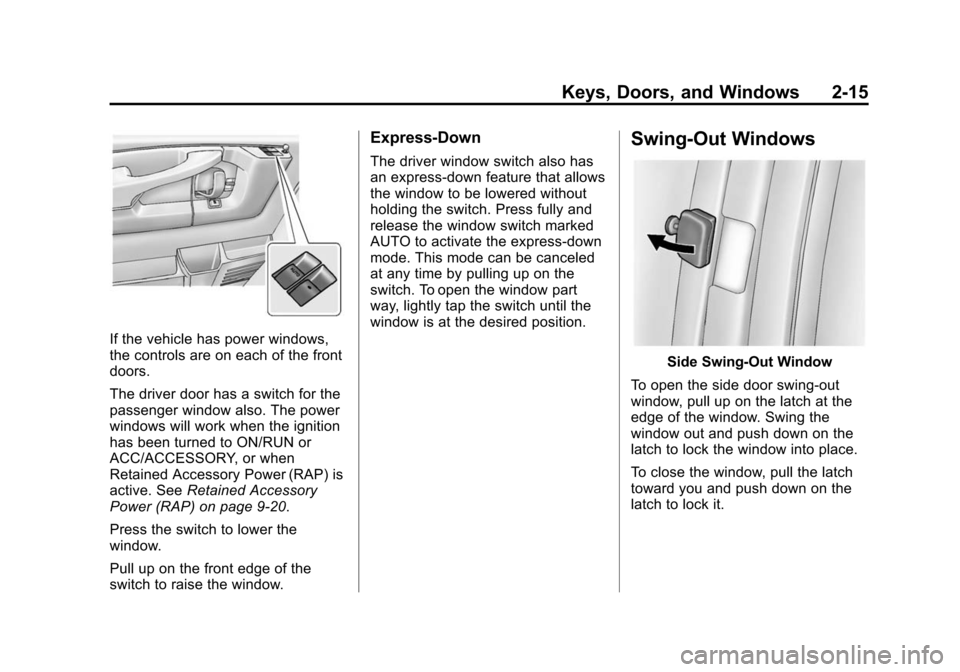
If the vehicle has power windows,
the controls are on each of the front
doors.
The driver door has a switch for the
passenger window also. The power
windows will work when the ignition
has been turned to ON/RUN or
ACC/ACCESSORY, or when
Retained Accessory Power (RAP) is
active. SeeRetained Accessory
Power (RAP) on page 9-20.
Press the switch to lower the
window.
Pull up on the front edge of the
switch to raise the window.
Express-Down
The driver window switch also has
an express-down feature that allows
the window to be lowered without
holding the switch. Press fully and
release the window switch marked
AUTO to activate the express-down
mode. This mode can be canceled
at any time by pulling up on the
switch. To open the window part
way, lightly tap the switch until the
window is at the desired position.
Swing-Out Windows
Side Swing-Out Window
To open the side door swing-out
window, pull up on the latch at the
edge of the window. Swing the
window out and push down on the
latch to lock the window into place.
To close the window, pull the latch
toward you and push down on the
latch to lock it.
Page 42 of 406
Black plate (16,1)Chevrolet Express Owner Manual (GMNA-Localizing-U.S./Canada/Mexico-
6014662) - 2014 - crc - 8/26/13
2-16 Keys, Doors, and Windows
Rear Swing‐Out Windows
The vehicle also has rear swing‐out
windows. The rear swing-out
windows work the same way as the
side swing‐out window, but the latch
is located at the bottom edge of the
window.
Enhanced Technology
Glass
The vehicle may be equipped with
Enhanced Technology Glass (ETG).
ETG is part of the overall occupant
protection system on passenger and
crew vans. ETG may help keep
passengers sitting next to these
fixed windows from being ejected
through the glass in some, but not
all crashes. Even with this glass,
safety belts must still be worn at all
times. For passenger and crew
vans, use only ETG glass approved
for the vehicle for replacement when
damaged.
The following table shows laminated
glass location, based on vehicle
model and options.
Page 43 of 406
Black plate (17,1)Chevrolet Express Owner Manual (GMNA-Localizing-U.S./Canada/Mexico-
6014662) - 2014 - crc - 8/26/13
Keys, Doors, and Windows 2-17
Vehicle ConfigurationETG Locations
Eight-Seat Passenger Vans Sliding door forward window
12- and 15-Seat Passenger Vans Sliding door forward window and
rear-most side windows
Long Wheelbase Cargo Vans Rear-most side windows
Crew Vans Sliding door forward window
Sun Visors
To block out glare, swing down the
sun visors. You can also swing them
to the side.
Visor Vanity Mirror
The vehicle may have visor vanity
mirrors, with or without lamps. Lift
the mirror cover to turn the lamps
on, if equipped.
Page 44 of 406
Black plate (18,1)Chevrolet Express Owner Manual (GMNA-Localizing-U.S./Canada/Mexico-
6014662) - 2014 - crc - 8/26/13
2-18 Keys, Doors, and Windows
2NOTES
Page 50 of 406

Black plate (6,1)Chevrolet Express Owner Manual (GMNA-Localizing-U.S./Canada/Mexico-
6014662) - 2014 - crc - 8/26/13
3-6 Seats and Restraints
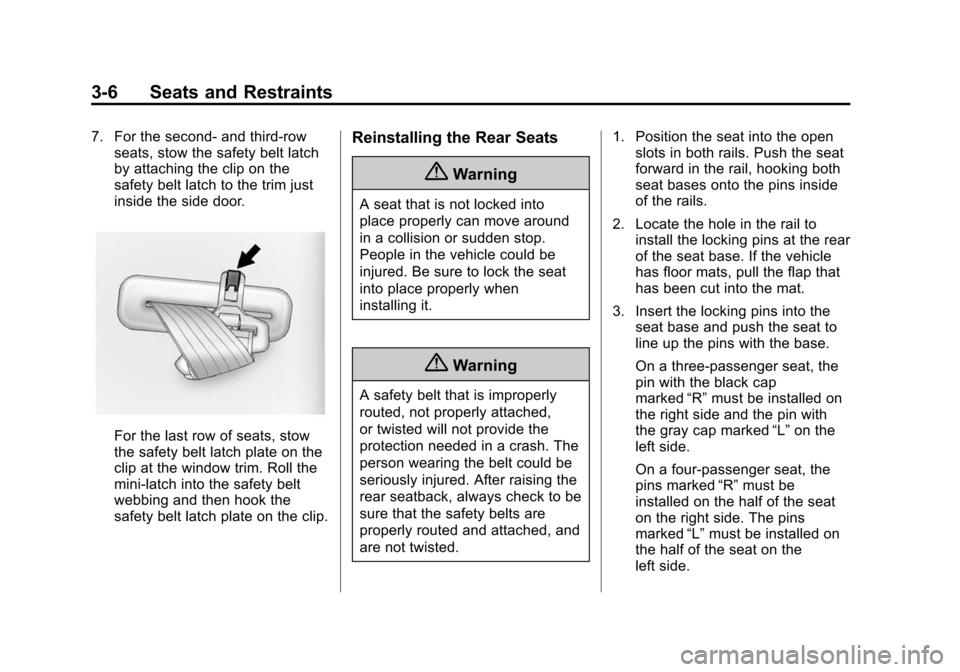
7. For the second- and third-rowseats, stow the safety belt latch
by attaching the clip on the
safety belt latch to the trim just
inside the side door.
For the last row of seats, stow
the safety belt latch plate on the
clip at the window trim. Roll the
mini-latch into the safety belt
webbing and then hook the
safety belt latch plate on the clip.
Reinstalling the Rear Seats
{Warning
A seat that is not locked into
place properly can move around
in a collision or sudden stop.
People in the vehicle could be
injured. Be sure to lock the seat
into place properly when
installing it.
{Warning
A safety belt that is improperly
routed, not properly attached,
or twisted will not provide the
protection needed in a crash. The
person wearing the belt could be
seriously injured. After raising the
rear seatback, always check to be
sure that the safety belts are
properly routed and attached, and
are not twisted. 1. Position the seat into the open
slots in both rails. Push the seat
forward in the rail, hooking both
seat bases onto the pins inside
of the rails.
2. Locate the hole in the rail to install the locking pins at the rear
of the seat base. If the vehicle
has floor mats, pull the flap that
has been cut into the mat.
3. Insert the locking pins into the seat base and push the seat to
line up the pins with the base.
On a three-passenger seat, the
pin with the black cap
marked “R”must be installed on
the right side and the pin with
the gray cap marked “L”on the
left side.
On a four-passenger seat, the
pins marked “R”must be
installed on the half of the seat
on the right side. The pins
marked “L”must be installed on
the half of the seat on the
left side.
Page 61 of 406

Black plate (17,1)Chevrolet Express Owner Manual (GMNA-Localizing-U.S./Canada/Mexico-
6014662) - 2014 - crc - 8/26/13
Seats and Restraints 3-17
row passengers seated directly
behind the front outboard
passenger. If the van is
equipped with a 60/40 swing-out
door, a single roof-rail airbag
covers all three seating
positions.
All vehicle airbags have the word
AIRBAG on the trim or on an
attached label near the deployment
opening.
For frontal airbags, the word
AIRBAG is on the center of the
steering wheel for the driver and on
the instrument panel for the front
outboard passenger.
For roof-rail airbags, the word
AIRBAG is on the ceiling or trim.
Airbags are designed to supplement
the protection provided by safety
belts. Even though today’s airbags
are also designed to help reduce
the risk of injury from the force of an
inflating airbag, all airbags must
inflate very quickly to do their job. Here are the most important things
to know about the airbag system:
{Warning
You can be severely injured or
killed in a crash if you are not
wearing your safety belt, even
with airbags. Airbags are
designed to work with safety
belts, not replace them. Also,
airbags are not designed to inflate
in every crash. In some crashes
safety belts are the only restraint.
See
When Should an Airbag
Inflate? on page 3-20.
Wearing your safety belt during a
crash helps reduce the chance of
hitting things inside the vehicle or
being ejected from it. Airbags are
“supplemental restraints” to the
safety belts. Everyone in the
vehicle should wear a safety belt
properly, whether or not there is
an airbag for that person.
{Warning
Airbags inflate with great force,
faster than the blink of an eye.
Anyone who is up against, or very
close to, any airbag when it
inflates can be seriously injured
or killed. Do not sit unnecessarily
close to the airbag, as you would
be if you were sitting on the edge
of your seat or leaning forward.
Safety belts help keep you in
position before and during a
crash. Always wear your safety
belt, even with airbags. The driver
should sit as far back as possible
while still maintaining control of
the vehicle.
Occupants should not lean on or
sleep against the door or side
windows in seating positions with
roof-rail airbags.