2014 CHEVROLET EXPRESS PASSANGER brake light
[x] Cancel search: brake lightPage 226 of 406

Black plate (36,1)Chevrolet Express Owner Manual (GMNA-Localizing-U.S./Canada/Mexico-
6014662) - 2014 - crc - 8/26/13
9-36 Driving and Operating
+RES (Resume/Accelerate):
Press briefly to make the vehicle
resume to a previously set speed,
or press and hold to accelerate.
If cruise control is already active,
use to increase vehicle speed.
SET−(Set/Coast): Press briefly to
set the speed and activate cruise
control, or press and hold to
decelerate. If cruise control is
already active, use to decrease
vehicle speed.
[(Cancel): Press to disengage
cruise control without erasing the
set speed from memory.
Setting Cruise Control
If the cruise button is on when not in
use, it could get bumped and go into
cruise when not desired. Keep the
cruise control switch off when cruise
is not being used. The cruise control light on the
instrument cluster comes on after
the cruise control has been set to
the desired speed.
1. Press the
Ibutton.
2. Get up to the desired speed.
3. Press the SET− button on the
steering wheel and release it.
4. Remove foot from the accelerator.
Resuming a Set Speed
If the cruise control is set at a
desired speed and then the brakes
are applied, the cruise control is
disengaged without erasing the set
speed from memory.
Once the vehicle speed reaches
about 40 km/h (25 mph) or more,
briefly press the +RES button on the
steering wheel. The vehicle returns
to the previous set speed. Increasing Speed While Using
Cruise Control
If the cruise control system is
already activated,.Press and hold the +RES button
on the steering wheel until the
desired speed is reached, then
release it.
.To increase vehicle speed in
small increments, briefly press
the +RES button. Each time this
is done, the vehicle goes about
1.6 km/h (1 mph) faster.
Reducing Speed While Using
Cruise Control
If the cruise control system is
already activated:
.Press and hold the SET– button
on the steering wheel until the
desired lower speed is reached,
then release it.
.To slow down in small
increments, briefly press the
SET– button on the steering
Page 227 of 406

Black plate (37,1)Chevrolet Express Owner Manual (GMNA-Localizing-U.S./Canada/Mexico-
6014662) - 2014 - crc - 8/26/13
Driving and Operating 9-37
wheel briefly. Each time this is
done, the vehicle goes about
1.6 km/h (1 mph) slower.
Passing Another Vehicle While
Using Cruise Control
Use the accelerator pedal to
increase the vehicle speed. When
you take your foot off the pedal, the
vehicle will slow down to the
previous set cruise speed. While
pressing the accelerator pedal or
shortly following the release to
override cruise control, briefly
applying the SET– button will result
in cruise control set to the current
vehicle speed.
Using Cruise Control on Hills
How well the cruise control works
on hills depends on the vehicle
speed, the load, and the steepness
of the hills. When going up steep
hills, pushing the accelerator pedal
may be necessary to maintain
vehicle speed. While going downhill:
.Vehicles with a 4-speed
automatic transmission may
need to have the brakes applied
or the transmission shifted to a
lower gear to help maintain
driver selected speed.
.Vehicles with a 6-speed
automatic transmission have
Cruise Grade Braking to help
maintain driver selected speed.
Cruise Grade Braking is enabled
when the vehicle is started and
Cruise Control is active. It is not
enabled in Range Selection Mode.
It assists in maintaining driver
selected speed when driving on
downhill grades by using the engine
and transmission to slow the
vehicle.
To disable and enable Cruise Grade
Braking for the current ignition key
cycle, press and hold the Tow/Haul
button for three seconds. A DIC
message displays. See
Transmission Messages on
page 5-38. When the brakes are manually
applied the cruise control is
disengaged.
Ending Cruise Control
There are three ways to end cruise
control:.To disengage cruise control,
step lightly on the brake pedal.
.Press the[on the steering
wheel.
.To turn off the cruise control,
press
Ion the steering wheel.
Erasing Speed Memory
The cruise control set speed is
erased from memory if
Iis
pressed or if the vehicle is
turned off.
Page 248 of 406

Black plate (58,1)Chevrolet Express Owner Manual (GMNA-Localizing-U.S./Canada/Mexico-
6014662) - 2014 - crc - 8/26/13
9-58 Driving and Operating
If the vehicle has a trailer hitch, the
seven-wire harness assembly with
connector is attached to a bracket
on the hitch platform. In both cases,
the seven-wire harness has a
connector and includes a 30-amp
feed wire.
The seven-wire harness connector
contains the following trailer circuits:
.Light Green: Back-up Lamps
(10A fuse)**
.White: Ground
.Dark Blue: Trailer Brake Signal
.Dark Green: Right Rear Stop
and Turn Signal*
.Red/Black Stripe: Battery Feed
(30A Fuse)
.Brown: Trailer Park Lamp
Supply Voltage (15A fuse)**
.Yellow: Left Rear Stop and Turn
Signal *The four-wire harness (without
connector) contains the following
circuits:
.Black: Ground
.Red/White: Battery Feed
.Dark Blue: Trailer Brake Signal
.Light Blue: CHMSL/Stoplamp
Supply Voltage
* If the vehicle is a cutaway with
trailer provisions, a 15 amp fuse will
be shared for both left/stop trailer
turn and right/stop trailer turn
signals. However, the cutaway
lighting connector will have a
10 amp fuse for each signal.
** If the vehicle is a cutaway with
trailer provisions, a 15 amp fuse will
be shared for trailer park lamps and
cutaway rear lighting connector park
lamps. Also, a 10 amp fuse will be
shared for trailer back-up lamps and
cutaway rear lighting connector
back-up lamps.
Tow/Haul Mode
This button is on the instrument
panel, to the right of the steering
wheel.
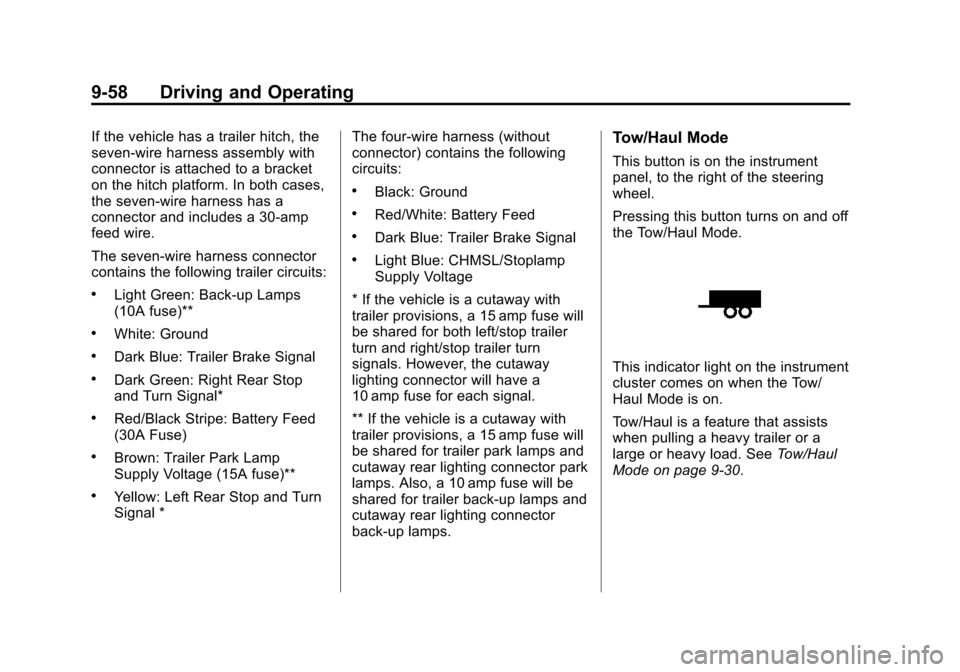
Pressing this button turns on and off
the Tow/Haul Mode.
This indicator light on the instrument
cluster comes on when the Tow/
Haul Mode is on.
Tow/Haul is a feature that assists
when pulling a heavy trailer or a
large or heavy load. See Tow/Haul
Mode on page 9-30.
Page 264 of 406

Black plate (14,1)Chevrolet Express Owner Manual (GMNA-Localizing-U.S./Canada/Mexico-
6014662) - 2014 - crc - 8/26/13
10-14 Vehicle Care
Caution (Continued)
transmission to overheat. Be sure
to get an accurate reading if
checking the transmission fluid.
Wait at least 30 minutes with the
engine off, before checking the
transmission fluid level if the vehicle
has been driven:
.In hot weather, when outside
temperatures are above 32°C
(90°F).
.The vehicle is heavily loaded.
.At high speed for quite a while in
hot weather.
.In heavy traffic and hot weather.
.While pulling a trailer.
After driving under these conditions,
a hot check can be performed. The
fluid should be hot, which is 71°C to
93°C (160°F to 200°F). A cold fluid level check can be
performed after the vehicle has
been sitting for eight hours or more
with the engine off, but this is used
only as a reference. Let the engine
run at idle for five minutes if the
outside temperature is between
15°C to 32°C (60°F to 90°F). Should
the fluid level be low during this cold
check, the fluid must be checked
warm or hot before adding fluid.
If the outside temperature is colder
than 15°C (60°F) or hotter than
32°C (90°F), a cold check cannot be
performed.
A warm fluid level check can be
performed by driving the vehicle
under lightly loaded conditions and
outside temperatures between 10°C
to 27°C (50°F to 80°F). The vehicle
should be driven for at least 24 km
(15 mi) before performing a warm
check. Checking the fluid warm or
hot will give a more accurate
reading of the fluid level than a cold
check.Because the vehicle is equipped
with a high-efficiency air-to-oil
cooler, the transmission fluid
temperature may not reach the
required hot fluid level checking
temperature under normal lightly
loaded driving vehicle conditions.
Checking the Fluid Level
Prepare the vehicle:
1. Park the vehicle on a level
place. Keep the engine running.
2. With the parking brake applied, place the shift lever in P (Park).
3. With a foot on the brake pedal, move the shift lever through
each gear range, pausing for
about three seconds in each
range. When M is reached,
move the selector from M1
through M3. Then, position the
shift lever in P (Park).
4. Let the engine run at idle for two minutes or more.
Page 276 of 406

Black plate (26,1)Chevrolet Express Owner Manual (GMNA-Localizing-U.S./Canada/Mexico-
6014662) - 2014 - crc - 8/26/13
10-26 Vehicle Care
Some driving conditions or climates
can cause a brake squeal when the
brakes are first applied or lightly
applied. This does not mean
something is wrong with the brakes.
Properly torqued wheel nuts are
necessary to help prevent brake
pulsation. When tires are rotated,
inspect brake pads for wear and
evenly tighten wheel nuts in the
proper sequence to torque
specifications. SeeCapacities and
Specifications on page 12-2.
Brake pads should be replaced as
complete sets.
Brake Pedal Travel
See your dealer if the brake pedal
does not return to normal height,
or if there is a rapid increase in
pedal travel. This could be a sign
that brake service might be
required.
Brake Adjustment
Every time the brakes are applied,
with or without the vehicle moving,
the brakes adjust for wear.
Replacing Brake System Parts
The braking system on a vehicle is
complex. Its many parts have to be
of top quality and work well together
if the vehicle is to have really good
braking. The vehicle was designed
and tested with top-quality brake
parts. When parts of the braking
system are replaced, be sure to get
new, approved replacement parts.
If this is not done, the brakes might
not work properly. For example,
installing disc brake pads that are
wrong for the vehicle, can change
the balance between the front and
rear brakes —for the worse. The
braking performance expected can
change in many other ways if the
wrong replacement brake parts are
installed.
Brake Fluid
The brake master cylinder reservoir
is filled with DOT 3 brake fluid. See
Engine Compartment Overview on
page 10-6 for the location of the
reservoir.
There are only two reasons why the
brake fluid level in the reservoir
might go down:
.The brake fluid level goes down
because of normal brake lining
wear. When new linings are
installed, the fluid level goes
back up.
.A fluid leak in the brake
hydraulic system can also cause
a low fluid level. Have the brake
hydraulic system fixed, since a
leak means that sooner or later
the brakes will not work well.
Page 330 of 406

Black plate (80,1)Chevrolet Express Owner Manual (GMNA-Localizing-U.S./Canada/Mexico-
6014662) - 2014 - crc - 8/26/13
10-80 Vehicle Care
{Caution
Ignoring these steps could result
in costly damage to the vehicle
that would not be covered by the
vehicle warranty. Trying to start
the vehicle by pushing or pulling it
will not work, and it could damage
the vehicle.
1. Check the other vehicle. It must have a 12-volt battery with a
negative ground system.
{Caution
If the other vehicle does not have
a 12-volt system with a negative
ground, both vehicles can be
damaged. Only use a vehicle that
has a 12-volt system with a
negative ground for jump starting. 2. Get the vehicles close enough
so the jumper cables can reach,
but be sure the vehicles are not
touching each other. If they are,
it could cause a ground
connection you do not want. You
would not be able to start your
vehicle, and the bad grounding
could damage the electrical
systems.
To avoid the possibility of the
vehicles rolling, set the parking
brake firmly on both vehicles
involved in the jump start
procedure. Put an automatic
transmission in P (Park) or a
manual transmission in Neutral
before setting the parking brake.
{Caution
If any accessories are left on or
plugged in during the jump
starting procedure, they could be
damaged. The repairs would not
be covered by the vehicle
(Continued)
Caution (Continued)
warranty. Whenever possible, turn
off or unplug all accessories on
either vehicle when jump starting.
3. Turn off the ignition on both vehicles. Unplug unnecessary
accessories plugged into the
cigarette lighter or the accessory
power outlet. Turn off the radio
and all lamps that are not
needed. This will avoid sparks
and help save both batteries.
And it could save the radio!
4. Open the hoods and locate the positive (+) and negative (−)
terminal locations of the other
vehicle.
On your van, use the unpainted
radio antenna bracket as a
remote negative (−) terminal.
Page 353 of 406

Black plate (9,1)Chevrolet Express Owner Manual (GMNA-Localizing-U.S./Canada/Mexico-
6014662) - 2014 - crc - 8/26/13
Service and Maintenance 11-9
Additional
Maintenance and Care
Your vehicle is an important
investment and caring for it properly
may help to avoid future costly
repairs. To maintain vehicle
performance, additional
maintenance services may be
required.
It is recommended that your dealer
perform these services—their
trained dealer technicians know
your vehicle best. Your dealer can
also perform a thorough
assessment with a multi-point
inspection to recommend when your
vehicle may need attention.
The following list is intended to
explain the services and conditions
to look for that may indicate
services are required. Battery
The battery supplies power to start
the engine and operate any
additional electrical accessories.
.To avoid break-down or failure to
start the vehicle, maintain a
battery with full cranking power.
.Trained dealer technicians have
the diagnostic equipment to test
the battery and ensure that the
connections and cables are
corrosion-free.
Belts
.Belts may need replacing if they
squeak or show signs of
cracking or splitting.
.Trained dealer technicians have
access to tools and equipment
to inspect the belts and
recommend adjustment or
replacement when necessary. Brakes
Brakes stop the vehicle and are
crucial to safe driving.
.Signs of brake wear may include
chirping, grinding, or squealing
noises, or difficulty stopping.
.Trained dealer technicians have
access to tools and equipment
to inspect the brakes and
recommend quality parts
engineered for the vehicle.
Fluids
Proper fluid levels and approved
fluids protect the vehicle’s systems
and components. See
Recommended Fluids and
Lubricants on page 11-12 for GM
approved fluids.
.Engine oil and windshield
washer fluid levels should be
checked at every fuel fill.
.Instrument cluster lights may
come on to indicate that fluids
may be low and need to be
filled.
Page 354 of 406

Black plate (10,1)Chevrolet Express Owner Manual (GMNA-Localizing-U.S./Canada/Mexico-
6014662) - 2014 - crc - 8/26/13
11-10 Service and Maintenance
Hoses
Hoses transport fluids and should
be regularly inspected to ensure
that there are no cracks or leaks.
With a multi-point inspection, your
dealer can inspect the hoses and
advise if replacement is needed.
Lamps
Properly working headlamps,
taillamps, and brake lamps are
important to see and be seen on
the road.
.Signs that the headlamps need
attention include dimming, failure
to light, cracking, or damage.
The brake lamps need to be
checked periodically to ensure
that they light when braking.
.With a multi-point inspection,
your dealer can check the lamps
and note any concerns.Shocks and Struts
Shocks and struts help aid in control
for a smoother ride.
.Signs of wear may include
steering wheel vibration, bounce/
sway while braking, longer
stopping distance, or uneven
tire wear.
.As part of the multi-point
inspection, trained dealer
technicians can visually inspect
the shocks and struts for signs
of leaking, blown seals,
or damage, and can advise
when service is needed.
Tires
Tires need to be properly inflated,
rotated, and balanced. Maintaining
the tires can save money and fuel,
and can reduce the risk of tire
failure.
.Signs that the tires need to be
replaced include three or more
visible treadwear indicators; cord
or fabric showing through the rubber; cracks or cuts in the
tread or sidewall; or a bulge or
split in the tire.
.Trained dealer technicians can
inspect and recommend the right
tires. Your dealer can also
provide tire/wheel balancing
services to ensure smooth
vehicle operation at all speeds.
Your dealer sells and services
name brand tires.
Vehicle Care
To help keep the vehicle looking like
new, vehicle care products are
available from your dealer. For
information on how to clean and
protect the vehicle’s interior and
exterior, see Interior Care on
page 10-91 andExterior Care on
page 10-86.