2014 CHEVROLET CRUZE tow
[x] Cancel search: towPage 320 of 420
Black plate (58,1)Chevrolet Cruze Owner Manual (GMNA-Localizing-U.S./Canada-6007168) -
2014 - 2nd Edition - 7/15/13
10-58 Vehicle Care
Reset the Tire Pressure Monitor
System. SeeTire Pressure
Monitor Operation on
page 10-53.
Check that all wheel nuts are
properly tightened. See “Wheel
Nut Torque” underCapacities
and Specifications on
page 12-2.
{Warning
Rust or dirt on a wheel, or on the
parts to which it is fastened, can
make wheel nuts become loose
after time. The wheel could come
off and cause an accident. When
changing a wheel, remove any
rust or dirt from places where the
wheel attaches to the vehicle. In
an emergency, a cloth or a paper
towel can be used; however, use
a scraper or wire brush later to
remove all rust or dirt.
Lightly coat the center of the
wheel hub with wheel bearing
grease after a wheel change or
tire rotation to prevent corrosion
or rust build-up. Do not get
grease on the flat wheel
mounting surface or on the
wheel nuts or bolts.
When It Is Time for New
Tires
Factors such as maintenance,
temperatures, driving speeds,
vehicle loading, and road conditions
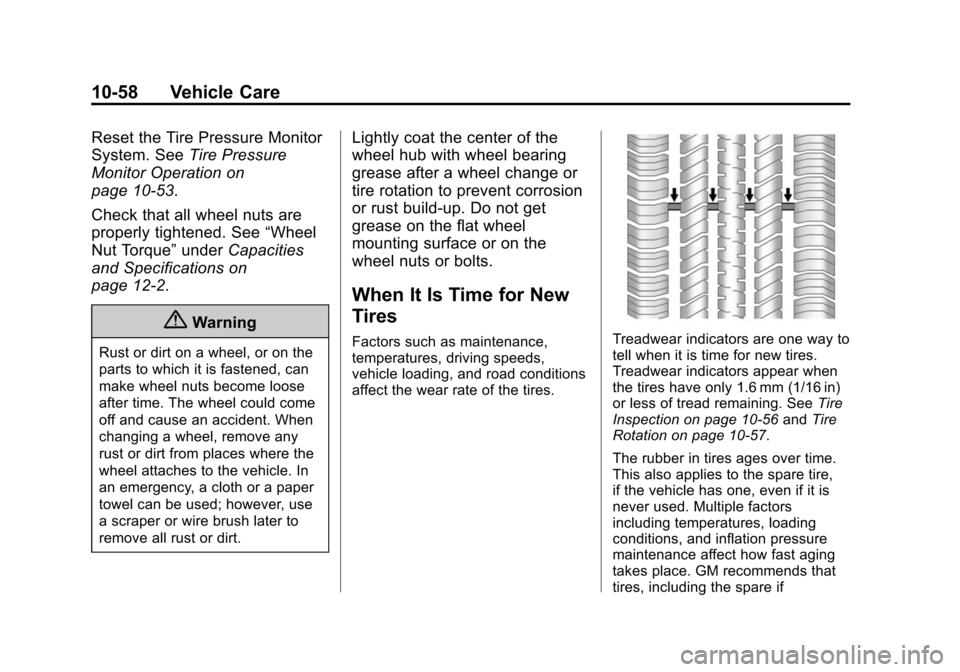
affect the wear rate of the tires.Treadwear indicators are one way to
tell when it is time for new tires.
Treadwear indicators appear when
the tires have only 1.6 mm (1/16 in)
or less of tread remaining. See Tire
Inspection on page 10-56 andTire
Rotation on page 10-57.
The rubber in tires ages over time.
This also applies to the spare tire,
if the vehicle has one, even if it is
never used. Multiple factors
including temperatures, loading
conditions, and inflation pressure
maintenance affect how fast aging
takes place. GM recommends that
tires, including the spare if
Page 326 of 420
Black plate (64,1)Chevrolet Cruze Owner Manual (GMNA-Localizing-U.S./Canada-6007168) -
2014 - 2nd Edition - 7/15/13
10-64 Vehicle Care
Tire Chains
{Warning
Do not use tire chains. There is
not enough clearance. Tire chains
used on a vehicle without the
proper amount of clearance can
cause damage to the brakes,
suspension, or other vehicle
parts. The area damaged by the
tire chains could cause loss of
control and a crash.
Use another type of traction
device only if its manufacturer
recommends it for the vehicle's
tire size combination and road
conditions. Follow that
manufacturer's instructions. To
avoid vehicle damage, drive slow
and readjust or remove the
traction device if it contacts the
vehicle. Do not spin the wheels.
If traction devices are used, install
them on the front tires.
If a Tire Goes Flat
It is unusual for a tire to blowout
while driving, especially if the tires
are maintained properly. SeeTires
on page 10-43. If air goes out of a
tire, it is much more likely to leak
out slowly. But if there ever is a
blowout, here are a few tips about
what to expect and what to do:
If a front tire fails, the flat tire
creates a drag that pulls the vehicle
toward that side. Take your foot off
the accelerator pedal and grip the
steering wheel firmly. Steer to
maintain lane position, and then
gently brake to a stop, well off the
road, if possible.
A rear blowout, particularly on a
curve, acts much like a skid and
may require the same correction as
used in a skid. Stop pressing the
accelerator pedal and steer to
straighten the vehicle. It may be
very bumpy and noisy. Gently brake
to a stop, well off the road,
if possible.{Warning
Driving on a flat tire will cause
permanent damage to the tire.
Re-inflating a tire after it has been
driven on while severely
underinflated or flat may cause a
blowout and a serious crash.
Never attempt to re-inflate a tire
that has been driven on while
severely underinflated or flat.
Have your dealer or an authorized
tire service center repair or
replace the flat tire as soon as
possible.
{Warning
Lifting a vehicle and getting under
it to do maintenance or repairs is
dangerous without the
appropriate safety equipment and
training. If a jack is provided with
the vehicle, it is designed only for
(Continued)
Page 334 of 420
Black plate (72,1)Chevrolet Cruze Owner Manual (GMNA-Localizing-U.S./Canada-6007168) -
2014 - 2nd Edition - 7/15/13
10-72 Vehicle Care
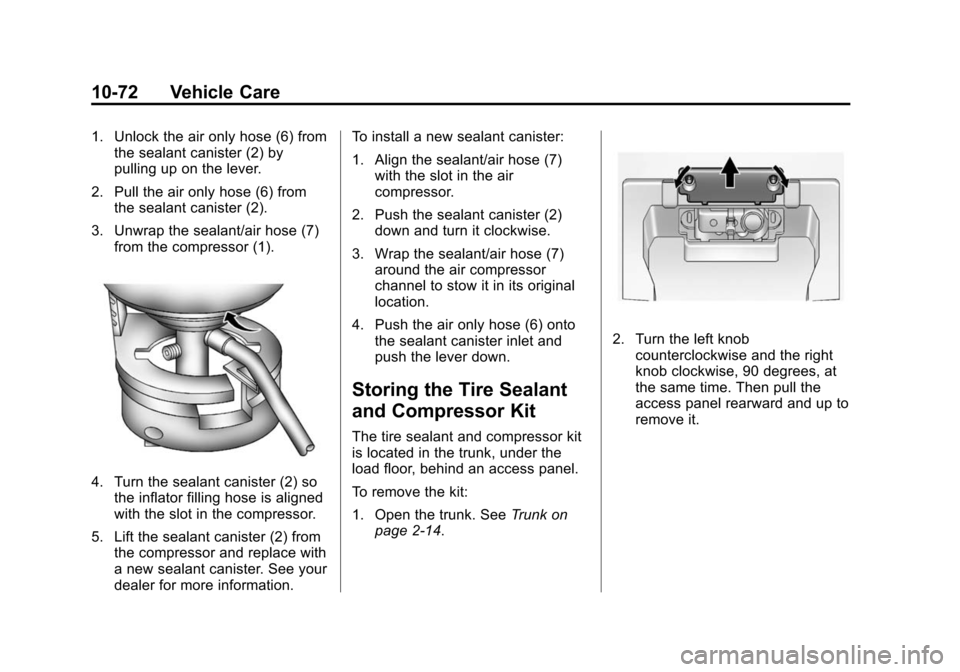
1. Unlock the air only hose (6) fromthe sealant canister (2) by
pulling up on the lever.
2. Pull the air only hose (6) from the sealant canister (2).
3. Unwrap the sealant/air hose (7) from the compressor (1).
4. Turn the sealant canister (2) sothe inflator filling hose is aligned
with the slot in the compressor.
5. Lift the sealant canister (2) from the compressor and replace with
a new sealant canister. See your
dealer for more information. To install a new sealant canister:
1. Align the sealant/air hose (7)
with the slot in the air
compressor.
2. Push the sealant canister (2) down and turn it clockwise.
3. Wrap the sealant/air hose (7) around the air compressor
channel to stow it in its original
location.
4. Push the air only hose (6) onto the sealant canister inlet and
push the lever down.
Storing the Tire Sealant
and Compressor Kit
The tire sealant and compressor kit
is located in the trunk, under the
load floor, behind an access panel.
To remove the kit:
1. Open the trunk. See Trunk on
page 2-14.
2. Turn the left knob counterclockwise and the right
knob clockwise, 90 degrees, at
the same time. Then pull the
access panel rearward and up to
remove it.
Page 336 of 420
Black plate (74,1)Chevrolet Cruze Owner Manual (GMNA-Localizing-U.S./Canada-6007168) -
2014 - 2nd Edition - 7/15/13
10-74 Vehicle Care
2. Tool Bag Tether
3. Tool Bag
4. Spare Tire
1. Open the trunk. SeeTrunk on
page 2-14.
2. Lift the load floor.
3. Turn the retainer nut (1) counterclockwise to remove it.
Then remove the tool bag
tether (2) from the stow rod, the
tool bag (3) containing the wheel
wrench and wheel blocks, and
the spare tire (4).
4. Remove the jack, jack handle extension, and two-piece
wrench, if equipped.
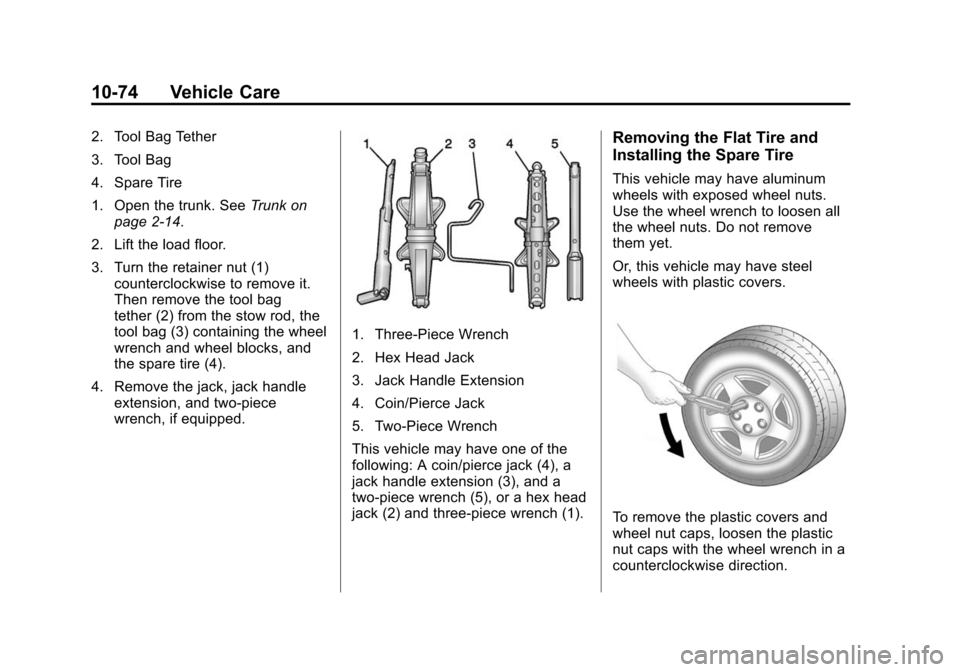
1. Three-Piece Wrench
2. Hex Head Jack
3. Jack Handle Extension
4. Coin/Pierce Jack
5. Two-Piece Wrench
This vehicle may have one of the
following: A coin/pierce jack (4), a
jack handle extension (3), and a
two-piece wrench (5), or a hex head
jack (2) and three-piece wrench (1).
Removing the Flat Tire and
Installing the Spare Tire
This vehicle may have aluminum
wheels with exposed wheel nuts.
Use the wheel wrench to loosen all
the wheel nuts. Do not remove
them yet.
Or, this vehicle may have steel
wheels with plastic covers.
To remove the plastic covers and
wheel nut caps, loosen the plastic
nut caps with the wheel wrench in a
counterclockwise direction.
Page 340 of 420
Black plate (78,1)Chevrolet Cruze Owner Manual (GMNA-Localizing-U.S./Canada-6007168) -
2014 - 2nd Edition - 7/15/13
10-78 Vehicle Care
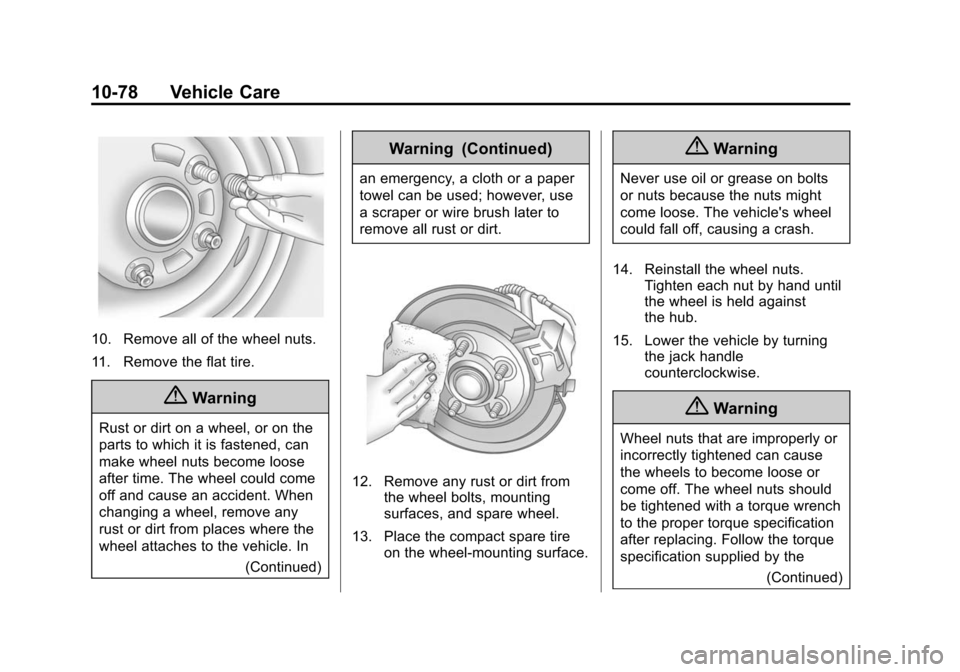
10. Remove all of the wheel nuts.
11. Remove the flat tire.
{Warning
Rust or dirt on a wheel, or on the
parts to which it is fastened, can
make wheel nuts become loose
after time. The wheel could come
off and cause an accident. When
changing a wheel, remove any
rust or dirt from places where the
wheel attaches to the vehicle. In(Continued)
Warning (Continued)
an emergency, a cloth or a paper
towel can be used; however, use
a scraper or wire brush later to
remove all rust or dirt.
12. Remove any rust or dirt fromthe wheel bolts, mounting
surfaces, and spare wheel.
13. Place the compact spare tire on the wheel-mounting surface.
{Warning
Never use oil or grease on bolts
or nuts because the nuts might
come loose. The vehicle's wheel
could fall off, causing a crash.
14. Reinstall the wheel nuts. Tighten each nut by hand until
the wheel is held against
the hub.
15. Lower the vehicle by turning the jack handle
counterclockwise.
{Warning
Wheel nuts that are improperly or
incorrectly tightened can cause
the wheels to become loose or
come off. The wheel nuts should
be tightened with a torque wrench
to the proper torque specification
after replacing. Follow the torque
specification supplied by the
(Continued)
Page 342 of 420
Black plate (80,1)Chevrolet Cruze Owner Manual (GMNA-Localizing-U.S./Canada-6007168) -
2014 - 2nd Edition - 7/15/13
10-80 Vehicle Care
{Caution
Wheel covers will not fit on the
vehicle's compact spare. If you try
to put a wheel cover on the
compact spare, the cover or the
spare could be damaged.
Storing a Flat or Spare Tire
and Tools
{Warning
Storing a jack, a tire, or other
equipment in the passenger
compartment of the vehicle could
cause injury. In a sudden stop or
collision, loose equipment could
strike someone. Store all these in
the proper place.
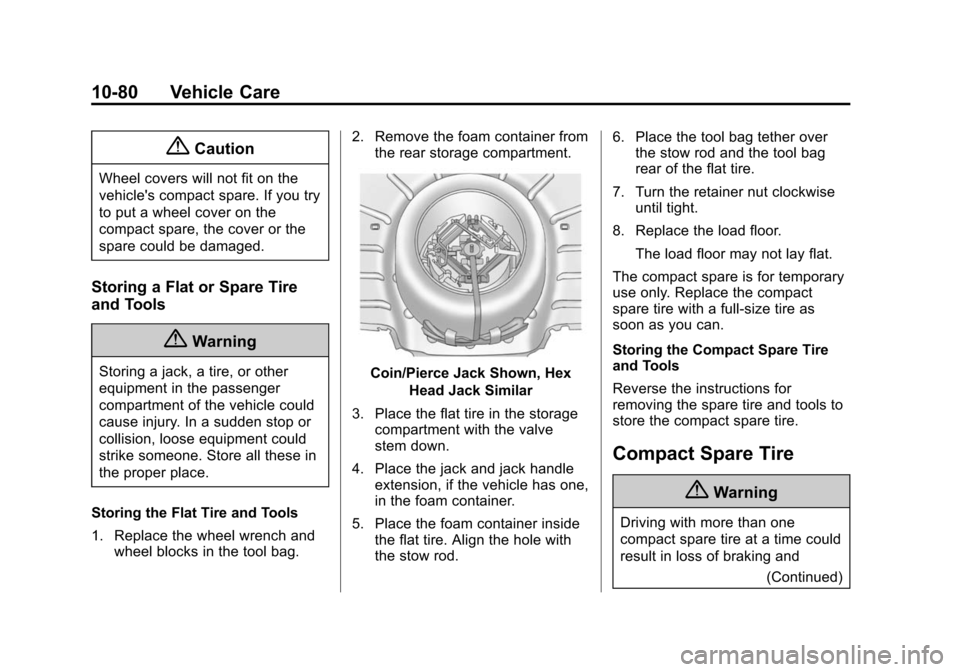
Storing the Flat Tire and Tools
1. Replace the wheel wrench and wheel blocks in the tool bag. 2. Remove the foam container from
the rear storage compartment.Coin/Pierce Jack Shown, Hex
Head Jack Similar
3. Place the flat tire in the storage compartment with the valve
stem down.
4. Place the jack and jack handle extension, if the vehicle has one,
in the foam container.
5. Place the foam container inside the flat tire. Align the hole with
the stow rod. 6. Place the tool bag tether over
the stow rod and the tool bag
rear of the flat tire.
7. Turn the retainer nut clockwise until tight.
8. Replace the load floor.
The load floor may not lay flat.
The compact spare is for temporary
use only. Replace the compact
spare tire with a full-size tire as
soon as you can.
Storing the Compact Spare Tire
and Tools
Reverse the instructions for
removing the spare tire and tools to
store the compact spare tire.
Compact Spare Tire
{Warning
Driving with more than one
compact spare tire at a time could
result in loss of braking and (Continued)
Page 347 of 420
Black plate (85,1)Chevrolet Cruze Owner Manual (GMNA-Localizing-U.S./Canada-6007168) -
2014 - 2nd Edition - 7/15/13
Vehicle Care 10-85
Towing the Vehicle
{Caution
Incorrectly towing a disabled
vehicle may cause damage. The
damage would not be covered by
the vehicle warranty. Do not lash
or hook to the chassis
components—including the front
and rear subframes, suspension
control arms, and links —during
towing and recovery of a disabled
vehicle, or when securing the
vehicle to a flatbed car carrier.
Use the proper nylon strap
harnesses around the tires to
secure them to the flatbed car
carrier.
Have the vehicle towed on a flatbed
car carrier or a wheel lift tow truck.
If a wheel lift tow truck is used, the
drive wheels cannot contact the
road while the vehicle is being
towed. A wheel dolly must be used
to lift all drive wheels off the ground. Consult your dealer or a
professional towing service if the
disabled vehicle must be towed.
To tow the vehicle behind another
vehicle for recreational purposes,
such as behind a motor home, see
“Recreational Vehicle Towing”
following.
Recreational Vehicle
Towing
Recreational vehicle towing refers to
towing the vehicle behind another
vehicle
–such as behind a motor
home. The two most common types
of recreational vehicle towing are
known as dinghy towing and dolly
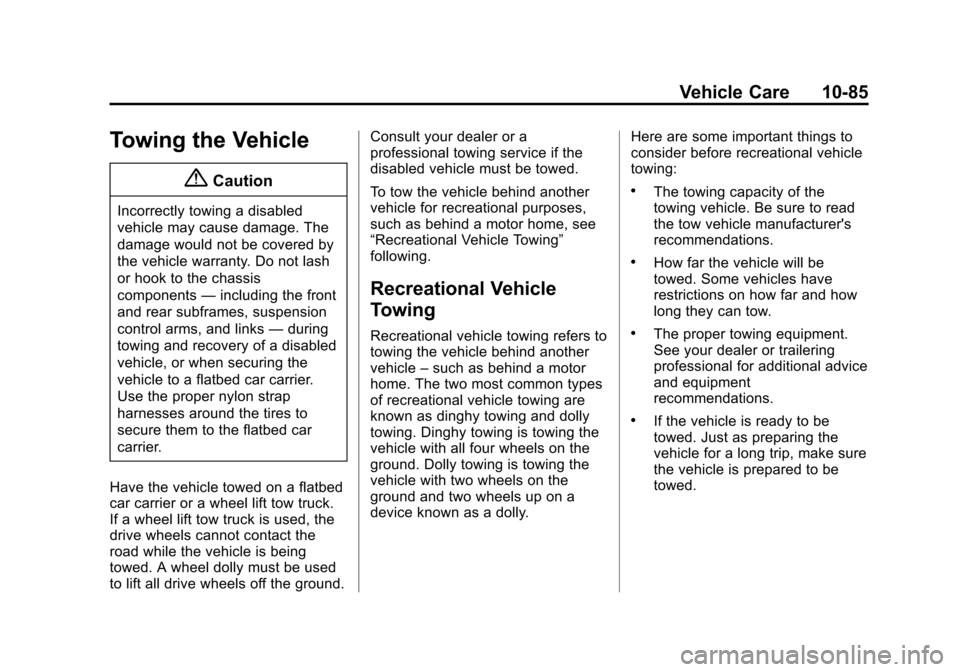
towing. Dinghy towing is towing the
vehicle with all four wheels on the
ground. Dolly towing is towing the
vehicle with two wheels on the
ground and two wheels up on a
device known as a dolly. Here are some important things to
consider before recreational vehicle
towing:
.The towing capacity of the
towing vehicle. Be sure to read
the tow vehicle manufacturer's
recommendations.
.How far the vehicle will be
towed. Some vehicles have
restrictions on how far and how
long they can tow.
.The proper towing equipment.
See your dealer or trailering
professional for additional advice
and equipment
recommendations.
.If the vehicle is ready to be
towed. Just as preparing the
vehicle for a long trip, make sure
the vehicle is prepared to be
towed.
Page 348 of 420
Black plate (86,1)Chevrolet Cruze Owner Manual (GMNA-Localizing-U.S./Canada-6007168) -
2014 - 2nd Edition - 7/15/13
10-86 Vehicle Care
Dinghy Towing (with Automatic
Transmission)
{Caution
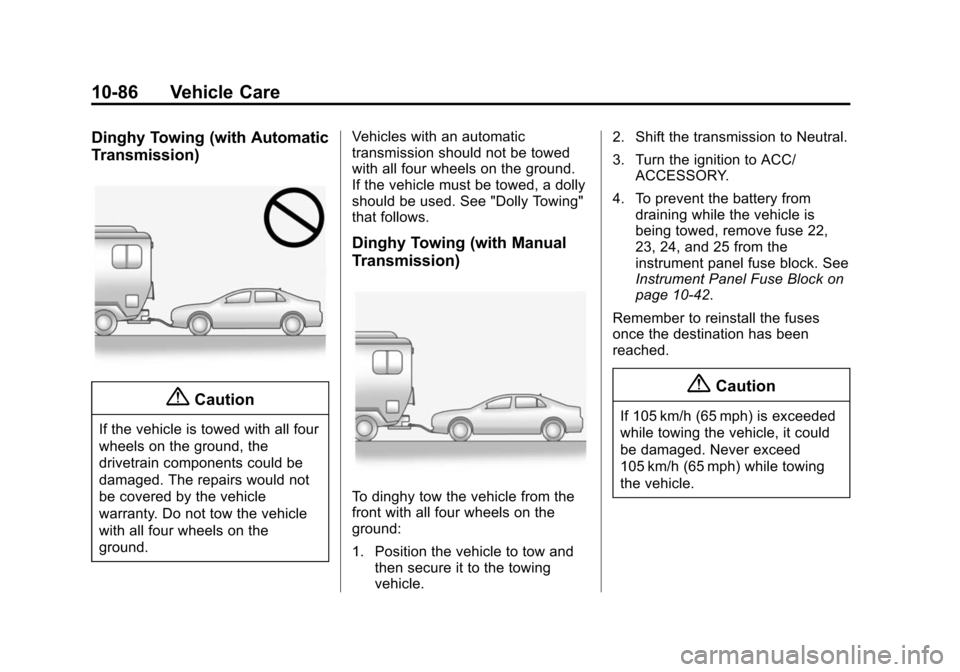
If the vehicle is towed with all four
wheels on the ground, the
drivetrain components could be
damaged. The repairs would not
be covered by the vehicle
warranty. Do not tow the vehicle
with all four wheels on the
ground.Vehicles with an automatic
transmission should not be towed
with all four wheels on the ground.
If the vehicle must be towed, a dolly
should be used. See "Dolly Towing"
that follows.
Dinghy Towing (with Manual
Transmission)
To dinghy tow the vehicle from the
front with all four wheels on the
ground:
1. Position the vehicle to tow and
then secure it to the towing
vehicle. 2. Shift the transmission to Neutral.
3. Turn the ignition to ACC/
ACCESSORY.
4. To prevent the battery from draining while the vehicle is
being towed, remove fuse 22,
23, 24, and 25 from the
instrument panel fuse block. See
Instrument Panel Fuse Block on
page 10-42.
Remember to reinstall the fuses
once the destination has been
reached.
{Caution
If 105 km/h (65 mph) is exceeded
while towing the vehicle, it could
be damaged. Never exceed
105 km/h (65 mph) while towing
the vehicle.