Page 25 of 408

Black plate (19,1)Cadillac ELR Owner Manual (GMNA-Localizing-U.S./Canada-6081525) -
2014 - Second Edition - 1/22/14
In Brief 1-19
Battery and Efficiency
High Voltage Safety
Information
{Warning
Exposure to high voltage can
cause shock, burns, and even
death. The high voltage
components in the vehicle can
only be serviced by technicians
with special training.
High voltage components are
identified by labels. Do not
remove, open, take apart,
or modify these components.
High voltage cable or wiring has
orange covering. Do not probe,
tamper with, cut, or modify high
voltage cable or wiring.
This vehicle has a high voltage
battery and a standard 12-volt
battery. If the vehicle is in a crash, the
sensing system may shut down the
high voltage system. When this
occurs, the high voltage battery is
disconnected and the vehicle will
not start. The SERVICE VEHICLE
SOON message in the Driver
Information Center (DIC) will be
displayed. Before the vehicle can be
operated again, it must be serviced
at your dealer.
{Warning
Damage to the high voltage
battery or high voltage system
can create a risk of electric shock,
overheating, or fire.
If the vehicle is damaged from a
crash, flood, fire, or other event it
may be necessary to have the
vehicle inspected. Contact
Customer Assistance as soon as
possible to determine whether an
inspection is needed. See
Customer Assistance Offices on
page 13-3.See
Battery on page 10-23 for
important safety information. If an
airbag has inflated, see What Will
You See after an Airbag Inflates? on
page 3-24.
Only a trained service technician
with the proper knowledge and tools
should inspect, test, or replace the
high voltage battery. See your
dealer if the high voltage battery
needs service.
See Battery on page 10-23.Charging
This section explains the process
for charging the high voltage battery.
Do not allow the vehicle to remain in
temperature extremes for long
periods without being driven or
plugged in. It is recommended that
the vehicle be plugged in when
temperatures are below 0°C (32°F)
and above 32°C (90°F) to maximize
high voltage battery life.
When using a 120-volt AC electrical
outlet, it will take approximately
12.5 hours to charge the vehicle
Page 26 of 408

Black plate (20,1)Cadillac ELR Owner Manual (GMNA-Localizing-U.S./Canada-6081525) -
2014 - Second Edition - 1/22/14
1-20 In Brief
with the 12 amp AC current setting
or 18 hours using the default 8 amp
AC current setting. When using a
240-volt charging station, it will take
approximately five hours to charge
the vehicle. Charge times will vary
with outside temperature. There are
three ways to program how the
vehicle is charged. See
Programmable Charging on
page 5-29.
The charging system may run fans
and pumps that result in sounds
from the vehicle while it is turned
off. Additional unexpected clicking
sounds may be caused by the
electrical devices used while
charging.
While the charge cord is plugged
into the vehicle, the vehicle cannot
be driven.
Charging
Start Charge
1. Make sure the vehicle is parkedand turned off. 2. Push the rearward edge of the
charge port door in and release
to open the door.
In cold weather conditions, ice
may form around the charge port
door. Remove ice from the area
before attempting to open or
close the charge port door.
3. Open the rear trunk, lift the left
load support floor cover, and
remove the charge cord. Pull up
on the charge cord handle to
release. The vehicle plug is
stored as shown. 4. Plug the charge cord into the
electrical outlet. See Electrical
Requirements for Battery
Charging on page 9-66. Verify
the charge cord status. See the
charge cord user guide. See
Charge Cord on page 9-64.
Select the appropriate charge
level using the Select Charge
Level Preference screen on the
center stack. See “Charge Level
Selection” underProgrammable
Charging on page 5-29.
Page 27 of 408

Black plate (21,1)Cadillac ELR Owner Manual (GMNA-Localizing-U.S./Canada-6081525) -
2014 - Second Edition - 1/22/14
In Brief 1-21
5. Plug in the vehicle plug of thecharge cord into the charge port
on the vehicle. Verify that the
charging status indicator
illuminates on top of the
instrument panel and a horn
chirp occurs. See Charging
Status Feedback on page 9-60.
Charge Cord Theft Alert
This vehicle has a Charge Cord
Theft Alert. To enable this feature,
see "Charge Cord Theft Alert" in
Vehicle Personalization on
page 5-51. The system can be
armed and disarmed using the door
lock function on the RKE
transmitter.
End Charge
1. Unlock the vehicle with the RKE transmitter to disarm the charge
cord theft alert.
2. Disconnect the vehicle plug ofthe charge cord from the vehicle.
3. Close the charge port door by pressing firmly on the rearward
edge of the door surface.
4. Unplug the charge cord from the electrical outlet.
5. Place the charge cord into the storage compartment.
Charge Cord
See Radio Frequency Statement on
page 13-15.
A portable charge cord used to
charge the vehicle high voltage
battery is stored under the load
support floor covering in the trunk. Important Information About
Portable Electric Vehicle Charging
.Charging an electric vehicle can
stress a building’
s electrical
system more than a typical
household appliance.
.Before you plug in to any
electrical outlet, have a qualified
electrician inspect and verify the
electrical system (electrical
outlet, wiring, junctions, and
protection devices) for
heavy-duty service at a 12 amp
continuous load.
.Electrical outlets may wear out
with normal usage or be
damaged over time, making
them unsuitable for electric
vehicle charging.
.Check the electrical outlet/plug
while charging and discontinue
use if the electrical outlet/plug is
hot, then have the electrical
outlet serviced by a qualified
electrician.
Page 28 of 408

Black plate (22,1)Cadillac ELR Owner Manual (GMNA-Localizing-U.S./Canada-6081525) -
2014 - Second Edition - 1/22/14
1-22 In Brief
.When outdoors, plug into an
electrical outlet that is
weather-proof while in use.
.Mount the charging cord to
reduce strain on the electrical
outlet/plug.
{Warning
Improper use of portable electric
vehicle charge cords may cause
a fire, electrical shock, or burns,
and may result in damage to
property, serious injury, or death.
.Do not use extension cords,
multi-outlet power strips,
splitters, grounding adaptors,
surge protectors, or similar
devices.
.Do not use an electrical outlet
that is worn or damaged,
or one that will not hold the
plug firmly in place.(Continued)
Warning (Continued)
.Do not use an electrical outlet
that is not properly grounded.
.Do not use an electrical outlet
that is on a circuit with other
electrical loads.
See the charge cord user guide.
Charge Cord Status Indicators
See “Charge Cord Status Indicators”
in the charge cord user guide.
Charge Level Selection
Charge level selection can be made
using the Select Charge Level
Preference setting on the center
stack. See “Charge Level Selection”
under Programmable Charging on
page 5-29.
{Warning
Using a charge level that exceeds
the electrical circuit or electrical
outlet capacity may start a fire or
damage the electrical circuit. Use
the lowest charge level until a
qualified electrician inspects your
electrical circuit capacity. Use the
lowest charge level if the
electrical circuit or electrical outlet
capacity is not known.
Page 29 of 408

Black plate (23,1)Cadillac ELR Owner Manual (GMNA-Localizing-U.S./Canada-6081525) -
2014 - Second Edition - 1/22/14
In Brief 1-23
Fueling
The fuel system on this vehicle
requires a refueling process to
control evaporative emissions. To
refuel the vehicle:
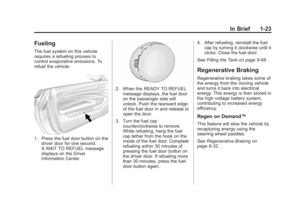
1. Press the fuel door button on thedriver door for one second.
A WAIT TO REFUEL message
displays on the Driver
Information Center.
2. When the READY TO REFUELmessage displays, the fuel door
on the passenger side will
unlock. Push the rearward edge
of the fuel door in and release to
open the door.
3. Turn the fuel cap counterclockwise to remove.
While refueling, hang the fuel
cap tether from the hook on the
inside of the fuel door. Complete
refueling within 30 minutes of
pressing the fuel door button on
the driver door. If refueling more
than 30 minutes, press the fuel
door button again. 4. After refueling, reinstall the fuel
cap by turning it clockwise until it
clicks. Close the fuel door.
See Filling the Tank on page 9-68.
Regenerative Braking
Regenerative braking takes some of
the energy from the moving vehicle
and turns it back into electrical
energy. This energy is then stored in
the high voltage battery system,
contributing to increased energy
efficiency.
Regen on Demand™
This feature will slow the vehicle by
recapturing energy using the
steering wheel paddles.
SeeRegenerative Braking on
page 9-32.
Page 30 of 408

Black plate (24,1)Cadillac ELR Owner Manual (GMNA-Localizing-U.S./Canada-6081525) -
2014 - Second Edition - 1/22/14
1-24 In Brief
Service
{Warning
Never try to do your own service
on high voltage components. You
can be injured and the vehicle
can be damaged if you try to do
your own service work. Service
and repair of these high voltage
components should only be
performed by a trained service
technician with the proper
knowledge and tools. SeeDoing
Your Own Service Work on
page 10-5.
Performance and
Maintenance
Traction Control/
Electronic Stability
Control
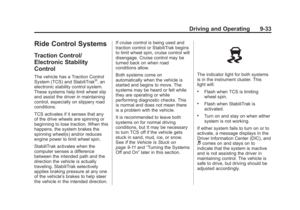
The Traction Control System (TCS)
limits wheel spin. The system turns
on automatically every time the
vehicle is started.
StabiliTrak assists with directional
control of the vehicle in difficult
driving conditions. The system turns
on automatically every time the
vehicle is started.
.To turn off TCS, press and
release the TCS/StabiliTrak
button
Yon the center console.
iilluminates in the instrument
cluster. The appropriate DIC
message is displayed. See Ride
Control System Messages on
page 5-48.
.Press the TCS/StabiliTrak buttonYagain to turn traction control
back on.
.To turn off both TCS and
StabiliTrak, press and hold the
TCS/StabiliTrak button
Yon the
center console until
gandi
illuminate in the instrument
cluster. The appropriate DIC
message displays. See Ride
Control System Messages on
page 5-48.
.Press the TCS/StabiliTrak buttonYagain to turn on both
systems.
See Traction Control/Electronic
Stability Control on page 9-33.
Page 31 of 408

Black plate (25,1)Cadillac ELR Owner Manual (GMNA-Localizing-U.S./Canada-6081525) -
2014 - Second Edition - 1/22/14
In Brief 1-25
Tire Pressure Monitor
This vehicle may have a Tire
Pressure Monitor System (TPMS).
The low tire pressure warning light
alerts to a significant loss in
pressure of one of the vehicle's
tires. If the warning light comes on,
stop as soon as possible and inflate
the tires to the recommended
pressure shown on the Tire and
Loading Information label. See
Vehicle Load Limits on page 9-12.
The warning light will remain on until
the tire pressure is corrected.
The low tire pressure warning light
may come on in cool weather when
the vehicle is first started, and then
turn off as the vehicle is driven. This
may be an early indicator that thetire pressures are getting low and
the tires need to be inflated to the
proper pressure.
The TPMS does not replace normal
monthly tire maintenance. Maintain
the correct tire pressures.
See
Tire Pressure Monitor System
on page 10-49.
Engine Oil Life System
The engine oil life system calculates
engine oil life based on vehicle use
and displays the CHANGE ENGINE
OIL SOON message when it is time
to change the engine oil and filter.
The oil life system should be reset
to 100% only following an oil
change.
Resetting the Oil Life System
1. Display RESET OIL LIFE on the DIC menu. See Driver
Information Center (DIC) on
page 5-38. 2. Press and hold SEL for several
seconds while the Oil Life
display is active to reset the Oil
Life system.
See Engine Oil Life System on
page 10-12.
Driving for Better Energy
Efficiency
Use the following tips to help
maximize energy efficiency and
range.
In colder temperatures, while these
efficiency tips will help, the electric
vehicle driving range may be lower
due to higher energy usage.
Driving Style
Efficiency Gauge (Instrument
Cluster)
The leaf indicator or green ring
indicator should be kept green and
in the center of the gauge.
Page 32 of 408

Black plate (26,1)Cadillac ELR Owner Manual (GMNA-Localizing-U.S./Canada-6081525) -
2014 - Second Edition - 1/22/14
1-26 In Brief
Inefficient acceleration is indicated
when the ring turns yellow or the
leaf turns yellow and travels above
the center of the gauge.
Aggressive braking is indicated
when the ring turns yellow or the
leaf turns yellow and travels below
the center of the gauge.
Acceleration/Braking/Coasting
Avoid unnecessary rapid
accelerations and decelerations.
Electric range is maximized at
80 km/h (50 mph) and below. Higher
speeds use more energy and can
significantly reduce electric range.
Use cruise control when
appropriate.
Plan ahead for decelerations and
coast whenever possible. For
example, do not rush to traffic
signals.
Do not shift to N (Neutral) to coast.
The vehicle recovers energy while
coasting and braking in D (Drive)
or L (Low).Drive Mode and PRNDL Selection
Use Tour Mode when possible.
Sport Mode provides more
responsive acceleration than Tour
Mode, but can reduce efficiency.
Use Mountain Mode prior to
climbing long, steep grades in
mountainous areas. Be sure to
engage Mountain Mode before
starting to climb. Mountain Mode
reduces electric range and power,
but may be needed to maintain
speeds above 96 km/h (60 mph)
when climbing grades of 5% or
greater.
Use Hold Mode on a trip where all
or most of the electric charge will be
depleted. Use Hold Mode mainly
during highway or high-speed
driving to maximize both electric
vehicle miles and fuel efficiency.
Use L (Low) in heavy stop-and-go
traffic or when traveling downhill.
L (Low) requires less brake pedal
application and provides a
controlled, efficient way to slow the
vehicle down.
Climate Setting
Using the heat and air conditioning
systems decreases the energy
available for electric driving.
Optimal energy efficiency is
achieved with the heat, air
conditioning, and fan turned off.
Less energy is used at low fan
speeds. When using the fan:
.MIN is the most energy efficient
climate setting as long as
0is
not selected.
.ECO is for moderate air
conditioning and heater
operation and is the next most
energy efficient setting as long
as
0is not selected.
.MAX mode provides the most
comfort but is the least energy
efficient.