Page 9 of 20

9
Efficiency
Information Displays
Touch the Energy icon on the center stack touch screen and then touch the Flow, Charging, or Energy Info icons at the bottom of the screen to display the desired energy information.
Power Flow
The Power Flow screens indicate the current system operating condition, showing the power flow between the high voltage propulsion battery, electric drive unit and eng\
ine. Each component is highlighted when it is active.
Charging
The Charging screens show the Charge Level and Charge Mode status. The v\
ehicle has three programmable charge modes:
• Immediately upon plug-in
• Delayed based on departure time
• Delayed based on electric rates and departure time
Charge Complete times are estimates and most accurate at moderate temperatures. The Charge Level and Charge Mode can be changed by touching the green text. See Cha\
rging (page 16).
Energy Information
The Energy Info screens show the Energy Usage (Electric Mode and Extend\
ed-Range Mode) since the last time the vehicle was fully recharged and the Lifetime Fuel Economy of the vehicle.
See Instruments and Controls in your Owner Manual.
Information Displays
Page 10 of 20
10
Touch Screen and Controls
Applications: Touch the screen icon to access the desired application
Power/Mute: Press and hold to turn CUE On/Off; press to mute audio
Driver’s Heated Seat Control
Driver’s Temperature Control
Passenger’s Temperature Control
Additional Pages: Touch to view additional pages of applications
Interaction Selector: Touch to display the favorites list.
Climate Control Fan Speed
Passenger’s Heated Seat Control
AUTO: Automatic Climate Control Operation
VOLUME: Touch arrows or swipe finger above chrome bar
Defrost Mode
REAR Rear Window Defog
Recirculation Mode
Home Page
Storage Compartment with USB Port: Press and hold the bright bar to open/close
OFF Climate Control Power Off
The controls use capacitive technology – simply touch the icon/text to access a feature or adjust a functionSee your CUE Infotainment System Manual.
Page 11 of 20

11
CUE System
Refer to your Owner Manual for important safety information about using \
the infotainment system while driving.
Portable Audio Devices
Two USB ports, an SD media card slot, and an auxiliary audio input jack are located in the center console storage compartment.
Connect an iPod®, iPhone®, MP3 player, a USB flash drive or a USB mass storage device to the USB port or insert an SD media card into the card slot.
Touch Media until the connected device is shown. CUE will read the device and build a list of voice commands.
Bluetooth® System
Before using a Bluetooth-enabled device in the vehicle, it must be paired with the in-vehicle Bluetooth system. Not all
devices will support all functions. The pairing process is disabled when the vehicle is moving. For more information, visit www.gmtotalconnect.com.
Pair a Phone
1. To use voice recognition, press the Push to Talk button on the steering wheel; after the beep, say “Pair phone,” or
Use the touch screen to select the Phone icon > Phones > Pair Device.
2. Start the pairing process on the phone. Locate Cadillac CUE on the phone.
3. Enter the four-digit code that appears on the touch screen into the phone or confirm the six-digit code on the phone.
4. If your phone prompts you to accept the connection or phone book download, click “yes” and always allow.
See your CUE Infotainment System Manual.
The touch screen in the center stack can be used to display and adjust Infotainment, Vehicle Personalization and Climate Control settings.
Use the controls on the center stack and the touch screen to access the various menus and settings.
The center stack controls only need a light touch to operate and work best with bare hands. Use the finger pad rather than the fingertip to minimize response time. The controls work with most gloves but may take longer to respond. Remove gloves if necessary.
In the screen menus, a check mark next to an item indicates it is selected/on.
Infotainment
CUE uses a Bluetooth or USB connection to link a smartphone, cell phone, USB flash drive or portable audio player/iPod® to the touch screen infotainment display. It offers a variety of
entertainment options, including streaming audio from the Internet through a smartphone, and features enhanced hands- free voice control, music information and the ability to play music files from a USB flash drive or an SD media card. For assistance, call 1-855-4-CUE-NOW (1-855-428-3669) or visit www.cadillac.com/cue.
Page 12 of 20

12
Climate Controls
Touch the Climate icon on the center stack touch screen to view and adjust the climate control settings.
Press AUTO on the center stack to have the system operate automatically.
Note: Under certain conditions, the engine will start to provide full heat and defrost capability.
Climate Power Gauge
The Climate Power gauge on the climate control screen displays the impact of the climate settings on energy consumption. A lower percentage indicates less energy is being used.
Climate Modes
Optimal efficiency is achieved with the heat, air conditioning and fan turned off.
Touch the climate mode settings to adjust the impact the
climate control system has on the vehicle’s efficiency.
The most efficient operation is in the following order:
• MIN – electric cabin heating/cooling is off
• ECO – limits cabin heating/cooling to balance comfort with energy use
• MAX – provides the most cabin heating/cooling but uses the most energy
Use the heated seats and heated steering wheel to reduce the demand on the cabin heating system. Heating the seats and steering wheel uses less energy than heating the vehicle interior.
See Climate Controls in your Owner Manual.
Climate Controls
Page 13 of 20

Some vehicle features can be customized using the controls on the infotainment system. The Vehicle Settings menu may include Climate and Air Quality; Collision/Detection Systems; Comfort and Convenience; Energy; Lighting; Power Door Locks; and Remote Lock, Unlock, Start.
1. Touch Settings on the Home page.
2. Touch Vehicle from the Settings menu.
3. Touch the desired menu item.
4. Touch the desired feature and setting.
5. Touch < Back to exit each menu.
See Instruments and Controls in your Owner Manual.
13
Vehicle PersonalizationSeat and Steering Wheel Adjustment
Before driving, adjust the seat and steering wheel to a comfortable position.
A. Move the steering wheel adjustment control to move the
steering wheel up or down and forward or rearward.
B. Move the horizontal control to move the seat forward or
rearward and to tilt, raise or lower the seat.
C. Move the vertical control to recline or raise the seatback, or adjust the seatback bolster support.
D. Move the small control to adjust lumbar support.
Memory Seats
With the driver’s seat, outside mirrors and steering wheel in the desired positions, press and release the SET button and then press and hold button 1 or 2 until a beep sounds to set the memory position. Press and hold button 1 or 2 to recall the stored position.
See Seats and Restraints, and Instruments and Controls, in your Owner Ma\
nual.
A
BCD
Page 14 of 20

14
Driver Assistance Systems
The driver assistance features are based on a “control and alert” strategy that helps identify potential collision situations and intervenes when a collision threat appears more imminent, employing visual, audible and/or tactile (vibration) alerts.
Lane Departure Warning – When crossing a detected lane
marking without using a turn signal, a visual alert flashes on the instrument cluster and the left or right side of the driver’s seat pulses. See Safety Alert Seat.
Press the Lane Departure Warning button on the left side of the CUE touch screen to turn the system on or off. The button illuminates when the system is on.
Forward Collision Alert – When approaching a vehicle directly ahead too quickly, a visual alert flashes on the windshield and the driver’s seat pulses. See Safety Alert Seat.
Press the Collision Alert button (or the Follow Distance Gap button if equipped with Adaptive Cruise Control) on the left side of the steering wheel to set the alert timing.
Safety Alert Seat – Subtle seat cushion vibration pulses, left or right, or simultaneously, alert the driver of potential hazards.
Audible notification may be selected instead of Safety Alert Seat vibration notification; to change the setting, go to Collision/Detection Systems in the Vehicle Settings menu.
Rear Vision Camera – When the vehicle is in Reverse, a view of the area behind the vehicle appears on the CUE touch screen.
Luxury Package♦
IntelliBeam® – Automatically turns the high-beam headlamps on or off depending on traffic conditions.
Side Blind Zone Alert – When a vehicle is detected in a side blind spot area, a warning symbol displays on the side mirror.
To turn off the system, go to Collision/Detection Systems in the Vehicle Settings menu.
Rear Cross Traffic Alert – Warns of traffic coming in either direction by displaying a visual alert on the Rear Vision Camera screen, and the left or right side of the driver’s seat pulses. See Safety Alert Seat.
To turn the system on or off, go to Collision/Detection Systems in the Vehicle Settings menu.
Adaptive Cruise Control♦ (requires Luxury Package) – If a vehicle is detected ahead, the vehicle accelerates or brakes
moderately to maintain the selected following gap. If driver action is required, a visual alert flashes on the windshield and the
driver’s seat pulses. See Safety Alert Seat.
Press the Follow Distance Gap button on the left side of the steering wheel to set a following gap.
Automatic Collision Preparation♦ (included with Adaptive Cruise Control) – Prepares the brakes or applies the brakes if an emergency collision appears immediate or the driver does not react to previous alerts.
See Driving and Operating in your Owner Manual.
♦ Optional equipment
Page 15 of 20
 may contact a parking block or curb i")
Low Ground Clearance
The low ground clear-ance of the ELR aids its aerodynamic efficiency. As a result, the flexible air deflector under the front fascia (bumper) may contact a parking block or curb if the vehicle is parked too closely. Use care when parking to avoid damage.
See Vehicle Care in your Owner Manual.
Electric Parking Brake
To apply the parking brake, pull the Parking Brake switch on the left side of the instrument panel.
To release the parking brake, with the ignition in the ON or Accessory position, press the brake pedal and press the
Parking Brake switch.
See Driving and Operating in your Owner Manual.
Pedestrian Safety Signal
The vehicle is equipped with an automatic sound generator and a manual alert. The automatic sound is generated at speeds below 20 mph to indicate the vehicle’s presence to pedestrians.
To activate the additional manual alert, with the vehicle in gear, pull the turn signal lever toward you. The high-beam headlamps will flash and a soft-note alert will sound.
See Instruments and Controls in your Owner Manual.
15
ParkingFueling
Filling the Fuel Tank
1. With the vehicle OFF, press the Fuel Door button, located on the driver’s door, for one
second. The Wait to Refuel message will display on the instrument cluster.
2. When the Ready to Refuel message displays, the fuel door on the passenger’s side of the vehicle will unlock. It will not open automatically.
3. Press and release the rear edge of the fuel door; it will pop open slightly. Open the door to refuel the vehicle.
Fuel
Use premium fuel with an octane rating of 91 or higher.
See Driving and Operating in your Owner Manual.
Page 16 of 20
. K")
Battery
The ELR is powered by a lithium-ion high voltage battery pack, which holds its charge efficiently and has no memory effect (so it doesn’t have to be run down completely before recharging). Keep the vehicle plugged in, even when fully charged, to keep the battery temperature ready for the next drive.
Charging Time
The ELR can be programmed for three charging modes: Immediately upon plug-in; Delayed based on departure time; and Delayed (Electric Rate and Departure Time).
Using a 120-volt standard outlet will take approximately 12.5 hours to charge the ELR at the 12 amp setting, or 18 hours at the 8 amp default setting. Using a 240-volt charging station will take approximately 5 hours. Charge times will vary with outside temperature.
Touch the Energy icon on the touch screen and then touch the Charging icon to view the current Charge Level and Charge Mode status.
Touch the green Charge Level text to select a different charge level.
Touch the green Charge Mode text to select a different charge mode.
Charging Status
Charging Status Indicators are located on the instru-ment panel near the
windshield and in the side mirrors (if activated).
Charging Status Indicator (Instrument Panel)
• Solid green with single horn chirp – Vehicle is plugged in; battery is charging
• Slow (long pulse) flashing green with double horn chirp – Vehicle is plugged in; battery charging is delayed
• Fast (short pulse) flashing green – Vehicle is plugged in; battery is fully charged
• Solid yellow – Vehicle is plugged in; not charging
• No light – Vehicle is not plugged in OR there is an issue with the charger or outlet
• No light and repetitive horn chirps – Electricity was
interrupted before charging was completed
Charging Status Indicator (Side Mirrors)
• Solid green – Battery is charging; charging is less than half complete
• Fast flashing green – Charging is more than half complete
• Slow flashing green – Charging is nearly complete
• No light – Not charging
See Driving and Operating in your Owner Manual.
16
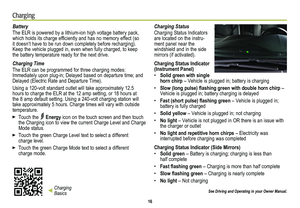
Charging
Charging Basics