2014 BMW Z4 SDRIVE28I service
[x] Cancel search: servicePage 138 of 285

Navigation systemVehicle equipmentThis chapter describes all series equipment as
well as country-specific and special equipment
offered for this model series.Therefore, it also
describes equipment that may not be found in
your vehicle, for instance due to the selected
special equipment or the country version. This
also applies to safety-related functions and
systems.
General information
The navigation system can determine the pre‐
cise position of the vehicle, with the aid of sat‐
ellites and vehicle sensors, and can reliably
guide you to every entered destination.
Entries in stationary vehicle
Enter data only when the vehicle is sta‐
tionary, and always give priority to the applica‐
ble traffic regulations in the event of any con‐
tradiction between traffic and road conditions
and the instructions issued by the navigation
system. Failure to take to this precaution can
place you in violation of the law and put vehicle
occupants and other road users in danger.◀
Opening the navigation system1. Press the button on the controller.2."Navigation"
The navigation system can also be called
up directly using the button on the con‐
troller.
Navigation data
Information on navigation data
1."Navigation"2.Open "Options".3."Navigation system version"
Information is displayed on the data ver‐
sion.
Updating the navigation data
General information
Navigation data are stored in the vehicle and
can be updated.
Current navigation data and the authorization
code are available from your service center.
▷Depending on the data volume, a data up‐
date may take several hours.▷Update during the trip to preserve battery.▷During the update, only the basic functions
of the navigation system are available.▷The status of the update can be viewed.▷After the updating process is complete, the
system restarts.▷Remove the medium with the navigation
data after the update.
Performing an update
1.Insert the navigation DVD into the DVD
player with the labeled side facing up.2.Follow the instructions on the Control Dis‐
play.3.Enter the authorization code of the naviga‐
tion DVD.4.Change the DVD if necessary.
After the trip is interrupted, follow the instruc‐
tions on the Control Display.
Viewing the status
1.Open "Options".2."Navigation update"Seite 138NavigationNavigation system138
Online Edition for Part no. 01 40 2 911 315 - VI/13
Page 145 of 285
In the splitscreen, special destinations of the
selected category are displayed in the map
view as symbols. The display depends on the
scale of the map and the category.
Destination entry via the Concierge
service
A connection is established to the Concierge
service, refer to page 217.1."Navigation"2."Enter address"3.Open "Options".4."BMW Assist dest. entry"
Displaying special destinations in the
map
To display symbols of the special destinations
in the map view:
1."Navigation"2."Map"3.Open "Options".4."Display Points of Interest"5.Select the setting.
Destination entry by map
Selecting the destination
1."Navigation"2."Map"
The current position of the vehicle is dis‐
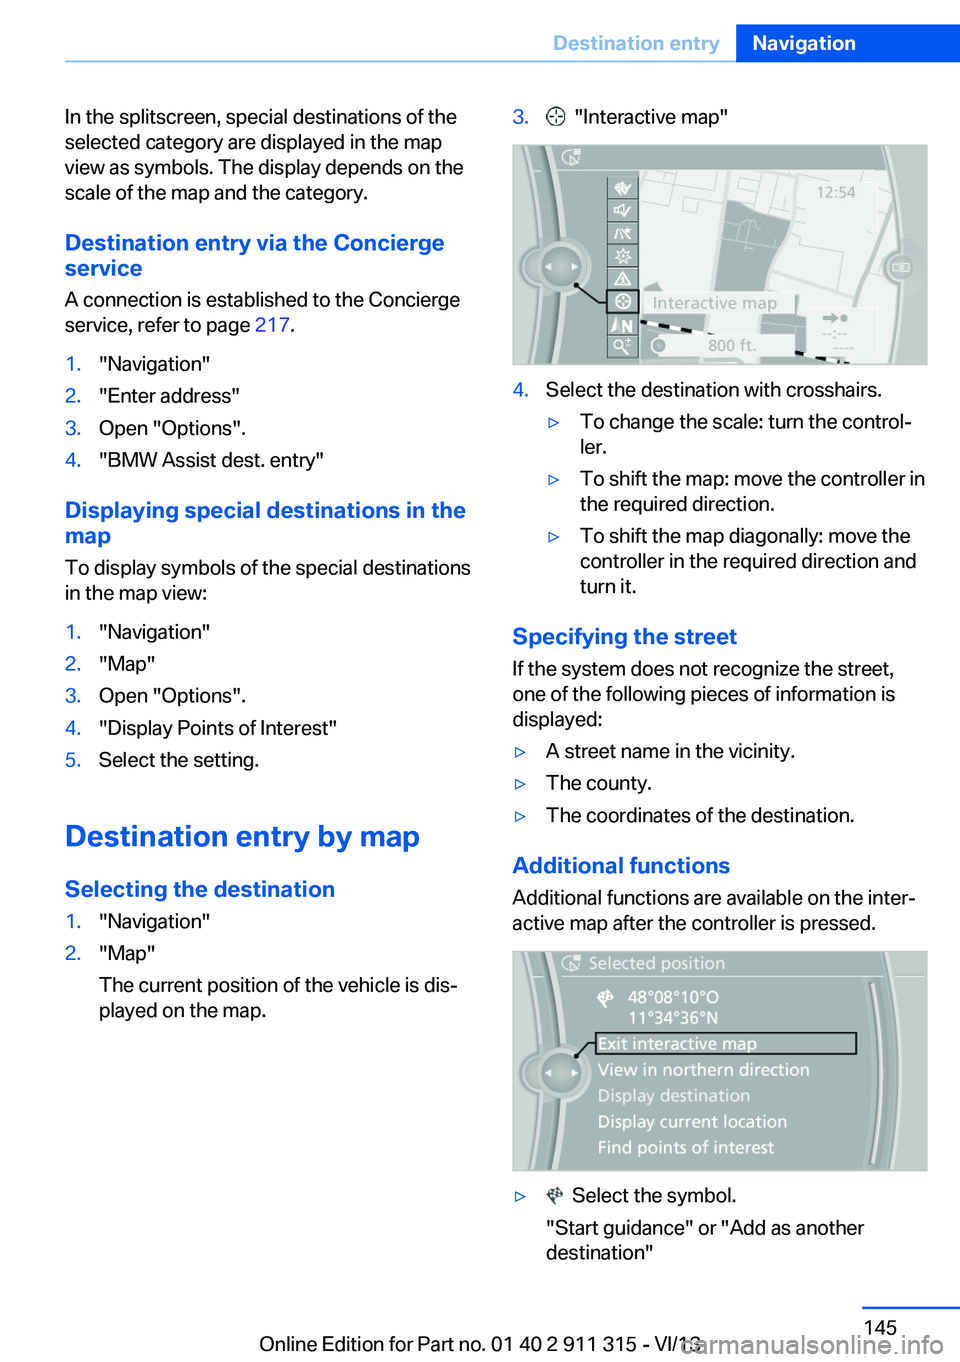
played on the map.3. "Interactive map"4.Select the destination with crosshairs.▷To change the scale: turn the control‐
ler.▷To shift the map: move the controller in
the required direction.▷To shift the map diagonally: move the
controller in the required direction and
turn it.
Specifying the street
If the system does not recognize the street,
one of the following pieces of information is
displayed:
▷A street name in the vicinity.▷The county.▷The coordinates of the destination.
Additional functions
Additional functions are available on the inter‐
active map after the controller is pressed.
▷ Select the symbol.
"Start guidance" or "Add as another destination"Seite 145Destination entryNavigation145
Online Edition for Part no. 01 40 2 911 315 - VI/13
Page 153 of 285
Automatically scaled map scaleIn the map view facing north, turn the control‐
ler in any direction until the AUTO scale is dis‐
played. The entire route between the current
location and the destination is displayed on the
map.
Settings for the map view
The settings are stored for the remote control
currently in use.1."Navigation"2."Map"3.Open "Options".4."Settings"5.To set the map view:▷"Day/night mode"
Select and create the necessary settings
depending on the light conditions.
"Traffic conditions/gray map" active: the
setting is disregarded.▷"Satellite images"
Depending on availability and resolution,
satellite images are displayed at scales of
approx. 1 mile to 600 miles/2 km to
1,000 km.▷"Perspective view in 3D"
Prominent areas that are contained in the
navigation data are displayed on the map in
3D.▷"Traffic conditions/gray map"
The map is optimized for displaying traffic
bulletins, refer to page 154.
Symbols for the special destinations are no
longer displayed.
Map view for splitscreen
The map view can be selected for the split
screen independently from the main screen.
1.Open "Options".2."Split screen"3.Move the controller to the right repeatedly
until the split screen is selected.4.Select "Split screen content" or the scale.5.Select the map view.▷"Arrow display"▷"Map facing north"▷"Map direction of travel"▷"Map view with perspective"▷"Position"▷"Exit ramp view": selected blind drive‐
ways are displayed three dimension‐
ally.▷"Traffic conditions/gray map"6.To change the scale: select the split
screen and turn the controller.
Traffic bulletins
At a glance
▷Display the traffic bulletins from radio sta‐
tions that broadcast the TI Traffic Informa‐
tion of a traffic information service. Infor‐
mation on traffic obstructions and hazards
is updated continuously.
Certain BMW models equipped with navi‐
gation have the capability to display real-
time traffic information. If your system has
this capability the following additional
terms and conditions apply:
An End-User shall no longer have the right
to use the Traffic Data in the event that the
End-User is in material breach of the terms
and conditions contained herein.
A. Total Traffic Network, a division of Clear
Channel Broadcasting, Inc. (“Total Traffic
Network”) holds the rights to the traffic in‐
cident data and RDS-TMC network
through which it is delivered. You may not
modify, copy, scan or use any other
method to reproduce, duplicate, republish,
transmit or distribute in any way any por‐Seite 153Destination guidanceNavigation153
Online Edition for Part no. 01 40 2 911 315 - VI/13
Page 155 of 285
garded in this setting. Symbols and special
destinations are not displayed.1."Navigation"2."Map"3.Open "Options".4."Settings"5."Traffic conditions/gray map"
Symbols in the map view
Depending on the scale of the map and the lo‐
cation of the traffic obstruction along the route,
the symbols for the traffic obstructions are dis‐
played.
Additional information in the map view Depending on the map scale, a traffic obstruc‐
tion's length, direction, and impact are dis‐
played in the map using triangles or gray bars
along the calculated route.
▷Red: traffic congestion▷Orange: stop-and-go traffic▷Yellow: heavy traffic▷Green: clear roads▷Gray: general traffic bulletins such as road
construction
The displayed information depends on the par‐
ticular traffic information service.
Filtering traffic bulletins
You can set which traffic bulletins appear on
the map.
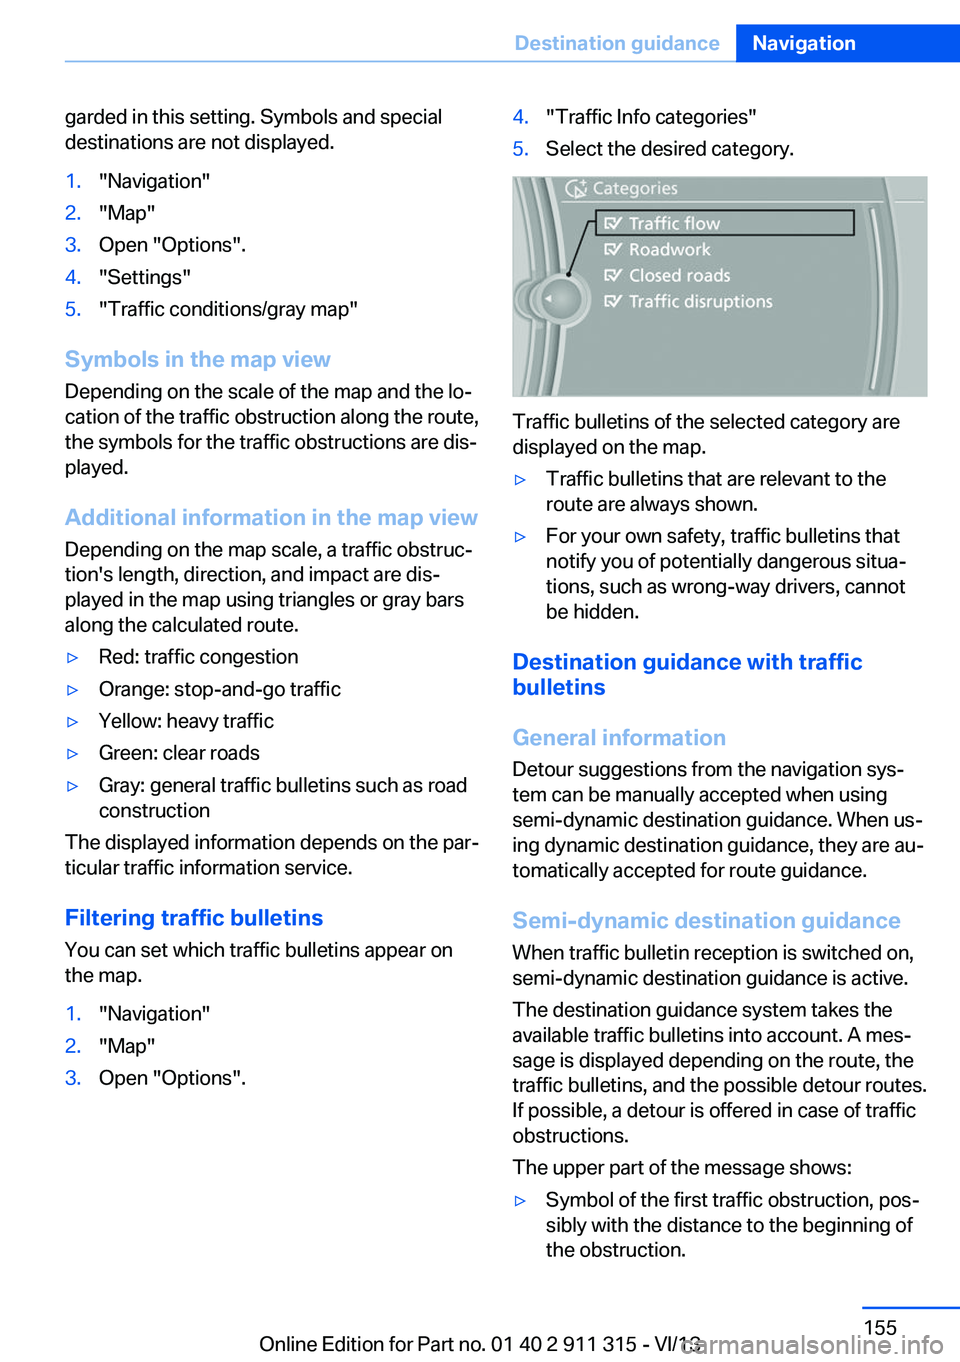
1."Navigation"2."Map"3.Open "Options".4."Traffic Info categories"5.Select the desired category.
Traffic bulletins of the selected category are
displayed on the map.
▷Traffic bulletins that are relevant to the
route are always shown.▷For your own safety, traffic bulletins that
notify you of potentially dangerous situa‐
tions, such as wrong-way drivers, cannot
be hidden.
Destination guidance with traffic
bulletins
General information
Detour suggestions from the navigation sys‐
tem can be manually accepted when using
semi-dynamic destination guidance. When us‐
ing dynamic destination guidance, they are au‐
tomatically accepted for route guidance.
Semi-dynamic destination guidance
When traffic bulletin reception is switched on,
semi-dynamic destination guidance is active.
The destination guidance system takes the
available traffic bulletins into account. A mes‐ sage is displayed depending on the route, the
traffic bulletins, and the possible detour routes.
If possible, a detour is offered in case of traffic
obstructions.
The upper part of the message shows:
▷Symbol of the first traffic obstruction, pos‐
sibly with the distance to the beginning of
the obstruction.Seite 155Destination guidanceNavigation155
Online Edition for Part no. 01 40 2 911 315 - VI/13
Page 175 of 285
Self-recorded CDs/DVDs▷Possible reasons for malfunctions with
self-recorded CDs/DVDs are inconsistent
data creation or recording processes, or
poor quality or old age of the blank CD/
DVD.▷Only label CDs/DVDs on the upper side
with a pen intended for this purpose.
Damage
▷Avoid fingerprints, dust, scratches and
moisture.▷Store CDs/DVDs in a sleeve.▷Do not subject CDs/DVDs to temperatures
over 122 ℉/50 ℃, high humidity or direct
sunlight.
CDs/DVDs with copy protection
CDs/DVDs are often provided with a copy pro‐
tection feature by the manufacturer. This can
mean that some CDs/DVDs cannot be played
or can only be played to a limited extent.
MACROVISION This product contains copyrighted technology
that is based on multiple registered US patents
and the intellectual property of the Macrovision
Corporation and other manufacturers. The use
of this copy protection must be approved by
Macrovision. Media protected by this product -
unless otherwise agreed with Macrovision - may only be used for private purposes. Copy‐
ing of this technology is prohibited.
DTS Digital Surround™
Manufactured under license under
U.S. Patent Numbers: 5,451,942; 5,956,674;
5,974,380; 5,978,762; 6,487,535 & and other
patents granted and registered in the USA and
worldwide. DTS and the logo are registered
trademarks & DTS Digital Surround and the
DTS logos are trademarks of DTS Inc. © DTS,
Inc. All rights reserved.
Music collection
Storing music
General information Music tracks from CDs/DVDs and USB devices
can be stored in the music collection on a hard
disc in the vehicle and played from there.▷Audio CD: tracks are converted into a com‐
pressed audio format. If available, informa‐
tion on the album, such as the artist, is
stored as well.▷CD/DVD or USB device with compressed
audio files: the entire content of the
CD/DVD or the USB device is stored in the
vehicle as an album. The WMA, MP3, M4A,
and AAC formats are stored. Individual
tracks and directories can be deleted later,
Deleting a track and directory, refer to
page 179.
Tracks with DRM copy protection can be
stored but cannot be played back.
Backing up music data
Regularly back up the music data; other‐
wise, it could be lost if there is a fault on the
hard disc.◀
Music recognition technology and re‐
lated data are provided by Grace‐
note®. Gracenote is the industry standard in
music recognition technology and related con‐
tent delivery. For more information, please visit
www.gracenote.com.
CD and music-related data from Gracenote,
Inc., copyright © 2000, Gracenote up to now.
Gracenote-Software Copyright 2000, Grace‐
note up to now. This product and service may
practice one or more of the following U.S. Pat‐
ents: #5,987,525; #6,061,680; #6,154,773,
#6,161,132, #6,230,192, #6,230,207,
#6,240,459, #6,330,593, and other patents is‐
sued or pending. Some services supplied un‐
der license from Open Globe, Inc. for U.S. Pat‐
ent: #6,304,523.
Seite 175CD/multimediaEntertainment175
Online Edition for Part no. 01 40 2 911 315 - VI/13
Page 176 of 285

Storing from a CD/DVD1.Insert a CD or DVD into the CD/DVD
player.2."CD/Multimedia"3."CD/DVD"4. Select the symbol for the CD/DVD
player.5."Store in vehicle"
The music collection is displayed and the first
track of the CD/DVD is played back. During the
storage process, the tracks are played in se‐
quence.
Observe the following during the storage proc‐
ess:
Do not switch to the CD/DVD player and do not
remove the CD/DVD from the CD/DVD player
as this will interrupt the storage process. You
can switch to the other audio sources without
interrupting the storage process. Tracks from
the current CD/DVD that have already been
stored can be called up.
Interrupting storage
1."CD/Multimedia"2."CD/DVD"3."Storing..."4."Cancel storing"
The storage process is interrupted and can be
continued at any time.
Continuing the storage process
1."CD/Multimedia"2."CD/DVD"3. Select the symbol for the CD/DVD
player.4."Continue storing"
Storage of the CD/DVD continues at the begin‐
ning of the track at which storage was inter‐
rupted.
Album information
During storage, information such as the name
of the artist is stored with the track, if this infor‐
mation is available in the vehicle database or
on the CD.
To update the database, contact your service
center.
Storing from a USB device
To store music, a suitable device must be con‐
nected to the USB interface in the glove com‐
partment.
▷Suitable devices: USB mass storage devi‐
ces, such as USB flash drives or MP3 play‐
ers with a USB interface.▷Unsuitable devices: USB hard drives, USB
hubs, USB memory card readers with mul‐
tiple inserts, Apple iPod/iPhone. Music
from the Apple iPod/iPhone can be playedSeite 176EntertainmentCD/multimedia176
Online Edition for Part no. 01 40 2 911 315 - VI/13
Page 181 of 285
Connect the headphone connector or line-out
connector of the device to the AUX-IN port.
Playback1.Connect the audio device, switch it on and
select a track on the audio device.2."CD/Multimedia"3.If necessary, "External devices"4. "AUX front"
Sound is output on the vehicle loudspeakers.
Volume
The volume of the sound output is dependent
on the audio device. If this volume differs
markedly from the volume of the other audio
sources, it is advisable to adjust the volumes.
Adjusting the volume
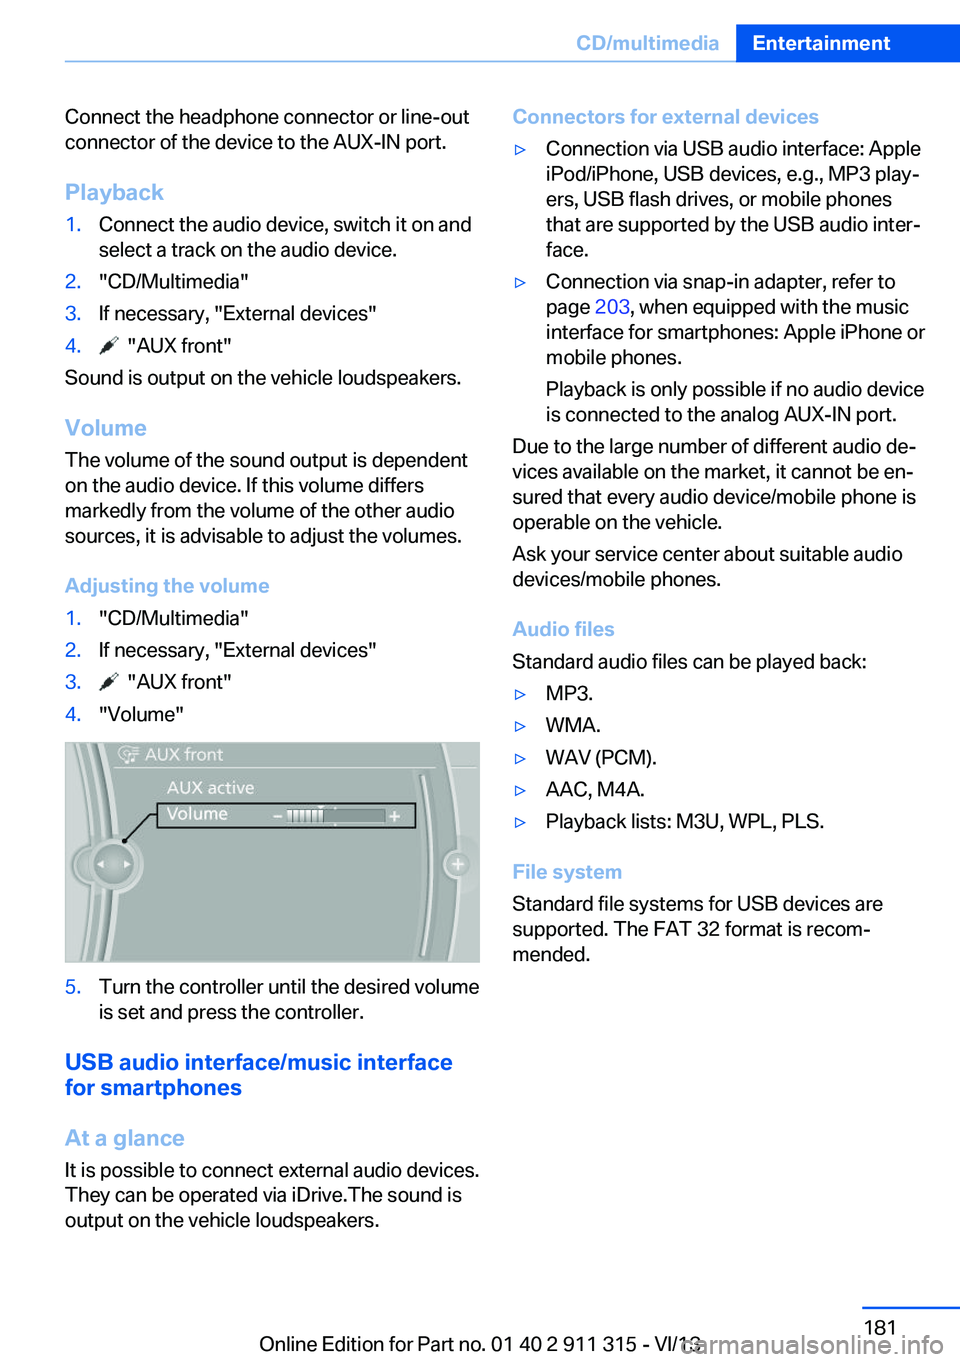
1."CD/Multimedia"2.If necessary, "External devices"3. "AUX front"4."Volume"5.Turn the controller until the desired volume
is set and press the controller.
USB audio interface/music interface
for smartphones
At a glance
It is possible to connect external audio devices.
They can be operated via iDrive.The sound is
output on the vehicle loudspeakers.
Connectors for external devices▷Connection via USB audio interface: Apple
iPod/iPhone, USB devices, e.g., MP3 play‐
ers, USB flash drives, or mobile phones
that are supported by the USB audio inter‐
face.▷Connection via snap-in adapter, refer to
page 203, when equipped with the music
interface for smartphones: Apple iPhone or
mobile phones.
Playback is only possible if no audio device
is connected to the analog AUX-IN port.
Due to the large number of different audio de‐
vices available on the market, it cannot be en‐
sured that every audio device/mobile phone is
operable on the vehicle.
Ask your service center about suitable audio
devices/mobile phones.
Audio files
Standard audio files can be played back:
▷MP3.▷WMA.▷WAV (PCM).▷AAC, M4A.▷Playback lists: M3U, WPL, PLS.
File system
Standard file systems for USB devices are
supported. The FAT 32 format is recom‐
mended.
Seite 181CD/multimediaEntertainment181
Online Edition for Part no. 01 40 2 911 315 - VI/13
Page 187 of 285

Music cannot be played back.▷Start the program for playing back music
data on the device and select a track on the
device if necessary.▷Switch the radio on and off again.
Music files can only be played back softly.
▷Adjust the volume settings on the device.
Playback is disturbed when buttons are
pressed or by other messages on the device.
▷Switch off the button tones and other sig‐
nal tones on the device.
Playback is interrupted by a telephone call or
traffic bulletin and is not resumed automati‐
cally.
▷Switch the radio on and off again.
Playback is not possible if the mobile phone is
connected via Bluetooth Audio while it is also
connected via the USB interface or the snap-in
adapter.
▷Disconnect one of the two connections; for
example, disconnect the audio connection,
refer to page 186, and restart playback.
If all points in this list have been checked and
the required function is still not available,
please contact the hotline or service center.
Software Update
The vehicle supports various external devices
depending on the current software version.
With a software update, the vehicle can sup‐
port new mobile phones or new external de‐
vice, for example.
▷USB.
Software updates and related current infor‐
mation is available at www.bmw.com/
update.
Displaying the current version
The currently installed software is displayed.
1."Settings"2."Software update"3."Show current version"
Select desired version to display additional in‐
formation.
Updating software via USB The software may only be updated when the
vehicle is stationary.
1.Store the file for the software-update in the
main director of a USB flash drive.2.Insert the USB flash drive into the USB au‐
dio interface in the center armrest. An up‐
date via the USB interface in the glove
compartment is not possible.3."Settings"4."Software update"5."Update software"6."Start update"7."OK"
All listed software updates are installed.
Restoring the previous version
The software version prior to the last software
update can be restored.
The previous version can only be restored
when the vehicle is stationary.
1."Settings"2."Software update"3."Restore previous version"4."OK" Double-click.
All listed software updates are removed.
Seite 187CD/multimediaEntertainment187
Online Edition for Part no. 01 40 2 911 315 - VI/13