2014 BMW X1 SDRIVE28I service
[x] Cancel search: servicePage 111 of 295
Rear window defrosterPress the button.
The rear window defroster switches
off automatically after a certain period of time.
Switching the system on/off
Switching off Press and hold the left button or, with
the setting at the lowest level, press
the left button.
All displays are cleared except for the rear win‐
dow defroster if it is switched on.
When the automatic climate control is
switched off, the supply of outside air is sus‐
pended. If the air quality deteriorates or the
window fogs over, switch the system back on
and increase the air flow rate.
Switching on Press any button, except for the buttons for
the ALL program or rear window heating.
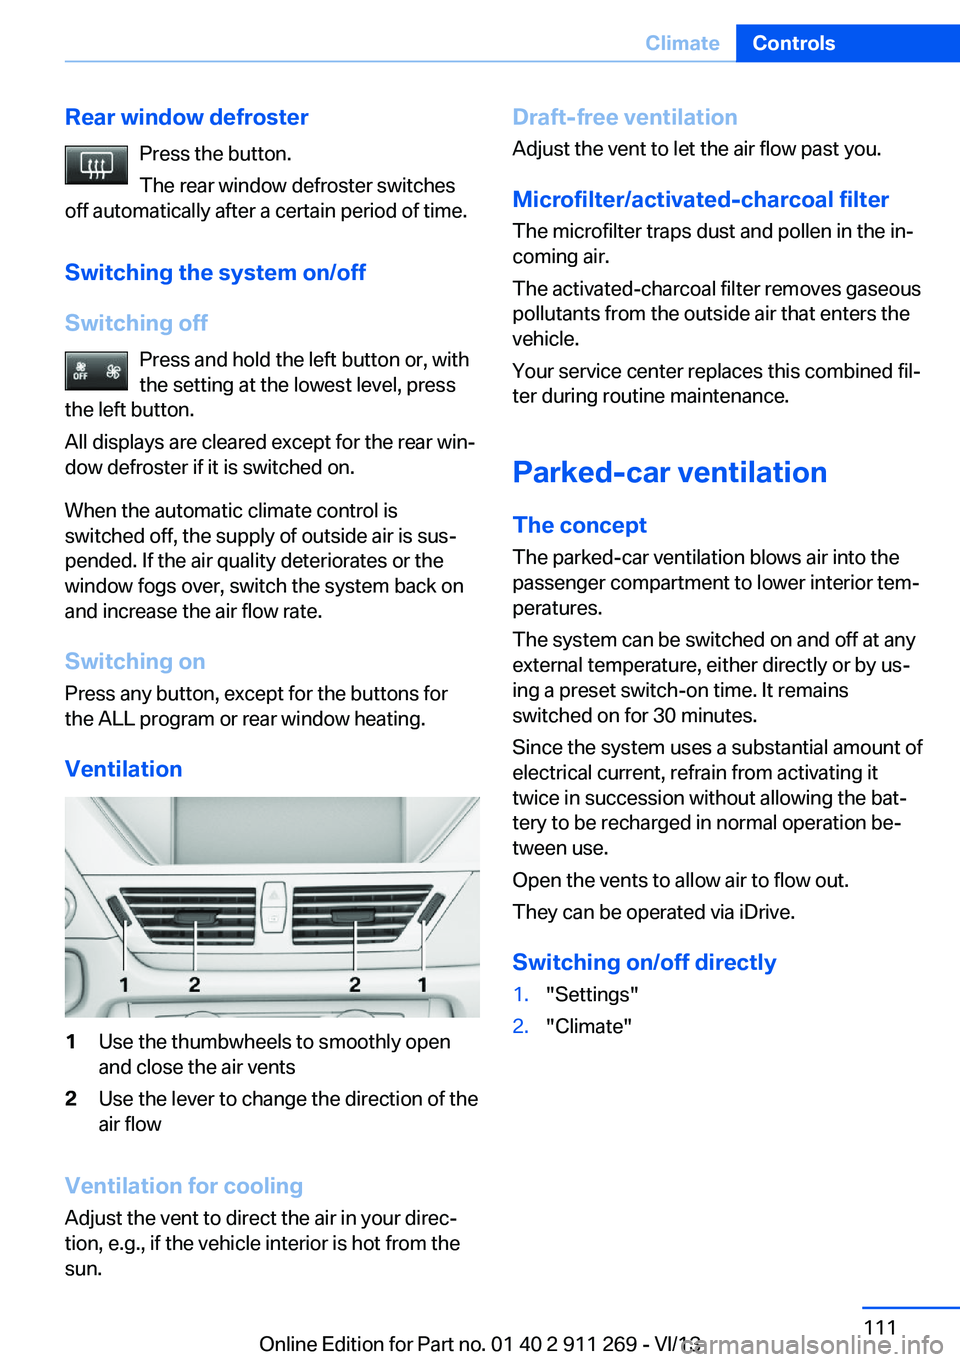
Ventilation1Use the thumbwheels to smoothly open
and close the air vents2Use the lever to change the direction of the
air flow
Ventilation for cooling
Adjust the vent to direct the air in your direc‐
tion, e.g., if the vehicle interior is hot from the
sun.
Draft-free ventilation
Adjust the vent to let the air flow past you.
Microfilter/activated-charcoal filter
The microfilter traps dust and pollen in the in‐
coming air.
The activated-charcoal filter removes gaseous
pollutants from the outside air that enters the
vehicle.
Your service center replaces this combined fil‐
ter during routine maintenance.
Parked-car ventilation The conceptThe parked-car ventilation blows air into the
passenger compartment to lower interior tem‐
peratures.
The system can be switched on and off at any
external temperature, either directly or by us‐
ing a preset switch-on time. It remains
switched on for 30 minutes.
Since the system uses a substantial amount of
electrical current, refrain from activating it
twice in succession without allowing the bat‐
tery to be recharged in normal operation be‐
tween use.
Open the vents to allow air to flow out.
They can be operated via iDrive.
Switching on/off directly1."Settings"2."Climate"Seite 111ClimateControls111
Online Edition for Part no. 01 40 2 911 269 - VI/13
Page 113 of 295

Interior equipmentVehicle equipmentThis chapter describes all series equipment as
well as country-specific and special equipment
offered for this model series.Therefore, it also
describes equipment that may not be found in
your vehicle, for instance due to the selected
special equipment or the country version. This
also applies to safety-related functions and
systems.
Universal Garage Door
Opener
The concept The Universal Garage Door Opener can be
used to operate up to 3 functions in remote-
controlled systems, such as garage door drives or lighting systems. The Universal Garage
Door Opener replaces up to 3 different hand-
held transmitters. To operate it, the buttons on
the interior rearview mirror must be program‐
med for the desired functions. The hand-held
transmitter for the system is needed for the
programming procedure.
During programming
During programming and before activat‐
ing a device using the Universal Garage Door
Opener, ensure that there are no people, ani‐
mals, or objects in the range of movement of
the remote-controlled device; otherwise, there
is a risk of injury or damage.
Also follow the safety instructions of the hand-
held transmitter.◀
Before selling the vehicle, delete the stored
functions for security reasons.
Compatibility If this symbol is printed on the packag‐
ing or in the operating instructions ofthe system being operated, the system is gen‐
erally compatible with the Universal Garage
Door Opener.
If you have any questions, please contact:▷Your service center.▷www.homelink.com on the Internet.
HomeLink is a registered trademark of John‐
son Controls, Inc.
Controls on the interior rearview
mirror
1LED2Buttons3Hand-held transmitter, required for pro‐
gramming.
Programming
General information
1.Switch on the ignition.2.Initial setup:
Press the right and left buttons on the inte‐
rior rearview mirror simultaneously for ap‐
prox. 20 seconds until the LED on the inte‐
rior rearview mirror begins to flash. All
programmed settings of the buttons on the
interior rearview mirror are deleted.3.Hold the hand-held transmitter of the sys‐
tem to be operated a distance of approx. 1
to 3 in/2.5 to 8 cm away from the buttonsSeite 113Interior equipmentControls113
Online Edition for Part no. 01 40 2 911 269 - VI/13
Page 138 of 295
Use coasting conditions
When approaching a red light, take your foot
off the accelerator and let the vehicle coast to
a halt.
On a downhill gradient, take your foot off the
accelerator and let the vehicle roll.
The flow of fuel is interrupted while coasting.
Switch off the engine during longer stops
Switch off the engine during longer stops, e.g.,
at traffic lights, railroad crossings or in traffic
congestion.
Automatic Engine Start/Stop Function The Automatic Start/Stop Function of your ve‐
hicle automatically switches off the engine
during a stop. Additional information on the
Automatic Engine Start/Stop Function, refer to
page 59.
If the engine is stopped and then started again,
fuel consumption and emissions drop com‐
pared to an engine that runs permanently.
Stopping the engine even for just a few sec‐
onds can result in savings.
Use of this system can cause premature wear
on certain vehicle components.
In addition, fuel consumption depends on
other factors as well, such as driving style, road
conditions, maintenance, and environmental
factors.
Switch off any functions that
are not currently needed
Functions such as seat heating and the rear
window defroster require a lot of energy and
consume additional fuel, especially in city and
stop-and-go traffic.
Therefore, switch off these functions if they
are not actually needed.Have maintenance carried
out
Have vehicles maintained regularly to achieve
optimal vehicle economy and operating life.
Have the maintenance carried out by your
service center.
Please also note the BMW Maintenance Sys‐
tem, refer to page 247.
ECO PRO
The concept ECO PRO supports the driver in achieving high
fuel economy. Engine control and comfort
functions, such as the climate control system,
are adjusted accordingly.
In addition, situation-related information can
be displayed that helps the driver achieve
lower fuel consumption.
The resulting range extension can be dis‐
played in the instrument cluster.
Activating ECO PRO Press the button; the LED above the
button lights up.
ECO PRO appears in the instrument cluster
and DSC is activated if necessary.
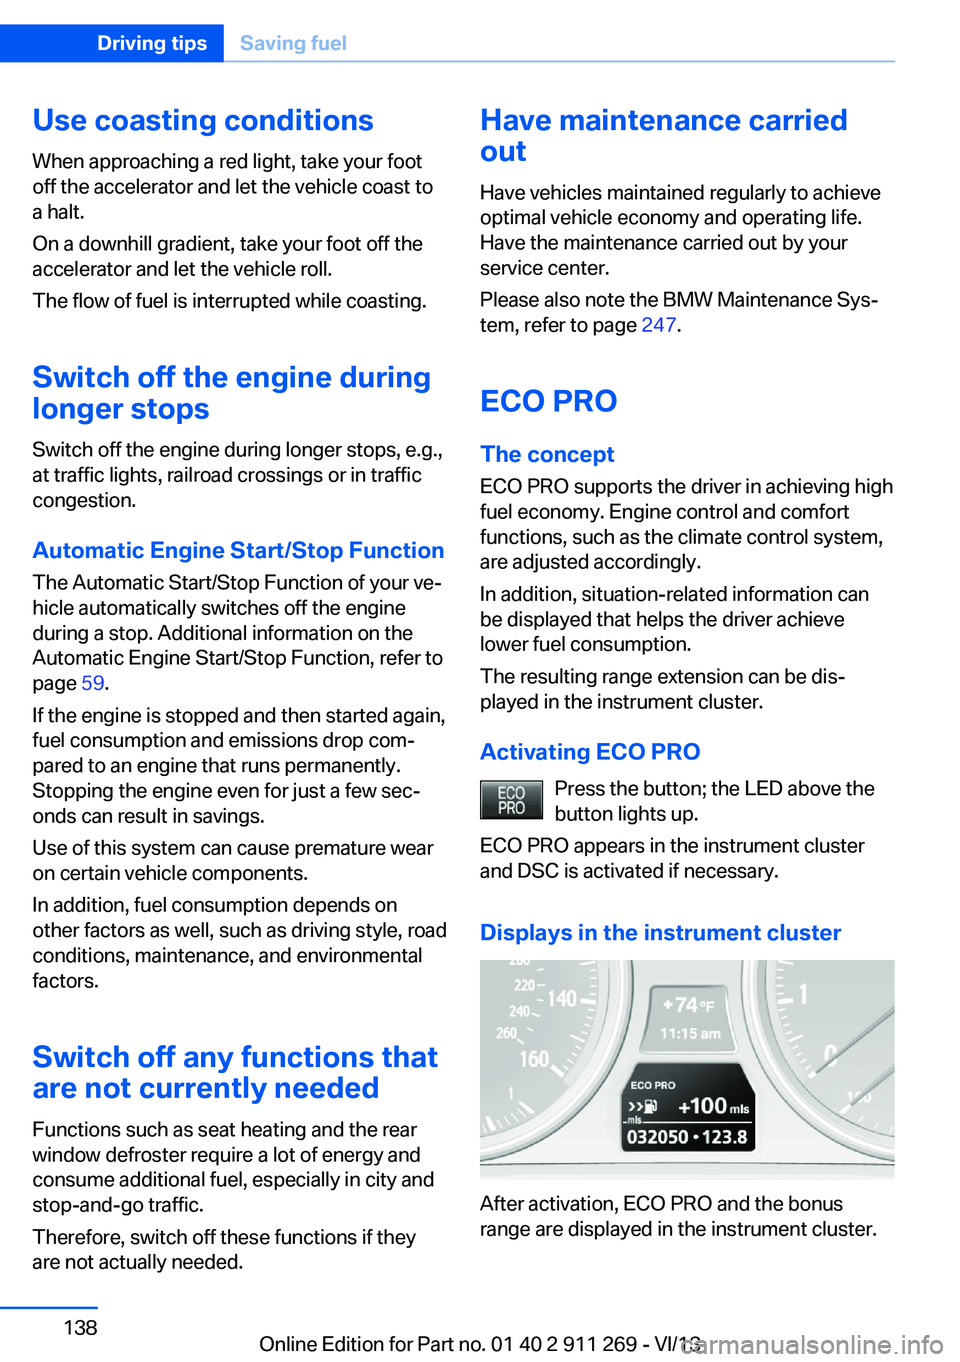
Displays in the instrument cluster
After activation, ECO PRO and the bonus
range are displayed in the instrument cluster.
Seite 138Driving tipsSaving fuel138
Online Edition for Part no. 01 40 2 911 269 - VI/13
Page 142 of 295

Navigation systemVehicle equipmentThis chapter describes all series equipment as
well as country-specific and special equipment
offered for this model series.Therefore, it also
describes equipment that may not be found in
your vehicle, for instance due to the selected
special equipment or the country version. This
also applies to safety-related functions and
systems.
General information
The navigation system can determine the pre‐
cise position of the vehicle, with the aid of sat‐
ellites and vehicle sensors, and can reliably
guide you to every entered destination.
Entries in stationary vehicle
Enter data only when the vehicle is sta‐
tionary, and always give priority to the applica‐
ble traffic regulations in the event of any con‐
tradiction between traffic and road conditions
and the instructions issued by the navigation
system. Failure to take to this precaution can
place you in violation of the law and put vehicle
occupants and other road users in danger.◀
Opening the navigation system1. Press the button on the controller.2."Navigation"
The navigation system can also be called
up directly using the button on the con‐
troller.
Navigation data
Information on navigation data
1."Navigation"2.Open "Options".3."Navigation system version"
Information is displayed on the data ver‐
sion.
Updating the navigation data
General information
Navigation data are stored in the vehicle and
can be updated.
Current navigation data and the authorization
code are available from your service center.
▷Depending on the data volume, a data up‐
date may take several hours.▷Update during the trip to preserve battery.▷During the update, only the basic functions
of the navigation system are available.▷The status of the update can be viewed.▷After the updating process is complete, the
system restarts.▷Remove the medium with the navigation
data after the update.
Performing an update
1.Insert the navigation DVD into the DVD
player with the labeled side facing up.2.Follow the instructions on the Control Dis‐
play.3.Enter the authorization code of the naviga‐
tion DVD.4.Change the DVD if necessary.
After the trip is interrupted, follow the instruc‐
tions on the Control Display.
Viewing the status
1.Open "Options".2."Navigation update"Seite 142NavigationNavigation system142
Online Edition for Part no. 01 40 2 911 269 - VI/13
Page 149 of 295
In the splitscreen, special destinations of the
selected category are displayed in the map
view as symbols. The display depends on the
scale of the map and the category.
Destination entry via the Concierge
service
A connection is established to the Concierge
service, refer to page 221.1."Navigation"2."Enter address"3.Open "Options".4."BMW Assist dest. entry"
Displaying special destinations in the
map
To display symbols of the special destinations
in the map view:
1."Navigation"2."Map"3.Open "Options".4."Display Points of Interest"5.Select the setting.
Destination entry by map
Selecting the destination
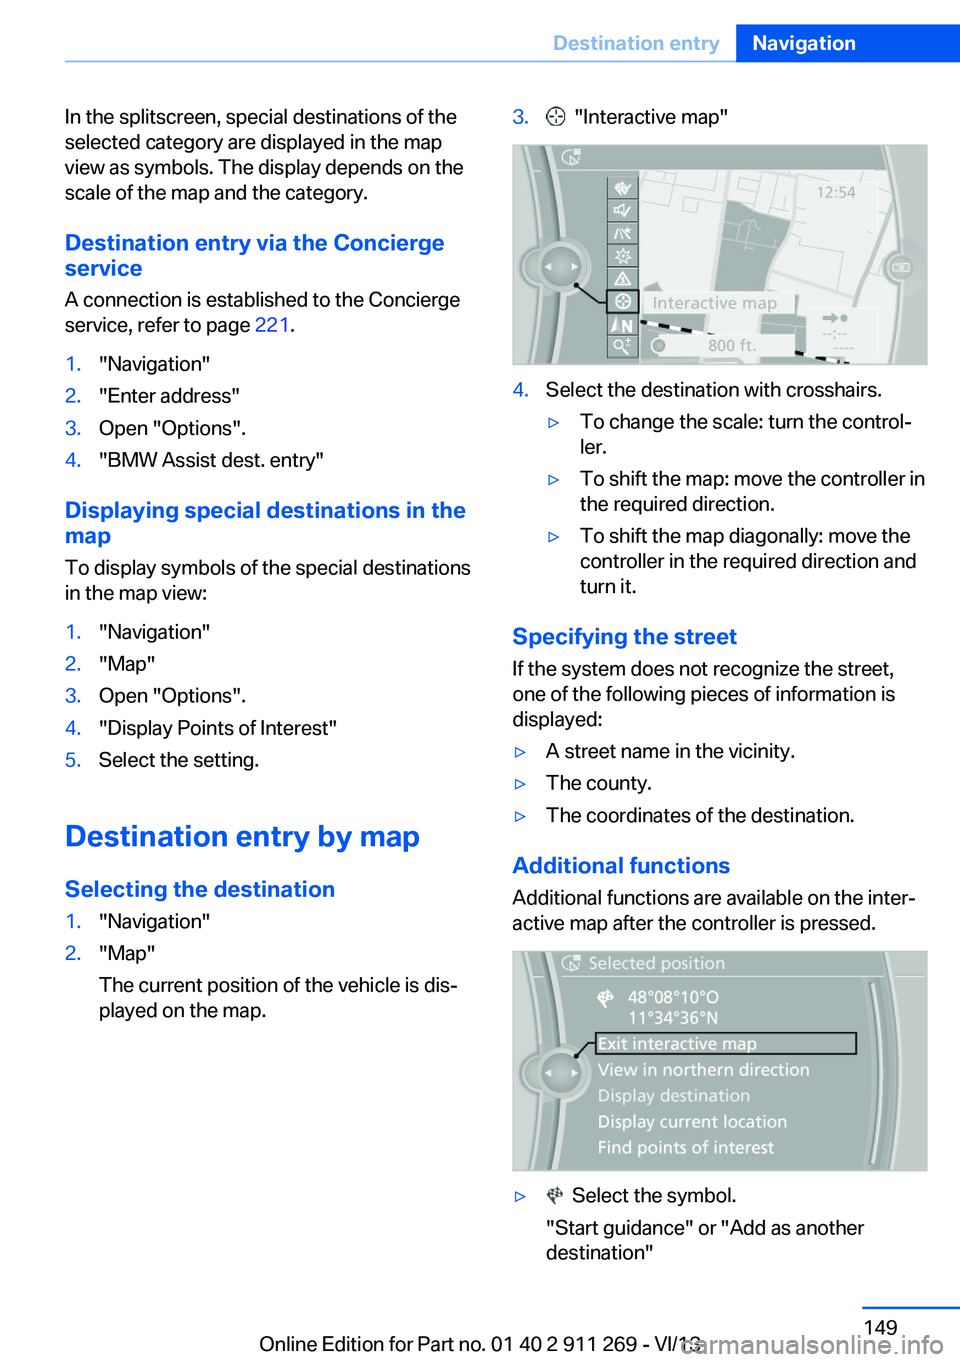
1."Navigation"2."Map"
The current position of the vehicle is dis‐
played on the map.3. "Interactive map"4.Select the destination with crosshairs.▷To change the scale: turn the control‐
ler.▷To shift the map: move the controller in
the required direction.▷To shift the map diagonally: move the
controller in the required direction and
turn it.
Specifying the street
If the system does not recognize the street,
one of the following pieces of information is
displayed:
▷A street name in the vicinity.▷The county.▷The coordinates of the destination.
Additional functions
Additional functions are available on the inter‐
active map after the controller is pressed.
▷ Select the symbol.
"Start guidance" or "Add as another destination"Seite 149Destination entryNavigation149
Online Edition for Part no. 01 40 2 911 269 - VI/13
Page 157 of 295
Automatically scaled map scaleIn the map view facing north, turn the control‐
ler in any direction until the AUTO scale is dis‐
played. The entire route between the current
location and the destination is displayed on the
map.
Settings for the map view
The settings are stored for the remote control
currently in use.1."Navigation"2."Map"3.Open "Options".4."Settings"5.To set the map view:▷"Day/night mode"
Select and create the necessary settings
depending on the light conditions.
"Traffic conditions/gray map" active: the
setting is disregarded.▷"Satellite images"
Depending on availability and resolution,
satellite images are displayed at scales of
approx. 1 mile to 600 miles/2 km to
1,000 km.▷"Perspective view in 3D"
Prominent areas that are contained in the
navigation data are displayed on the map in
3D.▷"Traffic conditions/gray map"
The map is optimized for displaying traffic
bulletins, refer to page 158.
Symbols for the special destinations are no
longer displayed.
Map view for splitscreen
The map view can be selected for the split
screen independently from the main screen.
1.Open "Options".2."Split screen"3.Move the controller to the right repeatedly
until the split screen is selected.4.Select "Split screen content" or the scale.5.Select the map view.▷"Arrow display"▷"Map facing north"▷"Map direction of travel"▷"Map view with perspective"▷"Position"▷"Exit ramp view": selected blind drive‐
ways are displayed three dimension‐
ally.▷"Traffic conditions/gray map"6.To change the scale: select the split
screen and turn the controller.
Traffic bulletins
At a glance
▷Display the traffic bulletins from radio sta‐
tions that broadcast the TI Traffic Informa‐
tion of a traffic information service. Infor‐
mation on traffic obstructions and hazards
is updated continuously.
Certain BMW models equipped with navi‐
gation have the capability to display real-
time traffic information. If your system has
this capability the following additional
terms and conditions apply:
An End-User shall no longer have the right
to use the Traffic Data in the event that the
End-User is in material breach of the terms
and conditions contained herein.
A. Total Traffic Network, a division of Clear
Channel Broadcasting, Inc. (“Total Traffic
Network”) holds the rights to the traffic in‐
cident data and RDS-TMC network
through which it is delivered. You may not
modify, copy, scan or use any other
method to reproduce, duplicate, republish,
transmit or distribute in any way any por‐Seite 157Destination guidanceNavigation157
Online Edition for Part no. 01 40 2 911 269 - VI/13
Page 159 of 295
garded in this setting. Symbols and special
destinations are not displayed.1."Navigation"2."Map"3.Open "Options".4."Settings"5."Traffic conditions/gray map"
Symbols in the map view
Depending on the scale of the map and the lo‐
cation of the traffic obstruction along the route,
the symbols for the traffic obstructions are dis‐
played.
Additional information in the map view Depending on the map scale, a traffic obstruc‐
tion's length, direction, and impact are dis‐
played in the map using triangles or gray bars
along the calculated route.
▷Red: traffic congestion▷Orange: stop-and-go traffic▷Yellow: heavy traffic▷Green: clear roads▷Gray: general traffic bulletins such as road
construction
The displayed information depends on the par‐
ticular traffic information service.
Filtering traffic bulletins
You can set which traffic bulletins appear on
the map.
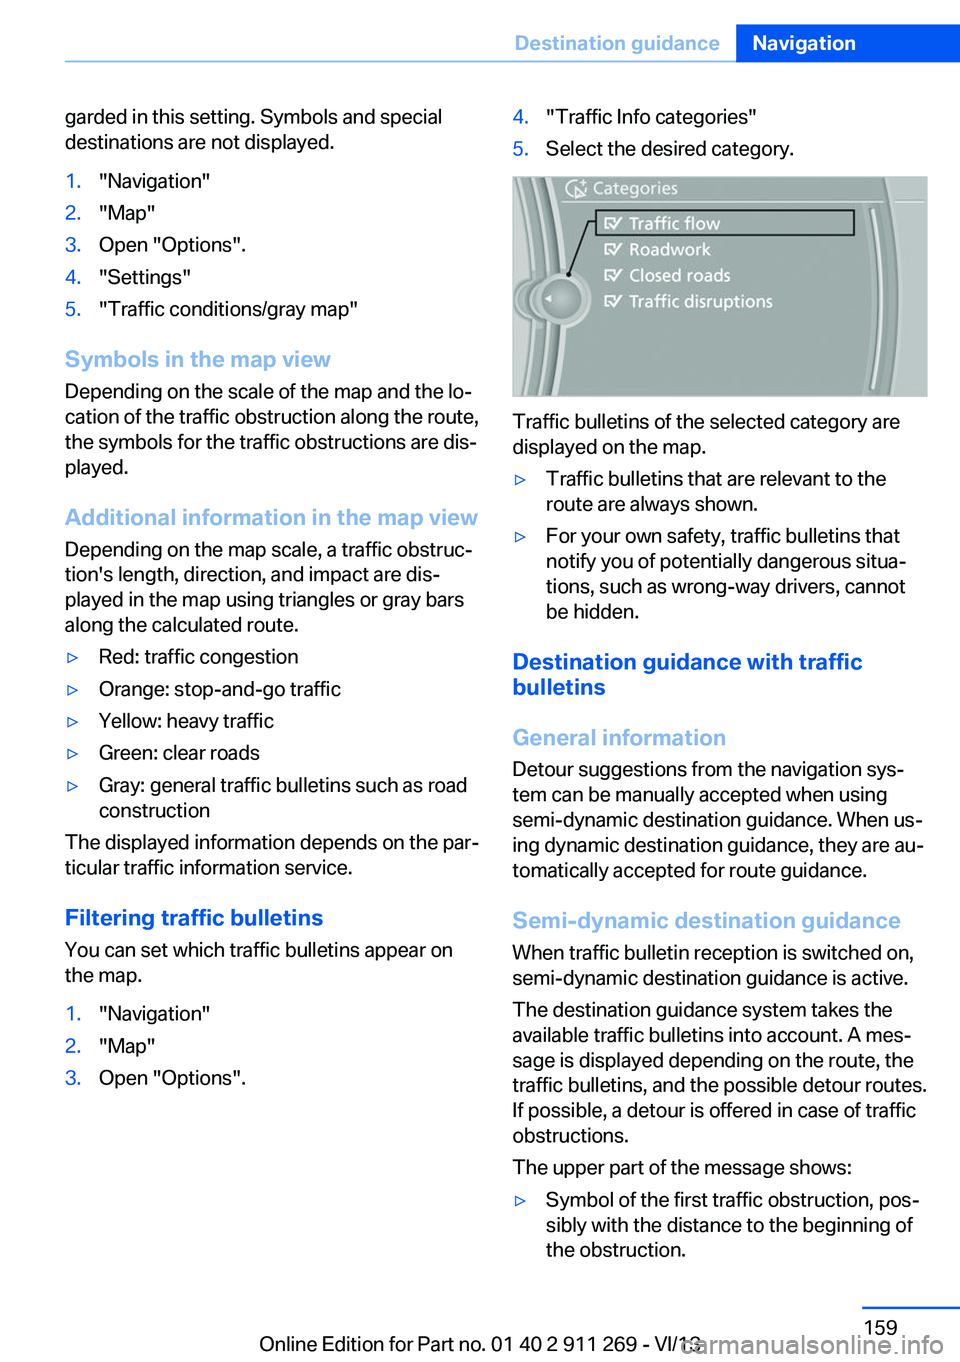
1."Navigation"2."Map"3.Open "Options".4."Traffic Info categories"5.Select the desired category.
Traffic bulletins of the selected category are
displayed on the map.
▷Traffic bulletins that are relevant to the
route are always shown.▷For your own safety, traffic bulletins that
notify you of potentially dangerous situa‐
tions, such as wrong-way drivers, cannot
be hidden.
Destination guidance with traffic
bulletins
General information
Detour suggestions from the navigation sys‐
tem can be manually accepted when using
semi-dynamic destination guidance. When us‐
ing dynamic destination guidance, they are au‐
tomatically accepted for route guidance.
Semi-dynamic destination guidance
When traffic bulletin reception is switched on,
semi-dynamic destination guidance is active.
The destination guidance system takes the
available traffic bulletins into account. A mes‐ sage is displayed depending on the route, the
traffic bulletins, and the possible detour routes.
If possible, a detour is offered in case of traffic
obstructions.
The upper part of the message shows:
▷Symbol of the first traffic obstruction, pos‐
sibly with the distance to the beginning of
the obstruction.Seite 159Destination guidanceNavigation159
Online Edition for Part no. 01 40 2 911 269 - VI/13
Page 179 of 295

Self-recorded CDs/DVDs▷Possible reasons for malfunctions with
self-recorded CDs/DVDs are inconsistent
data creation or recording processes, or
poor quality or old age of the blank CD/
DVD.▷Only label CDs/DVDs on the upper side
with a pen intended for this purpose.
Damage
▷Avoid fingerprints, dust, scratches and
moisture.▷Store CDs/DVDs in a sleeve.▷Do not subject CDs/DVDs to temperatures
over 122 ℉/50 ℃, high humidity or direct
sunlight.
CDs/DVDs with copy protection
CDs/DVDs are often provided with a copy pro‐
tection feature by the manufacturer. This can
mean that some CDs/DVDs cannot be played
or can only be played to a limited extent.
MACROVISION This product contains copyrighted technology
that is based on multiple registered US patents
and the intellectual property of the Macrovision
Corporation and other manufacturers. The use
of this copy protection must be approved by
Macrovision. Media protected by this product -
unless otherwise agreed with Macrovision - may only be used for private purposes. Copy‐
ing of this technology is prohibited.
DTS Digital Surround™
Manufactured under license under
U.S. Patent Numbers: 5,451,942; 5,956,674;
5,974,380; 5,978,762; 6,487,535 & and other
patents granted and registered in the USA and
worldwide. DTS and the logo are registered
trademarks & DTS Digital Surround and the
DTS logos are trademarks of DTS Inc. © DTS,
Inc. All rights reserved.
Music collection
Storing music
General information Music tracks from CDs/DVDs and USB devices
can be stored in the music collection on a hard
disc in the vehicle and played from there.▷Audio CD: tracks are converted into a com‐
pressed audio format. If available, informa‐
tion on the album, such as the artist, is
stored as well.▷CD/DVD or USB device with compressed
audio files: the entire content of the
CD/DVD or the USB device is stored in the
vehicle as an album. The WMA, MP3, M4A,
and AAC formats are stored. Individual
tracks and directories can be deleted later,
Deleting a track and directory, refer to
page 183.
Tracks with DRM copy protection can be
stored but cannot be played back.
Backing up music data
Regularly back up the music data; other‐
wise, it could be lost if there is a fault on the
hard disc.◀
Music recognition technology and re‐
lated data are provided by Grace‐
note®. Gracenote is the industry standard in
music recognition technology and related con‐
tent delivery. For more information, please visit
www.gracenote.com.
CD and music-related data from Gracenote,
Inc., copyright © 2000, Gracenote up to now.
Gracenote-Software Copyright 2000, Grace‐
note up to now. This product and service may
practice one or more of the following U.S. Pat‐
ents: #5,987,525; #6,061,680; #6,154,773,
#6,161,132, #6,230,192, #6,230,207,
#6,240,459, #6,330,593, and other patents is‐
sued or pending. Some services supplied un‐
der license from Open Globe, Inc. for U.S. Pat‐
ent: #6,304,523.
Seite 179CD/multimediaEntertainment179
Online Edition for Part no. 01 40 2 911 269 - VI/13