Page 169 of 230

of the Level 2 charging station. The permitted
charge current strength can vary by country.
The charge current strength for Level 2 charg‐
ing, refer to page 162, can be adjusted in the
vehicle in two steps.
At delivery, the charge current for
Level 2 charging is set to "Reduced". This set‐
ting should be maintained, unless it was veri‐
fied that a higher charge current strength is
permitted in the individual case.
The charge current changes depending on the
setting."Maximum""Reduced"32 A20 A
Depending on the charge current, the charging
duration changes.
Range Extender
With Range Extender, refer to page 67,
switched on, the current charging state can be
maintained. In this way, a higher range is ach‐
ieved.
Hints Working with electrical current
When working with electrical current, ob‐
serve the safety regulations. Otherwise, with
high voltage or excess current there is a risk to
persons and property, e.g., from electrocution or fire.◀
Have the charging device checked be‐
fore commissioning
Before the initial charging process, have your
own charging device checked at the charging location by a qualified electrician, that is,
charging port on the vehicle, charging cable,
charging station or household socket and con‐
nected circuits. Otherwise, there is a danger of
damage to the vehicle and overloading of the
supply mains at the charging location.◀
Follow instructions at the charging sta‐
tion
When working with electrical current, follow
the instructions at the charging station. Other‐
wise, there is a risk of an accident.◀
Make sure that the charging device is in
flawless operating condition
Only use the charging device in a flawless con‐
dition. Otherwise, a risk of fire may result, e.g.,
from the device heating up because of, say,
worn contacts or damage.◀
No simultaneous charging and refueling
Do not refuel while a charging cable is
plugged in, and maintain an adequate safety
distance from highly flammable materials. Oth‐
erwise, there is a danger of personal injury and
property damage from burning fuel vapors,
e.g., if the charging cable is improperly plug‐
ged in or unplugged.◀
Have the charging port cleaned by
trained personnel
If the charging port is dirty, have the car
cleaned only by appropriately trained person‐
nel. Otherwise, there is a danger of injury from high voltage.◀
Charging cable General information
Use a Level 1 charging cable, Level 2 charging
cable or the permanently installed charging ca‐
ble of a charging station to charge the vehicle.
Different charging cables can be required de‐ pending on the country.
Level 1 charging cable
With the Level 1 charging cable, it is permissi‐
ble to perform charging from grounded house‐
hold sockets. At the power connection of a
household socket, charging is done with alter‐
nating current.Seite 155Charging vehicleMobility157
Page 170 of 230

When a Level 1 charging cable is used, this
may produce efficiency values other than indi‐
cated on the energy label.
Level 2 charging cable
The Level 2 charging cable makes it possible
to recharge at sockets of designated
Level 2 charging stations using a special plug.
Charging is performed with alternating current
at designated Level 2 charging stations. The
charging process can be completed faster than
at household sockets.
If necessary, the charging cable is attached to
the charging station.
If a Level 2 charging cable is used, apply the
corresponding setting on the Control Display,
refer to page 162.
DC charging cable The DC charging cable that is permanently in‐
stalled at the charging station makes is possi‐
ble to charge at DC charging stations. Charg‐
ing is performed with direct current at
designated DC charging stations. At the higher
lidacity current connection of a DC charger
station the charging time is significantly lower
than with a household socket or a level 2
charging station.
During charging at a DC charging station, an
indication in the instrument cluster, refer to
page 162, is displayed.
Hints Use approved charging cables only
Use only approved charging cables or
charging stations for charging. Otherwise,
there is a danger of property damage or per‐
sonal injury, e.g., from burning cables. Informa‐
tion about the approved charging cables can
be obtained from the service center.◀Use the charging cable only for charging
the vehicle, and do not extend it
Use the charging cable only for charging the
vehicle and do not extend it with cables or
adapters. Otherwise, it may not be possible to
complete the charging process or property
damage might occur, e.g., due to a cable fire.◀
Do not use any damaged charging cables
Do not use any damaged charging ca‐
bles. Otherwise, there is a risk of injury from
high voltage.◀
Storage The Level 1 charging cable is located in the ca‐
ble compartment under the hood.
The Level 2 charging cable can be stored in
the same place.
Moisture can penetrate into the occasional use
cable compartment, e.g. in a car wash.
If required, store the charging cable with the
installed plug cover to prevent moisture in the
charging cable plug.Seite 156MobilityCharging vehicle158
Page 171 of 230

ConnectionTo connect, engage lever in position P P. Set
the parking brake if needed.1.Tap on the charging port flap, arrow.2.Remove the charging port lid, arrow.3.Connect either a Level 1 or Level 2 charg‐
ing cable to the household socket or the
port on the charging station.4.Remove cover of the charging cable plug if
needed.5.Insert the charging cable plug correspond‐
ing to the charging port, and push it in until
it latches.
When charging at a charging station, follow the
instructions at the charging station.
Remove
When the vehicle is locked, the charging cable
is locked. Unlock the vehicle before removing
the cable.
1.Unlock the vehicle by remote control if it is
locked.Charging cable is unlocked.2.Press the release button on the handle, ar‐
row 1, and grasp the charging cable at the
gripping areas.
Charging process is interrupted.3.Remove the charging cable from the
charging port, arrow 2.4.Put the charging port lid back on.5.Close the charging port flap.6.Attach cover of the charging cable plug if
needed.7.Disconnect either a Level 1 or Level 2
charging cable from the household socket
or the port on the charging station.8.Stow the charging cable.
At a charging station, insert the perma‐
nently installed charging cable in the place
provided for it.
Manual release
The charging port flap is automatically locked
while driving.
The charging cable may be locked during the
charging process.
The charging cable may be locked during the
charging process if the vehicle is locked.
Seite 157Charging vehicleMobility159
Page 172 of 230

Manually unlocking charging port flapIn case of an electrical malfunction of the
charging cable lock, the charging port flap can
be manually unlocked.1.Open rear door on the side of the charging
port flap.2.Remove the cover.3. Pull the blue knob, arrow. This releases
the charging port flap.4.If necessary, press the knob back into the
initial position.
Manual unlocking of the charging
cable
In case of an electrical malfunction, the charg‐
ing cable can be manually unlocked.
When charging at a charging station, complete
the charging process at the charging station
before unlocking the charging cable.
1.Open rear door on the side of the charging
port flap.2.Remove the cover.3. Pull the blue knob, arrow. Charging ca‐
ble is manually unlocked.4.Grasp the charging cable at the gripping
areas.5.Remove charging cable.
Charging operation
Hints Following safety instructions of the
power mains connection
During the charging process, heed the safety
instructions of the respective power mains
connection. Otherwise, there could be a risk of
personal injury or property damage from high
voltage, e.g., from electrocution or fire.◀
Using a Level 1 charging cable at other
household sockets
Before charging at other household sockets,
adapt the charging current strength to the
mains. Otherwise, there is a risk of fire, e.g.,
from overheating of the household socket or
overloading of the power mains.◀
Starting charging process
1.Engage selector lever position P. Set the
parking brake if needed.2.Planning charging process, refer to
page 161.3.Switch off drive readiness.4.Connect either a Level 1 or Level 2 charg‐
ing cable to the household socket or the
port on the charging station.5.Open charging port flap.6.Connect charging cable to the vehicle, re‐
fer to page 159.
At high temperatures, initially the high-voltage
battery is cooled. The charging process can be
started with a delay.
Display of the charging status
The charging status is indicated by the indica‐
tor light at the charging port.
Seite 158MobilityCharging vehicle160
Page 173 of 230

▷Lamp white: charging cable can be con‐
nected or removed.▷Lamp flashes yellow: charging process is
being initialized▷Lamp blue: charging process is started at a
set time.▷Lamp flashes blue: charging process ac‐
tive.▷Lamp flashes red: fault in the charging
process.▷Lamp green: charging process completed.
When the vehicle is locked, the indicator lamp
goes out after some time.
When the vehicle is unlocked, the blue indica‐
tor lamp flashes continuously. The other indi‐
cator lights go out after some time.
To check the charging process, press the
key on the remote control. The charging status
is indicated on the indicator lamp. In some
cases the vehicle is locked.
Additional messages regarding the charging
status, e.g., probable end of charging or the
planned departure time, can be displayed in
the instrument cluster, on the Control Display
and via the BMW i Remote App on the smart‐
phone.
Planning charging process The charging process can be adapted to con‐
straints, e.g., the cost of electricity. The vehicle
can control the charging process in such a way
that the charging process is completed at the
departure time. A departure time must be set
for this purpose, refer to page 163.
The following settings are available:▷Charge immediately.▷Set time window for favorable charging.▷Set charging via a Level 1 charging cable.▷Set charging via a Level 2 charging cable.
If drive readiness is switched off, changes can
be made on the Control Display. Departure
time can only be changed once. Scheduled de‐
parture times are not adjusted. Settings for
standing air conditioning and loading process
are accepted for planned departure times too.
Charging immediately
The charging process starts as soon as the
charging cable is connected.
1."Settings"2."Charging"3."Charge immediately"
Setting time window for favorable
charging
Level 1 or Level 2 charging:
When departure time is set, a time window for
charging with a favorable electricity rate can be
set.
1."Settings"2."Charging"3."Low cost charging"4.Set rate begin. Turn the controller until the
desired time is set and press the controller.5.Set rate end. Turn the controller until the
desired time is set and press the controller.
Setting charging via a
Level 1 charging cable
Depending on the electrical mains, the vehicle
must be charged with a different charging cur‐
rent strength, refer to page 156.
1."Settings"2."Charging"Seite 159Charging vehicleMobility161
Page 174 of 230

3."AC charging power:"
Settings are stored. When you change charg‐
ing locations you also might need to change
the setting for charging.
Set the charge current strength at other
household sockets to "Low".
Setting charging via a
Level 2 charging cable
Depending on the electrical mains, the vehicle
must be charged with a different charging cur‐
rent strength, refer to page 156.
When charging with a Level 2 charging cable,
the charging process can be completed faster
at a Level 2 charging station.
1."Settings"2."Charging"3."Level 2:"
Settings are stored. When you change charg‐
ing locations you also might need to change
the setting for charging.
Stopping charging process The charging operation can be stopped at any
time by removing the charging cable and con‐
tinued at a later time by connecting the charg‐
ing cable in order to use other loads on the
power connection or to prevent simultaneous
high power from multiple loads.
The charging operation is interrupted when the
vehicle is unlocked and automatically resumed
after a brief time or when it is locked.
Continue charging operation If the charging operation is interrupted, e.g.,
through a temporary power failure, the charg‐
ing operation is automatically continued after
the interruption.
Terminating charging process1.Removing the charging cable from the ve‐
hicle, refer to page 159.2.Stow the charging cable as required.3.Close the charging port flap.4.Lock vehicle if it is unlocked.
Displays in the instrument
cluster
The charging state indicator light shows the
charging state of the high-voltage battery in
the instrument cluster, if operating readiness is
turned on. If all segments are filled, the high-
voltage battery is fully charged.
Even if no segments are filled, the high-voltage
system is still under high voltage.
DisplayMeaningPlug blue: charging operation active.
White plug: charging interruption.Running light: animated with active
charging operation.End of charging time or set depar‐
ture time.Charging progress bar.DC charging active on a DC charg‐
ing station.Indicator in blue: charged electrical
range.Indicator in white: maximum electri‐
cal range.Departure time set.Seite 160MobilityCharging vehicle162
Page 175 of 230

DisplayMeaningClimate control activated at depar‐
ture time.Range with Range Extender.Flashing: ventilation active.Flashing: heating active.Flashing: cooling active.
Departure time
The concept For optimum range and climate control, the
departure time can be set before parking the
car.
With a set departure time, the vehicle is cli‐
mate controlled during the charging process
when climate control is set. Climate control
output is reduced during the trip. This in‐
creases the range.
The following settings are possible at depar‐
ture time:
▷Climate control at departure time.▷Planning a one-time departure time.▷Planning of up to three regular departure
times per day of the week.
If drive readiness is switched off, changes can
be made on the Control Display. Departure
time can only be changed once. Scheduled de‐
parture times are not adjusted. Settings for cli‐
mate control and charging operation are also
applied for scheduled departure times.
Climate control at departure time1."Settings"2."Departure time"3."Precond. for departure"
Setting departure time
Level 1 or Level 2 charging:
1."Settings"2."Departure time"3."Departure 1:"4.Set the day of the week if needed.
Turn the controller until the desired day of
the week is set and press the controller.
To select other days of the week, repeat
the operation.5.Set the time.
Turn the controller until the desired time is
set and press the controller.
Up to three departure times can be set.
Activating the departure time
1."Settings"2."Departure time"
Set departure times are displayed.3.E. g. "Activate depart. time 1"
Up to three departure times can be activated.
The set departure time will be deactivated, if
the departure time was ignored three times in
a row.
Climate control General information
The following settings for climate control of
the vehicle are possible:
▷Activate stationary climate control immedi‐
ately, refer to page 132.Seite 161Charging vehicleMobility163
Page 176 of 230

With stationary climate control activated
and no charging cable connected, the
range is reduced.▷Planned climate control at the set depar‐
ture time, refer to page 133.
Discharged high-voltage and
vehicle battery
General information
In addition to the high-voltage battery, the ve‐
hicle has a 12 volt vehicle battery, which is re‐
quired for operation of the onboard electron‐
ics.
If the high-voltage battery and the vehicle bat‐
tery are discharged, it is not possible to oper‐
ate the vehicle.
Place vehicle in service To place the vehicle in service, charge as
usual.
If there is no possibility of charging on site,
contact the service center.
Charging vehicle with a discharged
vehicle battery
1.Unlock the vehicle, if needed, using the
integrated key, refer to page 36.2.Secure the vehicle against rolling.3.Manually unlock charging port flap if it is
locked, refer to page 159.4.Connect either a Level 1 or Level 2 charg‐
ing cable to the household socket or the
port on the charging station.5.Attach charging cable corresponding to
the charging socket connection.
Charging is started. The charging status is
not displayed. Do not open vehicle during
this time.
After several minutes, the vehicle is slightly
charged. The onboard electronics are ready
again. It is again possible to open the vehicle.
The charging status as well as the charging
state of the high-voltage battery can be dis‐
played again.
Continue charging vehicle until desired range
is possible.
If the vehicle battery cannot be charged, con‐
tact the service center.Seite 162MobilityCharging vehicle164
 1
1 2
2 3
3 4
4 5
5 6
6 7
7 8
8 9
9 10
10 11
11 12
12 13
13 14
14 15
15 16
16 17
17 18
18 19
19 20
20 21
21 22
22 23
23 24
24 25
25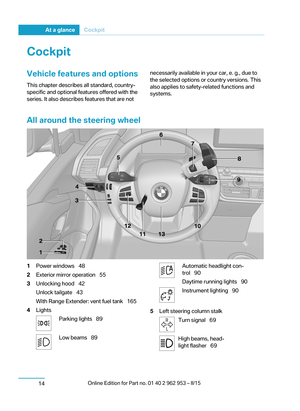 26
26 27
27 28
28 29
29 30
30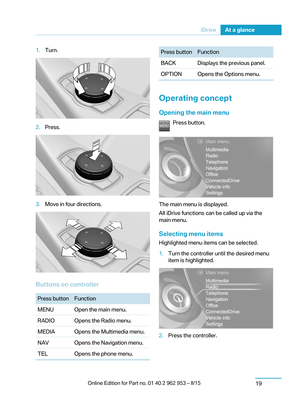 31
31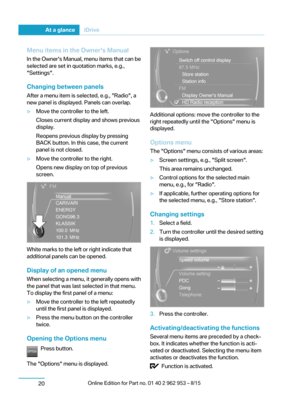 32
32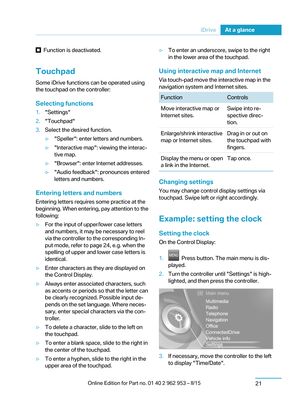 33
33 34
34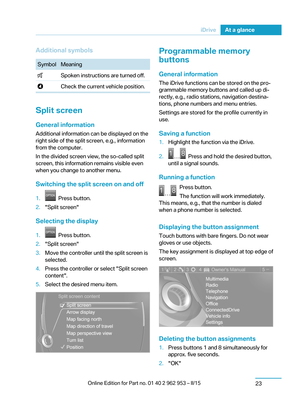 35
35 36
36 37
37 38
38 39
39 40
40 41
41 42
42 43
43 44
44 45
45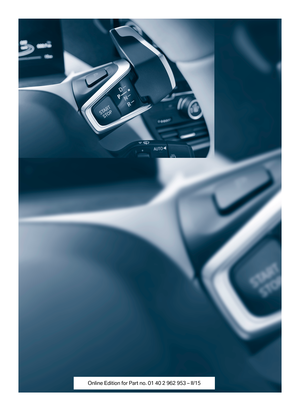 46
46 47
47 48
48 49
49 50
50 51
51 52
52 53
53 54
54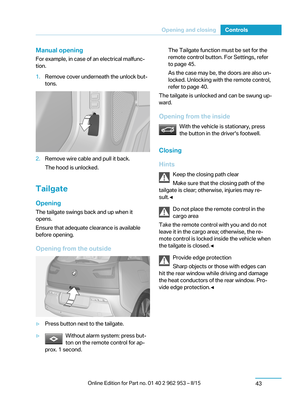 55
55 56
56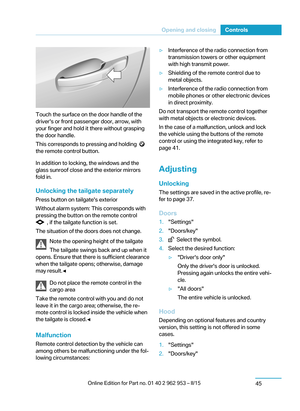 57
57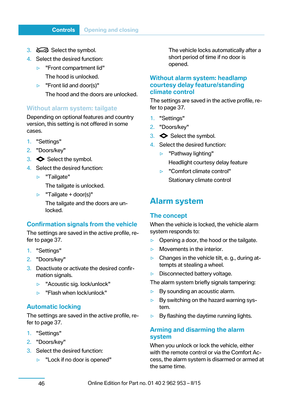 58
58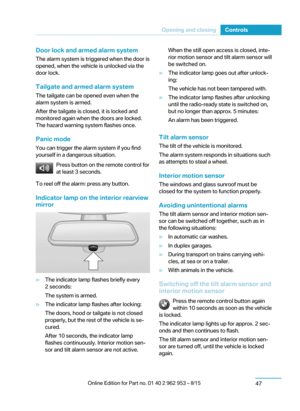 59
59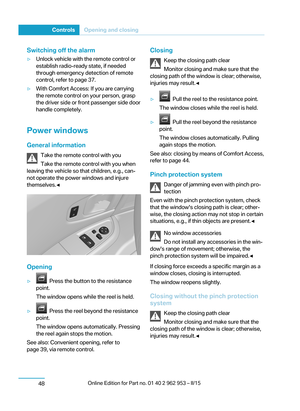 60
60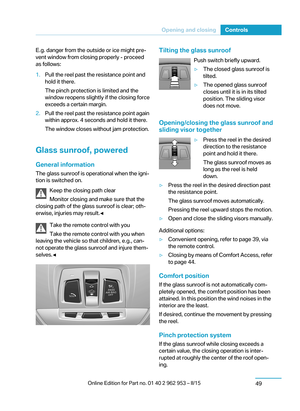 61
61 62
62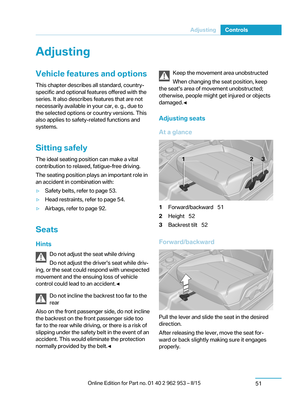 63
63 64
64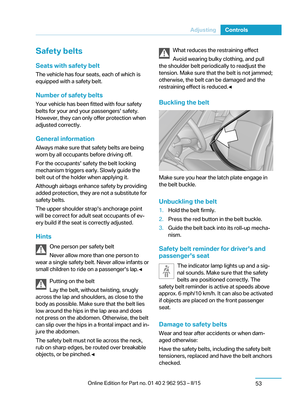 65
65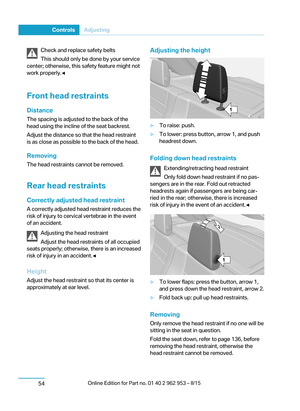 66
66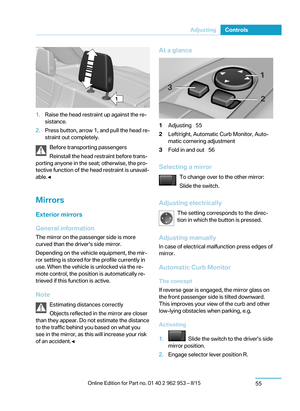 67
67 68
68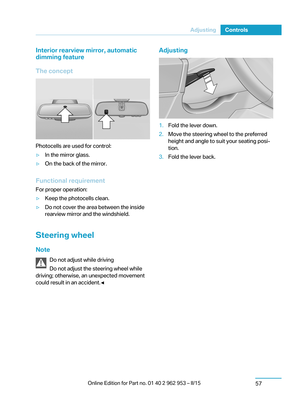 69
69 70
70 71
71 72
72 73
73 74
74 75
75 76
76 77
77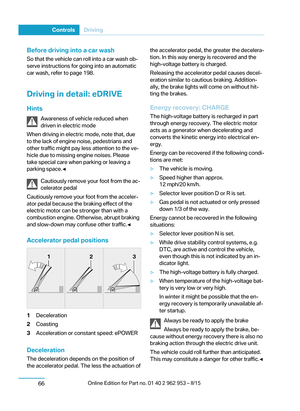 78
78 79
79 80
80 81
81 82
82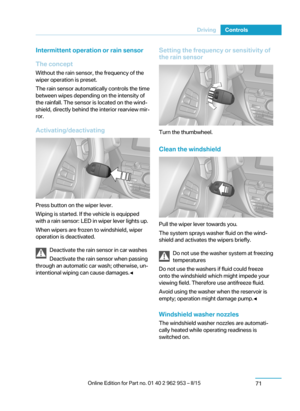 83
83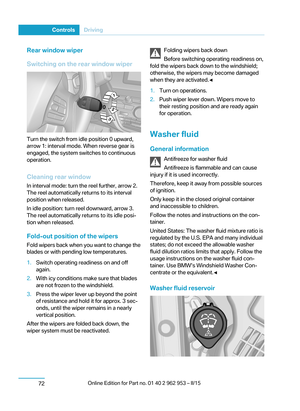 84
84 85
85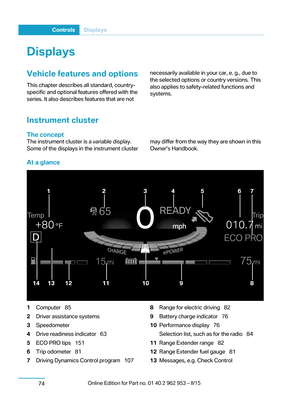 86
86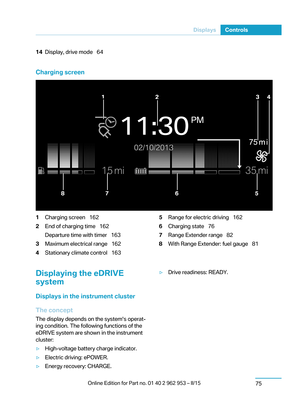 87
87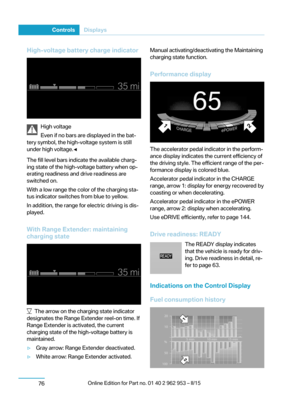 88
88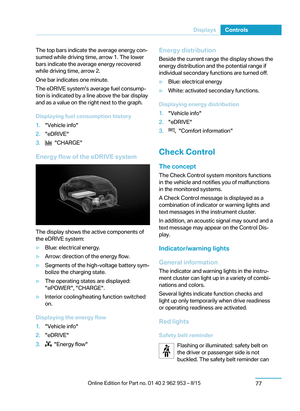 89
89 90
90 91
91 92
92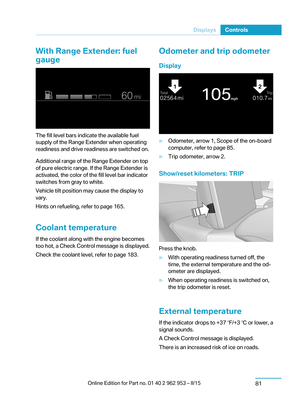 93
93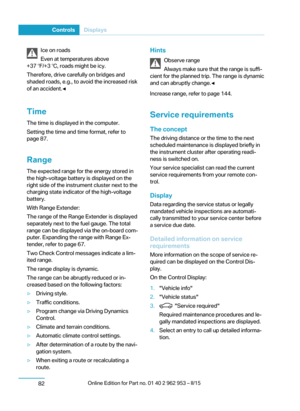 94
94 95
95 96
96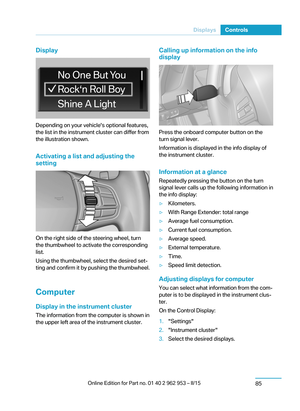 97
97 98
98 99
99 100
100 101
101 102
102 103
103 104
104 105
105 106
106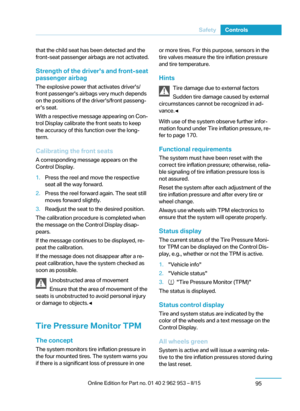 107
107 108
108 109
109 110
110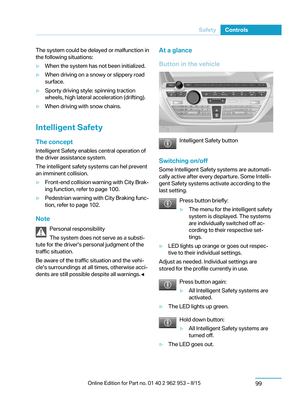 111
111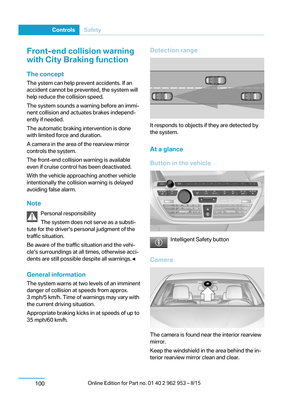 112
112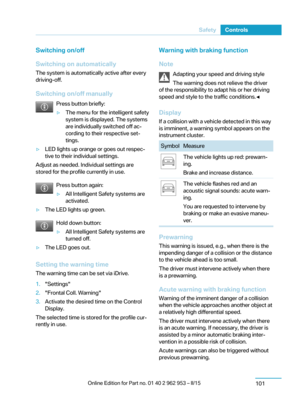 113
113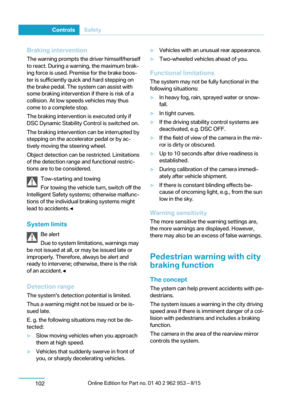 114
114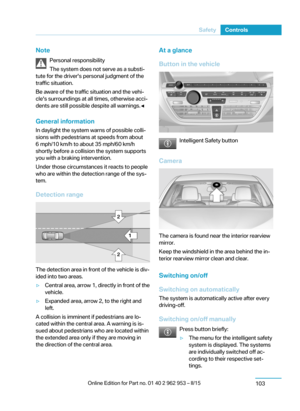 115
115 116
116 117
117 118
118 119
119 120
120 121
121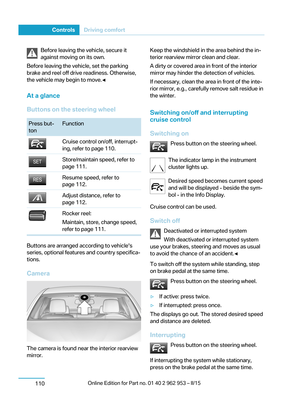 122
122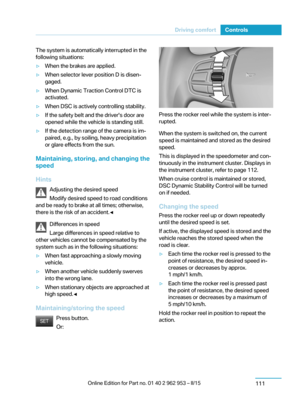 123
123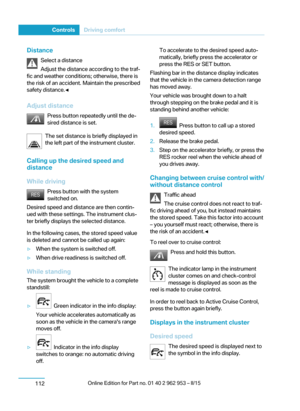 124
124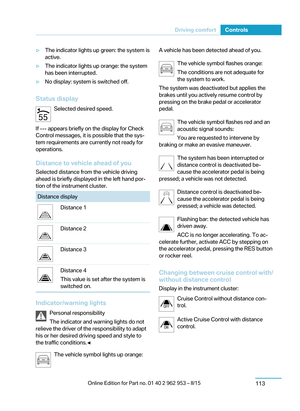 125
125 126
126 127
127 128
128 129
129 130
130 131
131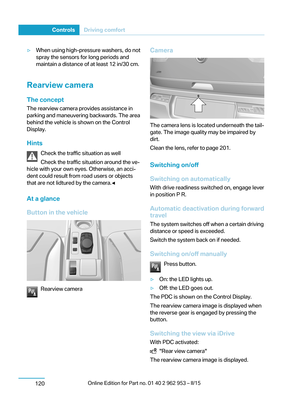 132
132 133
133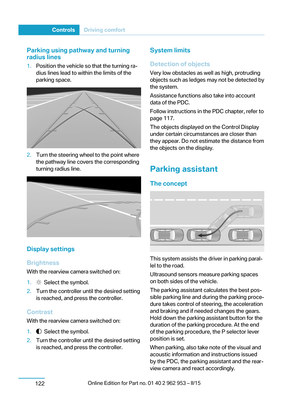 134
134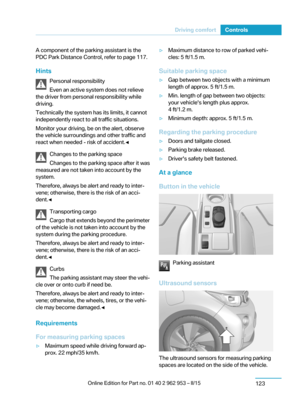 135
135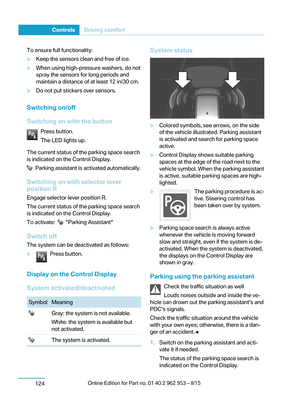 136
136 137
137 138
138 139
139 140
140 141
141 142
142 143
143 144
144 145
145 146
146 147
147 148
148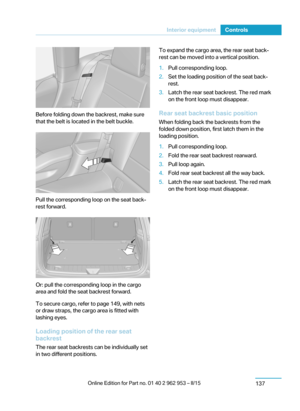 149
149 150
150 151
151 152
152 153
153 154
154 155
155 156
156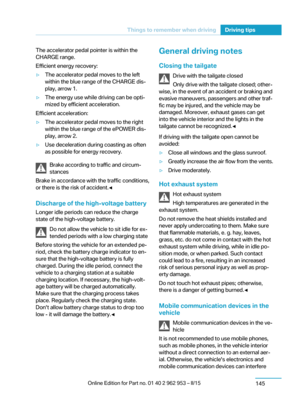 157
157 158
158 159
159 160
160 161
161 162
162 163
163 164
164 165
165 166
166 167
167 168
168 169
169 170
170 171
171 172
172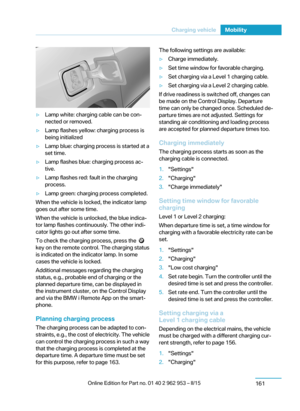 173
173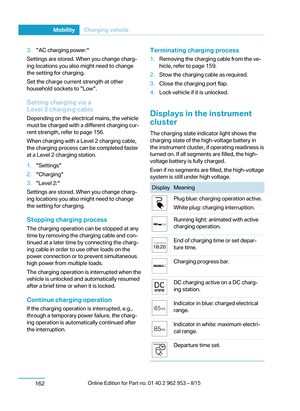 174
174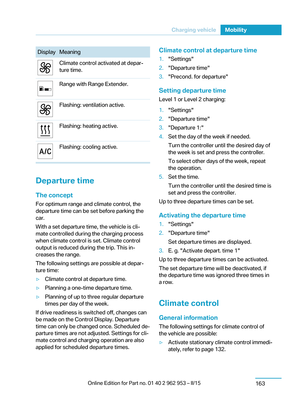 175
175 176
176 177
177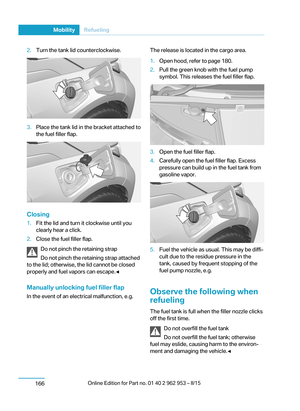 178
178 179
179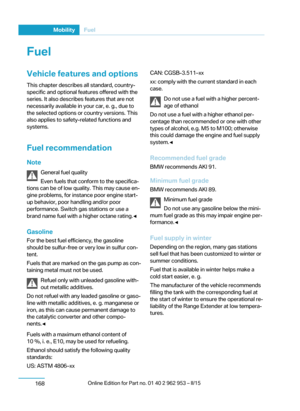 180
180 181
181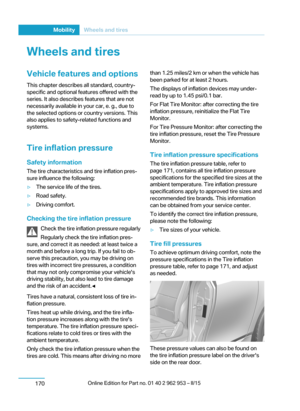 182
182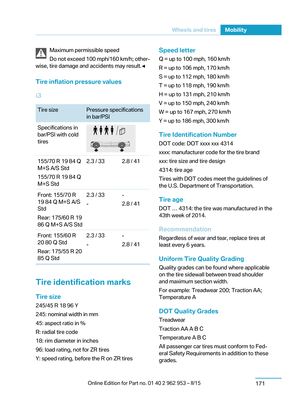 183
183 184
184 185
185 186
186 187
187 188
188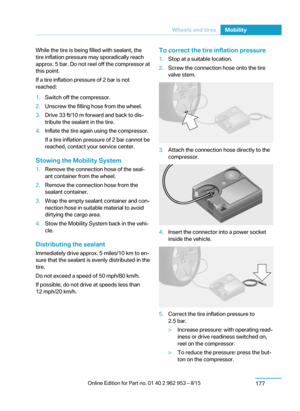 189
189 190
190 191
191 192
192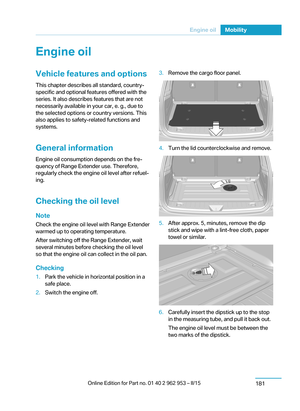 193
193 194
194 195
195 196
196 197
197 198
198 199
199 200
200 201
201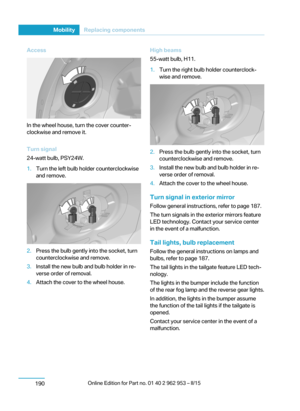 202
202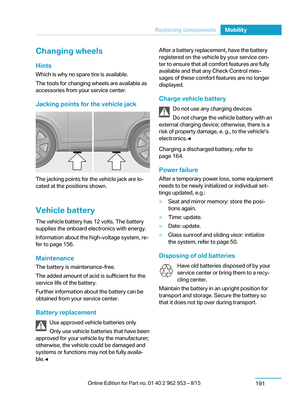 203
203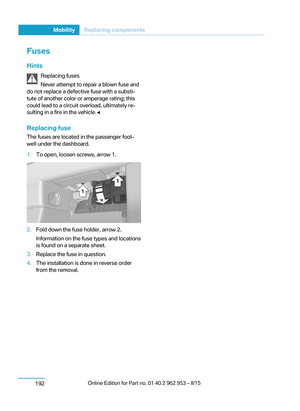 204
204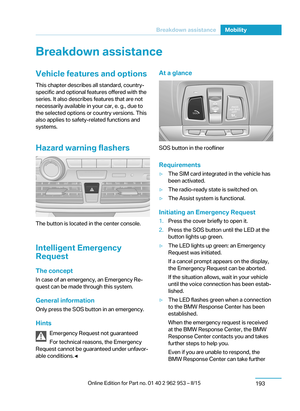 205
205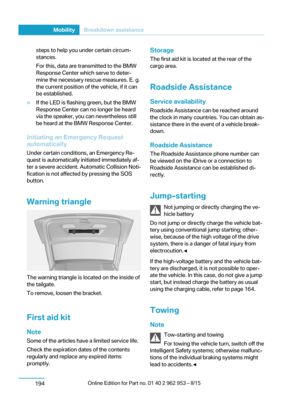 206
206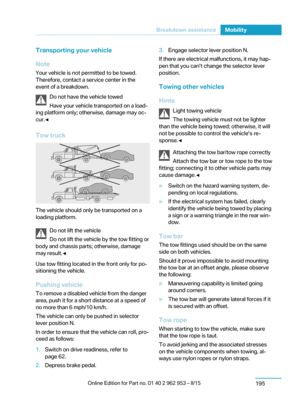 207
207 208
208 209
209 210
210 211
211 212
212 213
213 214
214 215
215 216
216 217
217 218
218 219
219 220
220 221
221 222
222 223
223 224
224 225
225 226
226 227
227 228
228 229
229