2014 BMW 650I CONVERTIBLE tow
[x] Cancel search: towPage 21 of 243

The function will run immediately. This means,
for example, that the number is dialed when a
phone number is selected.
Displaying the button assignment
Use a finger to touch the buttons. Do not wear
gloves or use objects.
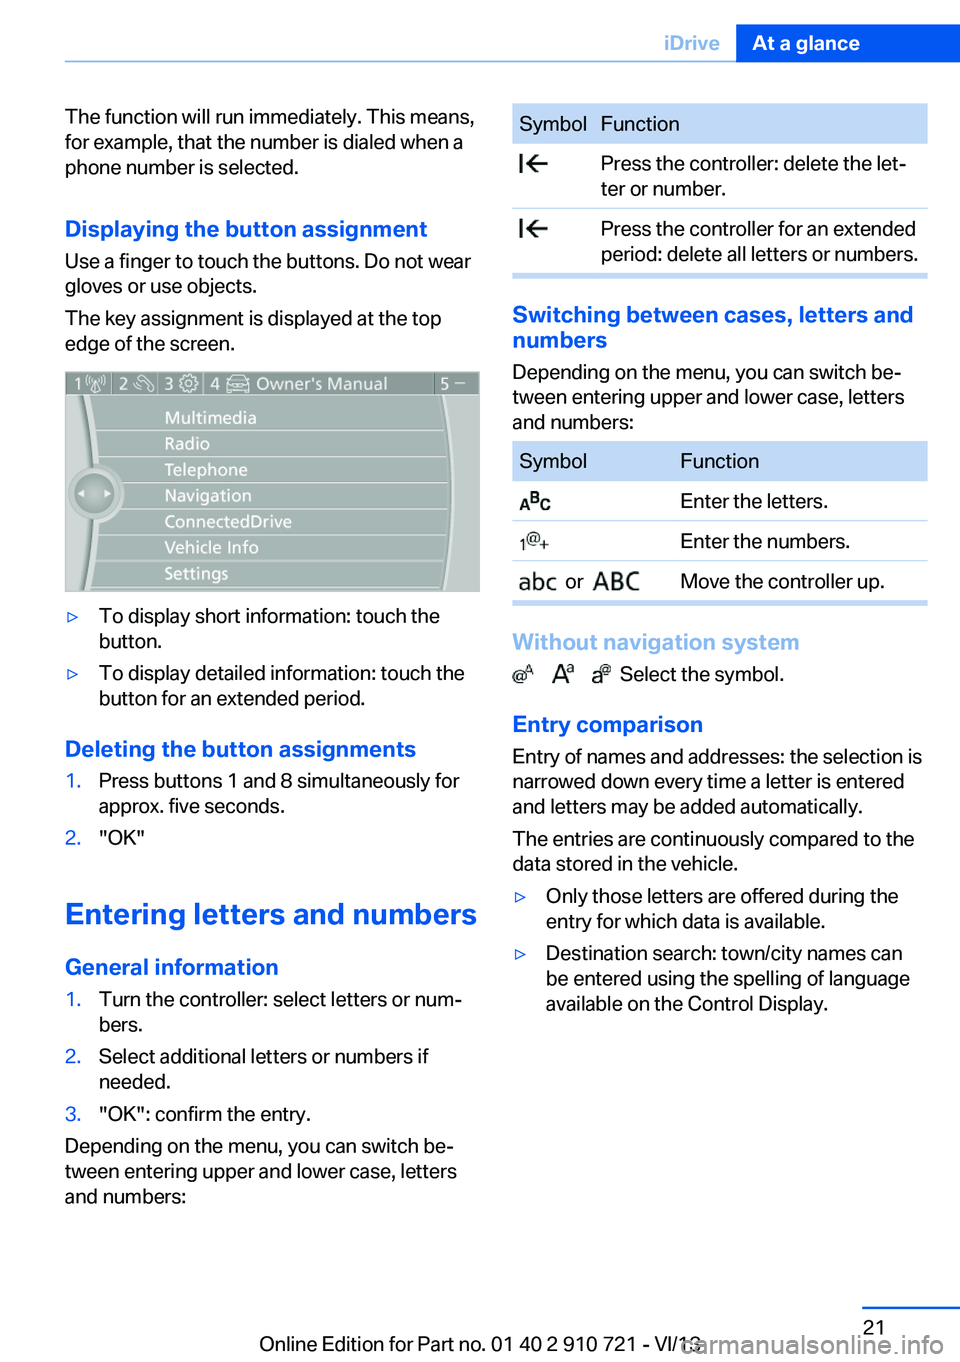
The key assignment is displayed at the top
edge of the screen.▷To display short information: touch the
button.▷To display detailed information: touch the
button for an extended period.
Deleting the button assignments
1.Press buttons 1 and 8 simultaneously for
approx. five seconds.2."OK"
Entering letters and numbers
General information
1.Turn the controller: select letters or num‐
bers.2.Select additional letters or numbers if
needed.3."OK": confirm the entry.
Depending on the menu, you can switch be‐
tween entering upper and lower case, letters
and numbers:
SymbolFunction Press the controller: delete the let‐
ter or number. Press the controller for an extended
period: delete all letters or numbers.
Switching between cases, letters and
numbers
Depending on the menu, you can switch be‐
tween entering upper and lower case, letters
and numbers:
SymbolFunction Enter the letters. Enter the numbers. or Move the controller up.
Without navigation system
Select the symbol.
Entry comparison Entry of names and addresses: the selection is
narrowed down every time a letter is entered
and letters may be added automatically.
The entries are continuously compared to the
data stored in the vehicle.
▷Only those letters are offered during the
entry for which data is available.▷Destination search: town/city names can
be entered using the spelling of language
available on the Control Display.Seite 21iDriveAt a glance21
Online Edition for Part no. 01 40 2 910 721 - VI/13
Page 35 of 243

Panic mode
You can trigger the alarm system if you find
yourself in a dangerous situation.
Press the button on the remote con‐
trol for at least 3 seconds.
To switch off the alarm: press any button.
Switching on the headlamp courtesy
delay feature
Briefly press the button on the remote
control.
The duration can be set in the Control Display.
Opening the trunk lid Press the button on the remote con‐
trol for approx. 1 second.
The trunk lid opens, regardless of whether it
was previously locked or unlocked.
In some vehicle equipment variants, the trunk
lid can only be opened using the remote con‐
trol if the vehicle has been unlocked.
Do not place the remote control in the
cargo area
Take the remote control with you and do not
leave it in the cargo area; otherwise, the re‐
mote control is locked inside the vehicle when
the trunk lid is closed.◀
The trunk lid is locked again as soon as it is
pushed closed.
Malfunction
If the vehicle can no longer be locked or un‐
locked with the remote control, the battery
may be discharged or there may be interfer‐
ence from external sources such as mobile
phones, metal objects, overhead power lines,
transmission towers, etc.
If this occurs, lock or unlock the driver's door at
the door lock using the integrated key.For US owners only
The transmitter and receiver units comply with
part 15 of the FCC/Federal Communication
Commission regulations. Operation is gov‐
erned by the following:
FCC ID:▷LX8766S.▷LX8766E.▷LX8CAS.▷LX8CAS2.▷MYTCAS4.
Compliance statement:
This device complies with part 15 of the FCC
Rules. Operation is subject to the following
two conditions:
▷This device may not cause harmful inter‐
ference, and▷this device must accept any interference
received, including interference that may
cause undesired operation.
Any unauthorized modifications or changes to
these devices could void the user's authority to
operate this equipment.
Using the door lock
General information
Locking from the outside
Do not lock the vehicle from the outside
if there are people in it, as the vehicle cannot
be unlocked from inside without special knowl‐
edge.◀
Seite 35Opening and closingControls35
Online Edition for Part no. 01 40 2 910 721 - VI/13
Page 39 of 243

Unlocking the trunk lid separately
Press on the top half of the BMW emblem on
the trunk lid.
This corresponds to pressing the
but‐
ton on the remote control.
Do not place the remote control in the
cargo area
Take the remote control with you and do not
leave it in the cargo area; otherwise, the re‐
mote control is locked inside the vehicle when
the trunk lid is closed.◀
Malfunction
Comfort Access may not function properly if it
experiences interference from external sour‐
ces such as mobile phones, metal objects,
overhead power lines, transmission towers,
etc.
In this case, open or close the vehicle using the
buttons on the remote control or use the
integrated key in the door lock.
Adjusting
Unlocking The setting is stored for the remote control
currently in use.
1."Settings"2."Doors/key"3. Select symbol or "Unlock button:"4.Select the desired function:▷"Driver's door only"
Only the driver's door and the fuel filler
flap are unlocked. Pressing again un‐
locks the entire vehicle.▷"All doors"
The entire vehicle is unlocked.
Depending on how the vehicle is equipped or
the country-specific variant, you can set
whether the doors are also unlocked with the
button on the remote control.
Confirmation signals from the vehicle
1."Settings"2."Doors/key"3.Deactivate or activate the desired confir‐
mation signals.▷"Acoustic sig. lock/unlock"▷"Flash when lock/unlock"
Automatic locking
The setting is stored for the remote control
currently in use.
1."Settings"2."Doors/key"3.Select the desired function:▷"Lock if no door opened"
The vehicle locks automatically after a
short period of time if a door is not
opened.▷"Lock after start driving"
The vehicle locks automatically after
you drive away.
Retrieving the seat, mirror, and
steering wheel settings
The driver's seat, exterior mirror, and steering
wheel positions selected last are stored for the
currently used remote control.
When the vehicle is unlocked, these positions
are automatically retrieved if this function was
activated.
Pinch hazard when moving back the seat
If this function is used, first make sure
that the footwell behind the driver's seat is
empty. Otherwise, people can be injured or ob‐
jects damaged when the seat is moved back.◀
The adjustment procedure is interrupted:
▷When a seat position switch is pressed.Seite 39Opening and closingControls39
Online Edition for Part no. 01 40 2 910 721 - VI/13
Page 40 of 243

▷When a button of the seat, mirror, and
steering wheel memory is pressed briefly.
Activating the setting
1."Settings"2."Doors/key"3."Last seat position autom."
Alarm system
The conceptThe vehicle alarm system responds to:
▷Opening of a door, the hood or the trunk
lid.▷Movements in the vehicle.▷Changes in the vehicle tilt, e.g., during at‐
tempts to steal a wheel or when towing the
car.▷Interruptions in battery voltage.
The alarm system briefly indicates tampering:
▷By sounding an acoustic alarm.▷By switching on the hazard warning sys‐
tem.▷By flashing the high beams.
Arming and disarming the alarm
system
General information
When you lock or unlock the vehicle, either
with the remote control, Comfort Access or at
the door lock the alarm system is armed or dis‐
armed at the same time.
Door lock and armed alarm systemUnlocking via the door lock will trigger the
alarm on some country-specific versions.
In order to terminate this alarm, unlock vehicle
with the remote control or switch on the igni‐
tion, if necessary, by emergency detection of
the remote control.
Trunk lid and armed alarm system
The trunk lid can be opened even when the
alarm system is armed.
Press the button on the remote con‐
trol for approx. 1 second.
After the trunk lid is closed, it is locked and
monitored again if the doors are locked. The
hazard warning system flashes once.
In some vehicle equipment variants, the trunk
lid can only be opened using the remote con‐
trol if the vehicle was unlocked first.
Panic mode
You can trigger the alarm system if you find
yourself in a dangerous situation.
Press the button on the remote con‐
trol for at least 3 seconds.
To switch off the alarm: press any button.
Switching off the alarm▷Unlock the vehicle using the remote con‐
trol.▷With Comfort Access: If you are carrying
the remote control with you, pull on the
driver side or front passenger side door
handle.
Indicator lamp on the interior rearview
mirror
▷The indicator lamp flashes briefly every
2 seconds:
The system is armed.Seite 40ControlsOpening and closing40
Online Edition for Part no. 01 40 2 910 721 - VI/13
Page 41 of 243

▷The indicator lamp flashes after locking:
The doors, hood or trunk lid is not closed
properly, but the rest of the vehicle is se‐
cured.
After 10 seconds, the indicator lamp
flashes continuously. Interior motion sen‐
sor and tilt alarm sensor are not active.▷The indicator lamp goes out after unlock‐
ing:
The vehicle has not been tampered with.▷The indicator lamp flashes after unlocking
until the engine ignition is switched on, but
no longer than approx. 5 minutes:
An alarm has been triggered.
Tilt alarm sensor The tilt of the vehicle is monitored.
The alarm system responds in situations such
as attempts to steal a wheel or when the car is
towed.
Interior motion sensor The interior is monitored to the height of the
seat cushions. The alarm system is armed to‐
gether with the interior motion sensor even
when the convertible top is open. Falling ob‐
jects such as leaves can trigger the alarm unin‐
tentionally.
Avoiding unintentional alarms
The tilt alarm sensor and interior motion sen‐
sor can be switched off together, such as in
the following situations:
▷In automatic car washes.▷In duplex garages.▷During transport on car-carrying trains, at
sea or on a trailer.▷When animals are to remain in the vehicle.Switching off the tilt alarm sensor and
interior motion sensor
Press the remote control button again
within 10 seconds as soon as the vehicle
is locked.
The indicator lamp lights up for approx. 2 sec‐
onds and then continues to flash.
The tilt alarm sensor and interior motion sen‐
sor are switched off until the vehicle is locked
again.
Power windows
General information Take the remote control with you
Take the remote control with you when
leaving the vehicle so that children, for exam‐
ple, cannot operate the power windows and in‐
jure themselves.◀
Closing the windows when driving
To close the side windows when driving,
first close the rear windows or all four windows
at the same time; otherwise, the windows may
not close tightly at high speeds.◀
Opening individually
▷ Press the switch to the resistance
point.
The window opens while the switch is held.
Seite 41Opening and closingControls41
Online Edition for Part no. 01 40 2 910 721 - VI/13
Page 48 of 243

7.With the cover ends placed high, close the
convertible top well storage cover.8.Fold down the two convertible top ends on
the convertible top well storage cover.
Lock convertible cover
1.Insert the cover tool on the front edge of
the convertible top frame into the
convertible top lock.2.Turn the cover tool counterclockwise until
the front convertible top frame is locked
with the front windshield frame. Simultane‐
ously, have a second person push from the
outside toward the center on the front
windshield frame.3.Insert the convertible top tool with the long
end into the adapter from the onboard ve‐
hicle tool kit.4.In the rear, raise the inner lining of the
convertible top. Place the adapter on the
red-marked pin of the convertible top
mechanism.5.Push the rear convertible top end down
and simultaneously have a second person
push the tool all the way up to the stop.
In this way, the convertible top end is
pushed against the convertible top well
storage cover and locked.
Proceed accordingly on the other end of
the convertible top.6.If possible, close the rear window electri‐
cally. To do this, switch on the ignition
again. The rear window cannot be manually
closed.7.Have the convertible top checked by the
service center.Seite 48ControlsOpening and closing48
Online Edition for Part no. 01 40 2 910 721 - VI/13
Page 55 of 243

Checking and replacing safety belts
Have the work performed only by your
service center; otherwise, it cannot be ensured
that this safety feature will function properly.◀
Front Head restraints
Correctly adjusted head restraint
A correctly adjusted head restraint reduces the
risk of injury to cervical vertebrae in the event
of an accident.
Adjusting the head restraint
Correctly adjust the head restraints of all
occupied seats; otherwise, there is an in‐
creased risk of injury in an accident.◀
Height Adjust the head restraint so that its center is
approximately at ear level.
Distance
Adjust the distance so that the head restraint
is as close as possible to the back of the head.
Active head restraint In the event of a rear-end collision with a cer‐
tain severity, the active head restraint automat‐
ically reduces the distance from the head.
Reduced protective function▷Do not use seat or head restraint
covers.▷Do not hang objects, e.g., clothes hangers,
on the head restraints.▷Only attach accessories approved by BMW
to the seat or head restraint.
Otherwise, the protective function of the active
head restraint will be impaired and the per‐
sonal safety of the occupants will be endan‐
gered.◀
In the case of strain caused by accidents or
damage:
Have the active headrest checked and if nec‐
essary replaced.
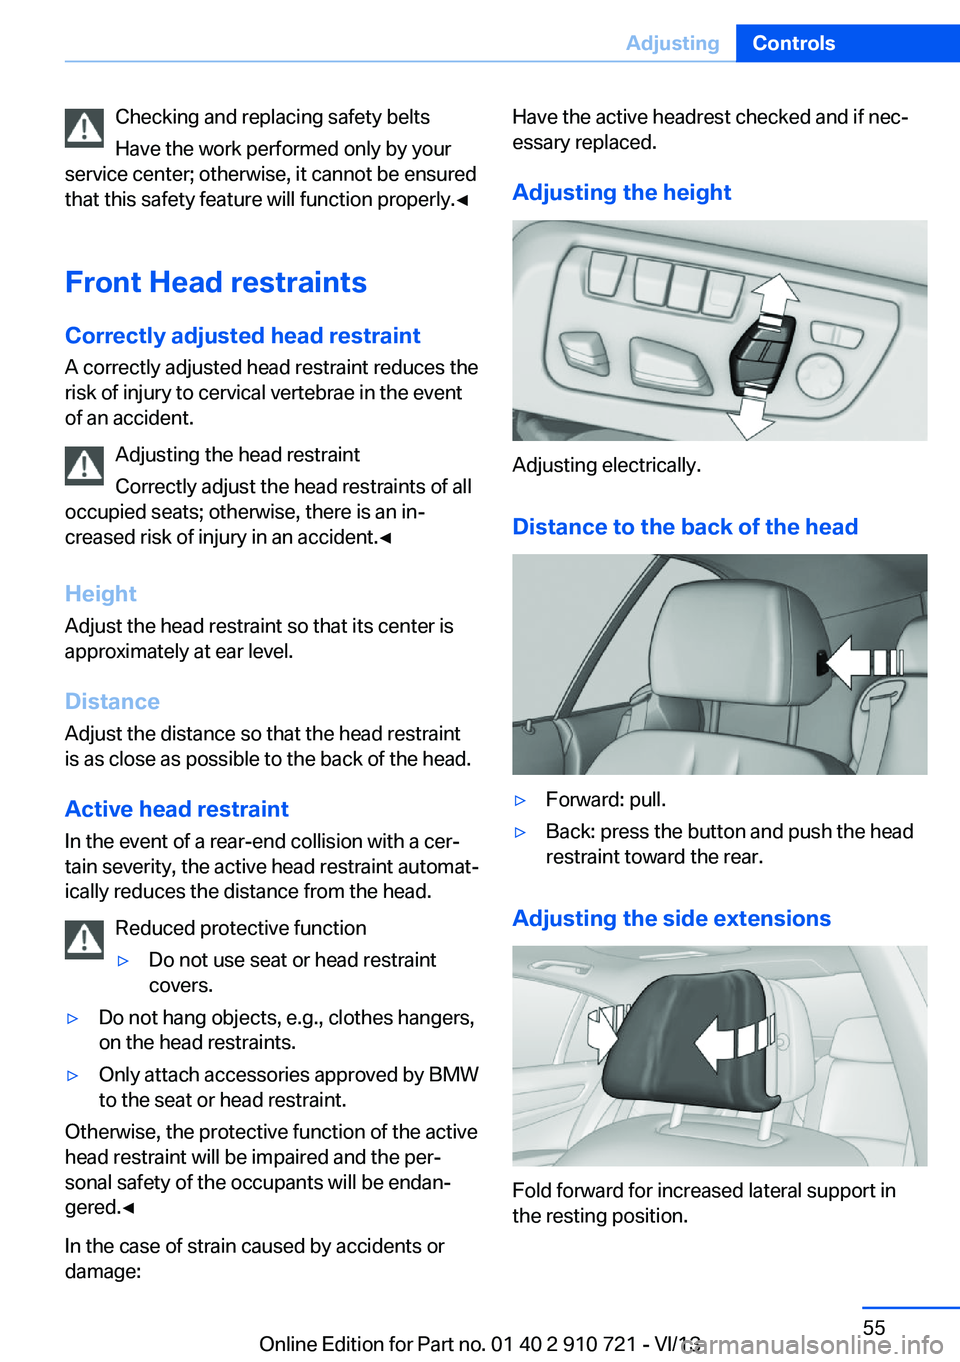
Adjusting the height
Adjusting electrically.
Distance to the back of the head
▷Forward: pull.▷Back: press the button and push the head
restraint toward the rear.
Adjusting the side extensions
Fold forward for increased lateral support in
the resting position.
Seite 55AdjustingControls55
Online Edition for Part no. 01 40 2 910 721 - VI/13
Page 86 of 243

signage is present, but passing would not
be permitted.
Hints
Personal judgment
The system cannot serve as a substitute
for the driver's personal judgment of the traffic
situation.
The system assists the driver and does not re‐
place the human eye.◀
At a glance
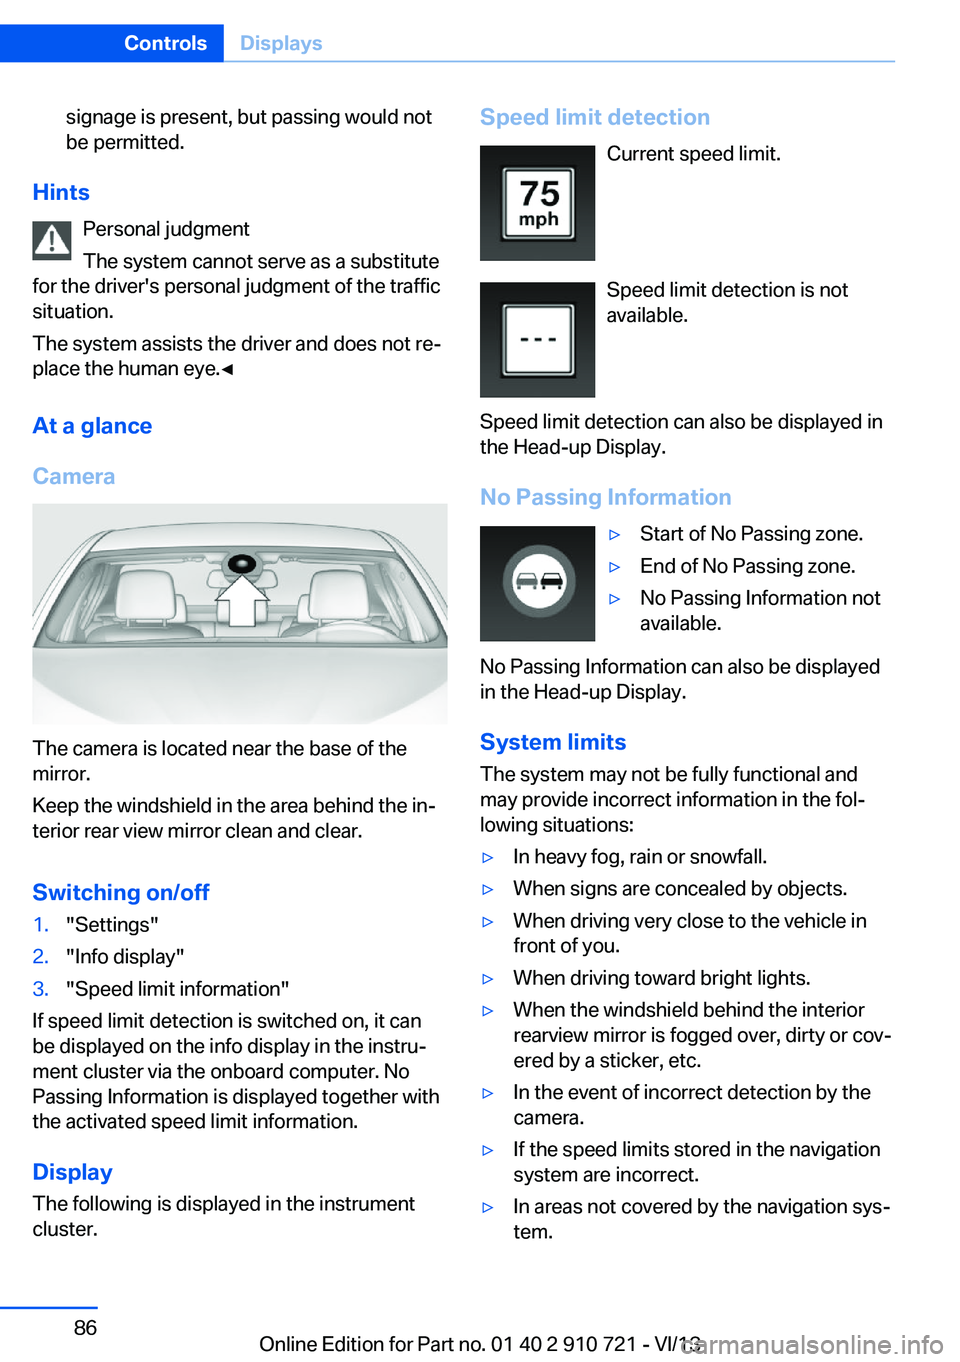
Camera
The camera is located near the base of the
mirror.
Keep the windshield in the area behind the in‐
terior rear view mirror clean and clear.
Switching on/off
1."Settings"2."Info display"3."Speed limit information"
If speed limit detection is switched on, it can
be displayed on the info display in the instru‐
ment cluster via the onboard computer. No
Passing Information is displayed together with
the activated speed limit information.
Display The following is displayed in the instrument
cluster.
Speed limit detection
Current speed limit.
Speed limit detection is not
available.
Speed limit detection can also be displayed in
the Head-up Display.
No Passing Information▷Start of No Passing zone.▷End of No Passing zone.▷No Passing Information not
available.
No Passing Information can also be displayed
in the Head-up Display.
System limits
The system may not be fully functional and
may provide incorrect information in the fol‐ lowing situations:
▷In heavy fog, rain or snowfall.▷When signs are concealed by objects.▷When driving very close to the vehicle in
front of you.▷When driving toward bright lights.▷When the windshield behind the interior
rearview mirror is fogged over, dirty or cov‐
ered by a sticker, etc.▷In the event of incorrect detection by the
camera.▷If the speed limits stored in the navigation
system are incorrect.▷In areas not covered by the navigation sys‐
tem.Seite 86ControlsDisplays86
Online Edition for Part no. 01 40 2 910 721 - VI/13