2014 BMW 535I XDRIVE SEDAN ESP
[x] Cancel search: ESPPage 246 of 273
Breakdown assistanceVehicle features and options
This chapter describes all standard, country-
specific and optional features offered with the
series. It also describes features that are not
necessarily available in your car, e. g., due to
the selected options or country versions. This
also applies to safety-related functions and
systems.
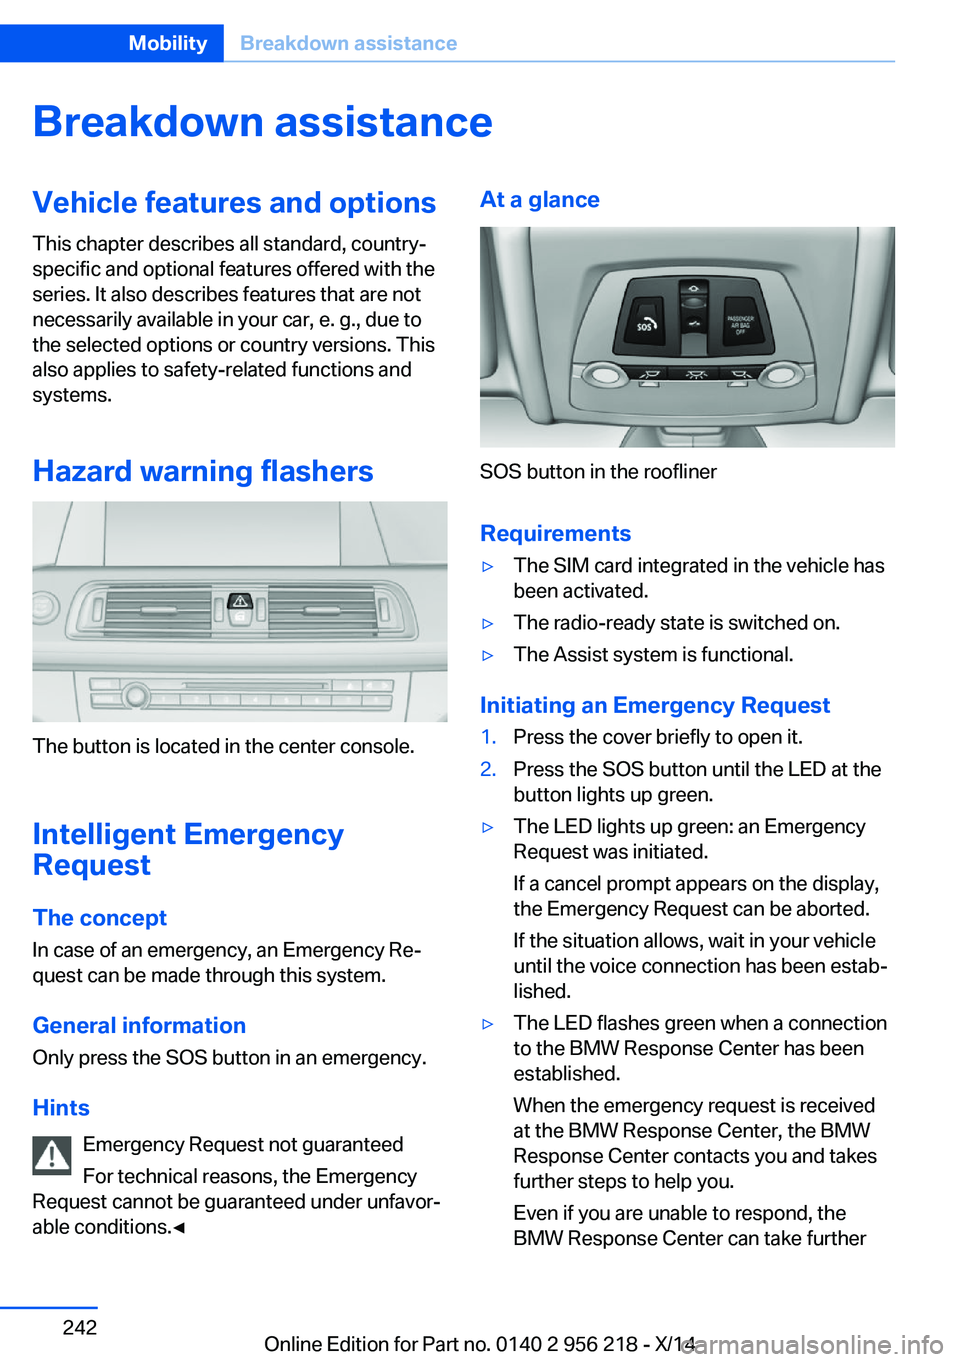
Hazard warning flashers
The button is located in the center console.
Intelligent Emergency
Request
The concept In case of an emergency, an Emergency Re‐
quest can be made through this system.
General information
Only press the SOS button in an emergency.
Hints Emergency Request not guaranteed
For technical reasons, the Emergency
Request cannot be guaranteed under unfavor‐
able conditions.◀
At a glance
SOS button in the roofliner
Requirements
▷The SIM card integrated in the vehicle has
been activated.▷The radio-ready state is switched on.▷The Assist system is functional.
Initiating an Emergency Request
1.Press the cover briefly to open it.2.Press the SOS button until the LED at the
button lights up green.▷The LED lights up green: an Emergency
Request was initiated.
If a cancel prompt appears on the display,
the Emergency Request can be aborted.
If the situation allows, wait in your vehicle
until the voice connection has been estab‐
lished.▷The LED flashes green when a connection
to the BMW Response Center has been
established.
When the emergency request is received
at the BMW Response Center, the BMW
Response Center contacts you and takes
further steps to help you.
Even if you are unable to respond, the
BMW Response Center can take furtherSeite 242MobilityBreakdown assistance242
Online Edition for Part no. 0140 2 956 218 - X/14
Page 247 of 273
steps to help you under certain circum‐
stances.
For this, data are transmitted to the BMW
Response Center which serve to deter‐
mine the necessary rescue measures. E. g.
the current position of the vehicle, if it can
be established.▷If the LED is flashing green, but the BMW
Response Center can no longer be heard
via the speaker, you can nevertheless still
be heard at the BMW Response Center.
Initiating an Emergency Request
automatically
Under certain conditions, an Emergency Re‐
quest is automatically initiated immediately af‐
ter a severe accident. Automatic Collision Noti‐
fication is not affected by pressing the SOS
button.
Warning triangle
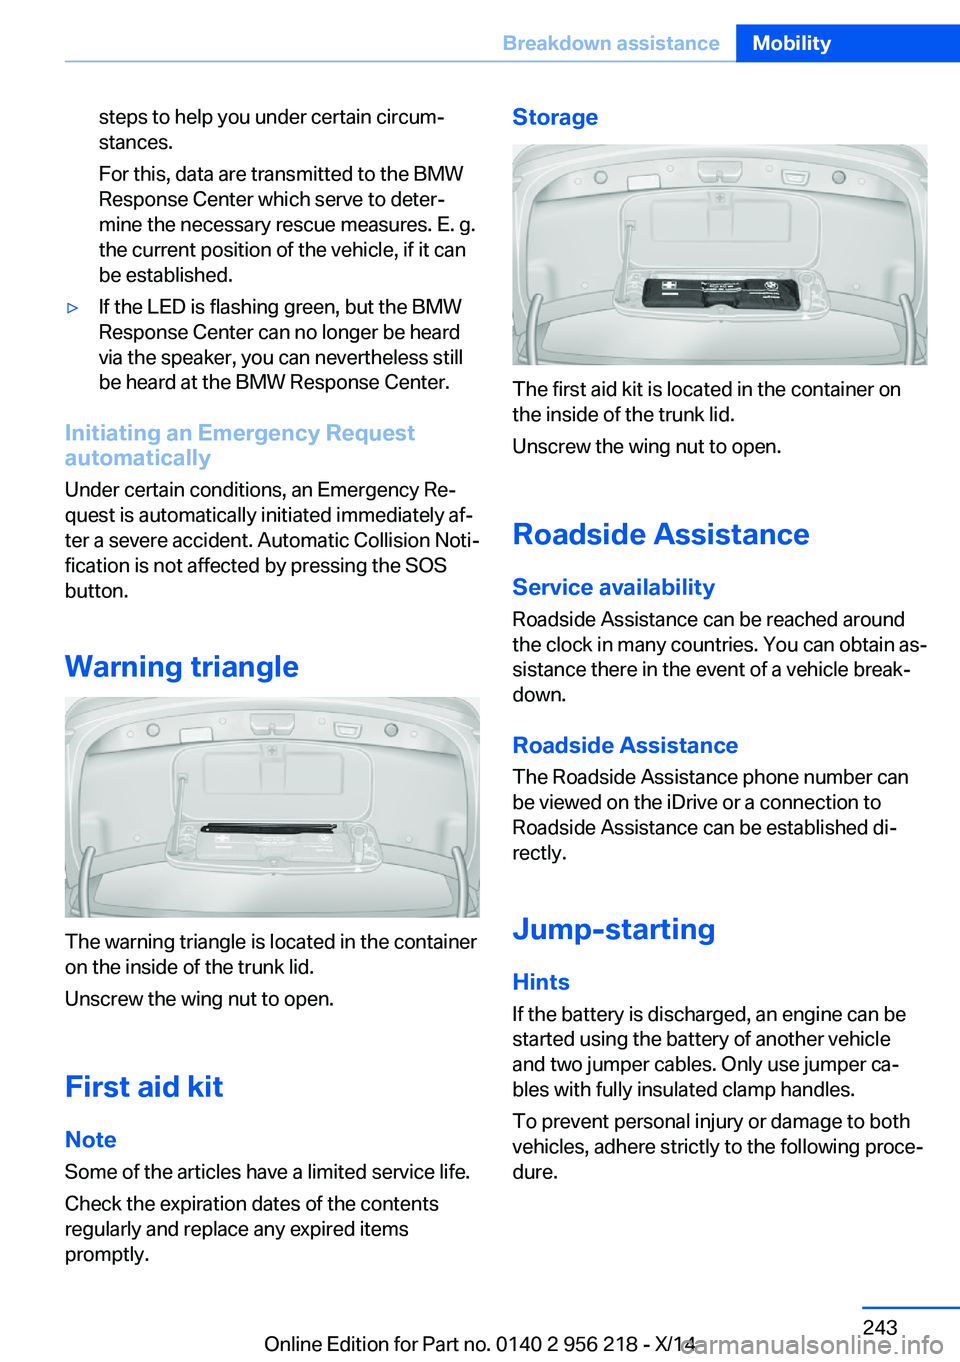
The warning triangle is located in the container
on the inside of the trunk lid.
Unscrew the wing nut to open.
First aid kit
Note Some of the articles have a limited service life.
Check the expiration dates of the contents
regularly and replace any expired items
promptly.
Storage
The first aid kit is located in the container on
the inside of the trunk lid.
Unscrew the wing nut to open.
Roadside Assistance
Service availability
Roadside Assistance can be reached around
the clock in many countries. You can obtain as‐
sistance there in the event of a vehicle break‐
down.
Roadside Assistance The Roadside Assistance phone number can
be viewed on the iDrive or a connection to
Roadside Assistance can be established di‐
rectly.
Jump-starting
Hints If the battery is discharged, an engine can be
started using the battery of another vehicle
and two jumper cables. Only use jumper ca‐
bles with fully insulated clamp handles.
To prevent personal injury or damage to both
vehicles, adhere strictly to the following proce‐
dure.
Seite 243Breakdown assistanceMobility243
Online Edition for Part no. 0140 2 956 218 - X/14
Page 248 of 273
Do not touch live parts
To avoid the risk of potentially fatal in‐
jury, always avoid all contact with electrical
components while the engine is running.◀
Preparation1.Check whether the battery of the other ve‐
hicle has a voltage of 12 volts. This infor‐
mation can be found on the battery.2.Switch off the engine of the assisting vehi‐
cle.3.Switch off any electronic systems/power
consumers in both vehicles.
Bodywork contact between vehicles
Make sure that there is no contact be‐
tween the bodywork of the two vehicles; other‐
wise, there is a danger of short circuits.◀
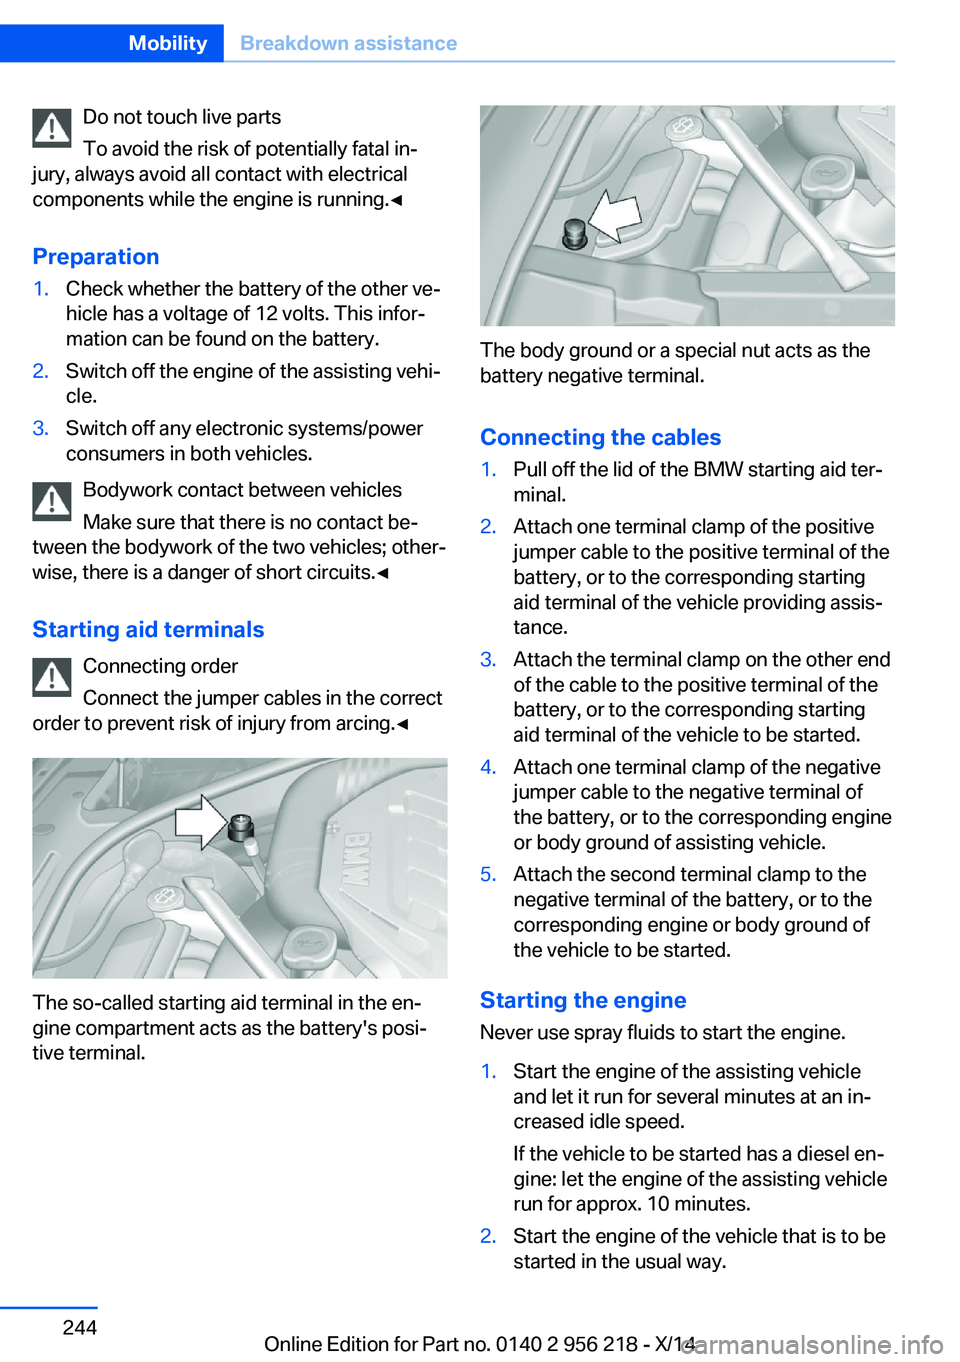
Starting aid terminals Connecting order
Connect the jumper cables in the correct
order to prevent risk of injury from arcing.◀
The so-called starting aid terminal in the en‐
gine compartment acts as the battery's posi‐
tive terminal.
The body ground or a special nut acts as the
battery negative terminal.
Connecting the cables
1.Pull off the lid of the BMW starting aid ter‐
minal.2.Attach one terminal clamp of the positive
jumper cable to the positive terminal of the
battery, or to the corresponding starting
aid terminal of the vehicle providing assis‐
tance.3.Attach the terminal clamp on the other end
of the cable to the positive terminal of the
battery, or to the corresponding starting
aid terminal of the vehicle to be started.4.Attach one terminal clamp of the negative
jumper cable to the negative terminal of
the battery, or to the corresponding engine
or body ground of assisting vehicle.5.Attach the second terminal clamp to the
negative terminal of the battery, or to the
corresponding engine or body ground of
the vehicle to be started.
Starting the engine
Never use spray fluids to start the engine.
1.Start the engine of the assisting vehicle
and let it run for several minutes at an in‐
creased idle speed.
If the vehicle to be started has a diesel en‐
gine: let the engine of the assisting vehicle
run for approx. 10 minutes.2.Start the engine of the vehicle that is to be
started in the usual way.Seite 244MobilityBreakdown assistance244
Online Edition for Part no. 0140 2 956 218 - X/14
Page 250 of 273
▷When the engine is stopped, there is no
power assist. Consequently, more force
needs to be applied when braking and
steering.▷Larger steering wheel movements are re‐
quired.▷The towing vehicle must not be lighter
than the vehicle being towed; otherwise,
it will not be possible to control the vehi‐
cle's response.
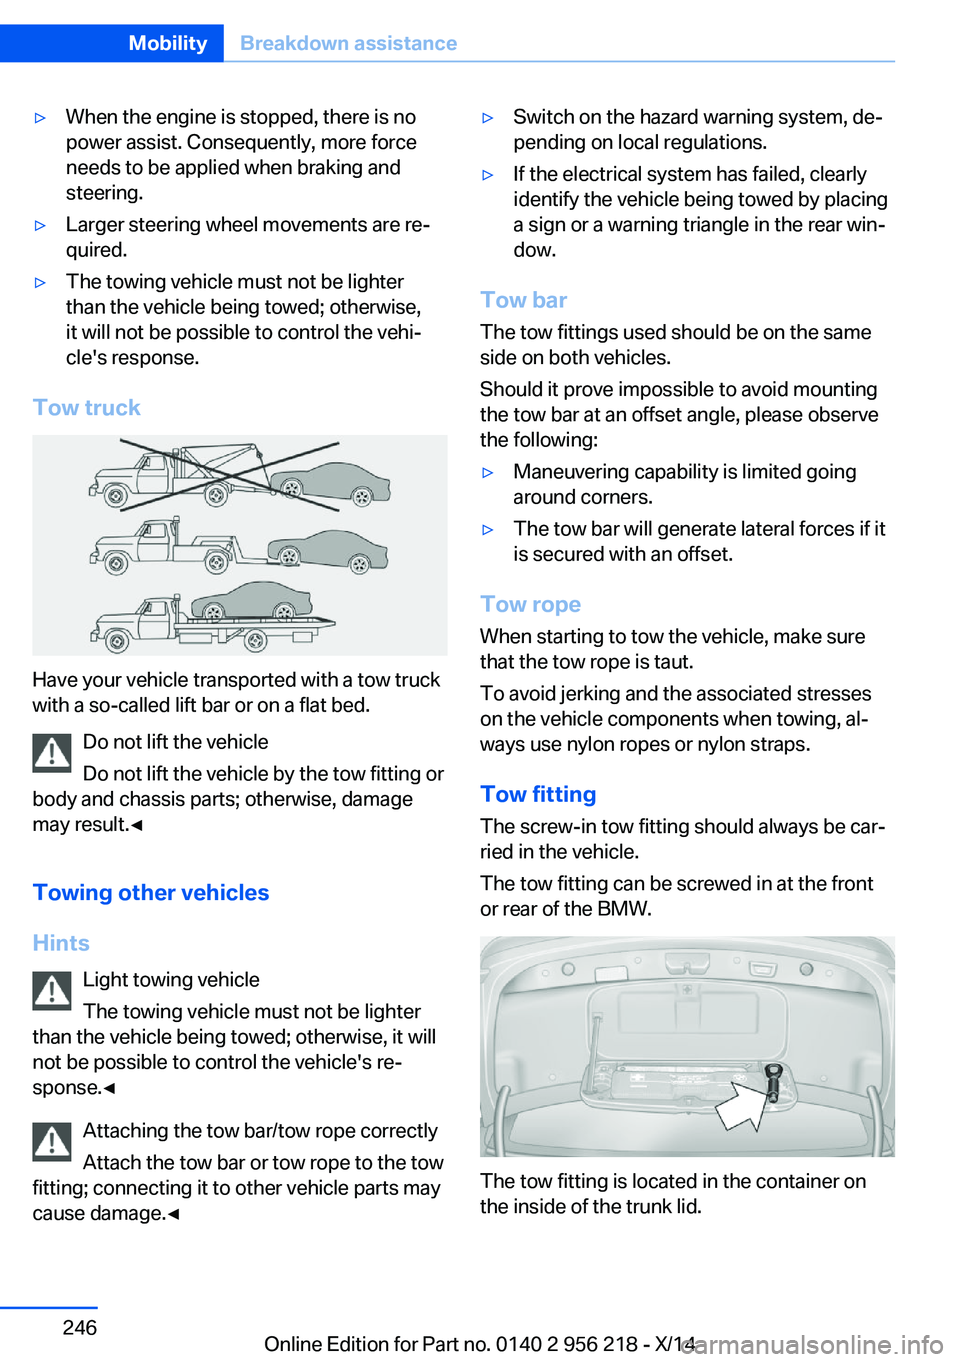
Tow truck
Have your vehicle transported with a tow truck
with a so-called lift bar or on a flat bed.
Do not lift the vehicle
Do not lift the vehicle by the tow fitting or
body and chassis parts; otherwise, damage
may result.◀
Towing other vehicles
Hints Light towing vehicle
The towing vehicle must not be lighter
than the vehicle being towed; otherwise, it will
not be possible to control the vehicle's re‐
sponse.◀
Attaching the tow bar/tow rope correctly
Attach the tow bar or tow rope to the tow
fitting; connecting it to other vehicle parts may
cause damage.◀
▷Switch on the hazard warning system, de‐
pending on local regulations.▷If the electrical system has failed, clearly
identify the vehicle being towed by placing
a sign or a warning triangle in the rear win‐
dow.
Tow bar
The tow fittings used should be on the same
side on both vehicles.
Should it prove impossible to avoid mounting
the tow bar at an offset angle, please observe
the following:
▷Maneuvering capability is limited going
around corners.▷The tow bar will generate lateral forces if it
is secured with an offset.
Tow rope
When starting to tow the vehicle, make sure
that the tow rope is taut.
To avoid jerking and the associated stresses
on the vehicle components when towing, al‐
ways use nylon ropes or nylon straps.
Tow fitting
The screw-in tow fitting should always be car‐
ried in the vehicle.
The tow fitting can be screwed in at the front
or rear of the BMW.
The tow fitting is located in the container on
the inside of the trunk lid.
Seite 246MobilityBreakdown assistance246
Online Edition for Part no. 0140 2 956 218 - X/14
Page 254 of 273
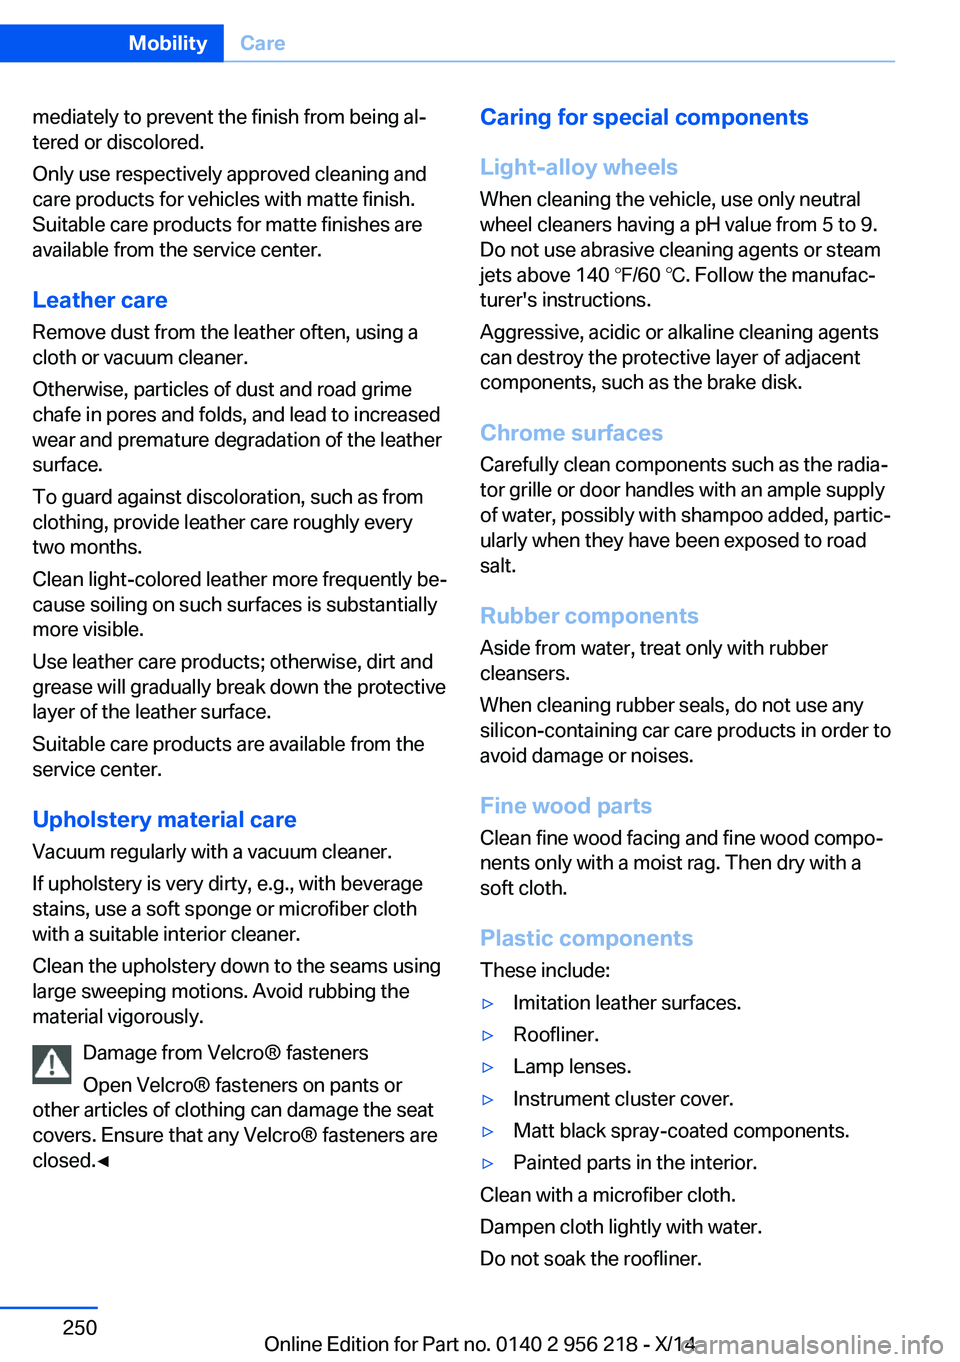
mediately to prevent the finish from being al‐
tered or discolored.
Only use respectively approved cleaning and
care products for vehicles with matte finish.
Suitable care products for matte finishes are
available from the service center.
Leather care
Remove dust from the leather often, using a
cloth or vacuum cleaner.
Otherwise, particles of dust and road grime
chafe in pores and folds, and lead to increased
wear and premature degradation of the leather
surface.
To guard against discoloration, such as from
clothing, provide leather care roughly every
two months.
Clean light-colored leather more frequently be‐
cause soiling on such surfaces is substantially
more visible.
Use leather care products; otherwise, dirt and
grease will gradually break down the protective
layer of the leather surface.
Suitable care products are available from the
service center.
Upholstery material care Vacuum regularly with a vacuum cleaner.
If upholstery is very dirty, e.g., with beverage
stains, use a soft sponge or microfiber cloth
with a suitable interior cleaner.
Clean the upholstery down to the seams using
large sweeping motions. Avoid rubbing the
material vigorously.
Damage from Velcro® fasteners
Open Velcro® fasteners on pants or
other articles of clothing can damage the seat
covers. Ensure that any Velcro® fasteners are
closed.◀Caring for special components
Light-alloy wheels When cleaning the vehicle, use only neutral
wheel cleaners having a pH value from 5 to 9.
Do not use abrasive cleaning agents or steam
jets above 140 ℉/60 ℃. Follow the manufac‐
turer's instructions.
Aggressive, acidic or alkaline cleaning agents
can destroy the protective layer of adjacent
components, such as the brake disk.
Chrome surfaces Carefully clean components such as the radia‐
tor grille or door handles with an ample supply of water, possibly with shampoo added, partic‐
ularly when they have been exposed to road
salt.
Rubber components Aside from water, treat only with rubber
cleansers.
When cleaning rubber seals, do not use any
silicon-containing car care products in order to
avoid damage or noises.
Fine wood parts
Clean fine wood facing and fine wood compo‐ nents only with a moist rag. Then dry with a
soft cloth.
Plastic components These include:▷Imitation leather surfaces.▷Roofliner.▷Lamp lenses.▷Instrument cluster cover.▷Matt black spray-coated components.▷Painted parts in the interior.
Clean with a microfiber cloth.
Dampen cloth lightly with water.
Do not soak the roofliner.
Seite 250MobilityCare250
Online Edition for Part no. 0140 2 956 218 - X/14
Page 264 of 273
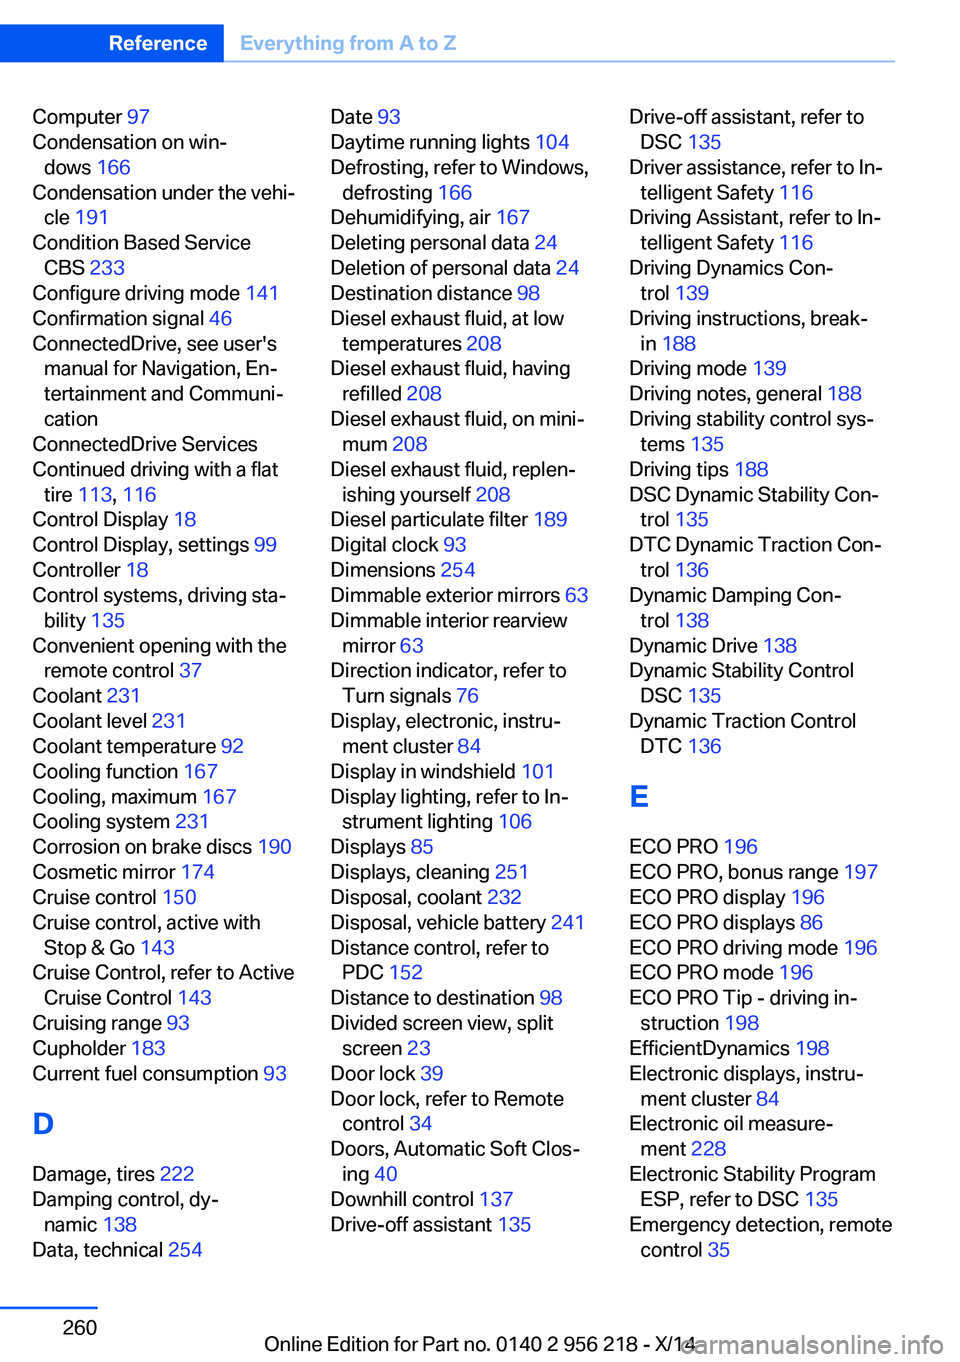
Computer 97
Condensation on win‐ dows 166
Condensation under the vehi‐ cle 191
Condition Based Service CBS 233
Configure driving mode 141
Confirmation signal 46
ConnectedDrive, see user's manual for Navigation, En‐
tertainment and Communi‐
cation
ConnectedDrive Services
Continued driving with a flat tire 113 , 116
Control Display 18
Control Display, settings 99
Controller 18
Control systems, driving sta‐ bility 135
Convenient opening with the remote control 37
Coolant 231
Coolant level 231
Coolant temperature 92
Cooling function 167
Cooling, maximum 167
Cooling system 231
Corrosion on brake discs 190
Cosmetic mirror 174
Cruise control 150
Cruise control, active with Stop & Go 143
Cruise Control, refer to Active Cruise Control 143
Cruising range 93
Cupholder 183
Current fuel consumption 93
D
Damage, tires 222
Damping control, dy‐ namic 138
Data, technical 254 Date 93
Daytime running lights 104
Defrosting, refer to Windows, defrosting 166
Dehumidifying, air 167
Deleting personal data 24
Deletion of personal data 24
Destination distance 98
Diesel exhaust fluid, at low temperatures 208
Diesel exhaust fluid, having refilled 208
Diesel exhaust fluid, on mini‐ mum 208
Diesel exhaust fluid, replen‐ ishing yourself 208
Diesel particulate filter 189
Digital clock 93
Dimensions 254
Dimmable exterior mirrors 63
Dimmable interior rearview mirror 63
Direction indicator, refer to Turn signals 76
Display, electronic, instru‐ ment cluster 84
Display in windshield 101
Display lighting, refer to In‐ strument lighting 106
Displays 85
Displays, cleaning 251
Disposal, coolant 232
Disposal, vehicle battery 241
Distance control, refer to PDC 152
Distance to destination 98
Divided screen view, split screen 23
Door lock 39
Door lock, refer to Remote control 34
Doors, Automatic Soft Clos‐ ing 40
Downhill control 137
Drive-off assistant 135 Drive-off assistant, refer to
DSC 135
Driver assistance, refer to In‐ telligent Safety 116
Driving Assistant, refer to In‐ telligent Safety 116
Driving Dynamics Con‐ trol 139
Driving instructions, break- in 188
Driving mode 139
Driving notes, general 188
Driving stability control sys‐ tems 135
Driving tips 188
DSC Dynamic Stability Con‐ trol 135
DTC Dynamic Traction Con‐ trol 136
Dynamic Damping Con‐ trol 138
Dynamic Drive 138
Dynamic Stability Control DSC 135
Dynamic Traction Control DTC 136
E
ECO PRO 196
ECO PRO, bonus range 197
ECO PRO display 196
ECO PRO displays 86
ECO PRO driving mode 196
ECO PRO mode 196
ECO PRO Tip - driving in‐ struction 198
EfficientDynamics 198
Electronic displays, instru‐ ment cluster 84
Electronic oil measure‐ ment 228
Electronic Stability Program ESP, refer to DSC 135
Emergency detection, remote control 35 Seite 260ReferenceEverything from A to Z260
Online Edition for Part no. 0140 2 956 218 - X/14
Page 265 of 273
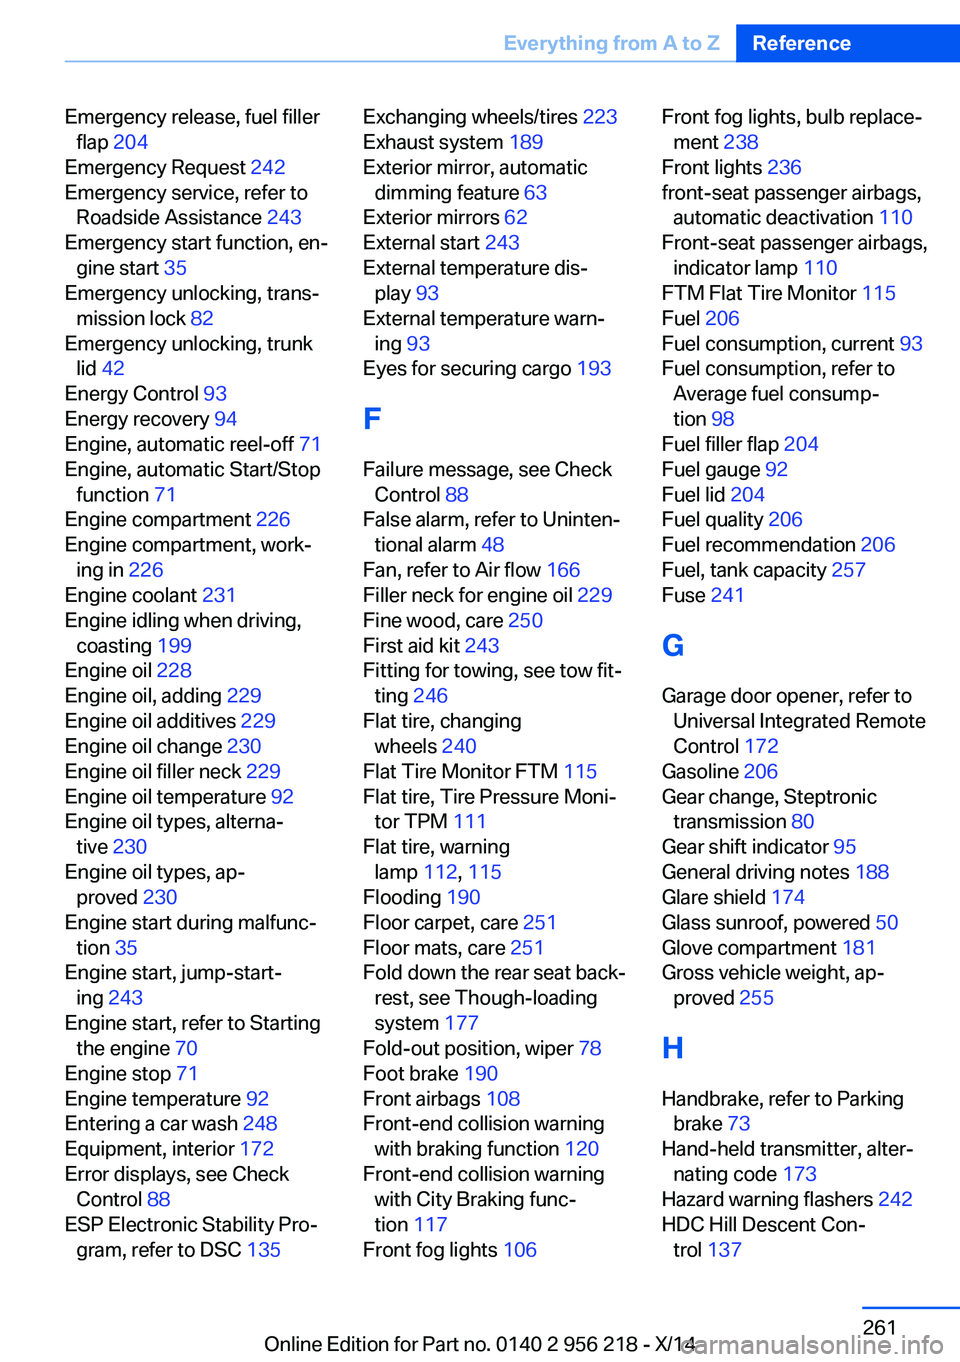
Emergency release, fuel fillerflap 204
Emergency Request 242
Emergency service, refer to Roadside Assistance 243
Emergency start function, en‐ gine start 35
Emergency unlocking, trans‐ mission lock 82
Emergency unlocking, trunk lid 42
Energy Control 93
Energy recovery 94
Engine, automatic reel-off 71
Engine, automatic Start/Stop function 71
Engine compartment 226
Engine compartment, work‐ ing in 226
Engine coolant 231
Engine idling when driving, coasting 199
Engine oil 228
Engine oil, adding 229
Engine oil additives 229
Engine oil change 230
Engine oil filler neck 229
Engine oil temperature 92
Engine oil types, alterna‐ tive 230
Engine oil types, ap‐ proved 230
Engine start during malfunc‐ tion 35
Engine start, jump-start‐ ing 243
Engine start, refer to Starting the engine 70
Engine stop 71
Engine temperature 92
Entering a car wash 248
Equipment, interior 172
Error displays, see Check Control 88
ESP Electronic Stability Pro‐ gram, refer to DSC 135 Exchanging wheels/tires 223
Exhaust system 189
Exterior mirror, automatic dimming feature 63
Exterior mirrors 62
External start 243
External temperature dis‐ play 93
External temperature warn‐ ing 93
Eyes for securing cargo 193
F
Failure message, see Check Control 88
False alarm, refer to Uninten‐ tional alarm 48
Fan, refer to Air flow 166
Filler neck for engine oil 229
Fine wood, care 250
First aid kit 243
Fitting for towing, see tow fit‐ ting 246
Flat tire, changing wheels 240
Flat Tire Monitor FTM 115
Flat tire, Tire Pressure Moni‐ tor TPM 111
Flat tire, warning lamp 112, 115
Flooding 190
Floor carpet, care 251
Floor mats, care 251
Fold down the rear seat back‐ rest, see Though-loading
system 177
Fold-out position, wiper 78
Foot brake 190
Front airbags 108
Front-end collision warning with braking function 120
Front-end collision warning with City Braking func‐
tion 117
Front fog lights 106 Front fog lights, bulb replace‐
ment 238
Front lights 236
front-seat passenger airbags, automatic deactivation 110
Front-seat passenger airbags, indicator lamp 110
FTM Flat Tire Monitor 115
Fuel 206
Fuel consumption, current 93
Fuel consumption, refer to Average fuel consump‐
tion 98
Fuel filler flap 204
Fuel gauge 92
Fuel lid 204
Fuel quality 206
Fuel recommendation 206
Fuel, tank capacity 257
Fuse 241
G
Garage door opener, refer to Universal Integrated Remote
Control 172
Gasoline 206
Gear change, Steptronic transmission 80
Gear shift indicator 95
General driving notes 188
Glare shield 174
Glass sunroof, powered 50
Glove compartment 181
Gross vehicle weight, ap‐ proved 255
H
Handbrake, refer to Parking brake 73
Hand-held transmitter, alter‐ nating code 173
Hazard warning flashers 242
HDC Hill Descent Con‐ trol 137 Seite 261Everything from A to ZReference261
Online Edition for Part no. 0140 2 956 218 - X/14