2014 BMW 535I XDRIVE ignition
[x] Cancel search: ignitionPage 243 of 267
If the first starting attempt is not success‐
ful, wait a few minutes before making an‐
other attempt in order to allow the dis‐
charged battery to recharge.3.Let both engines run for several minutes.4.Disconnect the jumper cables in the re‐
verse order.
Check the battery and recharge if necessary.
Tow-starting and towing Automatic transmission: transporting
your vehicle
Note
Your vehicle is not permitted to be towed.
Therefore, contact a service center in the
event of a breakdown.
Do not have the vehicle towed
Have your vehicle transported on a load‐
ing platform only; otherwise, damage may oc‐
cur.◀
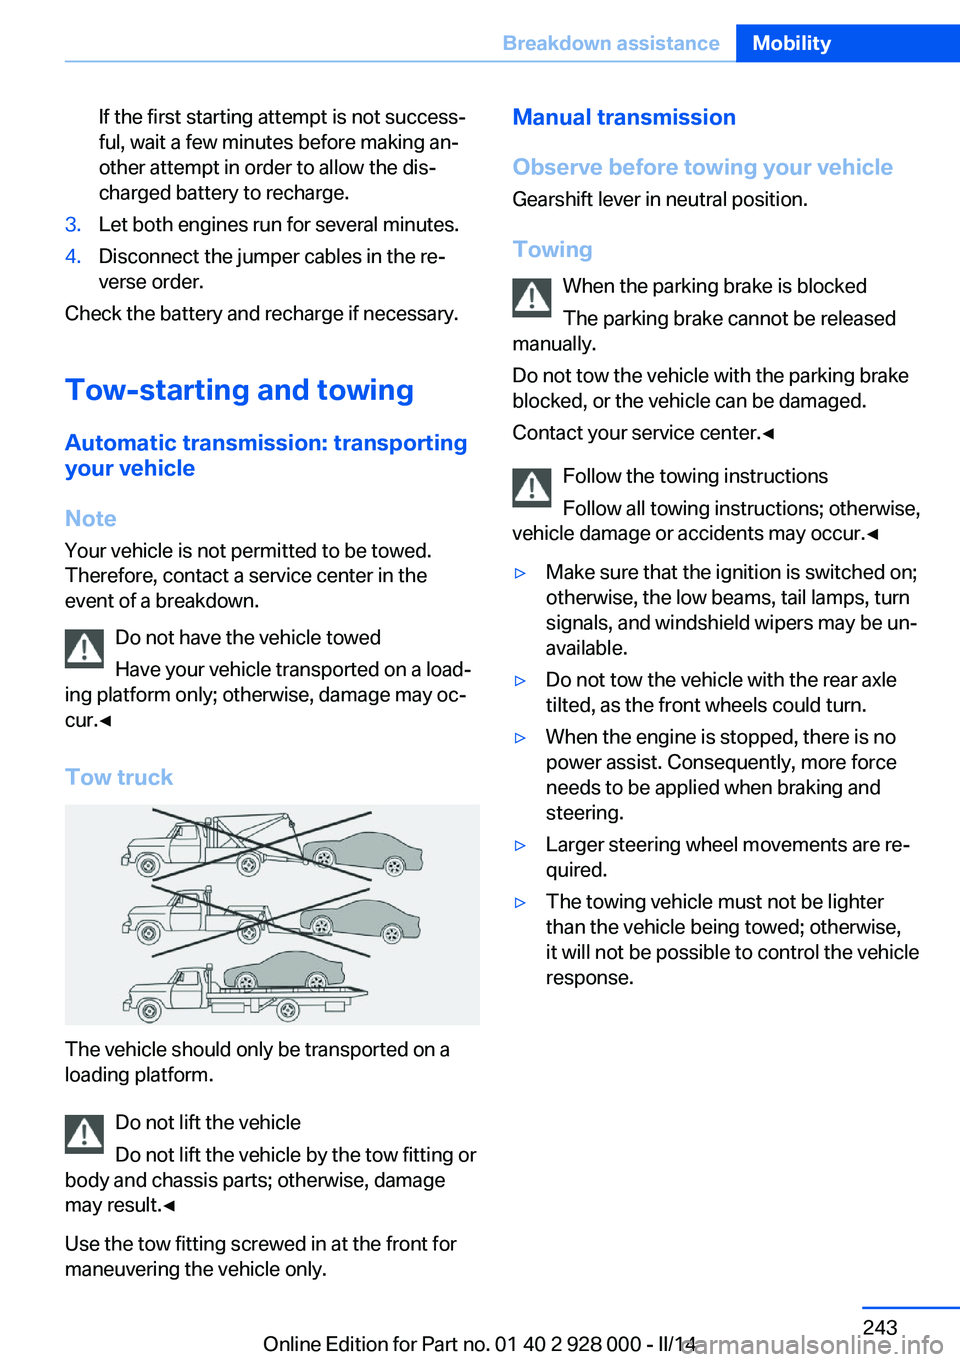
Tow truck
The vehicle should only be transported on a
loading platform.
Do not lift the vehicle
Do not lift the vehicle by the tow fitting or
body and chassis parts; otherwise, damage
may result.◀
Use the tow fitting screwed in at the front for
maneuvering the vehicle only.
Manual transmission
Observe before towing your vehicle Gearshift lever in neutral position.
Towing When the parking brake is blocked
The parking brake cannot be released
manually.
Do not tow the vehicle with the parking brake
blocked, or the vehicle can be damaged.
Contact your service center.◀
Follow the towing instructions
Follow all towing instructions; otherwise,
vehicle damage or accidents may occur.◀▷Make sure that the ignition is switched on;
otherwise, the low beams, tail lamps, turn
signals, and windshield wipers may be un‐
available.▷Do not tow the vehicle with the rear axle
tilted, as the front wheels could turn.▷When the engine is stopped, there is no
power assist. Consequently, more force
needs to be applied when braking and
steering.▷Larger steering wheel movements are re‐
quired.▷The towing vehicle must not be lighter
than the vehicle being towed; otherwise,
it will not be possible to control the vehicle
response.Seite 243Breakdown assistanceMobility243
Online Edition for Part no. 01 40 2 928 000 - II/14
Page 245 of 267
▷Avoid lateral loading of the tow fitting, e.g.,
do not lift the vehicle by the tow fitting.
Otherwise, damage to the tow fitting and the
vehicle can occur.◀
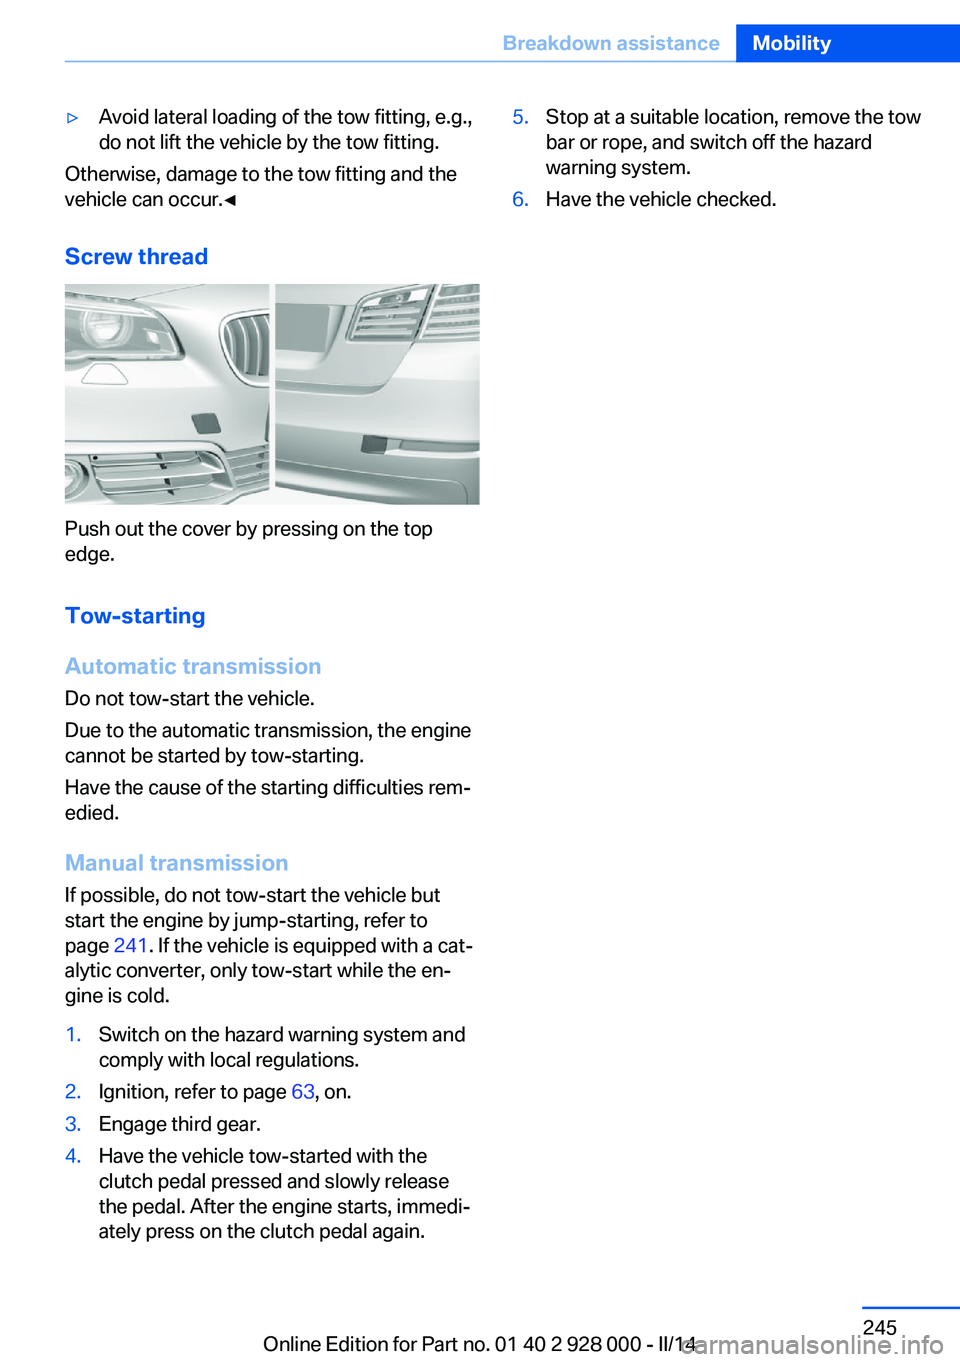
Screw thread
Push out the cover by pressing on the top
edge.
Tow-starting
Automatic transmission Do not tow-start the vehicle.
Due to the automatic transmission, the engine
cannot be started by tow-starting.
Have the cause of the starting difficulties rem‐
edied.
Manual transmission
If possible, do not tow-start the vehicle but
start the engine by jump-starting, refer to
page 241. If the vehicle is equipped with a cat‐
alytic converter, only tow-start while the en‐
gine is cold.
1.Switch on the hazard warning system and
comply with local regulations.2.Ignition, refer to page 63, on.3.Engage third gear.4.Have the vehicle tow-started with the
clutch pedal pressed and slowly release
the pedal. After the engine starts, immedi‐
ately press on the clutch pedal again.5.Stop at a suitable location, remove the tow
bar or rope, and switch off the hazard
warning system.6.Have the vehicle checked.Seite 245Breakdown assistanceMobility245
Online Edition for Part no. 01 40 2 928 000 - II/14
Page 246 of 267
CareVehicle equipmentAll standard, country-specific and optional
equipment that is offered in the model series is
described in this chapter. Therefore, equip‐
ment is also described that is not available in a
vehicle, e. g., because of the selected optional
equipment or country variant. This also applies
for safety-related functions and systems.
Car washes Hints Steam jets or high-pressure washers
When using steam jets or high-pressure
washers, hold them a sufficient distance away and use a maximum temperature of
140 ℉/60 ℃.
If the vehicle has a glass sunroof, ensure that a distance of at least 31.5 inches/80 cm is main‐
tained. Holding them too close or using exces‐
sively high pressures or temperatures can
cause damage or preliminary damage that may
then lead to long-term damage.
Follow the user's manual for the high-pressure
washer.◀
Cleaning sensors/cameras with high-
pressure washers
When using high-pressure washers, do not
spray the exterior sensors and cameras, e.g., Park Distance Control, for extended periods of
time and only from a distance of at least
12 in/30 cm.◀▷Regularly remove foreign items such as
leaves in the area below the windshield
when the hood is raised.▷Wash your vehicle frequently, particularly
in winter.Intense soiling and road salt can damage
the vehicle.
Automatic car washes
Hints
Note the following:
▷Give preference to cloth car washes or
those that use soft brushes in order to
avoid paint damage.▷Make sure that the wheels and tires are not
damaged by the transport mechanisms.▷Fold in the exterior mirrors; otherwise, they
may be damaged, depending on the width
of the vehicle.▷Deactivate, refer to page 72,the rain sensor
to avoid unintentional wiper activation.▷In some cases, an unintentional alarm can
be triggered by the interior motion sensor
of the alarm system. Follow the instruc‐
tions on avoiding an unintentional alarm,
refer to page 43.
Guide rails in car washes
Avoid car washes with guide rails higher
than 4 in/10 cm; otherwise, the vehicle body
could be damaged.◀
Before driving into a car wash In order to ensure that the vehicle can roll in a
car wash, take the following steps:
Manual transmission:
1.Drive into the car wash.2.Shift to neutral.3.Switch the engine off.4.Switch on the ignition.Seite 246MobilityCare246
Online Edition for Part no. 01 40 2 928 000 - II/14
Page 247 of 267
Automatic transmission:1.Drive into the car wash.2.Engage transmission position N.3.Deactivating Automatic Hold, refer to
page 69.4.Release the parking brake.5.Switch the engine off.
In this way, the ignition remains switched
on, and a Check-Control message is dis‐
played.
Do not turn off the ignition in the car
wash
Do not turn off the ignition in the car wash;
otherwise, selector lever position P is en‐
gaged and damages can result.◀
To start the engine:
1.Depress the brake pedal.2.Press the Start/Stop button.
Pressing the Start/Stop button without step‐
ping on the brake turns the ignition off.
The vehicle cannot be locked from the outside
when in transmission position N. A signal is
sounded when an attempt is made to lock the
vehicle.
Transmission position
Transmission position P is engaged automati‐
cally:
▷When the ignition is switched off.▷After approx. 15 minutes.
Headlamps
▷Do not rub dry and do not use abrasive or
caustic cleansers.▷Soak areas that have been soiled e.g. due
to insects, with shampoo and wash off with
water.▷Thaw ice with deicing spray; do not use an
ice scraper.After washing the vehicle
After washing the vehicle, apply the brakes
briefly to dry them; otherwise, braking action
can be reduced and corrosion of the brake
discs can occur.
Completely remove all residues on the win‐
dows, to minimize loss of visibility due to
smearing and to reduce wiper noises and
wiper blade wear.
Vehicle care
Car care products BMW recommends using cleaning and care
products from BMW, since these have been
tested and approved.
Car care and cleaning products
Follow the instructions on the container.
When cleaning the interior, open the doors or
windows.
Only use products intended for cleaning vehi‐
cles.
Cleansers can contain substances that are
dangerous and harmful to your health.◀
Vehicle paint
Regular care contributes to driving safety and
value retention. Environmental influences in
areas with elevated air pollution or natural con‐
taminants, such as tree resin or pollen can af‐
fect the vehicle's paintwork. Tailor the fre‐
quency and extent of your car care to these
influences.
Aggressive substances, such as spilled fuel,
oil, grease or bird droppings, must be removed
immediately to prevent the finish from being
altered or discolored.
Leather care
Remove dust from the leather often, using a
cloth or vacuum cleaner.Seite 247CareMobility247
Online Edition for Part no. 01 40 2 928 000 - II/14
Page 260 of 267
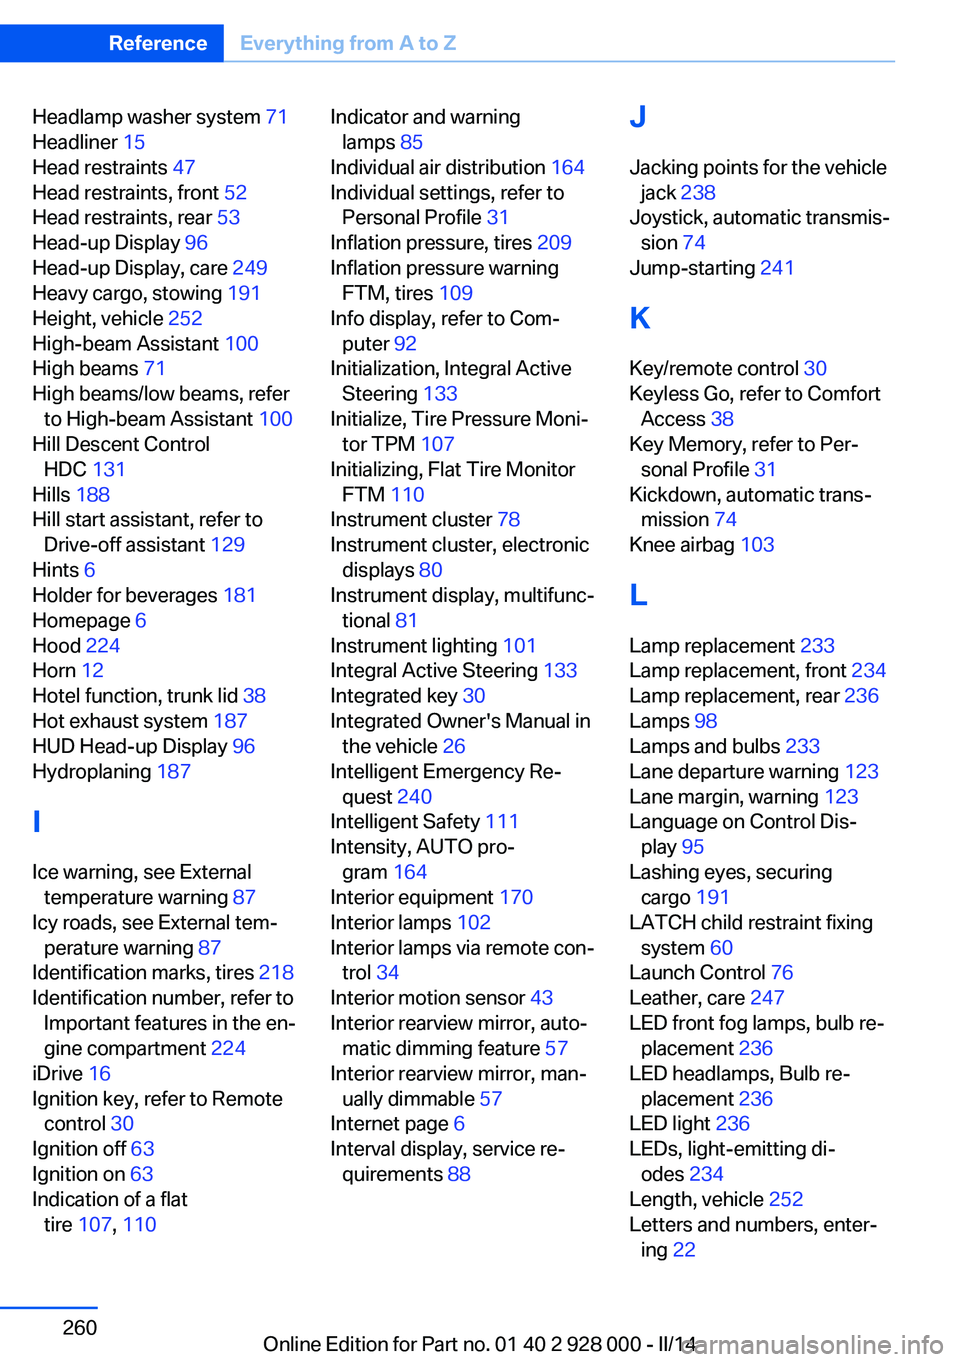
Headlamp washer system 71
Headliner 15
Head restraints 47
Head restraints, front 52
Head restraints, rear 53
Head-up Display 96
Head-up Display, care 249
Heavy cargo, stowing 191
Height, vehicle 252
High-beam Assistant 100
High beams 71
High beams/low beams, refer to High-beam Assistant 100
Hill Descent Control HDC 131
Hills 188
Hill start assistant, refer to Drive-off assistant 129
Hints 6
Holder for beverages 181
Homepage 6
Hood 224
Horn 12
Hotel function, trunk lid 38
Hot exhaust system 187
HUD Head-up Display 96
Hydroplaning 187
I Ice warning, see External temperature warning 87
Icy roads, see External tem‐ perature warning 87
Identification marks, tires 218
Identification number, refer to Important features in the en‐
gine compartment 224
iDrive 16
Ignition key, refer to Remote control 30
Ignition off 63
Ignition on 63
Indication of a flat tire 107 , 110 Indicator and warning
lamps 85
Individual air distribution 164
Individual settings, refer to Personal Profile 31
Inflation pressure, tires 209
Inflation pressure warning FTM, tires 109
Info display, refer to Com‐ puter 92
Initialization, Integral Active Steering 133
Initialize, Tire Pressure Moni‐ tor TPM 107
Initializing, Flat Tire Monitor FTM 110
Instrument cluster 78
Instrument cluster, electronic displays 80
Instrument display, multifunc‐ tional 81
Instrument lighting 101
Integral Active Steering 133
Integrated key 30
Integrated Owner's Manual in the vehicle 26
Intelligent Emergency Re‐ quest 240
Intelligent Safety 111
Intensity, AUTO pro‐ gram 164
Interior equipment 170
Interior lamps 102
Interior lamps via remote con‐ trol 34
Interior motion sensor 43
Interior rearview mirror, auto‐ matic dimming feature 57
Interior rearview mirror, man‐ ually dimmable 57
Internet page 6
Interval display, service re‐ quirements 88 J
Jacking points for the vehicle jack 238
Joystick, automatic transmis‐ sion 74
Jump-starting 241
K
Key/remote control 30
Keyless Go, refer to Comfort Access 38
Key Memory, refer to Per‐ sonal Profile 31
Kickdown, automatic trans‐ mission 74
Knee airbag 103
L Lamp replacement 233
Lamp replacement, front 234
Lamp replacement, rear 236
Lamps 98
Lamps and bulbs 233
Lane departure warning 123
Lane margin, warning 123
Language on Control Dis‐ play 95
Lashing eyes, securing cargo 191
LATCH child restraint fixing system 60
Launch Control 76
Leather, care 247
LED front fog lamps, bulb re‐ placement 236
LED headlamps, Bulb re‐ placement 236
LED light 236
LEDs, light-emitting di‐ odes 234
Length, vehicle 252
Letters and numbers, enter‐ ing 22 Seite 260ReferenceEverything from A to Z260
Online Edition for Part no. 01 40 2 928 000 - II/14