2014 BMW 5 SERIES GRAN TURISMO roof rack
[x] Cancel search: roof rackPage 112 of 259
Protective action
Airbags are not triggered in every impact situa‐
tion, e.g., in less severe accidents or rear-end
collisions.
Information on how to ensure the optimal
protective effect of the airbags▷Keep at a distance from the airbags.▷Always grasp the steering wheel on the
steering wheel rim, holding your hands at
the 3 o'clock and 9 o'clock positions, to
keep the risk of injury to your hands or
arms as low as possible when the airbag is
triggered.▷There should be no person, animals, or ob‐
jects between an airbag and a person.▷Do not use the cover of the front airbag on
the front passenger side as a storage area.▷Dashboard and windshield on the front
passenger side must stay clear - do not at‐
tach adhesive labels or coverings and do
not attach brackets or cables, e. g., for GPS
devices or' mobile phones.▷Make sure that the front passenger is sit‐
ting correctly, i.e., keeps his or her feet and
legs in the footwell; otherwise, leg injuries
might occur when front airbag is activated.▷Do not place slip covers, seat cushions or
other objects on the front passenger seat
that are not approved specifically for seats
with integrated side airbags.▷Do not hang pieces of clothing, such as
jackets, over the backrests.▷Make sure that occupants keep their heads
away from the side airbag and do not rest
against the head airbag; otherwise, injuries
might occur when airbag is activated.▷Do not remove the airbag system.▷Do not remove the steering wheel.▷Do not apply adhesive materials to the air‐
bag cover panels, do not cover them or
modify them in any way.▷Never modify either the individual compo‐
nents or the wiring in the airbag system.
This also applies to steering wheel covers,
the dashboard, the seats, the roof pillars
and the sides of the roofliner.◀
Even when you follow all instructions very
closely, injury from contact with the airbags
cannot be ruled out in certain situations.
The ignition and inflation noise may lead to
short-term and, in most cases, temporary
hearing impairment in sensitive individuals.
Malfunction, deactivation and after de‐
ploying the airbags
Do not touch the individual components imme‐
diately after the system has been triggered;
otherwise, you may risk burns.
Only have the airbags checked, repaired or dis‐
mantled and the airbag generator scrapped by
the service center or an authorized repair shop
for handling explosives.
Non-professional attempts to service the sys‐
tem could lead to failure in an emergency or
unintentional activation of the airbag - both
may lead to injury.◀
Warnings and information on the airbags are also found on the sun visors.
Functional readiness of the airbag
system
When the ignition is reel on, the warn‐
ing lamp in the instrument cluster lights
up briefly and thereby indicates the op‐
erational readiness of the entire airbag system
and the belt tensioner.
Airbag system malfunctioning
▷Warning lamp does not come on when the
ignition is turned on.▷The warning lamp lights up continuously.Seite 108ControlsSafety108
Online Edition for Part no. 01 40 2 956 191 - X/14
Page 138 of 259
Therefore, do not reduce the additional safety
margin by driving in a risky manner.◀
Do not deactivate DSC when driving withroof load
Do not deactivate Dynamic Stability Control
DSC when driving with roof load, e.g. roof-
mounted luggage rack.
Otherwise, driving safety is not given in driv‐
ing-critical situation due to the elevated center
of gravity.◀
At a glance
Button in the vehicle
DSC OFF button
Indicator/warning lights The indicator lamp flashes: DSC con‐
trols the drive and braking forces.
The indicator lamp lights up: DSC has
failed.
Deactivating DSC: DSC OFF
When DSC is deactivated, driving stability is
reduced during acceleration and when driving
in curves.
Stabilizing interventions by the Integral Active
Steering system are only performed by the
rear axle steering.
To increase vehicle stability, activate DSC
again as soon as possible.
Deactivating DSC
Press and hold this button but not lon‐
ger than approx. 10 seconds, until the
indicator lamp for DSC OFF lights up in the in‐
strument cluster and displays DSC OFF.
The DSC system is switched off.
The steering and, depending on the equip‐
ment, suspension are tuned for sporty driving.
Activating DSC Press button.
DSC OFF and the DSC OFF indicator
lamp go out.
Indicator/warning lights
When DSC is deactivated, DSC OFF is dis‐
played in the instrument cluster.
The indicator lamp lights up: DSC is
deactivated.
DTC Dynamic Traction
Control
The concept The DTC system is a version of the DSC where
forward momentum is optimized.
The system ensures maximum headway on
special road conditions or loose road surfaces,
e.g., unplowed snowy roads, but with some‐
what limited driving stability.
Activating the Dynamic Traction Control DTC
provides maximum traction. Driving stability is
limited during acceleration and when driving in
curves.
Therefore drive with appropriate caution.
You may find it useful to briefly activate DTC
under the following special circumstances:▷When driving in slush or on uncleared,
snow-covered roads.Seite 134ControlsDriving stability control systems134
Online Edition for Part no. 01 40 2 956 191 - X/14
Page 192 of 259
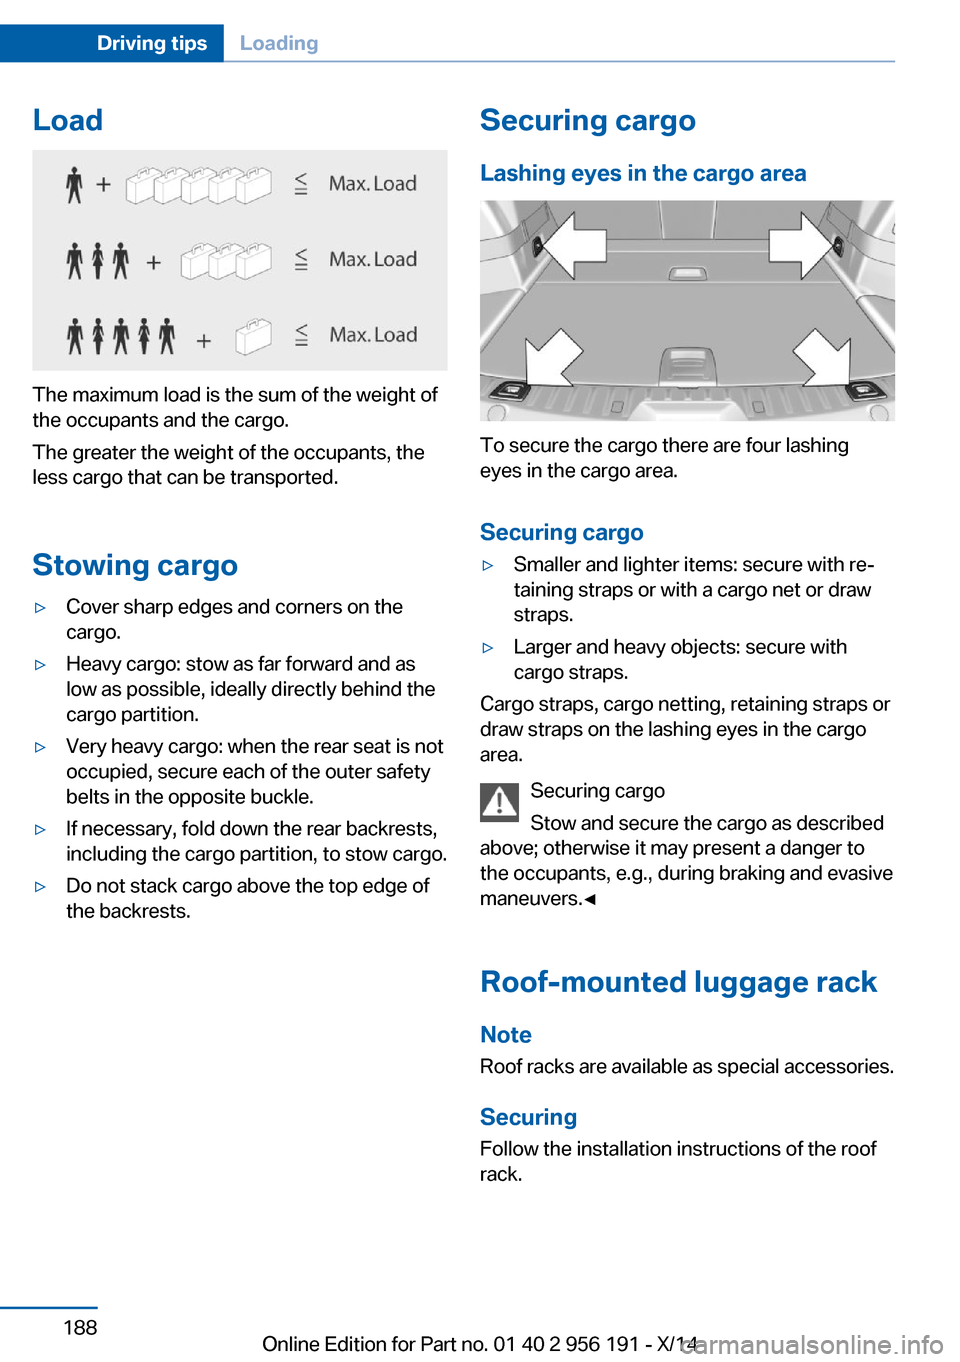
Load
The maximum load is the sum of the weight of
the occupants and the cargo.
The greater the weight of the occupants, the
less cargo that can be transported.
Stowing cargo
▷Cover sharp edges and corners on the
cargo.▷Heavy cargo: stow as far forward and as
low as possible, ideally directly behind the
cargo partition.▷Very heavy cargo: when the rear seat is not
occupied, secure each of the outer safety
belts in the opposite buckle.▷If necessary, fold down the rear backrests,
including the cargo partition, to stow cargo.▷Do not stack cargo above the top edge of
the backrests.Securing cargo
Lashing eyes in the cargo area
To secure the cargo there are four lashing
eyes in the cargo area.
Securing cargo
▷Smaller and lighter items: secure with re‐
taining straps or with a cargo net or draw
straps.▷Larger and heavy objects: secure with
cargo straps.
Cargo straps, cargo netting, retaining straps or
draw straps on the lashing eyes in the cargo
area.
Securing cargo
Stow and secure the cargo as described
above; otherwise it may present a danger to
the occupants, e.g., during braking and evasive
maneuvers.◀
Roof-mounted luggage rack Note
Roof racks are available as special accessories.
Securing
Follow the installation instructions of the roof
rack.
Seite 188Driving tipsLoading188
Online Edition for Part no. 01 40 2 956 191 - X/14
Page 193 of 259
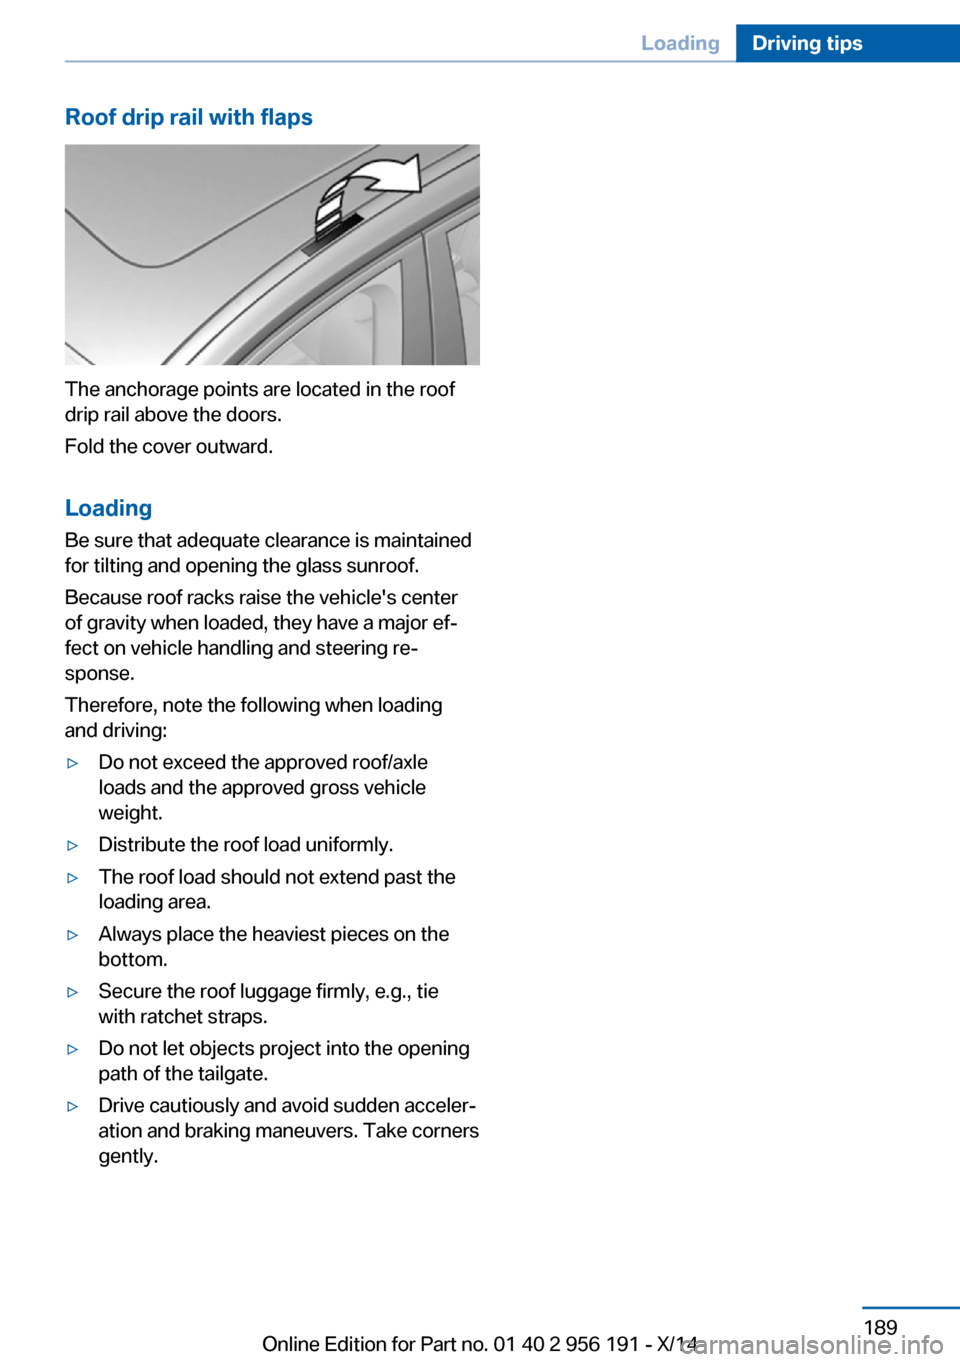
Roof drip rail with flaps
The anchorage points are located in the roof
drip rail above the doors.
Fold the cover outward.
Loading Be sure that adequate clearance is maintained
for tilting and opening the glass sunroof.
Because roof racks raise the vehicle's center
of gravity when loaded, they have a major ef‐
fect on vehicle handling and steering re‐
sponse.
Therefore, note the following when loading
and driving:
▷Do not exceed the approved roof/axle
loads and the approved gross vehicle
weight.▷Distribute the roof load uniformly.▷The roof load should not extend past the
loading area.▷Always place the heaviest pieces on the
bottom.▷Secure the roof luggage firmly, e.g., tie
with ratchet straps.▷Do not let objects project into the opening
path of the tailgate.▷Drive cautiously and avoid sudden acceler‐
ation and braking maneuvers. Take corners
gently.Seite 189LoadingDriving tips189
Online Edition for Part no. 01 40 2 956 191 - X/14
Page 194 of 259
Saving fuelVehicle features and optionsThis chapter describes all standard, country-
specific and optional features offered with the
series. It also describes features that are not
necessarily available in your car, e. g., due to
the selected options or country versions. This
also applies to safety-related functions and
systems.
General information
Your vehicle contains advanced technology for
the reduction of fuel consumption and emis‐
sions.
Fuel consumption depends on a number of dif‐
ferent factors.
Carrying out certain measures, such as a mod‐
erate driving style and regular maintenance,
can influence fuel consumption and the envi‐
ronmental impact.
Remove unnecessary cargoAdditional weight increases fuel consumption.
Remove attached parts
following use
Remove auxiliary mirrors, roof or rear luggage
racks which are no longer required following
use.
Attached parts on the vehicle impair the aero‐
dynamics and increase the fuel consumption.Close the windows and glass
sunroof
Driving with the glass sunroof and windows
open results in increased air resistance and
thereby reduces the range.
Tires
General information Tires can affect fuel consumption in various
ways, e.g., tire size may influence fuel con‐
sumption.
Check the tire inflation pressure
regularly
Check and, if needed, correct the tire inflation
pressure at least twice a month and before
starting on a long trip.
Low tire inflation pressure increases rolling re‐
sistance and thus raises fuel consumption and
tire wear.
Drive away immediately
Do not wait for the engine to warm-up while
the vehicle remains stationary. Start driving
right away, but at moderate engine speeds.
This is the quickest way of warming the cold
engine up to operating temperature.
Look well ahead when
driving
Avoid unnecessary acceleration and braking.
By maintaining a suitable distance to the vehi‐
cle driving ahead of you.
Driving smoothly and proactively reduces fuel
consumption.Seite 190Driving tipsSaving fuel190
Online Edition for Part no. 01 40 2 956 191 - X/14
Page 244 of 259
Technical dataVehicle features and options
This chapter describes all standard, country-
specific and optional features offered with the
series. It also describes features that are notnecessarily available in your car, e. g., due to
the selected options or country versions. This
also applies to safety-related functions and
systems.
Note
The technical data and specifications in this
Owner's Manual are used as guidance values.
The vehicle-specific data can deviate from this,
for example, due to the selected special equip‐
ment, country version or country-specific
measurement method. Detailed values can befound in the approval documents, on informa‐
tion signs on the vehicle or can be obtained
from the service center.
The information in the vehicle documents al‐
ways has priority.
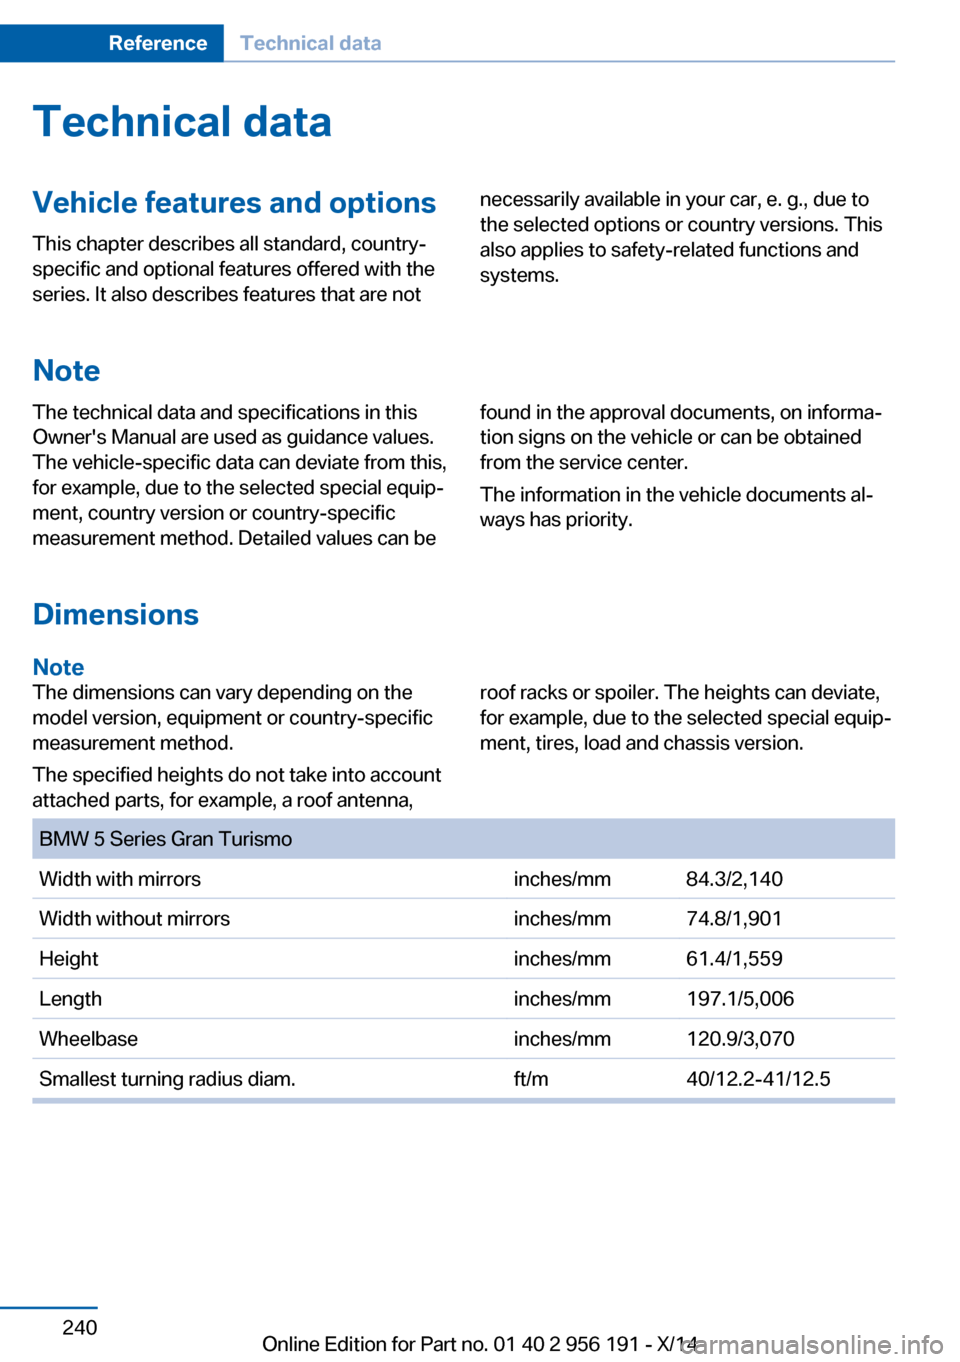
Dimensions
Note
The dimensions can vary depending on the
model version, equipment or country-specific
measurement method.
The specified heights do not take into account
attached parts, for example, a roof antenna,roof racks or spoiler. The heights can deviate,
for example, due to the selected special equip‐
ment, tires, load and chassis version. BMW 5 Series Gran TurismoWidth with mirrorsinches/mm84.3/2,140Width without mirrorsinches/mm74.8/1,901Heightinches/mm61.4/1,559Lengthinches/mm197.1/5,006Wheelbaseinches/mm120.9/3,070Smallest turning radius diam.ft/m40/12.2-41/12.5Seite 240ReferenceTechnical data240
Online Edition for Part no. 01 40 2 956 191 - X/14
Page 253 of 259
Light bulb replacement, seeLamp and bulb replace‐
ment 221
Light control 103
Light-emitting diodes, LEDs 222
Lighting 102
Lighting, speaker 106
Lighting via remote con‐ trol 38
Light reel 102
Lights 102
Lights and bulbs, see Lamp and bulb replacement 221
Load 188
Loading 187
Loading position 176
Lock, door 39
Locking/unlocking via door lock 39
Locking/unlocking with re‐ mote control 37
Locking, automatic 47
Locking, settings 46
Locking via tailgate 41
Lock, power window 50
Locks, doors, and win‐ dows 69
Low beams 102
Low beams, automatic, refer to High-beam Assistant 104
Lower back support 55
Luggage rack, see Roof- mounted luggage rack 188
Lumbar support 55
M
Maintenance 219
Maintenance require‐ ments 219
Maintenance, service require‐ ments 93
Maintenance system, BMW 219
Make-up mirror 171 Malfunction displays, see
Check Control 87
Malfunction, self-leveling sus‐ pension 138
Manual air distribution 163
Manual air flow 163
Manual brake, refer to Parking brake 73
Manual mode, Steptronic transmission 82
Manual operation, door lock 39
Manual operation, exterior mirrors 62
Manual operation, fuel filler flap 198
Manual operation, Park Dis‐ tance Control PDC 151
Manual operation, parking brake 76
Manual operation, rearview camera 153
Manual operation, Side View 155
Manual operation, Top View 157
Marking on approved tires 208
Marking, run-flat tires 209
Massage seat, front 56
Master key, refer to Remote control 34
Maximum cooling 164
Maximum speed, display 94
Maximum speed, winter tires 209
Measure, units of 99
Medical kit 229
Memory for seat, mirrors, steering wheel 61
Menu, EfficientDynamics 193
Menu in instrument clus‐ ter 96
Menus, operating, iDrive 18
Menus, refer to iDrive operat‐ ing concept 19 Messages, see Check Con‐
trol 87
Microfilter 165
Minimum tread, tires 207
Mirror 62
Mirror memory 61
Mobile communication devi‐ ces in the vehicle 185
Modifications, technical, refer to Safety 7
Moisture in headlight 222
Monitor, refer to Control Dis‐ play 18
Mounting of child restraint systems 65
Multifunctional instrument display 85
Multi-function hook 180
Multifunction steering wheel, buttons 14
N
Navigation, see user's manual for Navigation, Entertain‐
ment and Communication
Neck restraints, front, refer to Head restraints 59
Neck restraints, rear, refer to Head restraints 60
Neutral cleaner, see wheel cleaner 235
New wheels and tires 208
Night Vision 124
Night Vision device, see Night Vision 124
Nylon rope for tow-starting/ towing 231
O OBD Onboard Diagnosis 219
OBD, see OBD Onboard Di‐ agnosis 219
Object detection, see Night Vision 124 Seite 249Everything from A to ZReference249
Online Edition for Part no. 01 40 2 956 191 - X/14
Page 255 of 259

Retaining straps, securingcargo 188
Retreaded tires 209
Reversing lamp, bulb replace‐ ment 224
Roadside parking lights 103
Roller sunblinds 50
Roll stabilization, refer to Adaptive Drive 136
Roll stabilization, refer to Dy‐ namic Drive 136
RON recommended fuel grade 200
Roofliner 17
Roof load capacity 241
Roof-mounted luggage rack 188
Rope for tow-starting/ towing 231
RSC Run Flat System Com‐ ponent, refer to Run-flat
tires 209
Rubber components, care 235
Run-flat tires 209
S Safe braking 185
Safety 7
Safety belt reminder for driv‐ er's seat and front passen‐
ger seat 59
Safety belts 58
Safety belts, care 235
Safety Package, refer to Ac‐ tive Protection 131
Safety reel, windows 50
Safety systems, airbags 107
Saving fuel 190
Screen, refer to Control Dis‐ play 18
Screwdriver, see Onboard ve‐ hicle tool kit 221 Screw thread, see screw
thread for tow fitting, screw
thread for tow fitting 232
Seat belts, refer to Safety belts 58
Seat heating, front 56
Seat heating, rear 57
Seating position for chil‐ dren 65
Seat, mirror, and steering wheel memory 61
Seats 53
Seats, front 53
Seats, rear 57
Seat ventilation, front 56
Selection list in instrument cluster 96
Selector lever, Steptronic transmission 81
Self-leveling suspension, air suspension 138
Self-leveling suspension, malfunction 138
Sensors, care 236
Service and warranty 8
Service requirements, Condi‐ tion Based Service
CBS 219
Service requirements, dis‐ play 93
Service, Roadside Assis‐ tance 229
Services, ConnectedDrive
SET button, see Active Cruise Control, ACC 141
SET button, see Cruise con‐ trol 148
Settings, locking/unlock‐ ing 46
Settings on Control Dis‐ play 98
Settings, storing for seat, mir‐ rors, steering wheel 61
Shift paddles on steering wheel 82
Shoulder support 56 Side airbags 107
Side View 155
Signaling, horn 14
Signals when unlocking 47
Sitting safely 53
Size 240
Ski and snowboard bag 176
Slide/tilt glass roof 51
Smallest turning radius 240
Small tailgate via remote con‐ trol 38
Smoker's package 171
Snow chains 210
Socket 172
Socket, OBD Onboard Diag‐ nostics 219
SOS button 228
Spare fuse 226
Speaker lighting 106
Specified engine oil types 216
Speed, average 97
Speed limit detection, com‐ puter 97
Speed limiter, display 94
Speed Limit Information 94
Speed warning 98
Split screen 23
SPORT+ - program, Dynamic Driving Control 139
Sport displays, torque dis‐ play, performance dis‐
play 98
SPORT program, driving dy‐ namics 139
Sport program, transmis‐ sion 82
Stability control systems 133
Start/stop, automatic func‐ tion 71
Start/Stop button 70
Start function during malfunc‐ tion 35
Starting the engine 71
Status control display, tires 112 Seite 251Everything from A to ZReference251
Online Edition for Part no. 01 40 2 956 191 - X/14