2014 BMW 5 SERIES GRAN TURISMO check engine
[x] Cancel search: check enginePage 230 of 259
Further information about the battery can be
obtained from your service center.
Battery replacement Use approved vehicle batteries only
Only use vehicle batteries that have been
approved for your vehicle by the manufacturer;
otherwise, the vehicle could be damaged and
systems or functions may not be fully availa‐
ble.◀
After a battery replacement, have the battery
registered on the vehicle by your service cen‐
ter to ensure that all comfort features are fully
available and that any Check Control mes‐
sages of these comfort features are no longer
displayed.
Charging the battery
Note Do not connect charging devices to the
12 volt socket in the vehicle
Do not connect battery chargers to the fac‐
tory-installed 12 volt sockets in the vehicle as
this may damage the vehicle battery due to an
increased power consumption.◀
General information
Make sure that the battery is always suffi‐
ciently charged to guarantee that the battery
remains usable for its full service life.
The battery may need to be charged in the fol‐
lowing cases:▷When making frequent short-distance
drives.▷If the vehicle is not used for prolonged pe‐
riods, longer than a month.
Starting aid terminals
In the vehicle, only charge the battery via the
starting aid terminals, refer to page 230, in the
engine compartment with the engine off.
Power failure
After a temporary power loss, some equipment
needs to be newly initialized or individual set‐
tings updated, e.g.:▷Seat, mirror, and steering wheel memory:
store the positions again.▷Time: update.▷Date: update.▷Glass sunroof: initialize the system, refer to
page 52.
Disposing of old batteries
Have old batteries disposed of by your
service center or bring them to a recy‐
cling center.
Maintain the battery in an upright position for
transport and storage. Secure the battery so
that it does not tip over during transport.
Fuses Hints Replacing fuses
Never attempt to repair a blown fuse and
do not replace a defective fuse with a substi‐
tute of another color or amperage rating; this
could lead to a circuit overload, ultimately re‐
sulting in a fire in the vehicle.◀
Plastic tweezers and information on the fuse
types and locations are stored in the fuse box
in the cargo area.
Seite 226MobilityReplacing components226
Online Edition for Part no. 01 40 2 956 191 - X/14
Page 234 of 259
Jump-starting
Hints
If the battery is discharged, an engine can be
started using the battery of another vehicle
and two jumper cables. Only use jumper ca‐
bles with fully insulated clamp handles.
To prevent personal injury or damage to both
vehicles, adhere strictly to the following proce‐
dure.
Do not touch live parts
To avoid the risk of potentially fatal in‐
jury, always avoid all contact with electrical
components while the engine is running.◀
Preparation1.Check whether the battery of the other ve‐
hicle has a voltage of 12 volts. This infor‐
mation can be found on the battery.2.Switch off the engine of the assisting vehi‐
cle.3.Switch off any electronic systems/power
consumers in both vehicles.
Bodywork contact between vehicles
Make sure that there is no contact be‐
tween the bodywork of the two vehicles; other‐
wise, there is a danger of short circuits.◀
Starting aid terminals Connecting order
Connect the jumper cables in the correct
order to prevent risk of injury from arcing.◀
The so-called starting aid terminal in the en‐
gine compartment acts as the battery's posi‐
tive terminal.
The body ground or a special nut acts as the
battery negative terminal.
Connecting the cables
1.Pull off the lid of the BMW starting aid ter‐
minal.2.Attach one terminal clamp of the positive
jumper cable to the positive terminal of the
battery, or to the corresponding starting
aid terminal of the vehicle providing assis‐
tance.3.Attach the terminal clamp on the other end
of the cable to the positive terminal of the
battery, or to the corresponding starting
aid terminal of the vehicle to be started.4.Attach one terminal clamp of the negative
jumper cable to the negative terminal of
the battery, or to the corresponding engine
or body ground of assisting vehicle.5.Attach the second terminal clamp to the
negative terminal of the battery, or to theSeite 230MobilityBreakdown assistance230
Online Edition for Part no. 01 40 2 956 191 - X/14
Page 235 of 259
corresponding engine or body ground of
the vehicle to be started.
Starting the engine
Never use spray fluids to start the engine.
1.Start the engine of the assisting vehicle
and let it run for several minutes at an in‐
creased idle speed.2.Start the engine of the vehicle that is to be
started in the usual way.
If the first starting attempt is not success‐
ful, wait a few minutes before making an‐
other attempt in order to allow the dis‐
charged battery to recharge.3.Let both engines run for several minutes.4.Disconnect the jumper cables in the re‐
verse order.
Check the battery and recharge if needed.
Tow-starting and towing Note Tow-starting and towing
For towing the vehicle turn, switch off the
Intelligent Safety systems; otherwise malfunc‐
tions of the individual braking systems might
lead to accidents.◀
Transporting your vehicle
Note Your vehicle is not permitted to be towed.
Therefore, contact a service center in the
event of a breakdown.
Do not have the vehicle towed
Have your vehicle transported on a load‐
ing platform only; otherwise, damage may oc‐ cur.◀
Tow truck
The vehicle should only be transported on a
loading platform.
Do not lift the vehicle
Do not lift the vehicle by the tow fitting or
body and chassis parts; otherwise, damage
may result.◀
Towing other vehicles
Hints Light towing vehicle
The towing vehicle must not be lighter
than the vehicle being towed; otherwise, it will
not be possible to control the vehicle's re‐
sponse.◀
Attaching the tow bar/tow rope correctly
Attach the tow bar or tow rope to the tow
fitting; connecting it to other vehicle parts may
cause damage.◀
▷Switch on the hazard warning system, de‐
pending on local regulations.▷If the electrical system has failed, clearly
identify the vehicle being towed by placing
a sign or a warning triangle in the rear win‐
dow.
Tow bar
The tow fittings used should be on the same
side on both vehicles.
Seite 231Breakdown assistanceMobility231
Online Edition for Part no. 01 40 2 956 191 - X/14
Page 238 of 259
3.Deactivating Automatic Hold, refer to
page 75.4.Release the parking brake.5.Switch the engine off.
In this way, the ignition remains switched
on, and a Check-Control message is dis‐
played.
Do not turn off the ignition in the car
wash
Do not turn off the ignition in the car wash;
otherwise, selector lever position P is en‐
gaged and damages can result.◀
The vehicle cannot be locked from the outside
when in selector lever position N. A signal
sounds when an attempt is made to lock the
vehicle.
To start the engine:
1.Depress the brake pedal.2.Press the Start/Stop button.
Pressing the Start/Stop button without step‐
ping on the brake turns the ignition off.
Selector lever positionSelector lever position P is engaged automati‐
cally:
▷When the ignition is switched off.▷After approx. 15 minutes.
Headlights
▷Do not rub dry and do not use abrasive or
acidic cleansers.▷Soak areas that have been dirtied e. g.,
from insects, with shampoo and wash off
with water.▷Thaw ice with de-icing spray; do not use an
ice scraper.
After washing the vehicle
After washing the vehicle, apply the brakes
briefly to dry them; otherwise, braking action
can be reduced and corrosion of the brake
discs can occur.
Completely remove all residues on the win‐
dows, to minimize loss of visibility due to
smearing and to reduce wiper noises and
wiper blade wear.
Vehicle care
Car care products BMW recommends using care and cleaning
products from BMW, since these have been
tested and approved.
Car care and cleaning products
Follow the instructions on the container.
When cleaning the interior, open the doors or
windows.
Only use products intended for cleaning vehi‐
cles.
Cleansers can contain substances that are
dangerous and harmful to your health.◀
Vehicle paint
Regular care contributes to driving safety and
value retention. Environmental influences in
areas with elevated air pollution or natural con‐
taminants, such as tree resin or pollen can af‐
fect the vehicle's paintwork. Tailor the fre‐
quency and extent of your car care to these
influences.
Aggressive substances such as spilled fuel, oil,
grease or bird droppings, must be removed im‐
mediately to prevent the finish from being al‐
tered or discolored.
Only use respectively approved cleaning and
care products for vehicles with matte finish.
Suitable care products for matte finishes are
available from the service center.
Leather care
Remove dust from the leather often, using a
cloth or vacuum cleaner.Seite 234MobilityCare234
Online Edition for Part no. 01 40 2 956 191 - X/14
Page 249 of 259
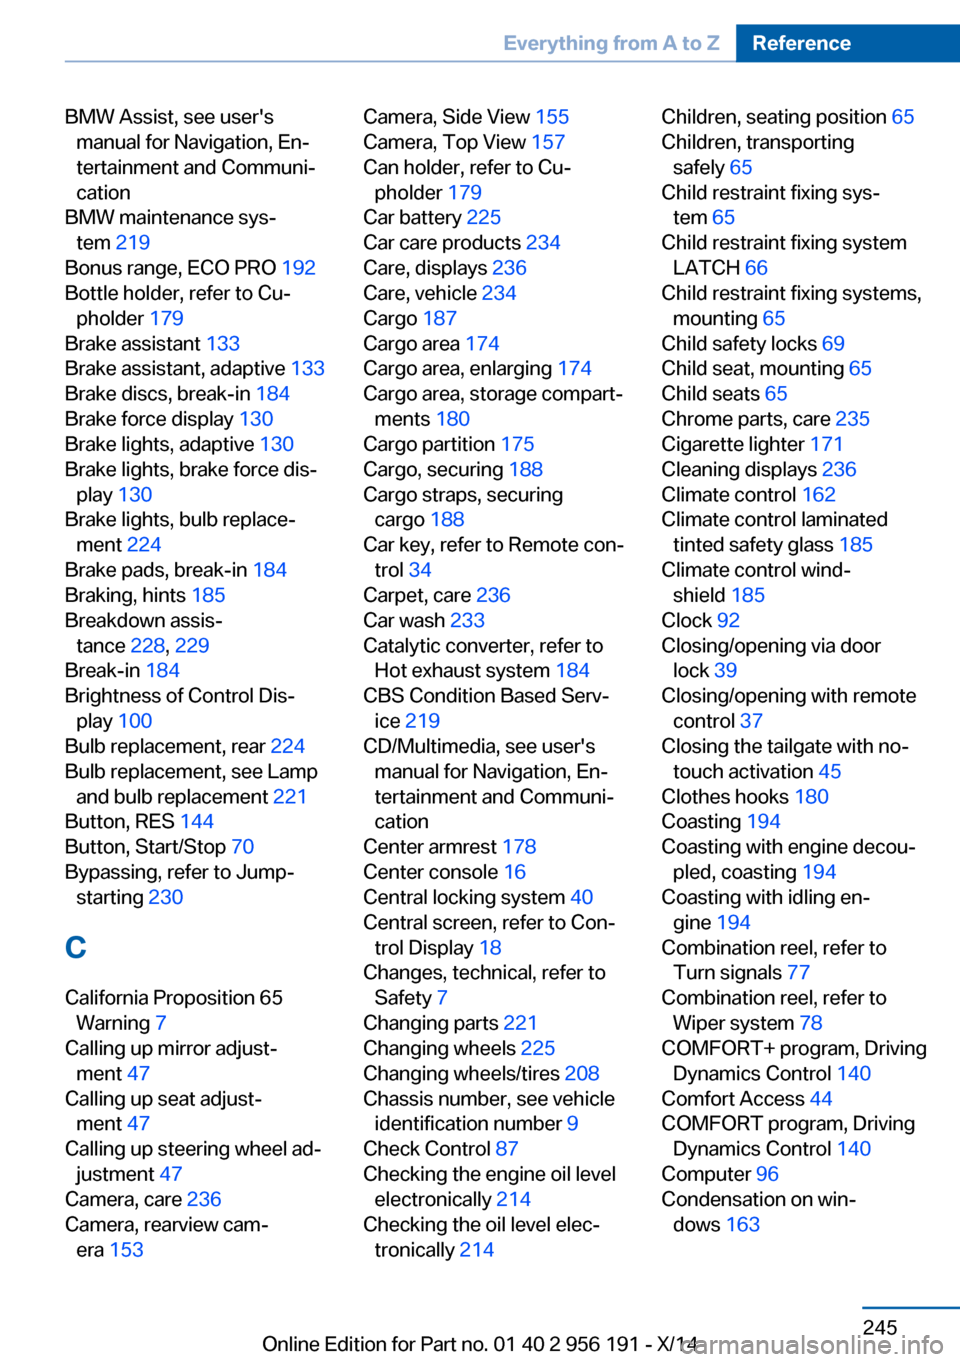
BMW Assist, see user'smanual for Navigation, En‐
tertainment and Communi‐
cation
BMW maintenance sys‐ tem 219
Bonus range, ECO PRO 192
Bottle holder, refer to Cu‐ pholder 179
Brake assistant 133
Brake assistant, adaptive 133
Brake discs, break-in 184
Brake force display 130
Brake lights, adaptive 130
Brake lights, brake force dis‐ play 130
Brake lights, bulb replace‐ ment 224
Brake pads, break-in 184
Braking, hints 185
Breakdown assis‐ tance 228, 229
Break-in 184
Brightness of Control Dis‐ play 100
Bulb replacement, rear 224
Bulb replacement, see Lamp and bulb replacement 221
Button, RES 144
Button, Start/Stop 70
Bypassing, refer to Jump- starting 230
C
California Proposition 65 Warning 7
Calling up mirror adjust‐ ment 47
Calling up seat adjust‐ ment 47
Calling up steering wheel ad‐ justment 47
Camera, care 236
Camera, rearview cam‐ era 153 Camera, Side View 155
Camera, Top View 157
Can holder, refer to Cu‐ pholder 179
Car battery 225
Car care products 234
Care, displays 236
Care, vehicle 234
Cargo 187
Cargo area 174
Cargo area, enlarging 174
Cargo area, storage compart‐ ments 180
Cargo partition 175
Cargo, securing 188
Cargo straps, securing cargo 188
Car key, refer to Remote con‐ trol 34
Carpet, care 236
Car wash 233
Catalytic converter, refer to Hot exhaust system 184
CBS Condition Based Serv‐ ice 219
CD/Multimedia, see user's manual for Navigation, En‐
tertainment and Communi‐
cation
Center armrest 178
Center console 16
Central locking system 40
Central screen, refer to Con‐ trol Display 18
Changes, technical, refer to Safety 7
Changing parts 221
Changing wheels 225
Changing wheels/tires 208
Chassis number, see vehicle identification number 9
Check Control 87
Checking the engine oil level electronically 214
Checking the oil level elec‐ tronically 214 Children, seating position 65
Children, transporting safely 65
Child restraint fixing sys‐ tem 65
Child restraint fixing system LATCH 66
Child restraint fixing systems, mounting 65
Child safety locks 69
Child seat, mounting 65
Child seats 65
Chrome parts, care 235
Cigarette lighter 171
Cleaning displays 236
Climate control 162
Climate control laminated tinted safety glass 185
Climate control wind‐ shield 185
Clock 92
Closing/opening via door lock 39
Closing/opening with remote control 37
Closing the tailgate with no- touch activation 45
Clothes hooks 180
Coasting 194
Coasting with engine decou‐ pled, coasting 194
Coasting with idling en‐ gine 194
Combination reel, refer to Turn signals 77
Combination reel, refer to Wiper system 78
COMFORT+ program, Driving Dynamics Control 140
Comfort Access 44
COMFORT program, Driving Dynamics Control 140
Computer 96
Condensation on win‐ dows 163 Seite 245Everything from A to ZReference245
Online Edition for Part no. 01 40 2 956 191 - X/14
Page 251 of 259
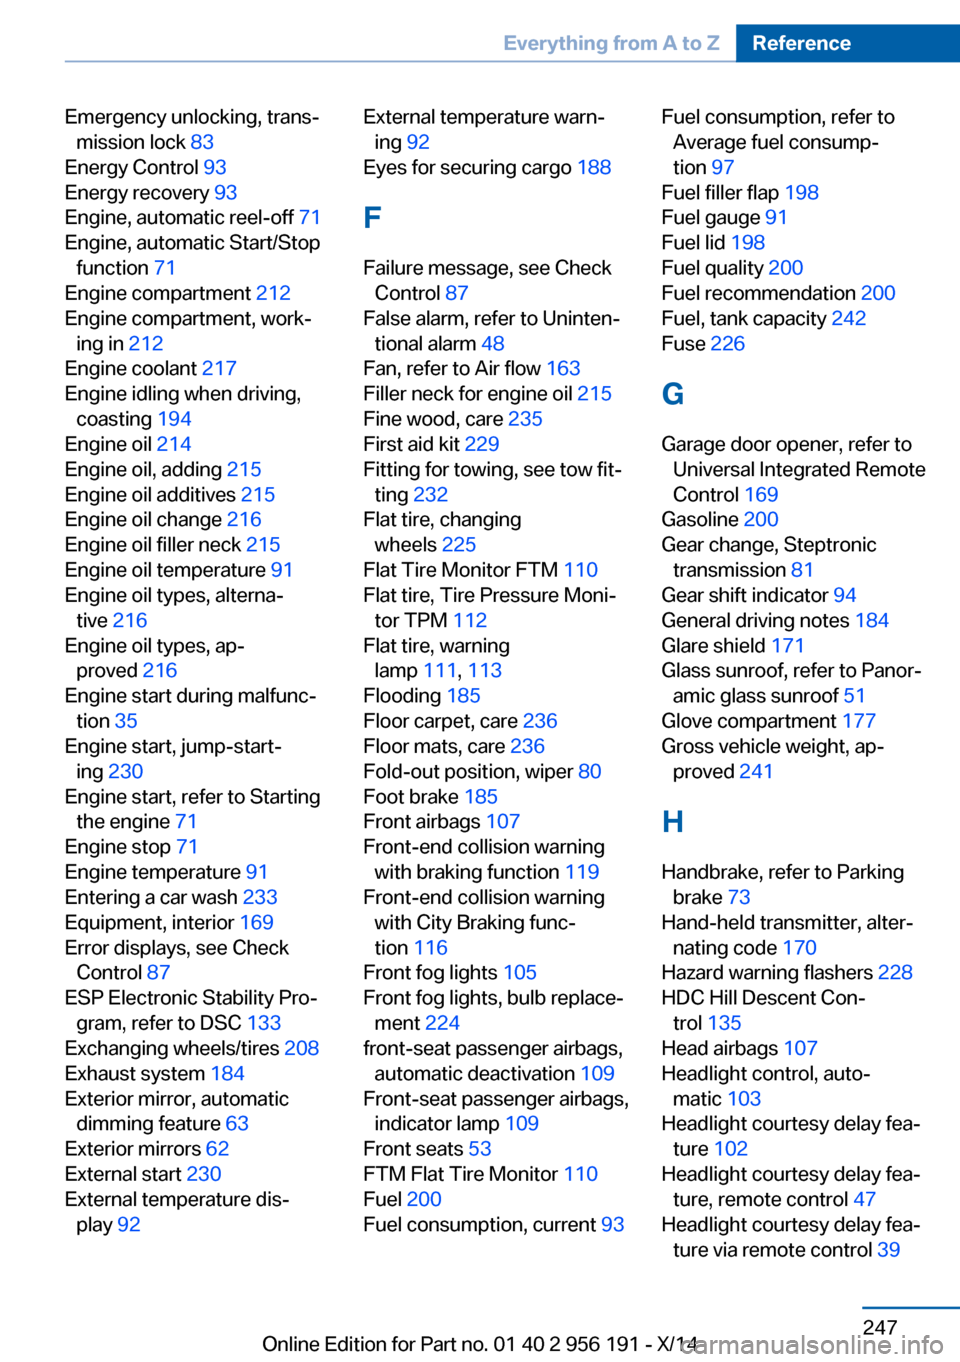
Emergency unlocking, trans‐mission lock 83
Energy Control 93
Energy recovery 93
Engine, automatic reel-off 71
Engine, automatic Start/Stop function 71
Engine compartment 212
Engine compartment, work‐ ing in 212
Engine coolant 217
Engine idling when driving, coasting 194
Engine oil 214
Engine oil, adding 215
Engine oil additives 215
Engine oil change 216
Engine oil filler neck 215
Engine oil temperature 91
Engine oil types, alterna‐ tive 216
Engine oil types, ap‐ proved 216
Engine start during malfunc‐ tion 35
Engine start, jump-start‐ ing 230
Engine start, refer to Starting the engine 71
Engine stop 71
Engine temperature 91
Entering a car wash 233
Equipment, interior 169
Error displays, see Check Control 87
ESP Electronic Stability Pro‐ gram, refer to DSC 133
Exchanging wheels/tires 208
Exhaust system 184
Exterior mirror, automatic dimming feature 63
Exterior mirrors 62
External start 230
External temperature dis‐ play 92 External temperature warn‐
ing 92
Eyes for securing cargo 188
F
Failure message, see Check Control 87
False alarm, refer to Uninten‐ tional alarm 48
Fan, refer to Air flow 163
Filler neck for engine oil 215
Fine wood, care 235
First aid kit 229
Fitting for towing, see tow fit‐ ting 232
Flat tire, changing wheels 225
Flat Tire Monitor FTM 110
Flat tire, Tire Pressure Moni‐ tor TPM 112
Flat tire, warning lamp 111, 113
Flooding 185
Floor carpet, care 236
Floor mats, care 236
Fold-out position, wiper 80
Foot brake 185
Front airbags 107
Front-end collision warning with braking function 119
Front-end collision warning with City Braking func‐
tion 116
Front fog lights 105
Front fog lights, bulb replace‐ ment 224
front-seat passenger airbags, automatic deactivation 109
Front-seat passenger airbags, indicator lamp 109
Front seats 53
FTM Flat Tire Monitor 110
Fuel 200
Fuel consumption, current 93 Fuel consumption, refer to
Average fuel consump‐
tion 97
Fuel filler flap 198
Fuel gauge 91
Fuel lid 198
Fuel quality 200
Fuel recommendation 200
Fuel, tank capacity 242
Fuse 226
G
Garage door opener, refer to Universal Integrated Remote
Control 169
Gasoline 200
Gear change, Steptronic transmission 81
Gear shift indicator 94
General driving notes 184
Glare shield 171
Glass sunroof, refer to Panor‐ amic glass sunroof 51
Glove compartment 177
Gross vehicle weight, ap‐ proved 241
H
Handbrake, refer to Parking brake 73
Hand-held transmitter, alter‐ nating code 170
Hazard warning flashers 228
HDC Hill Descent Con‐ trol 135
Head airbags 107
Headlight control, auto‐ matic 103
Headlight courtesy delay fea‐ ture 102
Headlight courtesy delay fea‐ ture, remote control 47
Headlight courtesy delay fea‐ ture via remote control 39 Seite 247Everything from A to ZReference247
Online Edition for Part no. 01 40 2 956 191 - X/14