2014 BMW 5 SERIES GRAN TURISMO belt
[x] Cancel search: beltPage 112 of 259
Protective action
Airbags are not triggered in every impact situa‐
tion, e.g., in less severe accidents or rear-end
collisions.
Information on how to ensure the optimal
protective effect of the airbags▷Keep at a distance from the airbags.▷Always grasp the steering wheel on the
steering wheel rim, holding your hands at
the 3 o'clock and 9 o'clock positions, to
keep the risk of injury to your hands or
arms as low as possible when the airbag is
triggered.▷There should be no person, animals, or ob‐
jects between an airbag and a person.▷Do not use the cover of the front airbag on
the front passenger side as a storage area.▷Dashboard and windshield on the front
passenger side must stay clear - do not at‐
tach adhesive labels or coverings and do
not attach brackets or cables, e. g., for GPS
devices or' mobile phones.▷Make sure that the front passenger is sit‐
ting correctly, i.e., keeps his or her feet and
legs in the footwell; otherwise, leg injuries
might occur when front airbag is activated.▷Do not place slip covers, seat cushions or
other objects on the front passenger seat
that are not approved specifically for seats
with integrated side airbags.▷Do not hang pieces of clothing, such as
jackets, over the backrests.▷Make sure that occupants keep their heads
away from the side airbag and do not rest
against the head airbag; otherwise, injuries
might occur when airbag is activated.▷Do not remove the airbag system.▷Do not remove the steering wheel.▷Do not apply adhesive materials to the air‐
bag cover panels, do not cover them or
modify them in any way.▷Never modify either the individual compo‐
nents or the wiring in the airbag system.
This also applies to steering wheel covers,
the dashboard, the seats, the roof pillars
and the sides of the roofliner.◀
Even when you follow all instructions very
closely, injury from contact with the airbags
cannot be ruled out in certain situations.
The ignition and inflation noise may lead to
short-term and, in most cases, temporary
hearing impairment in sensitive individuals.
Malfunction, deactivation and after de‐
ploying the airbags
Do not touch the individual components imme‐
diately after the system has been triggered;
otherwise, you may risk burns.
Only have the airbags checked, repaired or dis‐
mantled and the airbag generator scrapped by
the service center or an authorized repair shop
for handling explosives.
Non-professional attempts to service the sys‐
tem could lead to failure in an emergency or
unintentional activation of the airbag - both
may lead to injury.◀
Warnings and information on the airbags are also found on the sun visors.
Functional readiness of the airbag
system
When the ignition is reel on, the warn‐
ing lamp in the instrument cluster lights
up briefly and thereby indicates the op‐
erational readiness of the entire airbag system
and the belt tensioner.
Airbag system malfunctioning
▷Warning lamp does not come on when the
ignition is turned on.▷The warning lamp lights up continuously.Seite 108ControlsSafety108
Online Edition for Part no. 01 40 2 956 191 - X/14
Page 136 of 259
If the vehicle includes the front-end collision
warning or front-end collision warning with
braking feature, impending collisions with vehi‐
cles driving ahead or stopped in front of you
can also be detected within the system's
range.
Note Personal responsibility
The system cannot possibly serve as a
substitute for the driver's personal judgment of
the traffic situation. The system may not al‐
ways detect critical situations reliably and in a
timely manner. Adapt speed to traffic situation
and drive alertly; otherwise, a risk to safety may
result.◀
Function
After the safety belt is buckled, the front belts
are automatically pretensioned once after the
vehicle is driven is away.
In critical driving situations, the following indi‐
vidual functions become active as needed:▷The front belts are automatically preten‐
sioned.▷Automatic closing of the windows.▷Automatic closing of the glass sunroof.▷For vehicles equipped with power backrest
adjustment: automatic positioning of the
backrest for the front passenger seat.
After a critical driving situation without an acci‐
dent, the front belts are loosened again. All
other systems can be restored to the desired
setting.
If the belt tension does not loosen automati‐
cally, stop the vehicle and unbuckle the belt
using the red button in the buckle. Fasten the
belt before continuing on your trip.
PostCrash
In the event of an accident, the system can
bring the car to a halt automatically without in‐
tervention by the driver in certain situations.
This can reduce the risk of a further collision
and the consequences thereof.
Depressing the brake pedal can cause the ve‐
hicle to brake harder. This interrupts automatic
braking. Destepping on the gas pedal also in‐
terrupts automatic braking.
After coming to a halt, the brake is released
automatically. Secure the vehicle against roll‐
ing.Seite 132ControlsSafety132
Online Edition for Part no. 01 40 2 956 191 - X/14
Page 147 of 259
The indicator lights in the instrument cluster
light up and the mark in the speedometer is set
to the current speed.
Cruise control can be used.
Switch off Deactivated or interrupted system
With deactivated or interrupted system
use your brakes, steering and moves as usual
to avoid the chance of an accident.◀
To switch off the system while standing, step
on brake pedal at the same time.
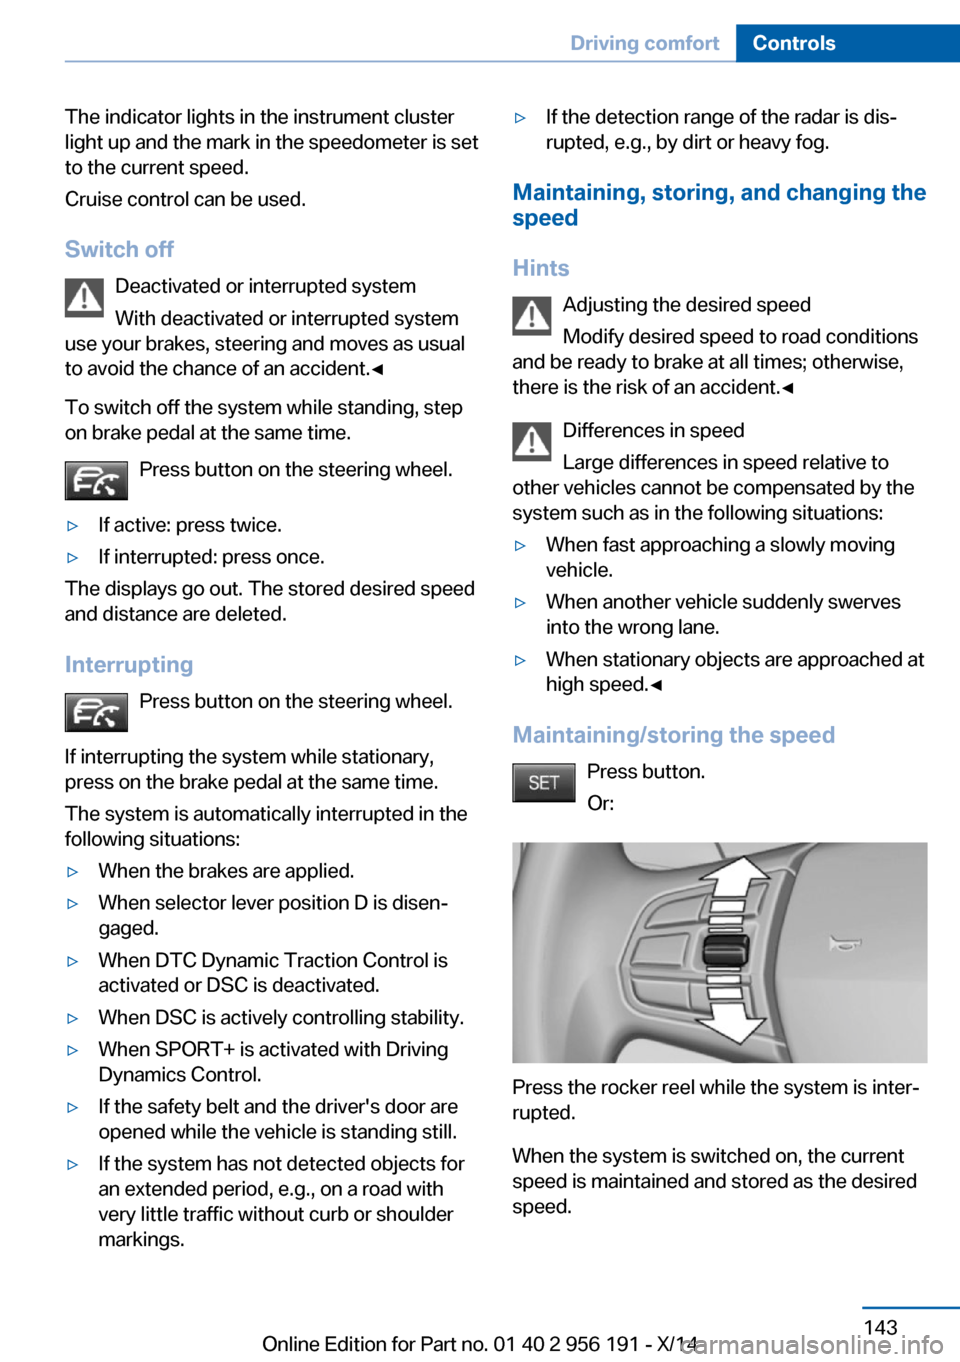
Press button on the steering wheel.▷If active: press twice.▷If interrupted: press once.
The displays go out. The stored desired speed
and distance are deleted.
Interrupting Press button on the steering wheel.
If interrupting the system while stationary,
press on the brake pedal at the same time.
The system is automatically interrupted in the
following situations:
▷When the brakes are applied.▷When selector lever position D is disen‐
gaged.▷When DTC Dynamic Traction Control is
activated or DSC is deactivated.▷When DSC is actively controlling stability.▷When SPORT+ is activated with Driving
Dynamics Control.▷If the safety belt and the driver's door are
opened while the vehicle is standing still.▷If the system has not detected objects for
an extended period, e.g., on a road with
very little traffic without curb or shoulder
markings.▷If the detection range of the radar is dis‐
rupted, e.g., by dirt or heavy fog.
Maintaining, storing, and changing the
speed
Hints Adjusting the desired speedModify desired speed to road conditions
and be ready to brake at all times; otherwise,
there is the risk of an accident.◀
Differences in speed
Large differences in speed relative to
other vehicles cannot be compensated by the
system such as in the following situations:
▷When fast approaching a slowly moving
vehicle.▷When another vehicle suddenly swerves
into the wrong lane.▷When stationary objects are approached at
high speed.◀
Maintaining/storing the speed
Press button.
Or:
Press the rocker reel while the system is inter‐
rupted.
When the system is switched on, the current
speed is maintained and stored as the desired
speed.
Seite 143Driving comfortControls143
Online Edition for Part no. 01 40 2 956 191 - X/14
Page 192 of 259
Load
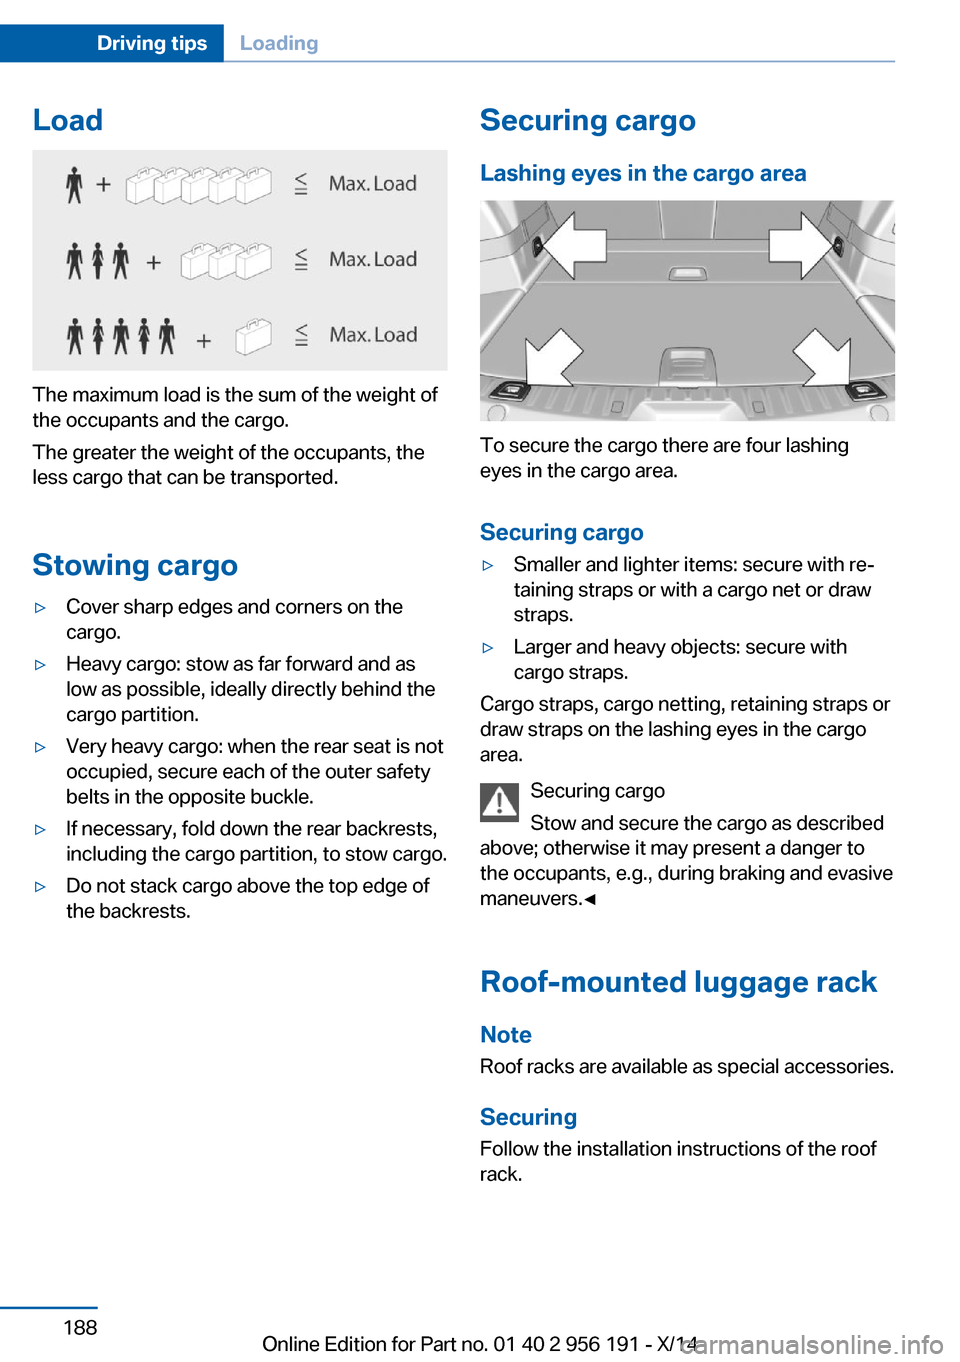
The maximum load is the sum of the weight of
the occupants and the cargo.
The greater the weight of the occupants, the
less cargo that can be transported.
Stowing cargo
▷Cover sharp edges and corners on the
cargo.▷Heavy cargo: stow as far forward and as
low as possible, ideally directly behind the
cargo partition.▷Very heavy cargo: when the rear seat is not
occupied, secure each of the outer safety
belts in the opposite buckle.▷If necessary, fold down the rear backrests,
including the cargo partition, to stow cargo.▷Do not stack cargo above the top edge of
the backrests.Securing cargo
Lashing eyes in the cargo area
To secure the cargo there are four lashing
eyes in the cargo area.
Securing cargo
▷Smaller and lighter items: secure with re‐
taining straps or with a cargo net or draw
straps.▷Larger and heavy objects: secure with
cargo straps.
Cargo straps, cargo netting, retaining straps or
draw straps on the lashing eyes in the cargo
area.
Securing cargo
Stow and secure the cargo as described
above; otherwise it may present a danger to
the occupants, e.g., during braking and evasive
maneuvers.◀
Roof-mounted luggage rack Note
Roof racks are available as special accessories.
Securing
Follow the installation instructions of the roof
rack.
Seite 188Driving tipsLoading188
Online Edition for Part no. 01 40 2 956 191 - X/14
Page 239 of 259
Otherwise, particles of dust and road grime
chafe in pores and folds, and lead to increased
wear and premature degradation of the leather
surface.
To guard against discoloration, such as from
clothing, provide leather care roughly every
two months.
Clean light-colored leather more frequently be‐
cause soiling on such surfaces is substantially
more visible.
Use leather care products; otherwise, dirt and
grease will gradually break down the protective
layer of the leather surface.
Suitable care products are available from the
service center.
Upholstery material care Vacuum regularly with a vacuum cleaner.
If upholstery is very dirty, e.g., with beverage
stains, use a soft sponge or microfiber cloth
with a suitable interior cleaner.
Clean the upholstery down to the seams using
large sweeping motions. Avoid rubbing the
material vigorously.
Damage from Velcro® fasteners
Open Velcro® fasteners on pants or
other articles of clothing can damage the seat
covers. Ensure that any Velcro® fasteners are
closed.◀
Caring for special components
Light-alloy wheels When cleaning the vehicle, use only neutral
wheel cleaners having a pH value from 5 to 9.
Do not use abrasive cleaning agents or steam
jets above 140 ℉/60 ℃. Follow the manufac‐
turer's instructions.
Aggressive, acidic or alkaline cleaning agents
can destroy the protective layer of adjacent
components, such as the brake disk.Chrome surfaces
Carefully clean components such as the radia‐
tor grille or door handles with an ample supply
of water, possibly with shampoo added, partic‐
ularly when they have been exposed to road
salt.
Rubber components
Aside from water, treat only with rubber
cleansers.
When cleaning rubber seals, do not use any
silicon-containing car care products in order to
avoid damage or noises.
Fine wood partsClean fine wood facing and fine wood compo‐
nents only with a moist rag. Then dry with a
soft cloth.
Plastic components
These include:▷Imitation leather surfaces.▷Roofliner.▷Lamp lenses.▷Instrument cluster cover.▷Matt black spray-coated components.▷Painted parts in the interior.
Clean with a microfiber cloth.
Dampen cloth lightly with water.
Do not soak the roofliner.
No cleansers that contain alcohol or sol‐
vents
Do not use cleansers that contain alcohol or
solvents, such as lacquer thinners, heavy-duty
grease removers, fuel, or such; this could lead
to surface damage.◀
Safety belts
Dirty belt straps impede the reeling action and
thus have a negative impact on safety.
Seite 235CareMobility235
Online Edition for Part no. 01 40 2 956 191 - X/14
Page 240 of 259

Chemical cleaning
Do not clean chemically; this can destroy
the webbing.◀
Use only a mild soapy solution, with the safety
belts clipped into their buckles.
Do not allow the reels to retract the safety
belts until they are dry.
Carpets and floor mats No objects in the area around the pedals
Keep floor mats, carpets, and any other
objects out of the pedal area; otherwise, the
function of the pedals could be impeded while
driving and create the risk of an accident.
Do not place additional floor mats over existing
mats or other objects.
Only use floor mats that have been approved
for the vehicle and can be properly attached to
floor.
Ensure that the floor mats are securely fas‐
tened again after they were removed for clean‐
ing, e.g.◀
Floor mats can be removed from the car's inte‐
rior for cleaning.
If the floor carpets are very dirty, clean with a
microfiber cloth and water or a textile cleaner.
To prevent matting of the carpet, rub back and
forth in the direction of travel only.
Sensors/cameras
To clean sensors and cameras, use a cloth
moistened with a small amount of glass
cleaner.
Displays/monitors Cleaning displays and screens
Do not use any chemical or household
cleaning agents; otherwise, surfaces can be af‐
fected.◀Keeping out moisture
Keep all fluids and moisture away from
the unit; otherwise, electrical components can
be damaged.◀
Avoid pressure
Avoid pressing too hard when cleaning
and do not use abrasive materials; otherwise,
damage can result.◀
Clean with a clean, antistatic microfiber cloth.
Long-term
When the vehicle is shut down for longer than three months, special measures must be
taken. Additional information is available from
the service center.Seite 236MobilityCare236
Online Edition for Part no. 01 40 2 956 191 - X/14
Page 248 of 259
Everything from A to Z
IndexA ABS, Antilock Brake Sys‐ tem 133
ACC, Active Cruise Control with Stop & Go 141
Activated-charcoal filter 165
Active Blind Spot Detec‐ tion 129
Active Cruise Control with Stop & Go, ACC 141
Active Protection 131
Active seat, front 56
Active seat ventilation, front 56
Active Steering, integral 137
Adaptive brake assistant 133
Adaptive brake lights, refer to Brake force display 130
Adaptive drive 136
Adaptive Light Control 103
Additives, oil 215
Adjustments, seats/head re‐ straints 53
After washing vehicle 234
Airbags 107
Airbags, indicator/warning light 108
Air circulation, refer to Recir‐ culated-air mode 164
Air, dehumidifying, refer to Cooling function 164
Air distribution, manual 163
Air flow, automatic climate control 163
Air outlets, see ventila‐ tion 165
Air pressure, tires 202
Alarm system 47
Alarm, unintentional 48 All around the center con‐
sole 16
All around the roofliner 17
All around the steering wheel 14
All-season tires, refer to Win‐ ter tires 209
All-wheel-drive 135
Alternating-code hand-held transmitter 170
Alternative oil types 216
Ambient light 105
Animal detection, see Night Vision 124
Antifreeze, washer fluid 80
Antilock Brake System, ABS 133
Anti-slip control, refer to DSC 133
Approved axle load 241
Approved engine oils 216
Armrest, refer to Center arm‐ rest 178
Arrival time 97
Ashtray 171
Assistance, Roadside Assis‐ tance 229
Assistance when driving off 133
Attentiveness assistant 131
AUTO H button 74
AUTO H button, refer to Au‐ tomatic Hold 74
AUTO intensity 163
Automatic car wash 233
Automatic climate con‐ trol 162
Automatic Cruise Control with Stop & Go 141
Automatic Curb Monitor 63 Automatic deactivation, front-
seat passenger airbags 109
Automatic headlight con‐ trol 103
Automatic Hold 74
Automatic locking 47
Automatic recirculated-air control 164
Automatic Soft Closing, doors 40
Automatic tailgate 41
Automatic transmission, see Steptronic transmission 81
AUTO program, automatic cli‐ mate control 163
AUTO program, intensity 163
Auto Start/Stop function 71
Average fuel consumption 97
Average speed 97
Axle loads, weights 241
B Backrest curvature, refer to Lumbar support 55
Backrest, seats 53
Backrest, width 56
Band-aids, refer to First aid kit 229
Bar for tow-starting/ towing 231
Battery replacement, vehicle battery 226
Battery replacement, vehicle remote control 35
Battery, vehicle 225
Belts, safety belts 58
Beverage holder, cu‐ pholder 179
Blinds, sun protection 50 Seite 244ReferenceEverything from A to Z244
Online Edition for Part no. 01 40 2 956 191 - X/14
Page 255 of 259

Retaining straps, securingcargo 188
Retreaded tires 209
Reversing lamp, bulb replace‐ ment 224
Roadside parking lights 103
Roller sunblinds 50
Roll stabilization, refer to Adaptive Drive 136
Roll stabilization, refer to Dy‐ namic Drive 136
RON recommended fuel grade 200
Roofliner 17
Roof load capacity 241
Roof-mounted luggage rack 188
Rope for tow-starting/ towing 231
RSC Run Flat System Com‐ ponent, refer to Run-flat
tires 209
Rubber components, care 235
Run-flat tires 209
S Safe braking 185
Safety 7
Safety belt reminder for driv‐ er's seat and front passen‐
ger seat 59
Safety belts 58
Safety belts, care 235
Safety Package, refer to Ac‐ tive Protection 131
Safety reel, windows 50
Safety systems, airbags 107
Saving fuel 190
Screen, refer to Control Dis‐ play 18
Screwdriver, see Onboard ve‐ hicle tool kit 221 Screw thread, see screw
thread for tow fitting, screw
thread for tow fitting 232
Seat belts, refer to Safety belts 58
Seat heating, front 56
Seat heating, rear 57
Seating position for chil‐ dren 65
Seat, mirror, and steering wheel memory 61
Seats 53
Seats, front 53
Seats, rear 57
Seat ventilation, front 56
Selection list in instrument cluster 96
Selector lever, Steptronic transmission 81
Self-leveling suspension, air suspension 138
Self-leveling suspension, malfunction 138
Sensors, care 236
Service and warranty 8
Service requirements, Condi‐ tion Based Service
CBS 219
Service requirements, dis‐ play 93
Service, Roadside Assis‐ tance 229
Services, ConnectedDrive
SET button, see Active Cruise Control, ACC 141
SET button, see Cruise con‐ trol 148
Settings, locking/unlock‐ ing 46
Settings on Control Dis‐ play 98
Settings, storing for seat, mir‐ rors, steering wheel 61
Shift paddles on steering wheel 82
Shoulder support 56 Side airbags 107
Side View 155
Signaling, horn 14
Signals when unlocking 47
Sitting safely 53
Size 240
Ski and snowboard bag 176
Slide/tilt glass roof 51
Smallest turning radius 240
Small tailgate via remote con‐ trol 38
Smoker's package 171
Snow chains 210
Socket 172
Socket, OBD Onboard Diag‐ nostics 219
SOS button 228
Spare fuse 226
Speaker lighting 106
Specified engine oil types 216
Speed, average 97
Speed limit detection, com‐ puter 97
Speed limiter, display 94
Speed Limit Information 94
Speed warning 98
Split screen 23
SPORT+ - program, Dynamic Driving Control 139
Sport displays, torque dis‐ play, performance dis‐
play 98
SPORT program, driving dy‐ namics 139
Sport program, transmis‐ sion 82
Stability control systems 133
Start/stop, automatic func‐ tion 71
Start/Stop button 70
Start function during malfunc‐ tion 35
Starting the engine 71
Status control display, tires 112 Seite 251Everything from A to ZReference251
Online Edition for Part no. 01 40 2 956 191 - X/14